• Skip to primary navigation
  • Skip to main content
  • Skip to primary sidebar
  • Skip to footer

    Nav Social Menu

    • Email
    • Facebook
    • Instagram
    • Pinterest
    • YouTube
  • Shop
    • Shop My Favorites
    • Our Home
    • Spanish Sanctuary
    • Hacienda Hideaway
    • Shop my LTK
    • Shop my Amazon
    • Gift Guides
  • House Tours
  • DIY Projects
  • About Jenna Sue
  • About the Blog
  • Contact
Jenna Sue Design

Jenna Sue Design

DIY tutorials, home design and budget decor inspiration

  • Shop
    • Shop my Favorites
    • Our House
    • Spanish Sanctuary
    • Hacienda Hideaway
    • Shop my LTK
    • Shop my Amazon
    • Gift Guides
  • House Tours
    • Hacienda Hideaway
    • Heights House
    • Riverside Retreat
    • Cottage House Flip
    • Modern Farmhouse
    • SEE ALL
  • DIY PROJECTS
  • About
    • About Jenna Sue
    • About the Blog
  • Contact
Home ยป Modern Farmhouse ยป New Laundry Room: Beadboard wall, Paint & Lighting

New Laundry Room: Beadboard wall, Paint & Lighting

January 30, 2015 | By Jenna Sue Modern Farmhouse

Welcome to the latest installment of our laundry room reno! We made some great progress this week that has me quite excited for the end result. Everything (so far) is coming together as I had envisioned.

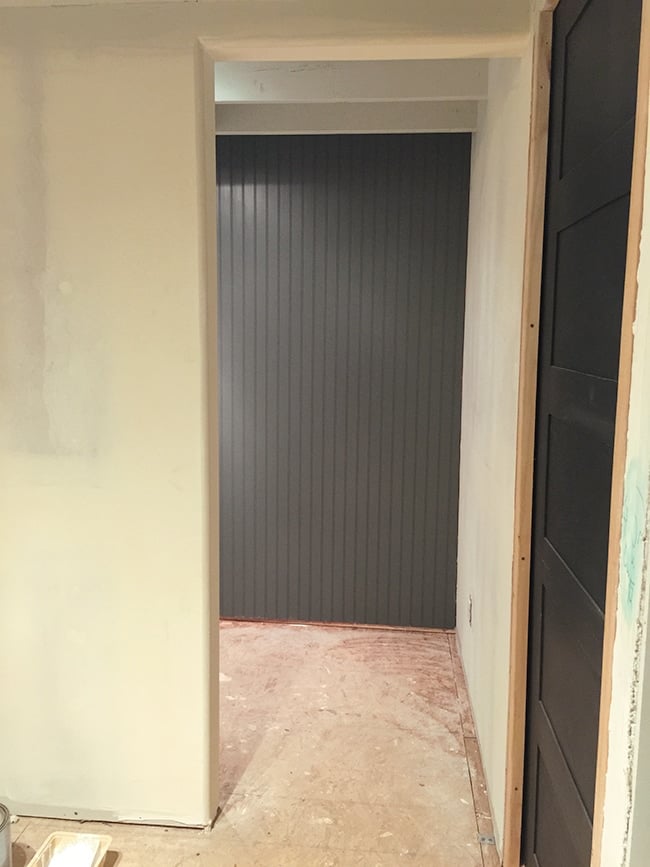
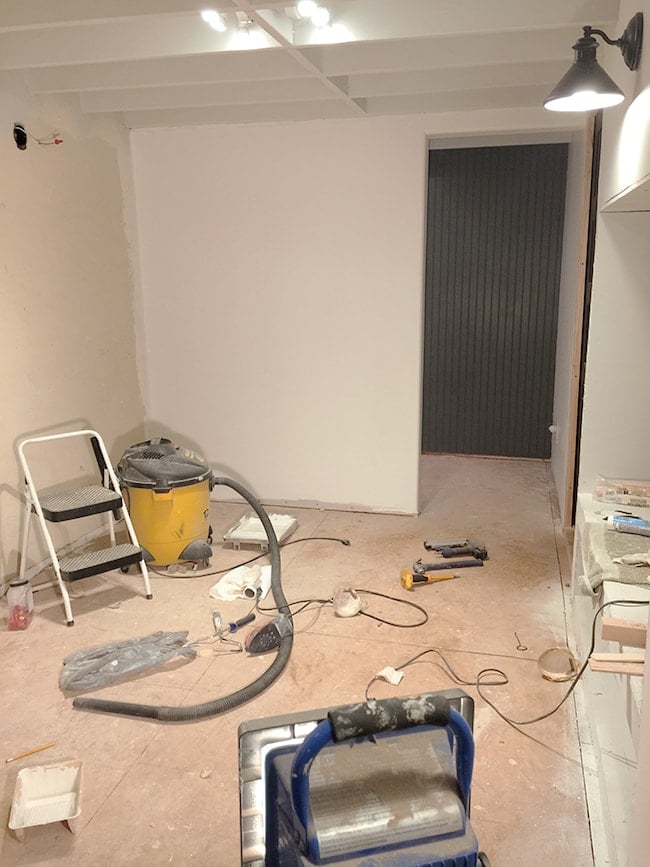
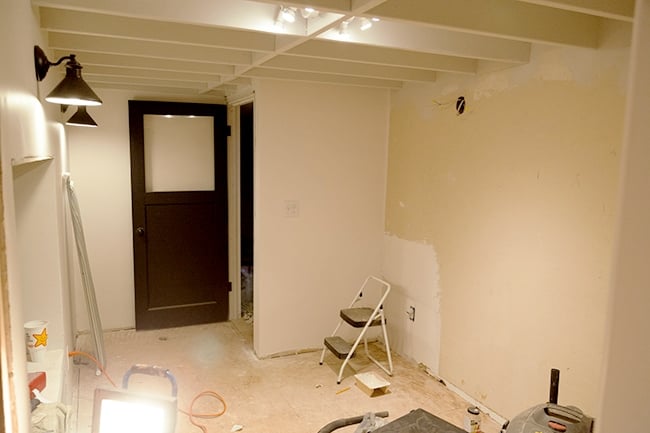
On Tuesday we left off with the storage room looking like this:

Pin

The original plan was to have a wall of Ikea Pax wardrobes but after purchasing them, I realized that I accidentally bought the 23″ deep model rather than the 14″ deep, leaving just 27″ of walking space since the room is only 50″ wide. Oops. Not only that, but the ceiling has to be a few inches taller than the wardrobe height so it can slide in after assembly and ours was an inch too short. So scratch that plan.

After some Pinterest-ing I came up with an even better solution of open wood shelving which I think will look much nicer and help the room feel more open (more on that soon).

Instead of drywall (which requires several steps and more $) we decided to create a focal wall behind the future shelves with beadboard. Normally I would not recommend nailing headboard directly onto 2×4’s without any drywall or hard surface behind it for support, but since it’s not exactly a functional wall it doesn’t need to be reinforced.

All it took was two sheets of 4×8’s, cut to size and nailed up.

Pin

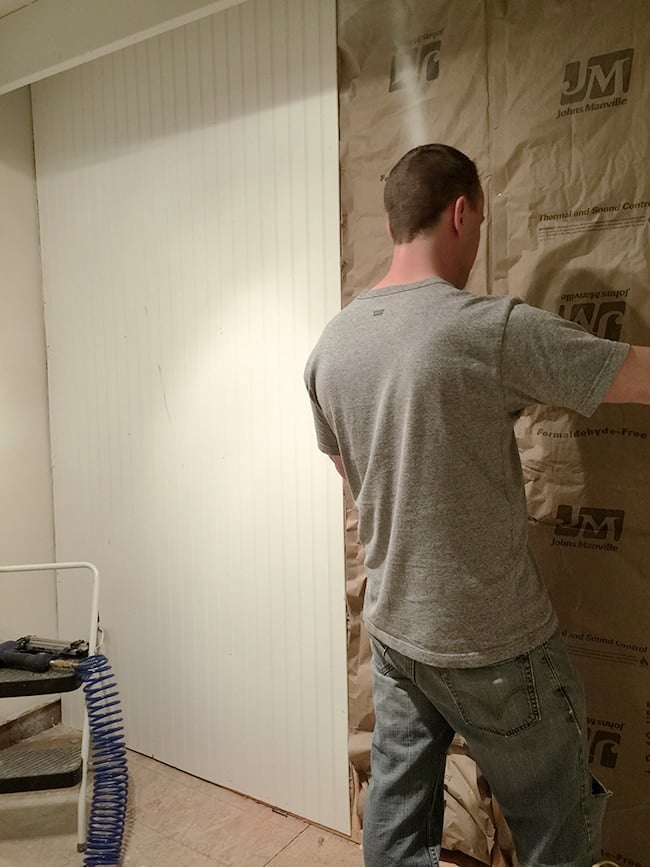
Done in an hour… easy peasy.

Pin
Pin
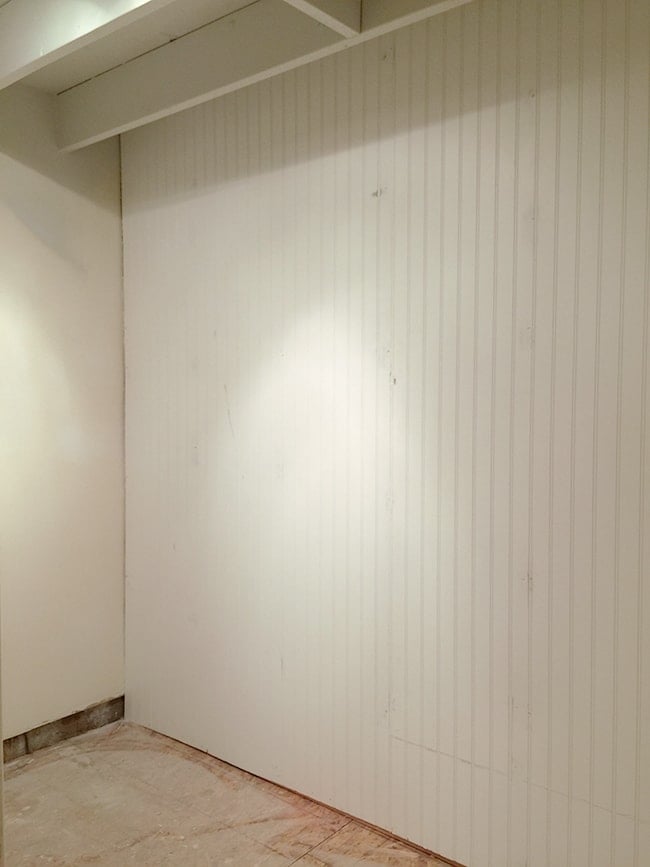
Don’t judge my crooked jigsaw cuts… it will be hidden with trim!

After patching & sanding the nail holes, it was time for paint. To save money I grabbed the can we used on the plank and panel walls in our bedroom and the studio, Valspar’s Ocean Storm (in eggshell):

Pin

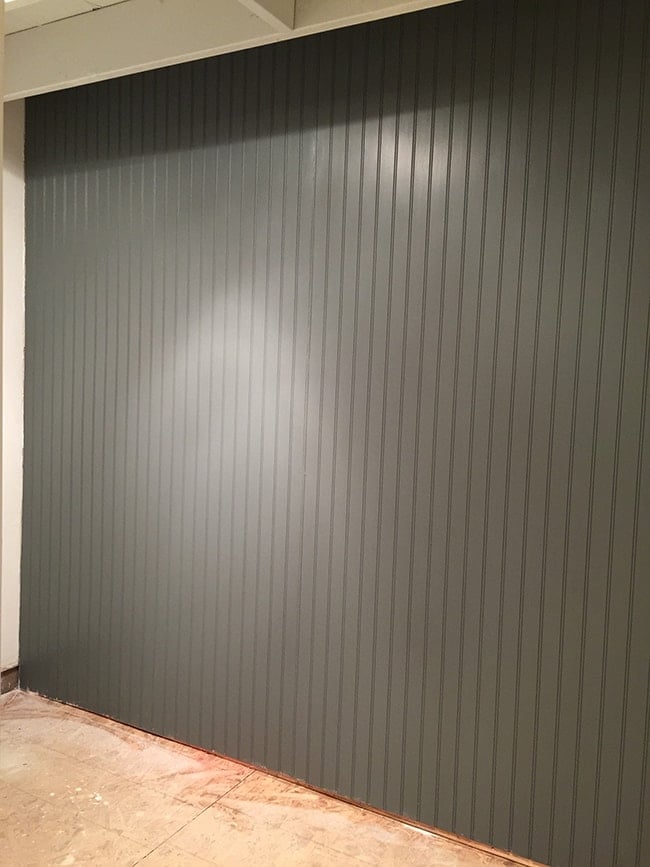
I think the contrast will be a nice break from all the white walls and allow the shelves and storage items to pop.

Pin

Once that was out of the way, it was on to painting all of the drywall. My vision for this room is airy, clean and refreshing (just like fresh laundry), so I naturally chose white for the wall color. We used Valspar Signature color matched to Kelly Moore’s Swiss Coffee which is a nice neutral white.

Goodbye off-white drywall!
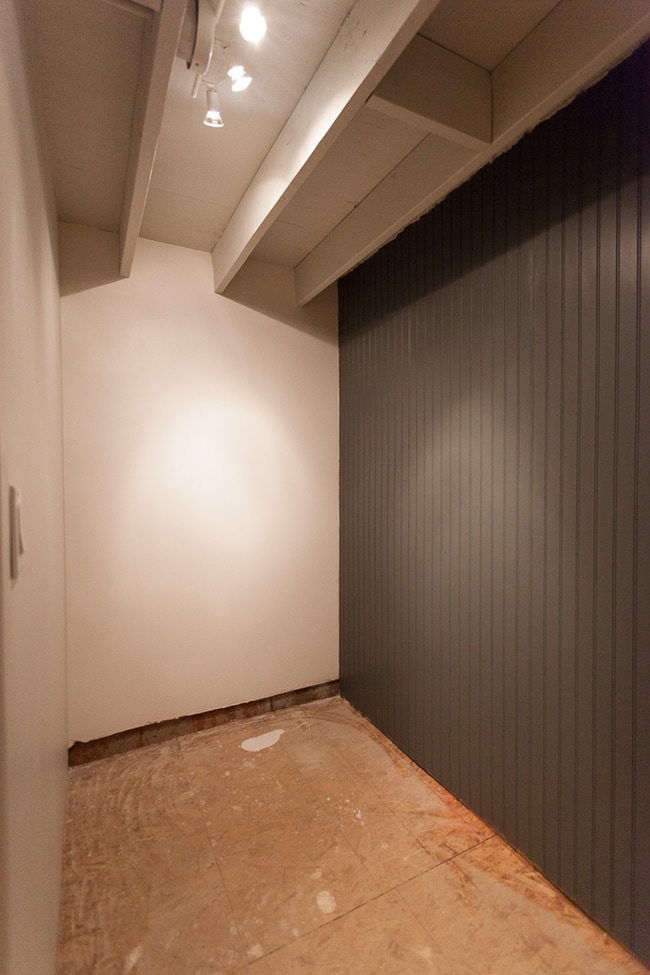
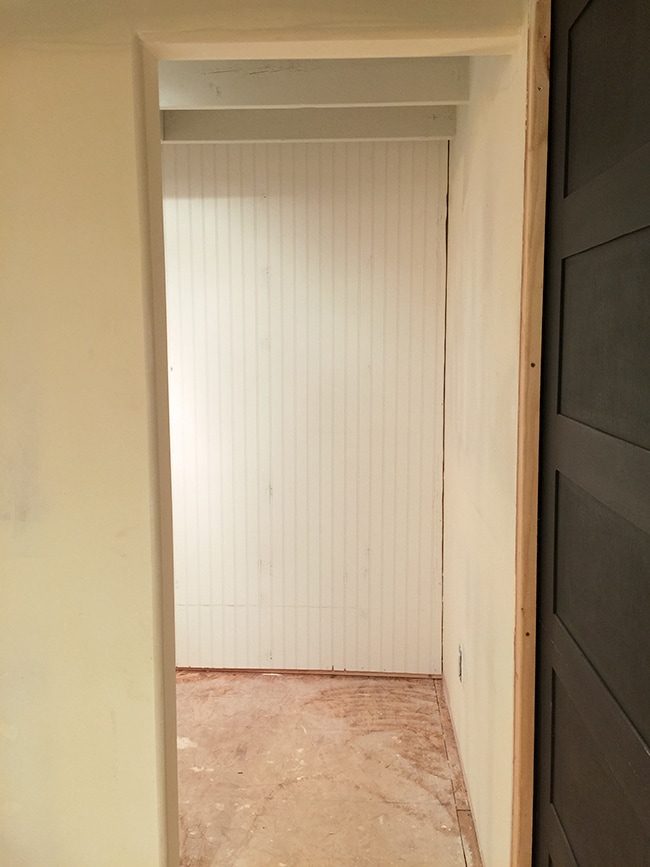
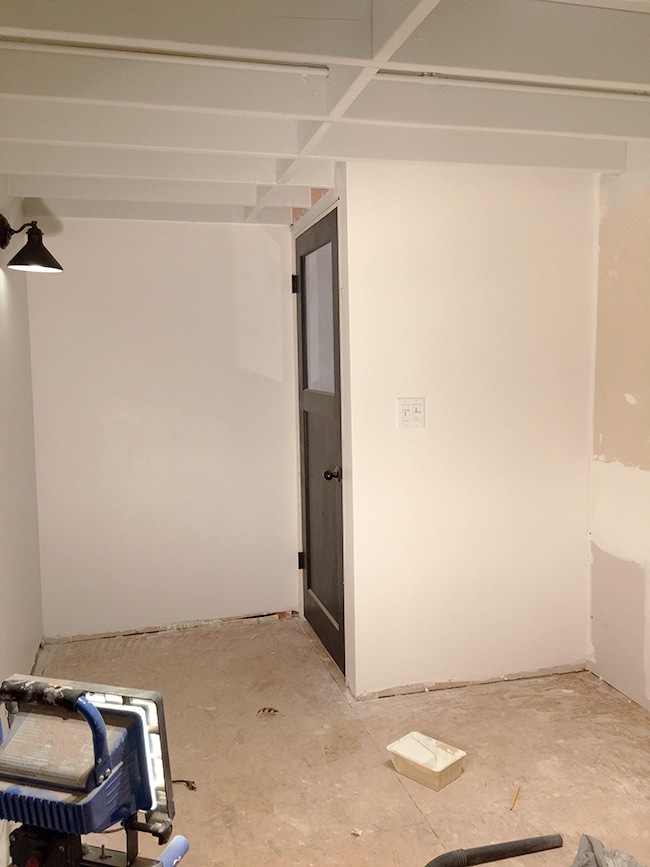
Pin

PSโ€”our photographer neighbor stopped by last night with his camera and took some wide angle shots for us, so all of the non-iPhone photos in this post are from him!

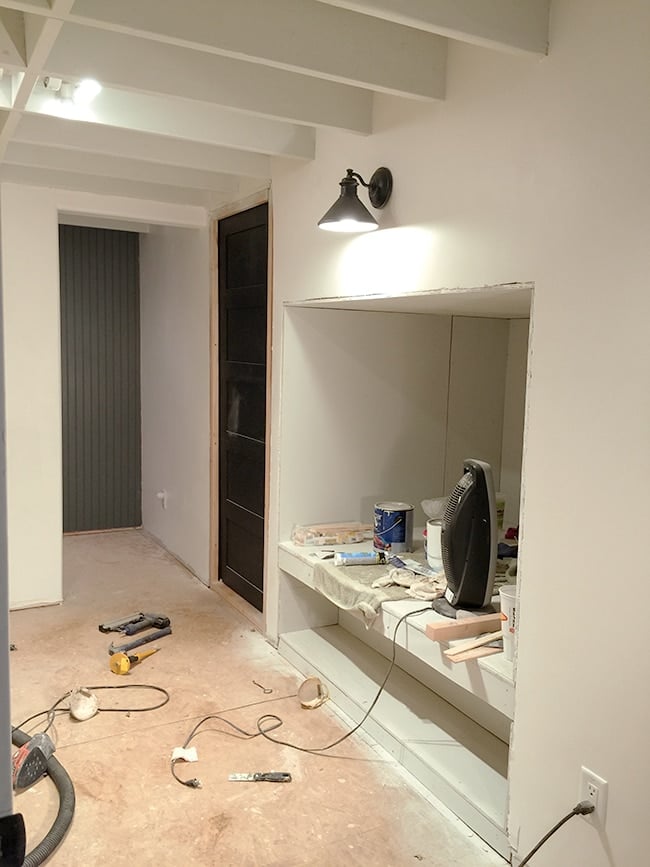
Here’s a never before captured angle from the back of the storage room:

Pin

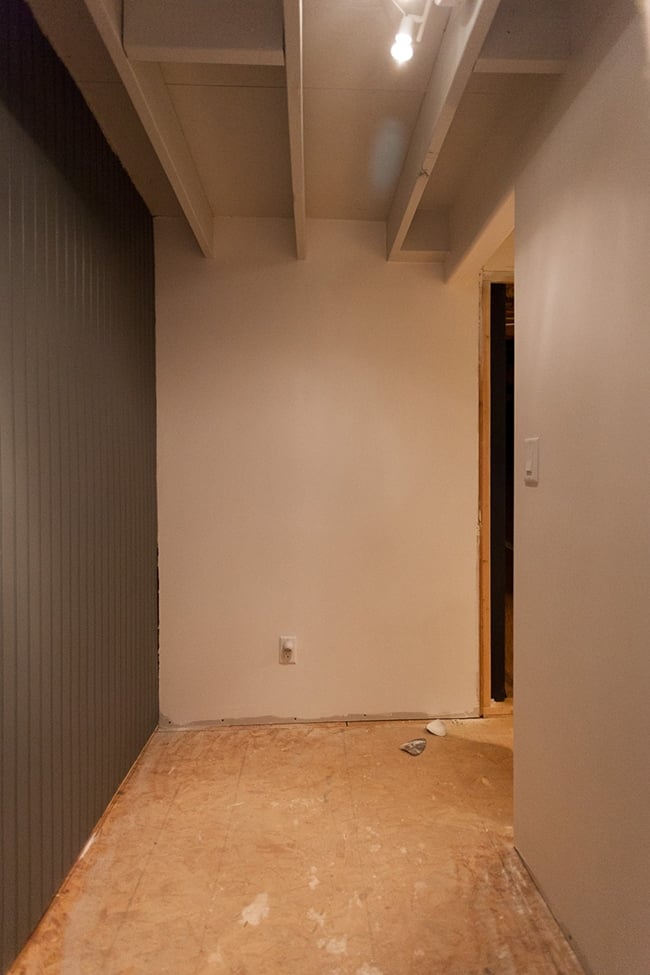
And one of the entire cabinet wall:

Pin

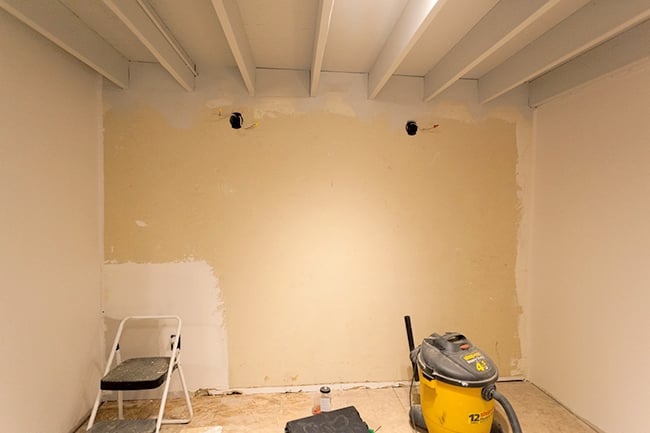
We skipped the paint here since we plan to tile over it. But oh, look at the difference. A breath of fresh air.

Pin

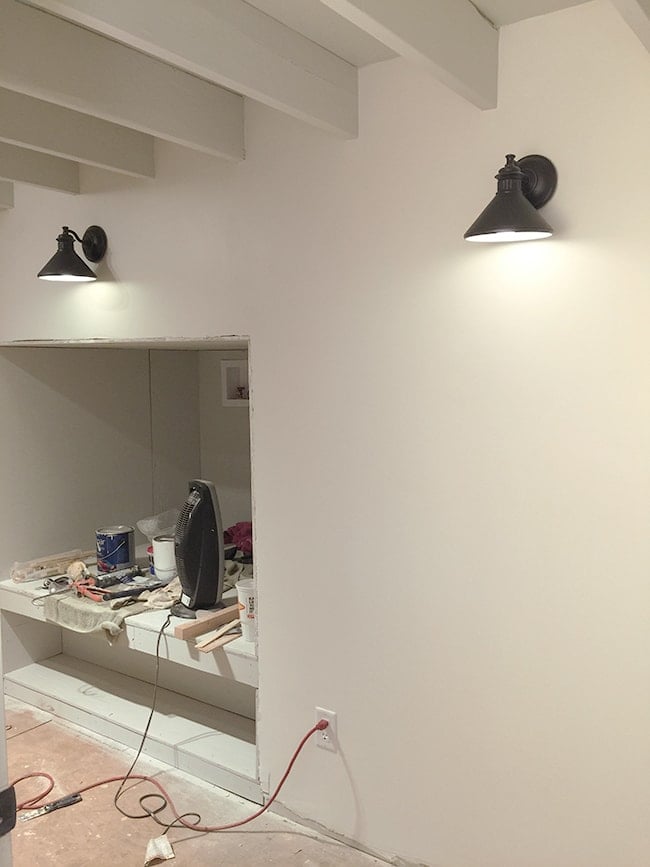
Brad also hooked up two of our lamps on the washer/dryer wall.

Pin

I picked up four in-store at Lowe’s in the outdoor lighting section. $30/eaโ€”total bargain!

Pin

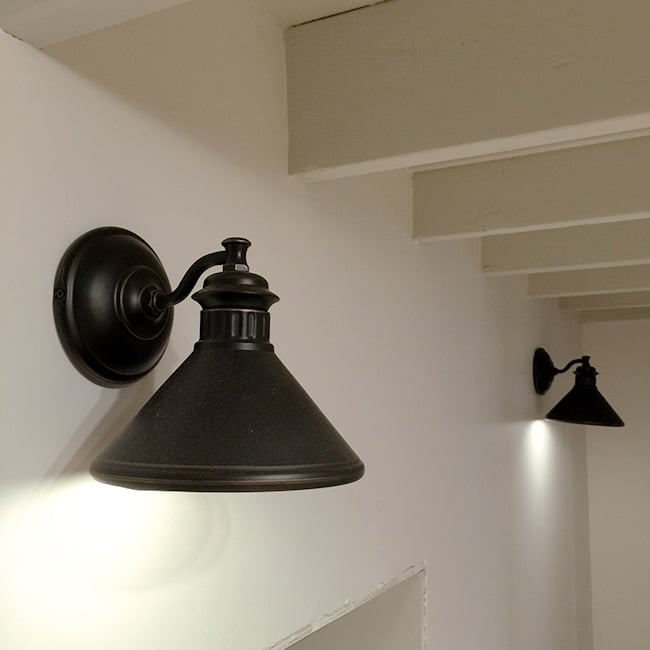
We have them on dimmers for a little laundry room “mood lighting”.

Pin
And painting the walls did help the ceiling look more gray, so that’s good.
Pin
Pin
Pin
First thing tomorrow we’re headed to Lowe’s to buy materials to tile the floor. We’ve never tiled a floor or installed cement board so we’re total rookies and a little nervous about it (we also plan to buy our own tile saw since there will be future projects). Any tips would be much appreciated!
Last but not least… I mentioned some big changes to this blog earlier and can now officially announce that this blog will be moving to jennasuedesign.com next Tuesday, February 2nd!
The new design is in place, the final adjustments have been made and the site is finally ready to launch. I am so excited about the new design… here’s a first exclusive look:
Pin
And there will be a giveaway involved! I’ll have a new post up Monday with a quick laundry room update, and then a final post on Tuesday linking to the new blog once it is live. Exciting stuff next week all around!
Wish us luck in our tiling adventure (and make sure to catch our progress on Instagram!)
Pin
XFacebookEmail1Pinterest
1
SHARE
Previous Post: « New Laundry Room: Painted Wood Ceiling
Next Post: New Laundry Room: Floor tile, Part 1 »

Reader Interactions

Comments

  1. Jenna Sue says

    February 2, 2015 at 3:39 pm

    Thanks Kathryn! They're super inexpensive $9 fixtures from Ikea. Not sure of the name but we purchased a few years ago.

  2. Laura Mclain says

    February 1, 2015 at 11:26 pm

    Nice room. Great taste, lady! Got my house #'s in the mail Friday. Already framed and hung….. love.

  3. Hannah says

    February 1, 2015 at 7:22 pm

    It's coming together so great, I just love everything that you do!

  4. Kathryn says

    February 1, 2015 at 3:59 am

    thank you for the continued reveal of your laundry room. It's so inspiring. Could you please tell me what are the lights you installed on your ceiling. I see them peeking out from the beams and they are so pretty. And keeps these posts coming. The best! Kathryn in Southern California

  5. Kathryn says

    February 1, 2015 at 3:57 am

    thanks for the detailed update on your laundry room. So inspiring. Can you tell me what are the lights that are installed within the ceiling beams (the ones at the very top…not the gorgeous black ones on the wall). I think they look awesome and wonder what they are! Thanks and keep the great reveal coming. Kathryn in Southern California

  6. AUTUMN says

    January 31, 2015 at 7:03 pm

    I'm excited too (about the new blog/website). I love how clean it looks, and that logo is simple yet gorgeous at the same time. Well done Jenna Sue!

« Older Comments

Welcome!

Hi, Iโ€™m Jenna and Iโ€™ve been designing and DIYโ€™ing my way through homes since 2008. Join me as I learn, share my experience, and hopefully encourage/inspire you along the way!

As Seen In

Primary Sidebar

Welcome!

Hi, Iโ€™m Jenna and Iโ€™ve been designing and DIYโ€™ing my way through homes since 2008. Join me as I learn, share my experience, and hopefully encourage/inspire you along the way!

JOIN THE FUN

  • Email
  • Facebook
  • Instagram
  • Pinterest
  • YouTube

Shop MY HOMES

  • Spanish Sanctuary
  • Hacienda Hideaway
  • Heights House
  • Riverside Retreat
  • Cottage House Flip
  • Modern Farmhouse

Shop MY AMAZON

As an Amazon Associate I earn
from qualifying purchases

Recent Posts

  • The best faux stems and florals for spring
  • Spanish Sanctuary Primary Bedroom Reveal
  • The Spanish Sanctuary Primary Bathroom Reveal
  • Our Custom Metal Shower Enclosure
  • The Queen Bedroom Reveal
  • The Twin Bedroom Closet Makeover
  • Design Finds: Classic Gingham

Subscribe via email

Footer

Shop My Homes

  • Spanish Sanctuary
  • Hacienda Hideaway
  • Heights House
  • Riverside Retreat
  • Cottage House Flip
  • Modern Farmhouse

Connect

  • Instagram
  • Facebook
  • Pinterest
  • Youtube

Information

  • Contact
  • About Jenna Sue
  • About the Blog
  • Privacy Policy

Copyright © 2026 ยท Jenna Sue Design Co. ยท All Rights Reserved ยท

SUBSCRIBE VIA EMAIL: