With just eight days to go until the Country Living shoot, I am so happy to share that the tables have finally turned—this weekend was the best on record for the cottage house flip:
It’s a bit surprising that I’m feeling so positive considering I didn’t complete any of the top three items on my DIY to-do list (build the dining table, build/install the shutters, finish/install the laundry room barn door) but when you survive two weeks of everything going wrong, you’ll take any progress as success!
Perhaps the biggest reason I’ve managed to stay calm is that I have complete faith in my contractor. He understands how important this deadline is and has gone out of his way to make sure we are on track. We have our game plan in place and will be working up until the last second to finish, but it will get done.
The other reason is that Mother Nature seems to have finally decided to play nice. The weather forecast for the next 10 days could not be more perfect—warmer temperatures to melt the snow, rain to help wash it away, and sunny skies on Open House day. Let’s just hope it stays that way.
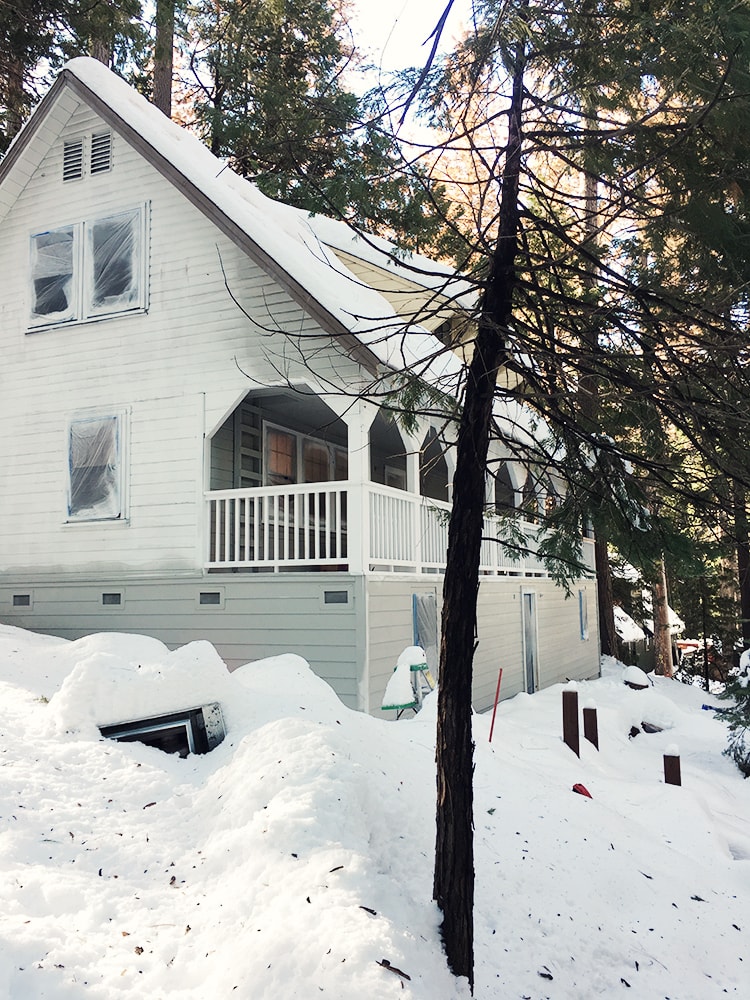
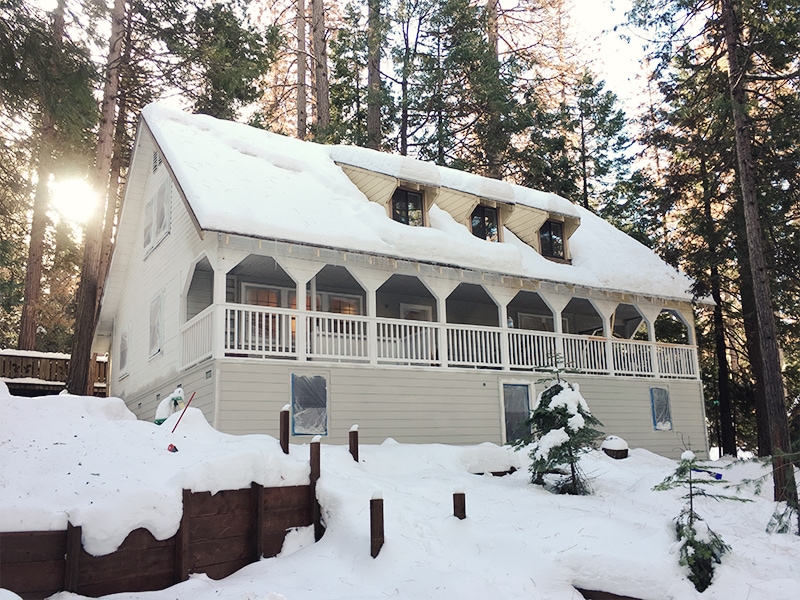
As of now, the house is still buried in snow and there’s no driveway access or place to park on the road that has become one lane. We had to find a plowed driveway on another street behind the house who was kind enough to let us park there, and carved a path through the neighborhood to get to the back of the house.

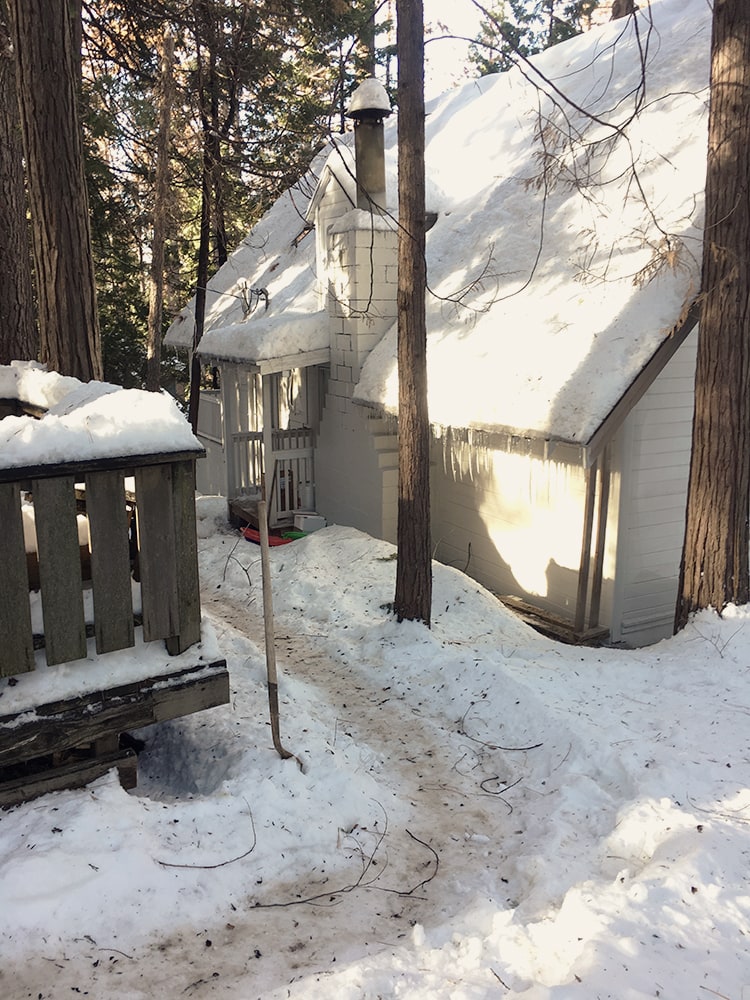
The path is long, icy and slippery, so the contractors had to use sleds to transport all of their equipment. Seriously, how many contractors out there would do that?
Here’s the end of the trail, up to the back of the house. One of the guys was carrying a heavy wood beam and slipped and fell… ugh. I felt terrible. Never flip in the middle of a snowstorm, people!
Clearly this situation will not work during the open house, so I am praying that this rain makes enough of a dent in the snow so that we can use the driveway… and that folks actually have a place to park. I’ll have to figure out how to pay the city to plow it if I have to… or I’ll be out there myself with a shovel, either way.
But it sure is pretty to look at.

While the weather was cooperating they wrapped up painting on the porch, and by the time this post is published they should (hopefully) be done with all of the exterior paint. They had to get guys up on the roof to clear off the snow in order to paint the dormers. I can’t wait to see it when I come back in a couple days!
Now let’s head inside…
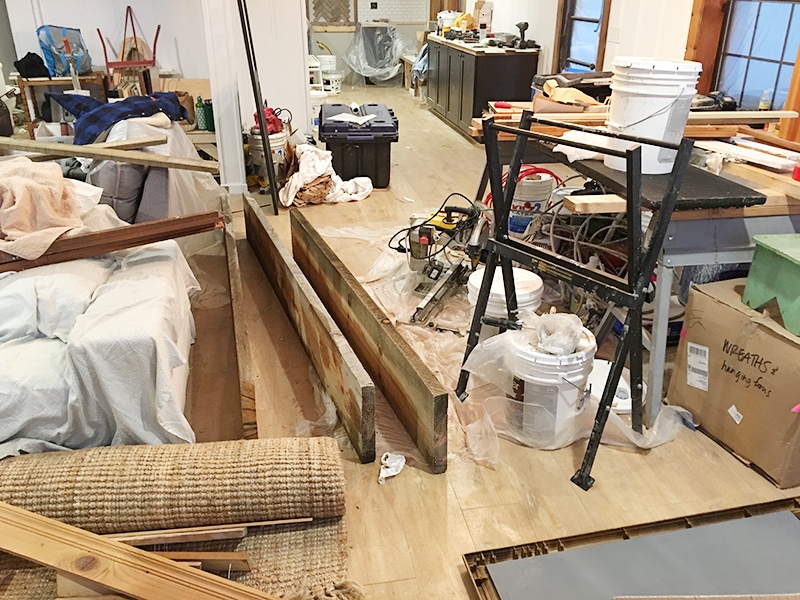
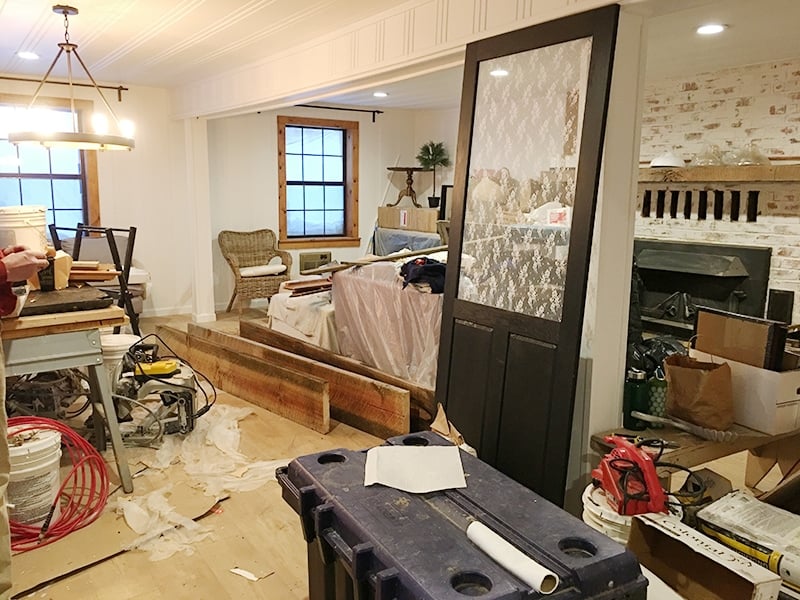
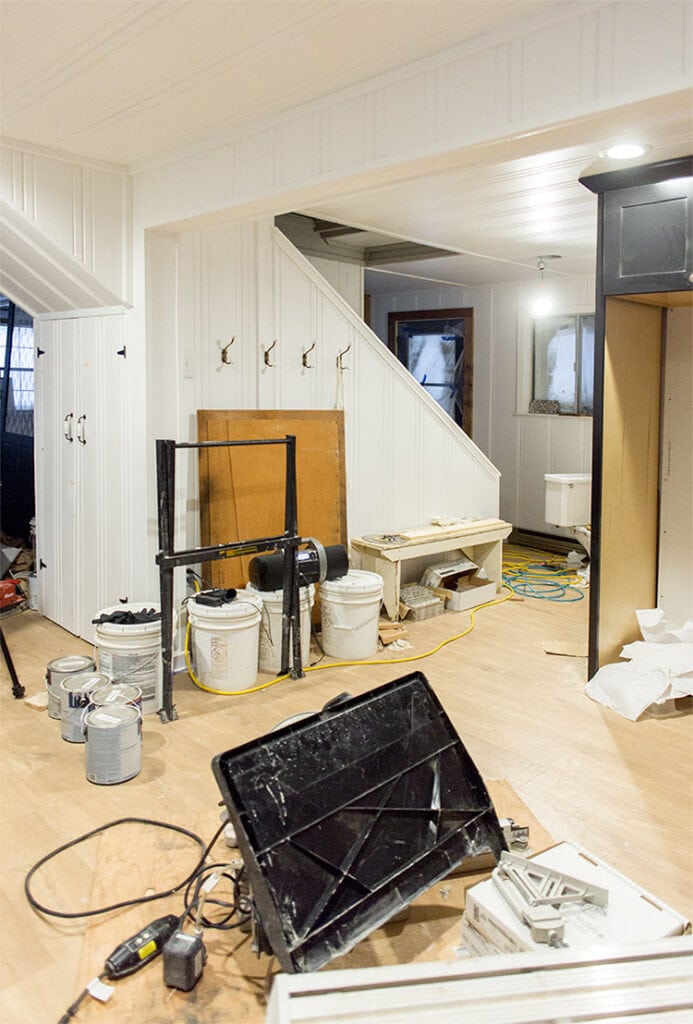
The house is actually messier than its ever been. There’s half completed projects, tools, paint and sawdust everywhere.
Visually, it feels like we’ve actually regressed but I can see past the mess and know that as soon as the workers are done and have cleared out their tools and equipment, it will all come together fast—we’re talking just a few days.
Still, it’s slightly overwhelming to think that this must be photoshoot (and Open House) ready next week:
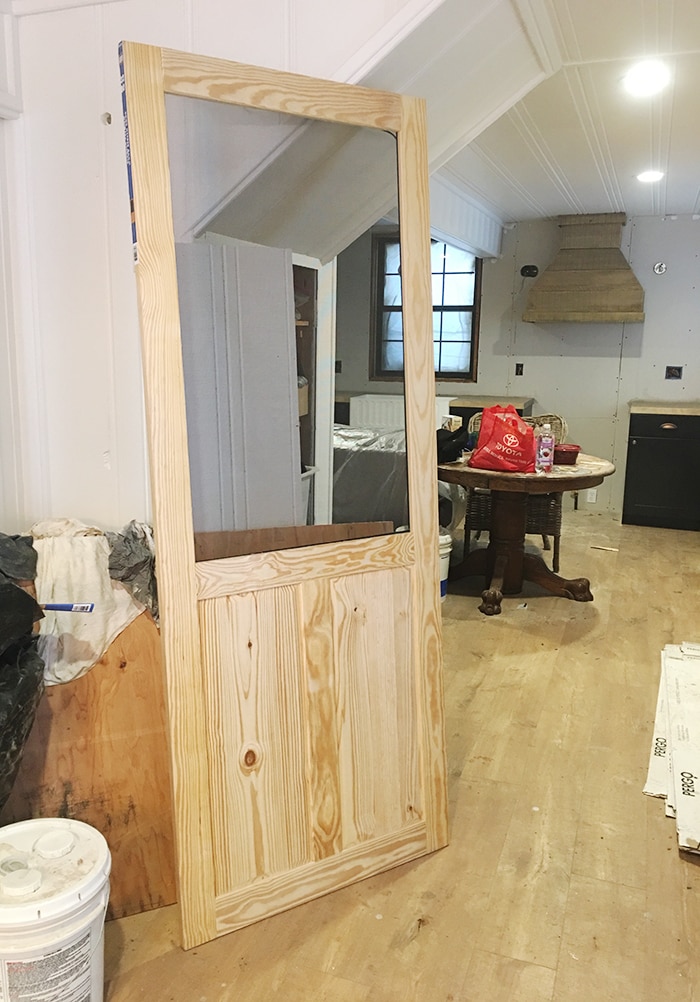
But, do you see that door? Oh man, I am in love.
It all started with this screen door from Lowe’s:
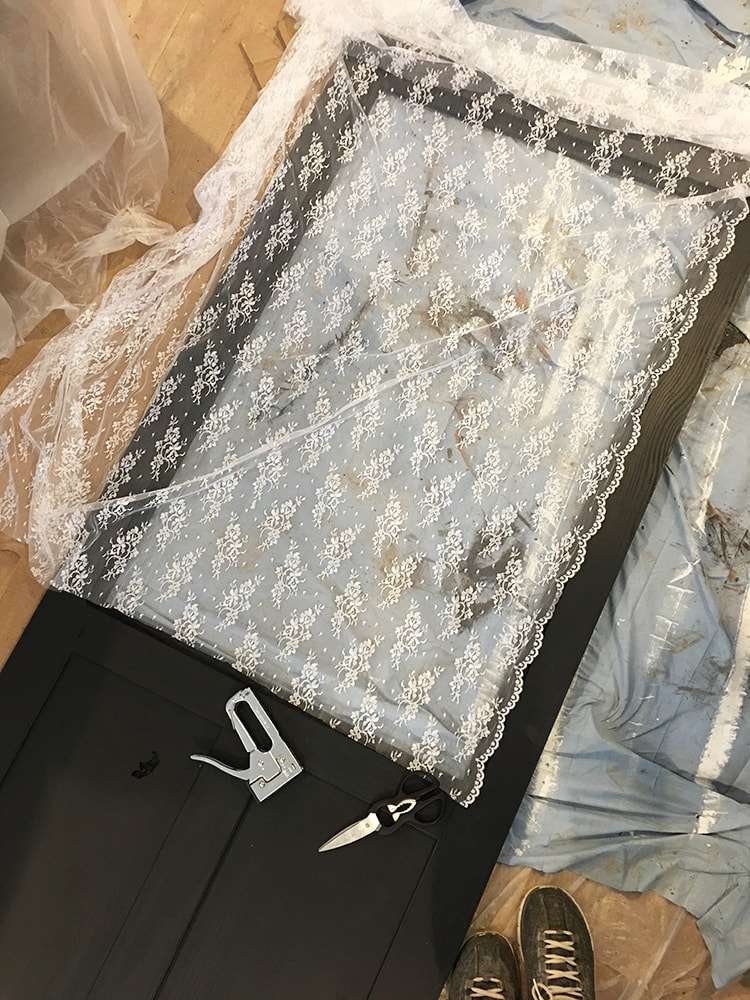
I explained Part 1 last week, and this week I returned with 2 yards of chantilly lace fabric (in white) from JoAnn’s. It was as simple as positioning it onto the back of the door…
Then I borrowed a pneumatic staple gun from one of the guys (although the handheld version works just fine) and began securing the lace. You want to make sure it’s pulled taught so that there is no loose fabric, but not so tight that it stretches and distorts the lace. It’s a nice happy medium.
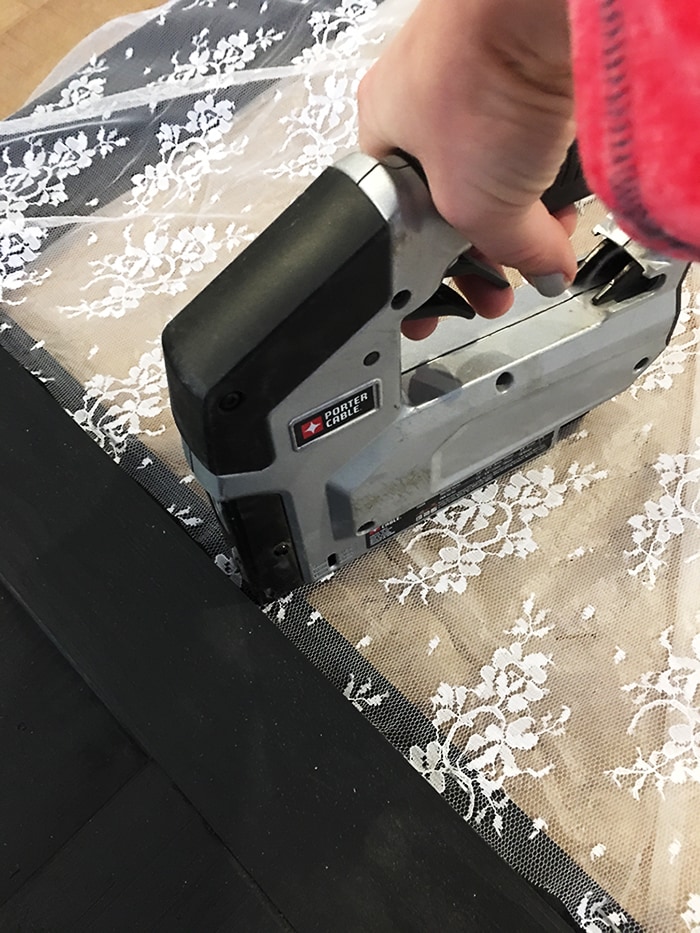
Once the staples were placed every few inches or so around the entire perimeter, I cut the excess fabric with scissors.
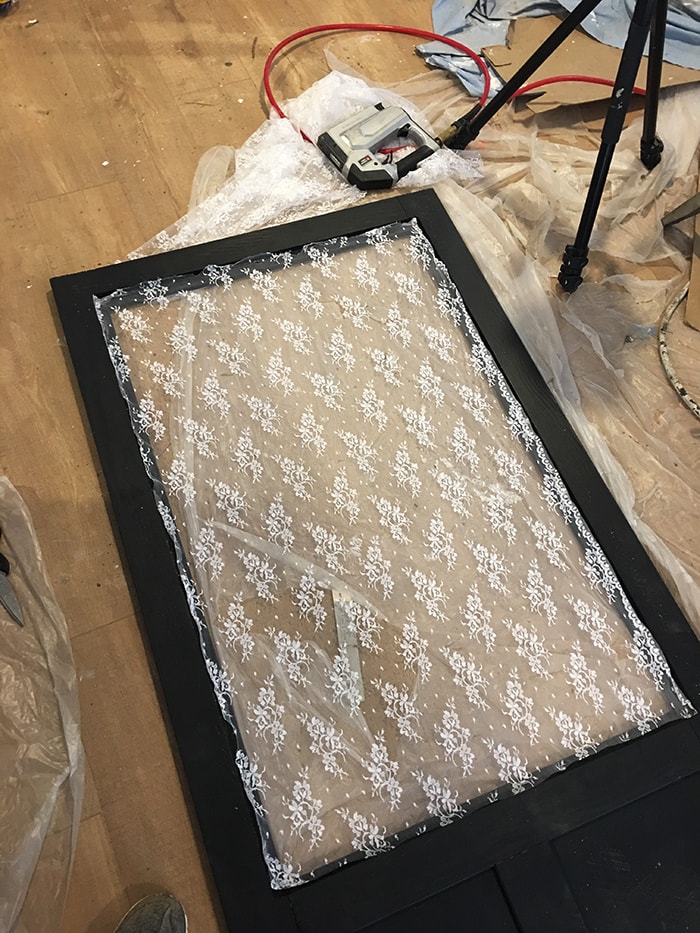
Then I folded and tucked any extra and stapled any loose areas.
Ta-da!
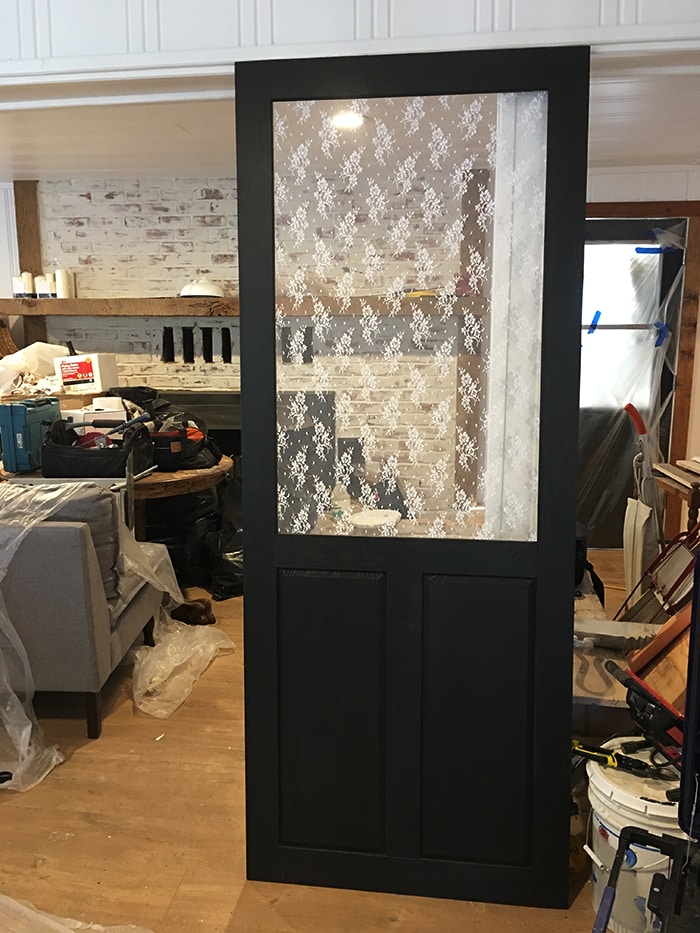
Love love love it. I ordered a crystal knob from eBay which will complete the vintage look, and the next time you see this door it will be on a sliding track in front of the laundry room!
Speaking of the laundry room… I finally finished the trim and got the washer/dryer back into place.
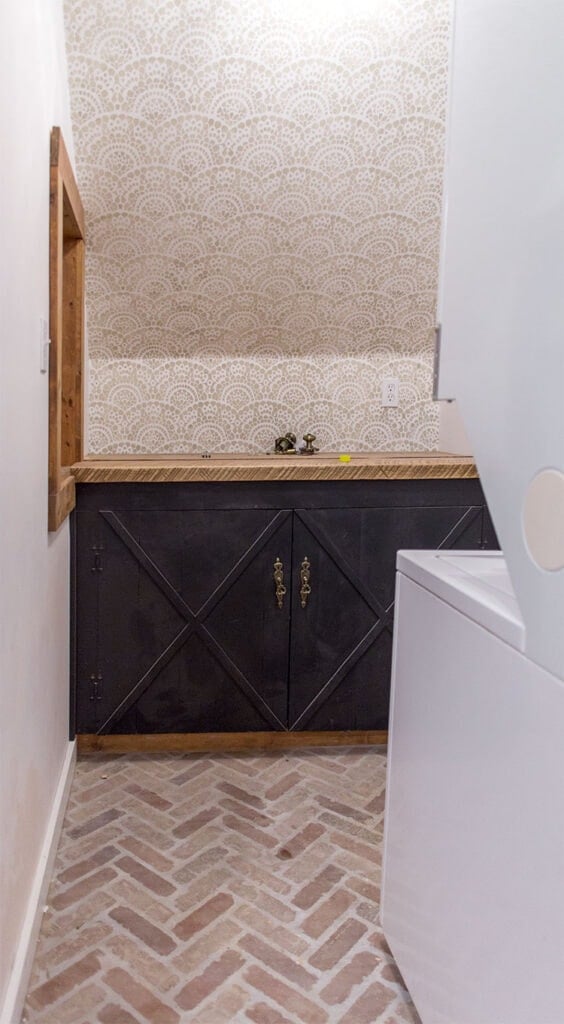
The baseboard below the cabinet will be painted black, and I’m also painting the shelf trim on the right (probably white) so the only natural wood in here will be the counter top. The ceiling needs a bit of touch up paint and then this room will be finito! (after a good cleaning & staging, of course)
While we’re upstairs, let’s look at the hallway…
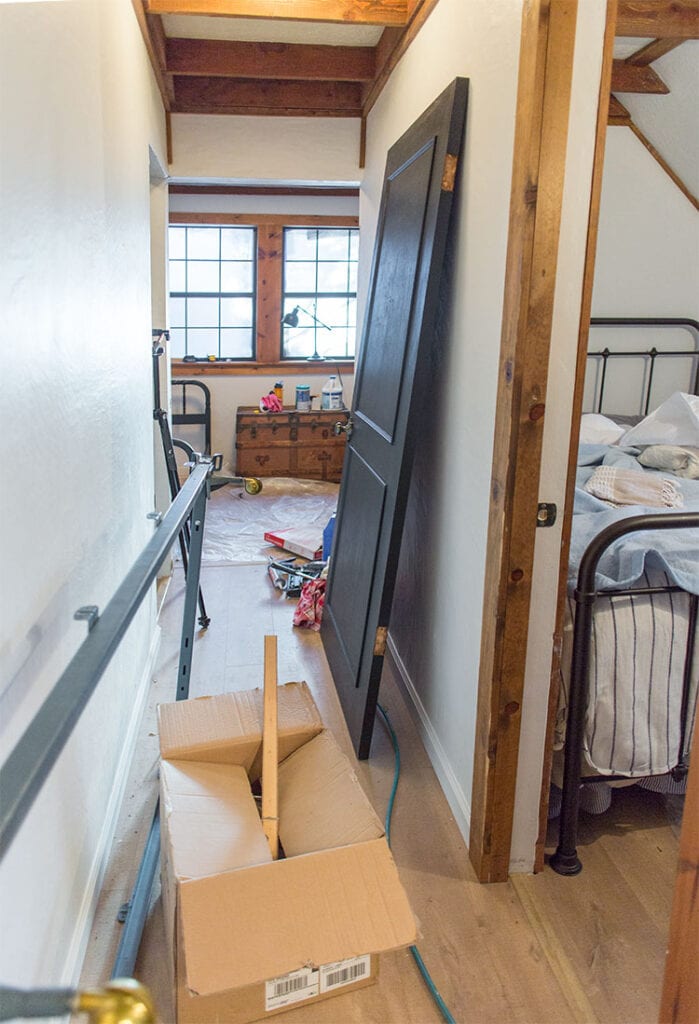
It’s a little cramped—there’s still doors that need to be reattached and beds that are being shuffled around.
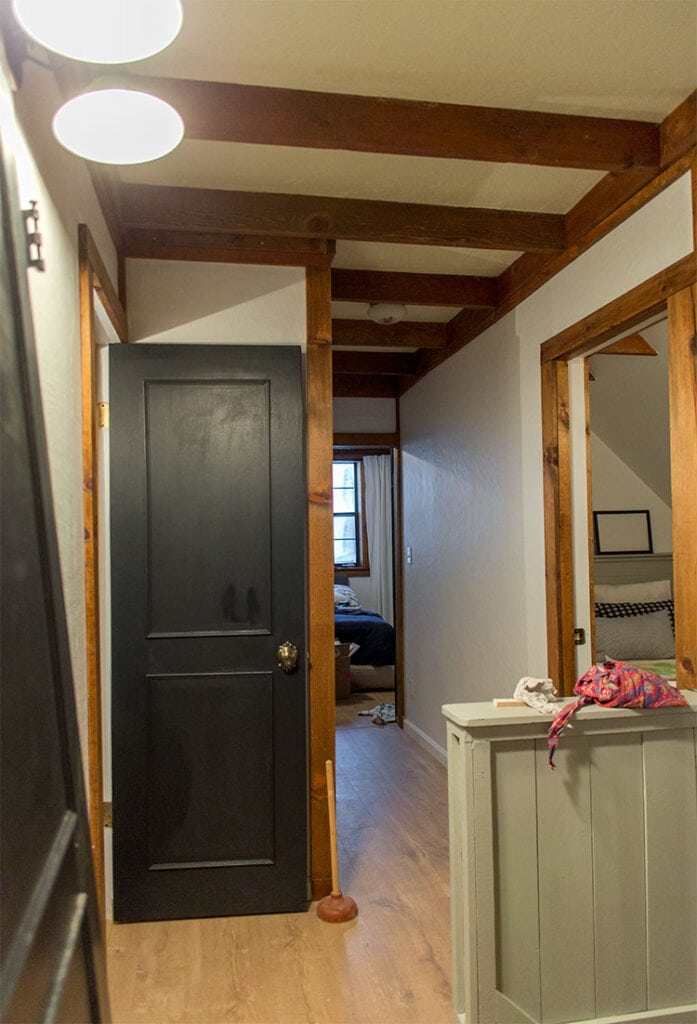
But the wood landing has been painted and it’s coming along.
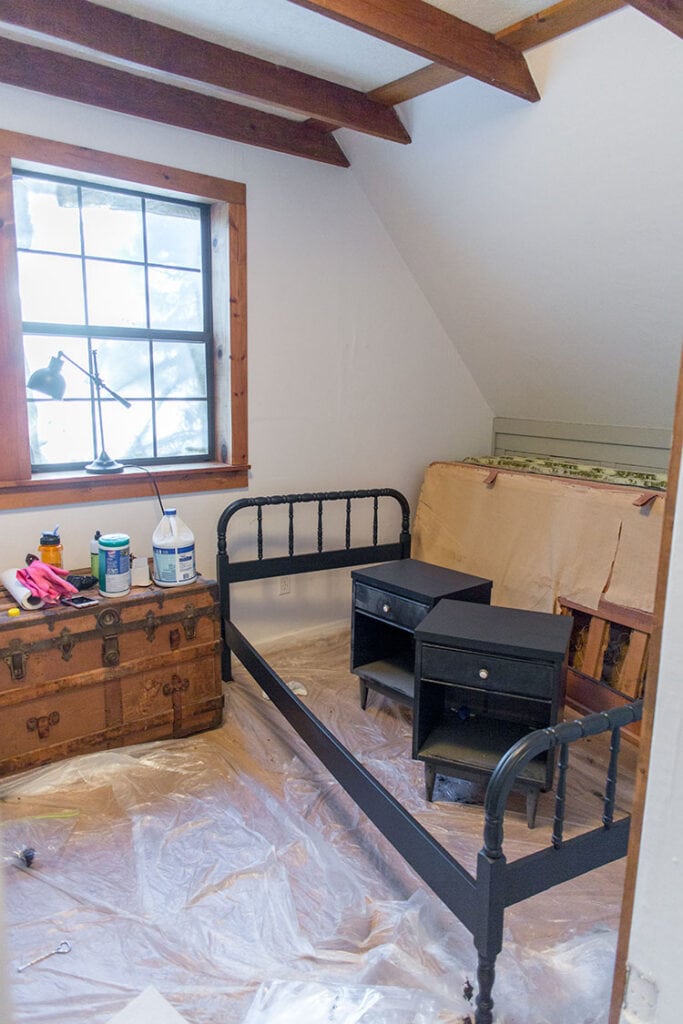
Speaking of beds, remember my sad story about one of the matching twin bed footboards going missing? Well, that was a blessing in disguise because I walked into the Restore Friday morning and found these:
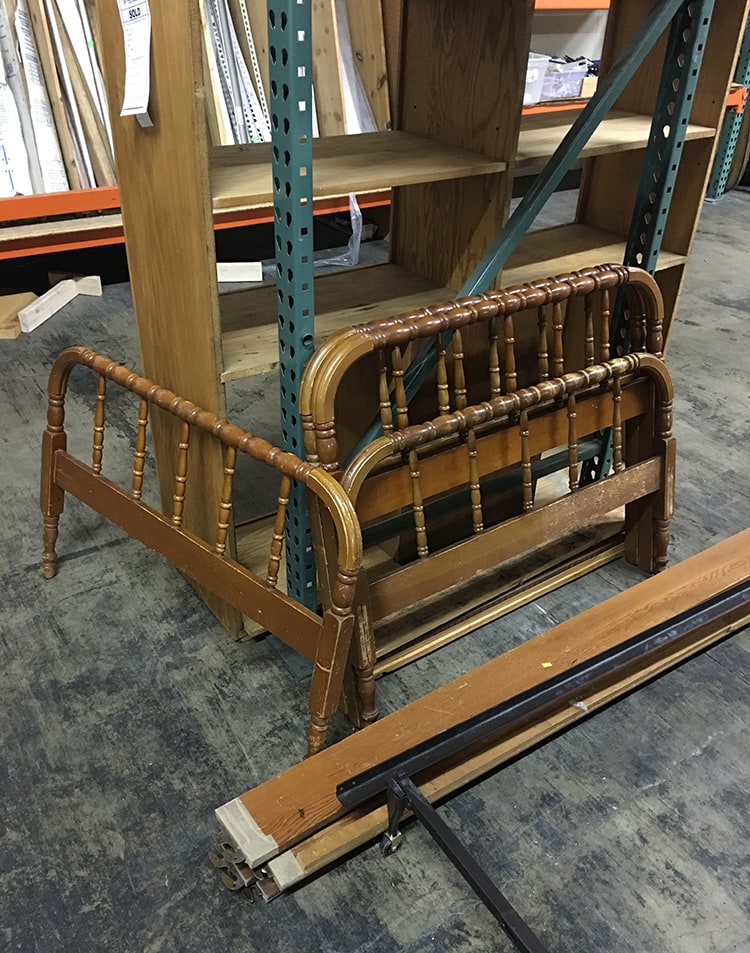
They had just arrived the night before. Two matching antique Jenny Lind style beds… for $20/each! I was happy dancing all over the place. Restore, you are a designers’ greatest gift.
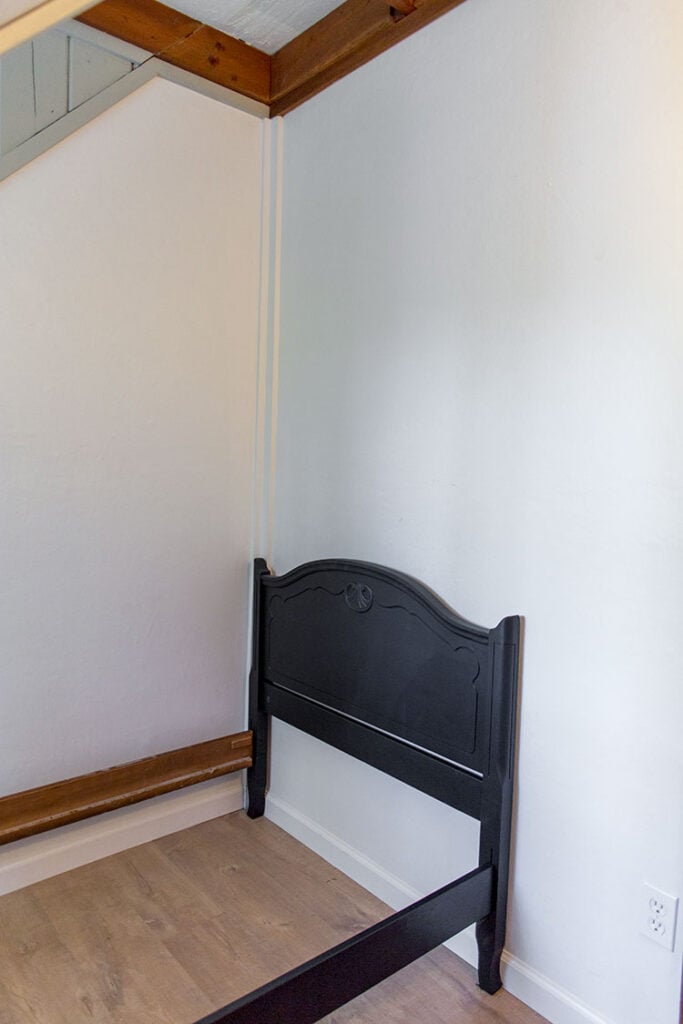
Anyway, I happily loaded those babies into the car, set them up and gave them a quick update (using Valspar’s Cracked Pepper):
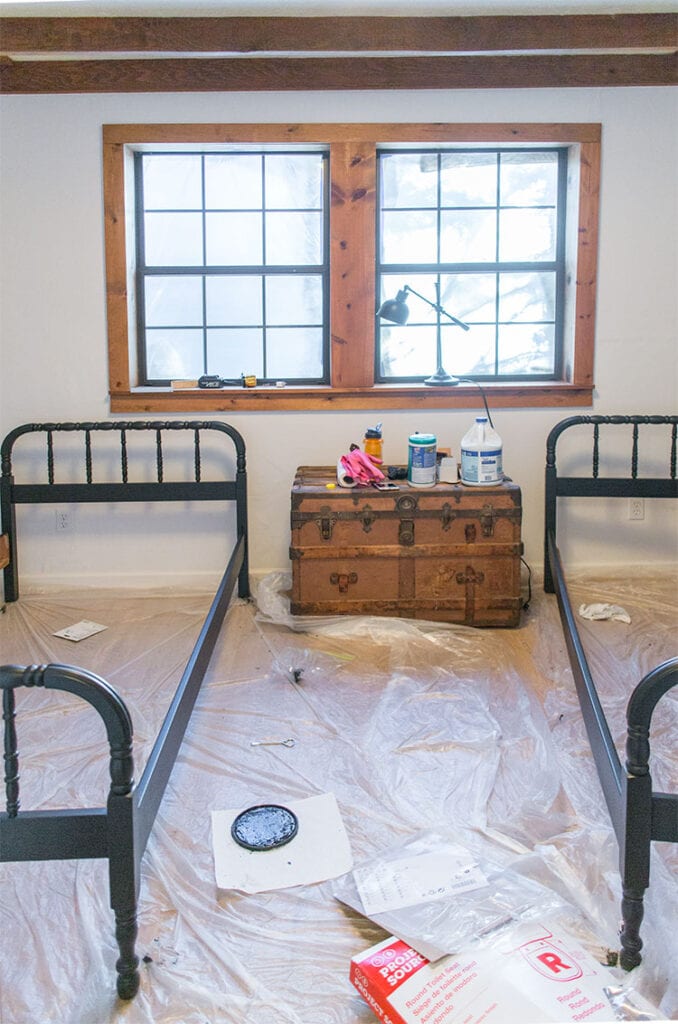
They make my heart sing.
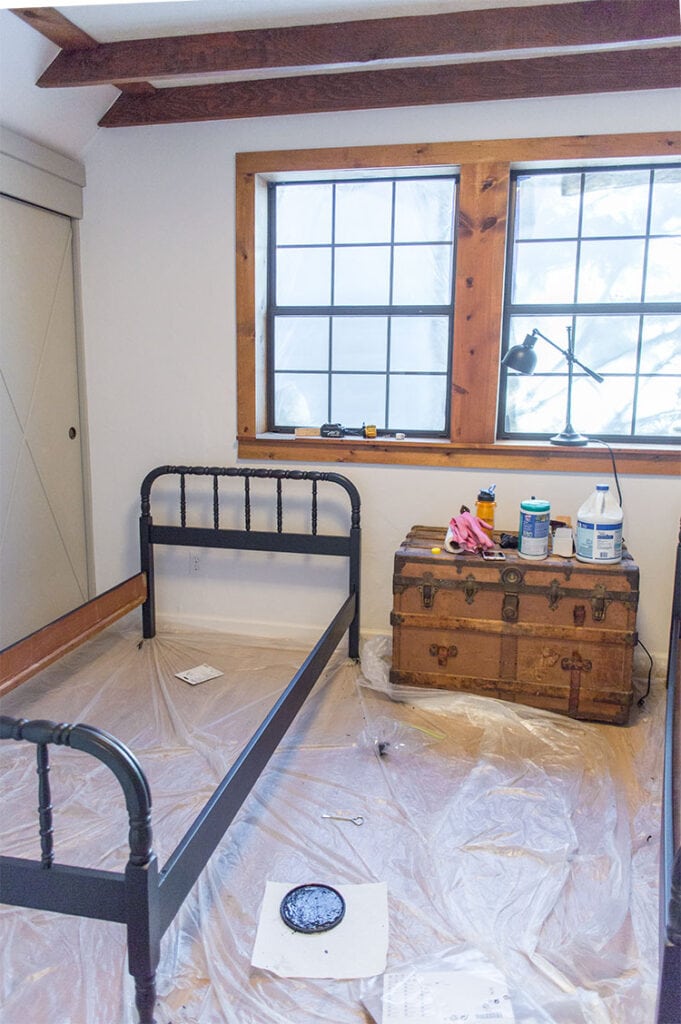
I can’t wait to decorate and photograph this room.

Because I found these beds, I was able to use the extra bed for another room!
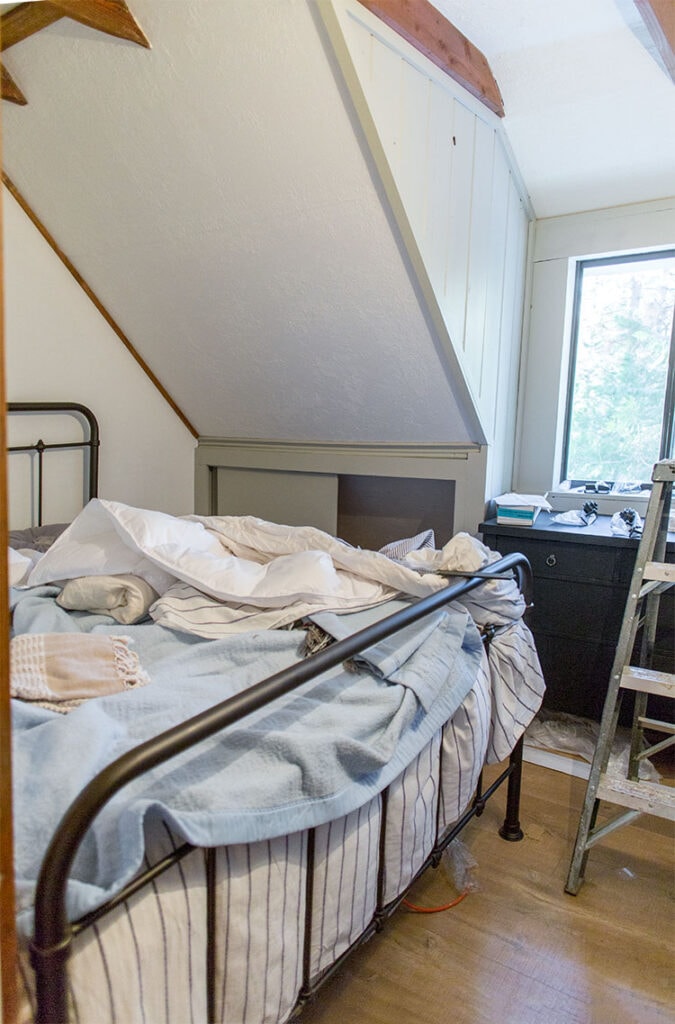
This is Bedroom #4, the littlest of them all. Excuse the mattresses in the way.
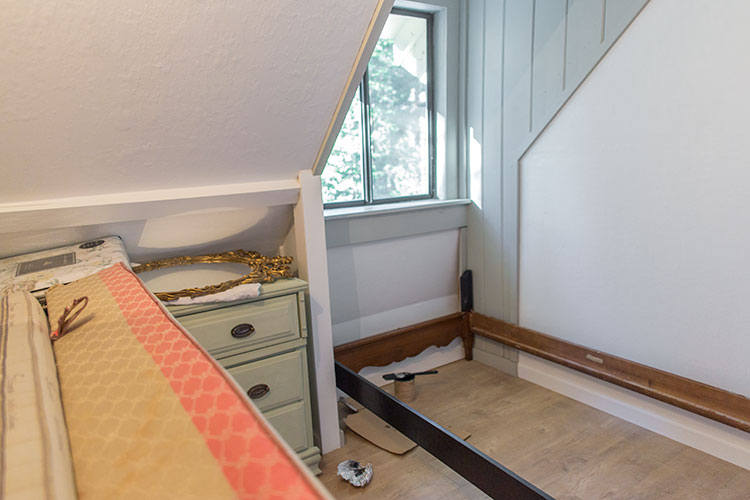
That morning I had also scored a set of old bronze pulls from another thrift store, which I used to finish this dresser update—which you can only see half of right now, I apologize.
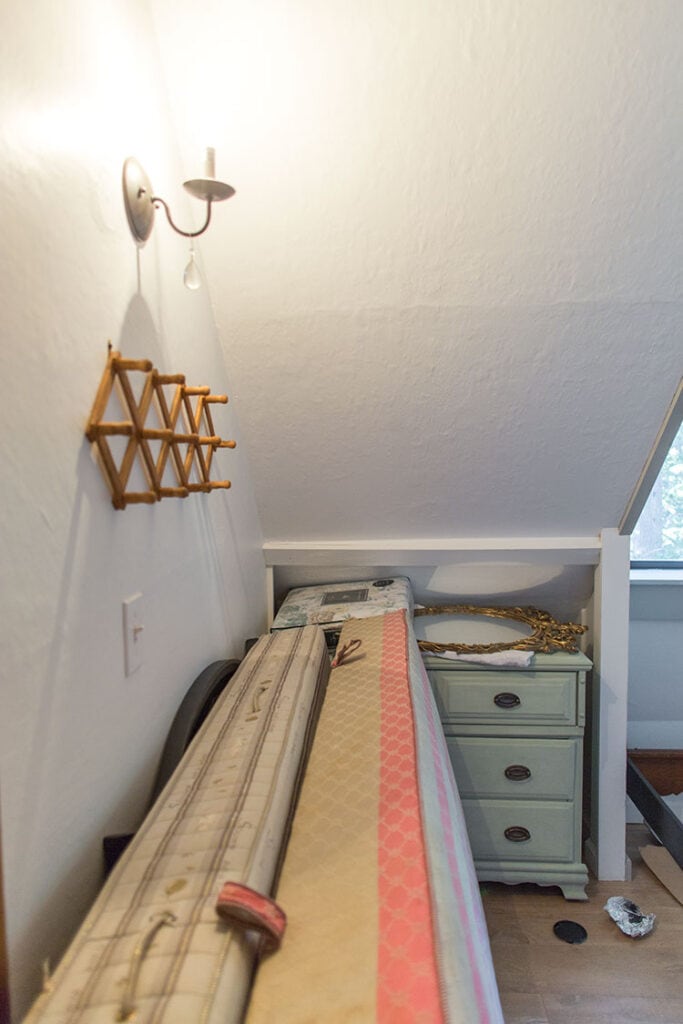
Sometimes I think this will be my favorite room (the bedding is so sweet)… can not wait to show you! If only I could get a decent picture. You’ll have to come to the open house if you want to see it how it’s meant to be shown 🙂
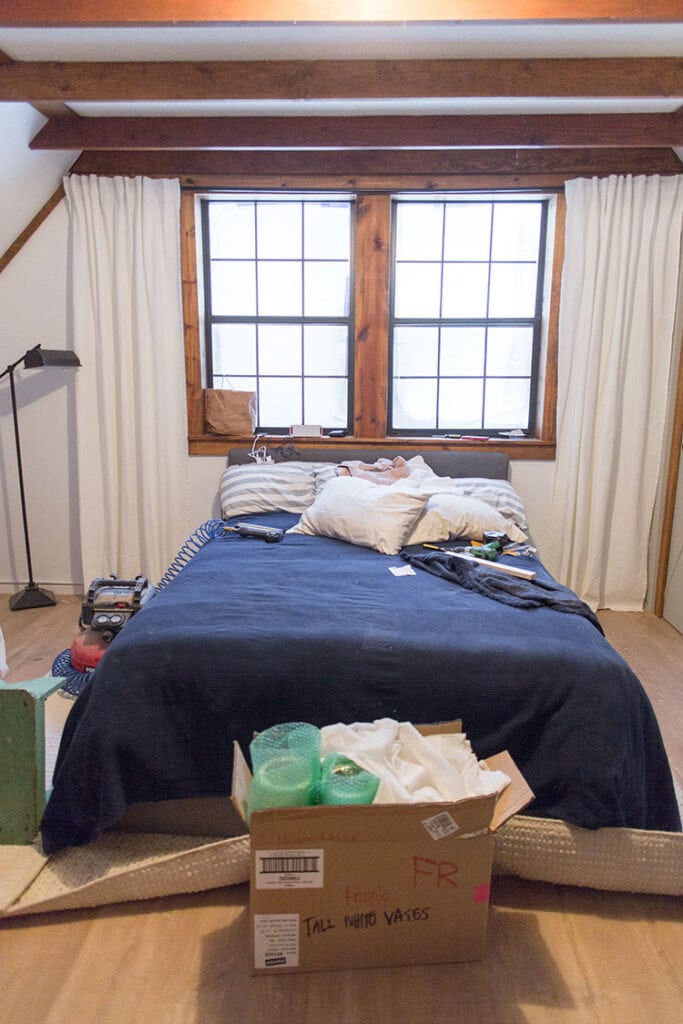
While we’re on the bedroom update tour, here’s #5:
Yep, still a mess, and it’s going to take a few different angles to fit these all in.
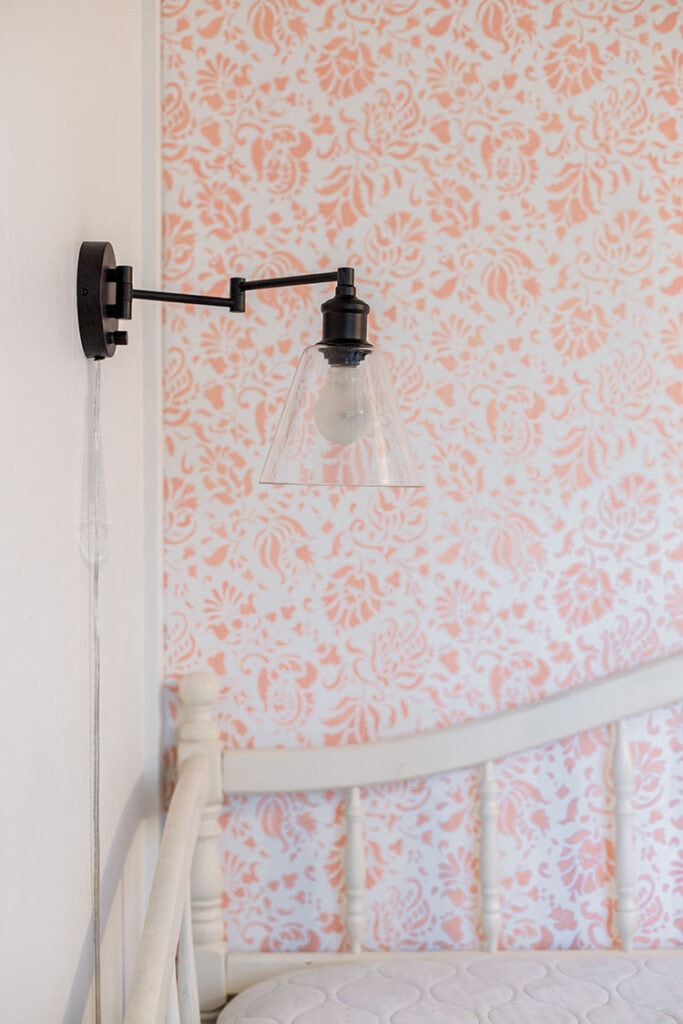
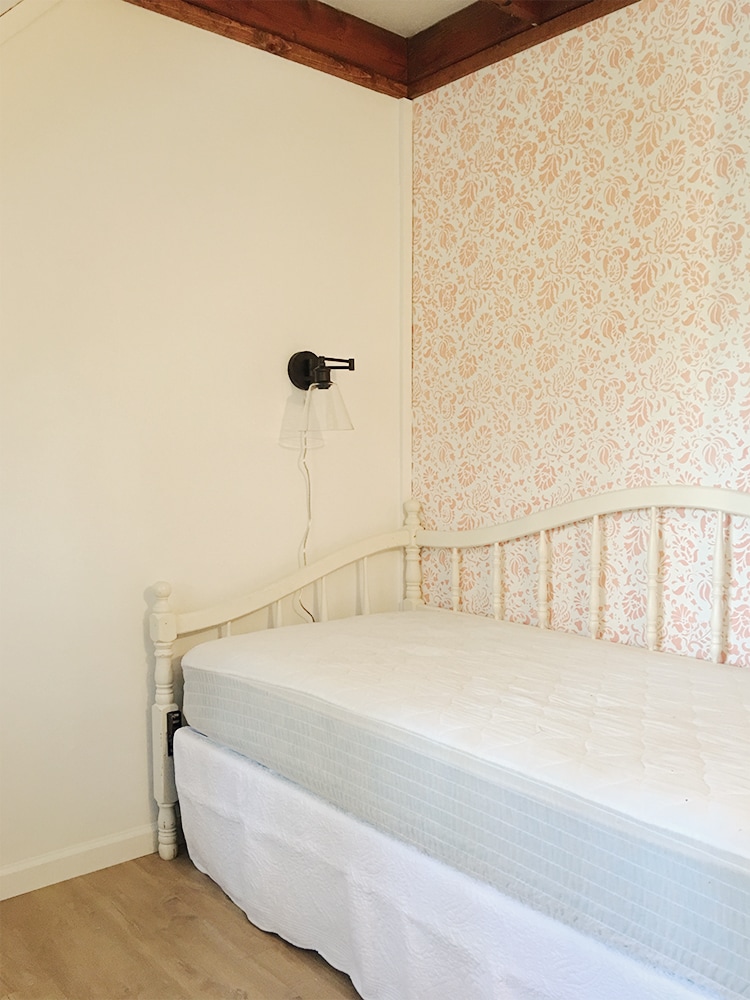
Bedroom #3 has come a long way. I finally have the bed in place (thanks to my parents for letting me borrow it!) and installed a couple sconce lights over the weekend.
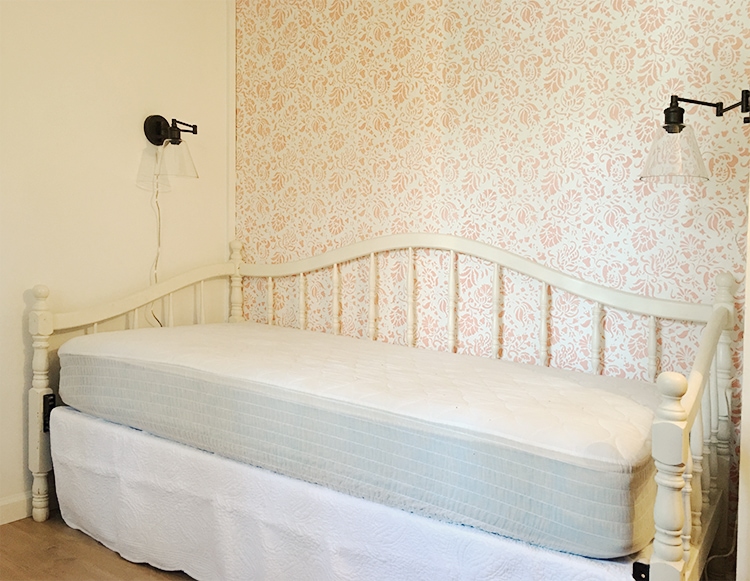
I bought 5 of these sconces for this house, so obsessed.
I’m also loving this quilted bed skirt from Wayfair (I bought two of these as well):
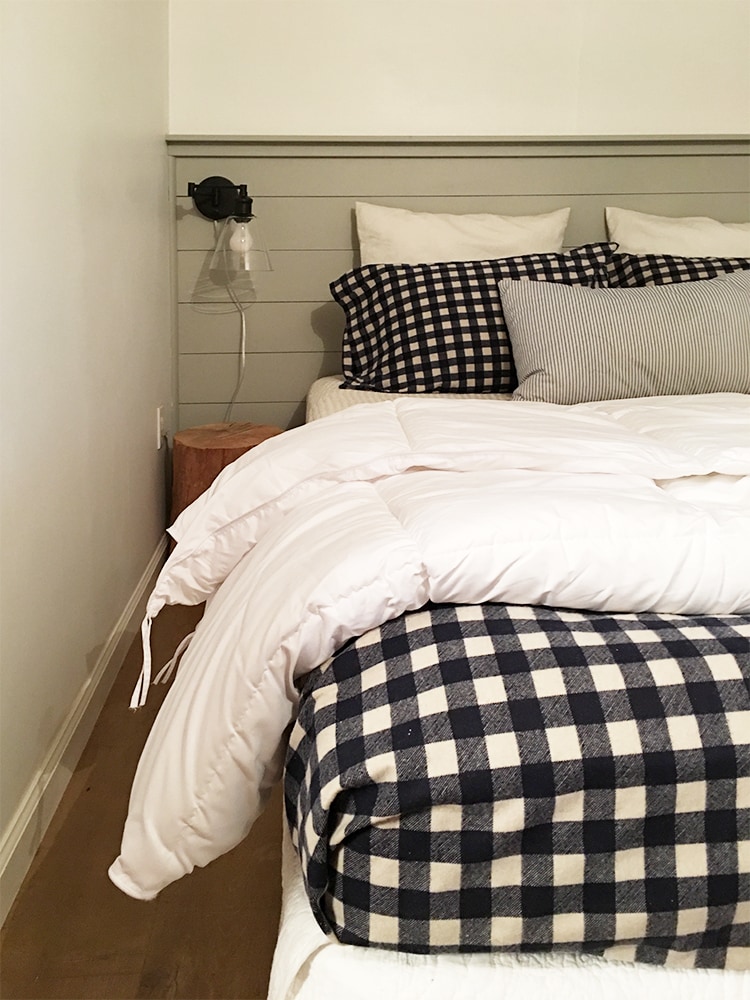
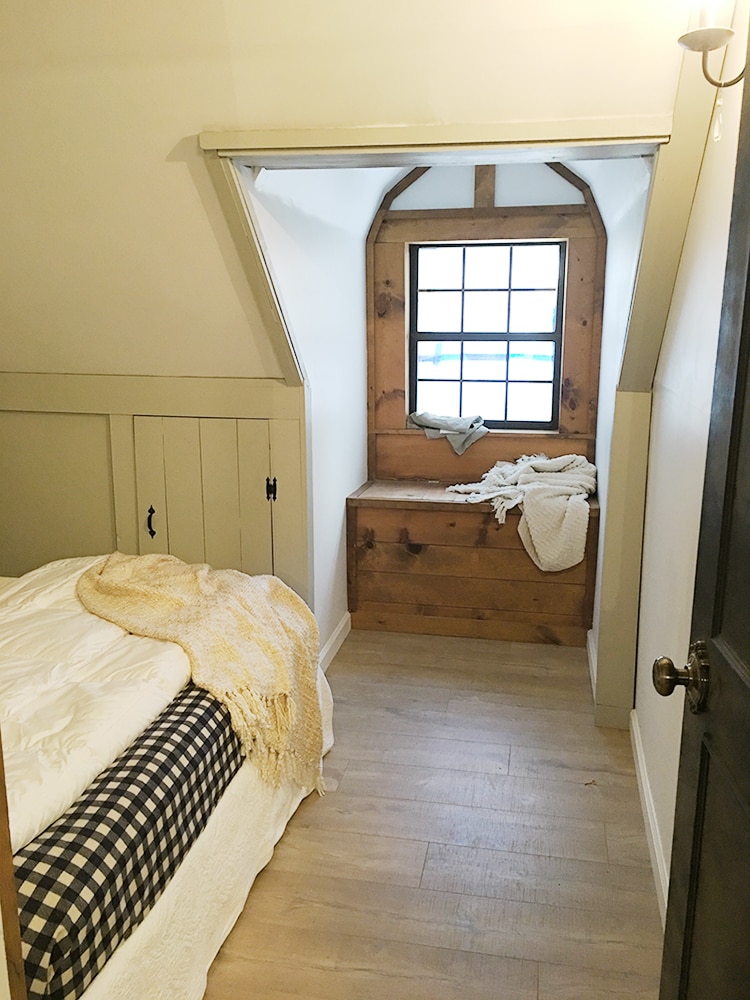
Bedroom #2 is seconds away from being finished…
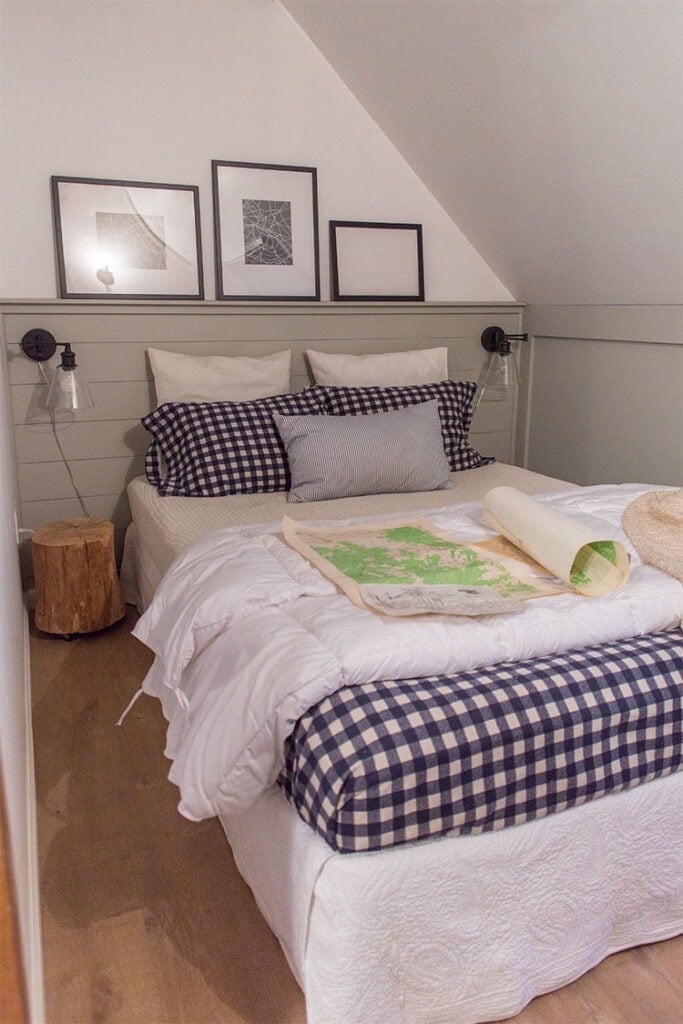
I’m still playing around with the bedding (will be changing a few things) and need to update the artwork. Aren’t these buffalo check sheets fun for a mountain home? (or any home, really…)
A couple pillows in this charming reading nook and we’ll be set.
And lastly, bedroom #1, also known as the “master suite”:
This is NOT the bedding I plan to use—I just threw it on for my parents to stay warm when we stayed the night. I picked up this gorgeous toile quilt set so the colors will be very soft, warm and relaxing. There will be black night stands, bronze reading lamps, a white cushy reading chair and probably a different rug, among other things.
Country Living will most likely only include 2-3 bedrooms in their spread, so it’s fun to guess which ones they’ll choose. I’m pretty sure it’ll be the largest room (#1), the second largest with the matching twin beds (#6), but if there’s a third (or 4th) which do you think it’ll be?
Okay, ready for my favorite room of all…?
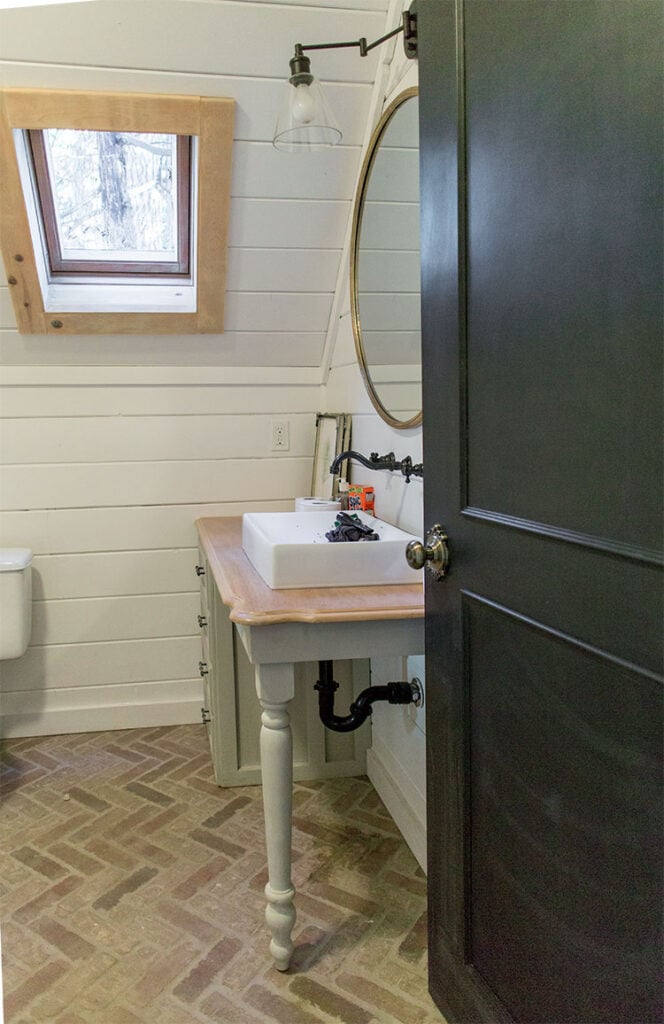
We’ve got the door back on in the upstairs bathroom and all that’s left to do is stage.
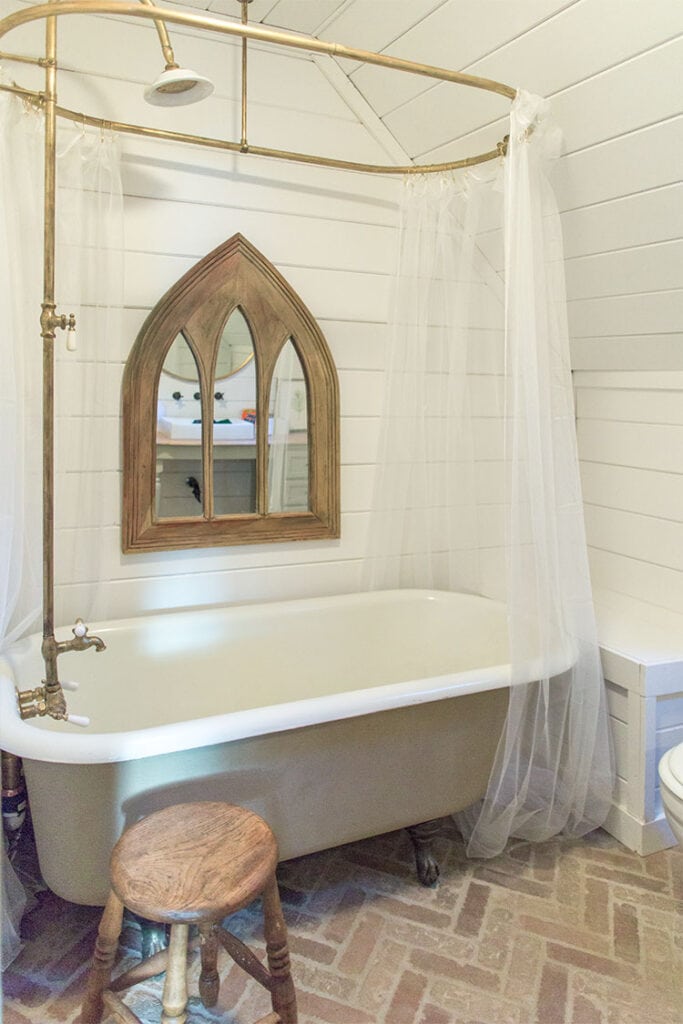
I added some $5 gauze curtains to soften the space and found some artwork to hang on the wall.
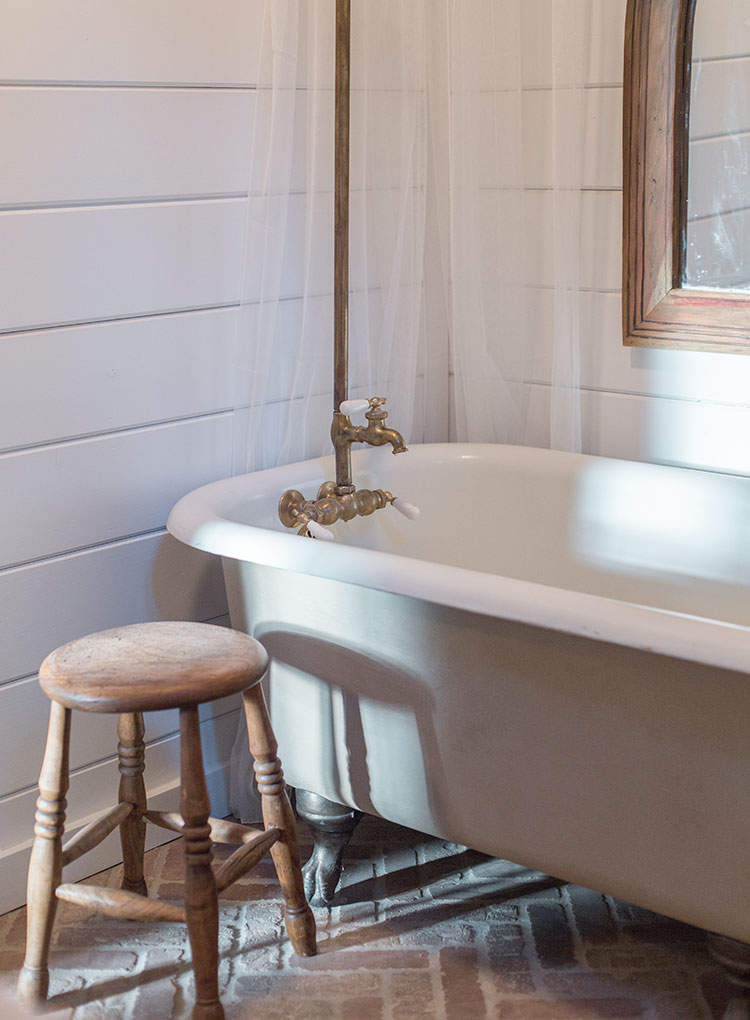
A couple hooks, turkish towels, candles and flowers is all this dream bathroom needs.
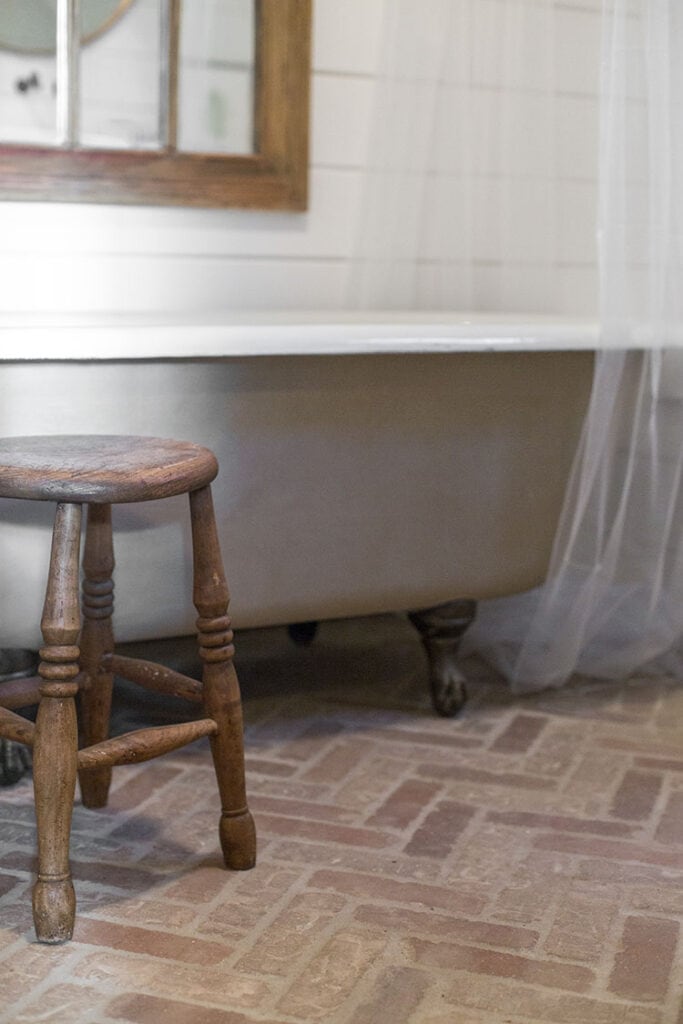
…and a good way to actually photograph it properly. I’m sure Country Living will do a much better job than I can! This is one room that has turned out pretty much exactly as planned. I still can’t get over the brick floors and am pretty certain I’ll end up using them in every house for the rest of my life.
And while we’re discussing bathrooms, the downstairs bathroom still looks like this…

Slightly nerve wracking, but they’ve assured me it will still get done. This one will be a race to the finish.
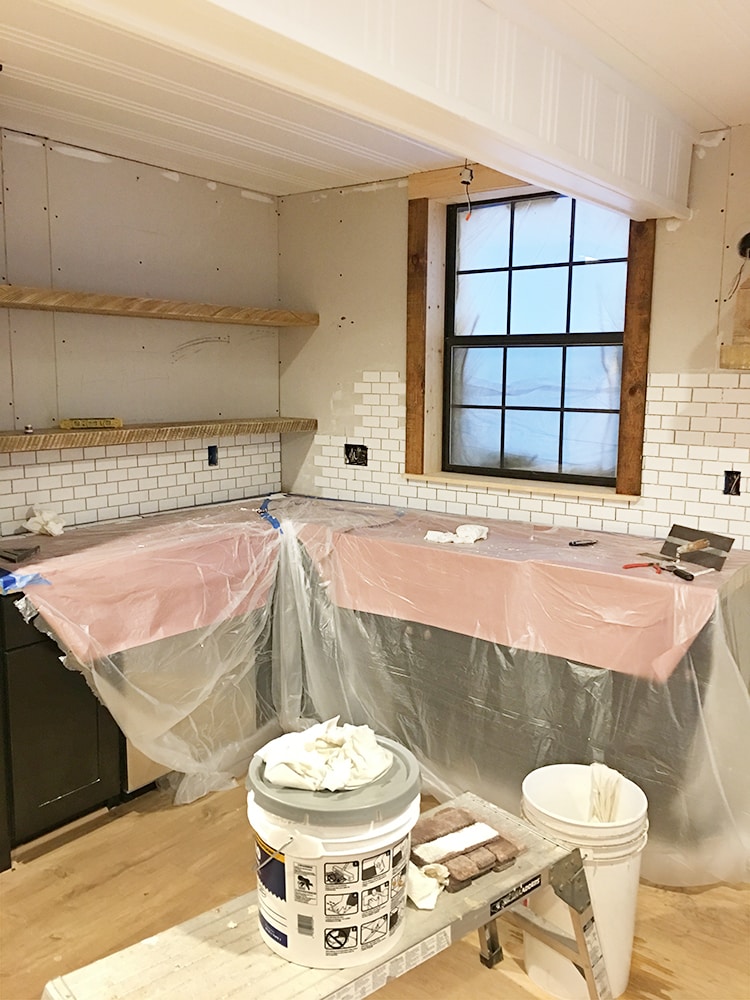
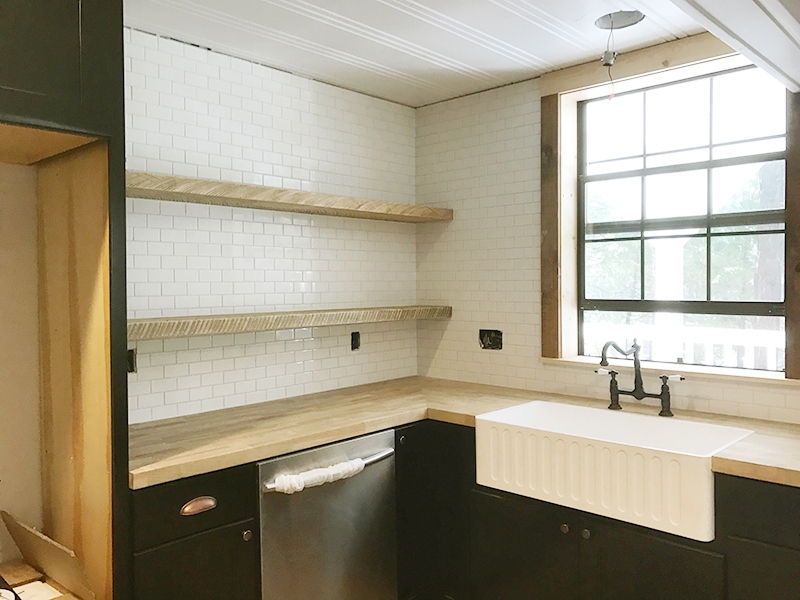
Since we’ve made it back downstairs, let’s finish on a high note—the kitchen!
Tile work began on Thursday. I opted for the same white subway tile used in my previous home, because it’s classic & budget friendly:
However… I fell in love so hard with the brick pavers used in the upstairs bathroom & laundry room, and had some leftover, so I decided to not play it so safe and have a little fun. Enter the range hood focal point.
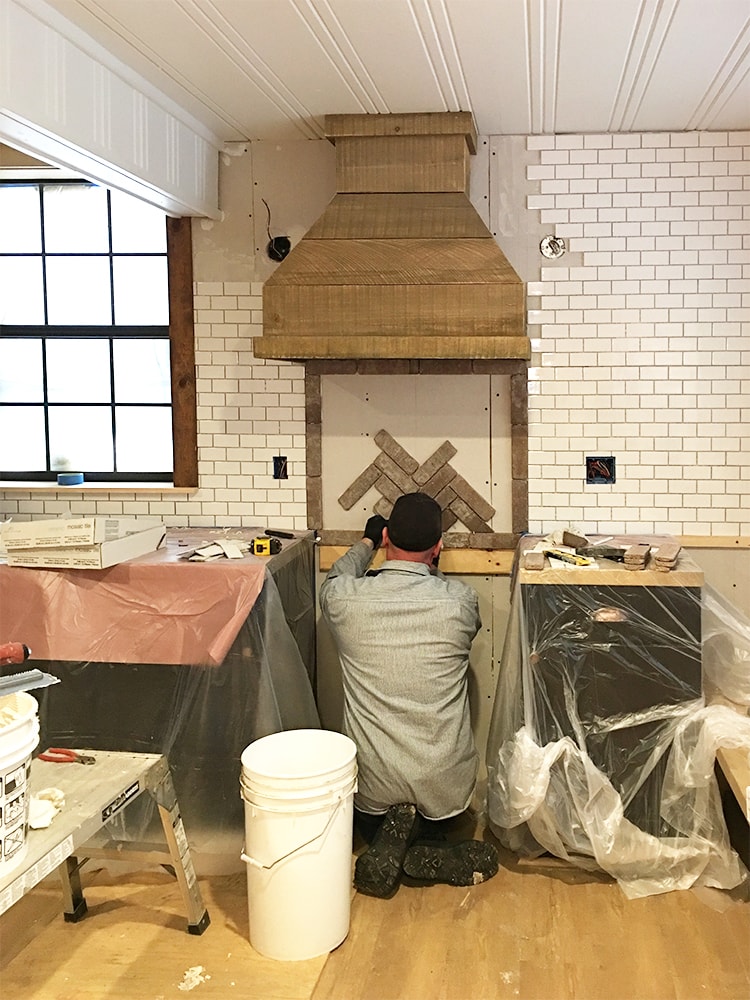
Sometimes you’ve gotta take risks and do something unexpected. I’m glad I went for it.
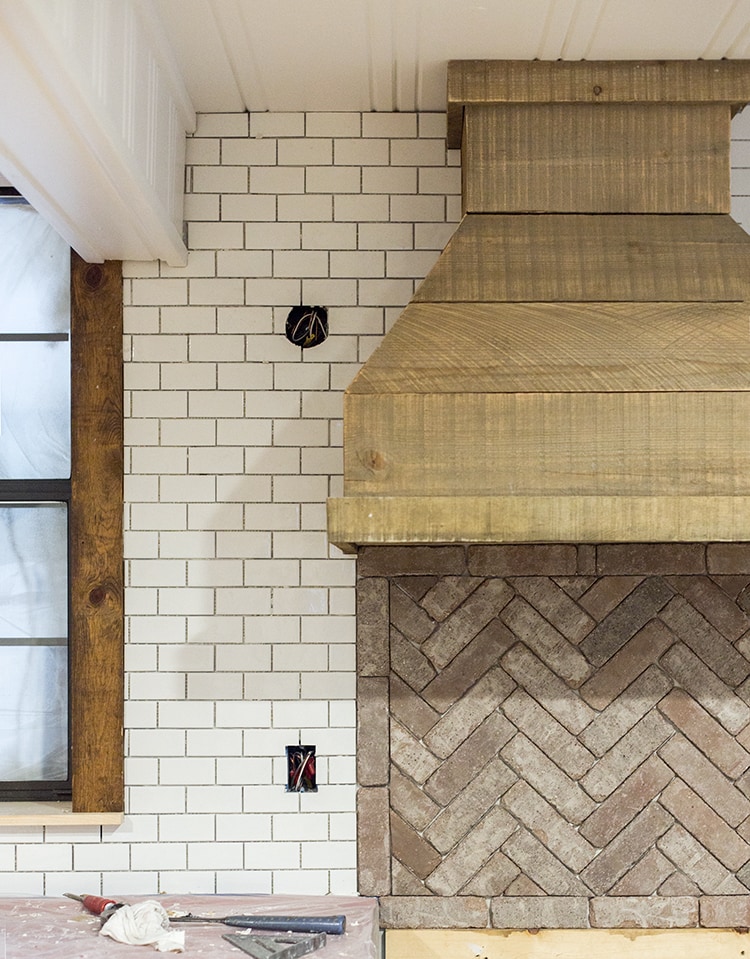
It still needs grout, of course, which will change the look a bit and I’m dying to see it in person.
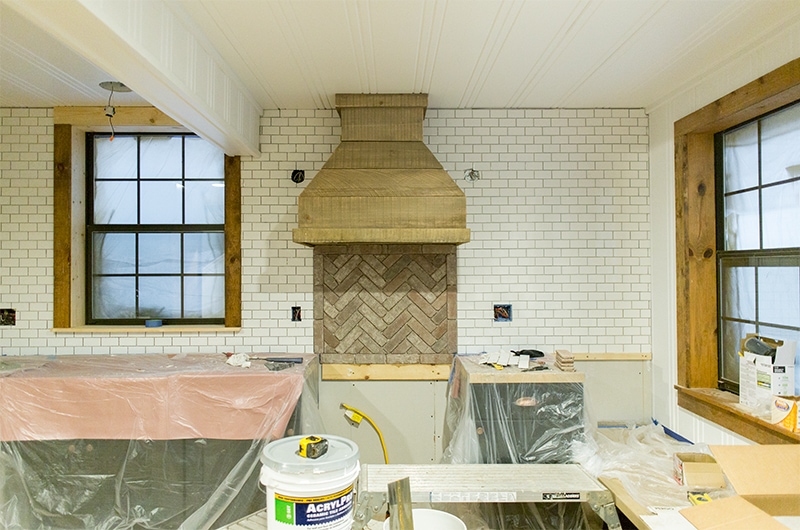
Oh, and I’ve officially decided to paint the window trim (both windows). Once the tile went up there was no doubt in my mind that they need paint.
Now the only question is… white or light gray?
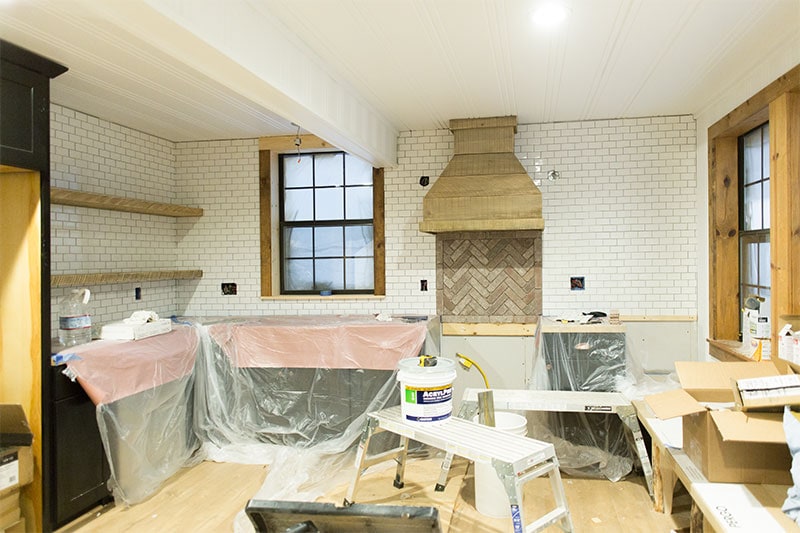
White is the safe choice, for sure. I’ll have a better idea once all the plastic is down and the appliances are in (they are currently at the top of a hill buried in snow and can’t be moved until the snow melts).
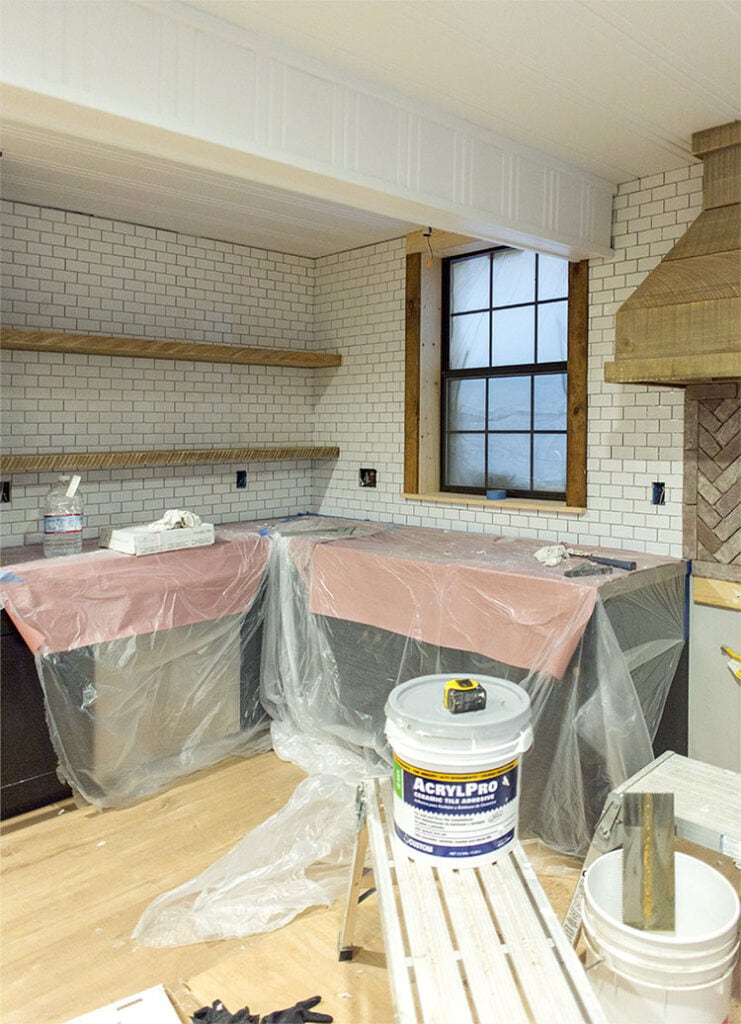
Here’s the other side of the kitchen…
I’m over looking at this mess and just want to decorate already! WE’RE ALMOST THERE, YOU GUYS!!!
BREAKING NEWS: These just in from my contractor!
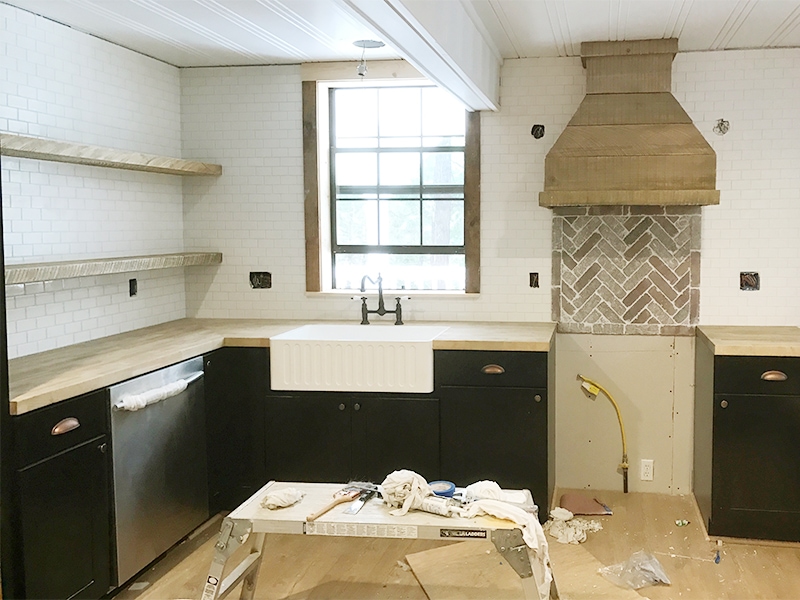
Holy moly, I’ve never been so excited to receive a text message. How perfect is that faucet and sink combo? All these months of planning and hard work and it’s finally coming to life!
In two days I’ll be back at the flip and won’t return home until Feb 12th, the day after the Open House. I will hopefully be able to squeeze in a quick progress update post next week before the photo shoot, and plan to begin revealing each space the week of the 13th.
There are still many uncontrollable factors so these plans may change, but I’ll do everything in my power to stick to this schedule and keep you guys in the loop! You can find me on instagram, facebook and snapchat (@jennasuedesign) where I’ll be sharing daily live updates in the meantime.
Thank you all again for the encouragement and support thus far—it really helps keep me going and pushing toward that finish line! Brace yourself for a whirlwind of updates soon…
Disclosure: Some of the products listed were provided via sponsorship—all of which I selected and fully approve of.


Suzette Fox says
Jenna, just love the way it’s turning out. I love, love, love the brick floors. I’m thinking of laying them in my entrance foyer, kitchen and dining room. What are your thoughts? I’ve see you’ve installed in the bathrooms and laundry.
So happy for you…you are so talented. Good luck with the photo shoot!
jennasuedesign says
Thank you Suzette 🙂 I am obsessed with this brick… I’d put it everywhere if I could. I say go for it!
Kristen Ayotte says
It’s going to look amazing! The progress you’ve been able to make is really remarkable. I may have missed it, but are you planning to sell it furnished?
jennasuedesign says
Thanks Kristen! The furniture will be negotiable, though I plan to keep most of the decor/accessories and will use whatever is leftover for staging for future homes.
Sherri says
Hey Jenna Sue- You know I think you are awesome and am a faithful follower. I know you will kick ass and get it done, even if you have to stay up 24/7 to finish everything! Your parents are rockstars on how much they help! I was wondering if all the stuff that you stage with will be offered to the buyers of the home? Or do you store it until another flip? You have worked sooo hard, despite the obstacles, and I know it will be amazing for the Country Living shoot! Also, your boyfriend is sooo cute. I am happy you found him because you guys are adorable together and seem to have such a good time!! Knock it out of the ballpark girl! I know you will!! Sherri
jennasuedesign says
Appreciate it as always Sherri! And Lucas says thank you 😉 The furnishings will be negotiable if the buyer wants them, although I do plan to keep most of the decor/accessories for future houses!
mary says
Great progress – I am really having fun following this rehab. As always your vision and taste is perfect for this location. Can’t wait to see the completion .
Marilyn says
Looking good! Look forward to updates every Wednesday! I think the windows would look great painted the same color as the dark cabinets. Just my opinion but white may be too much with the subway tile.. 2nd choice would be grey.. Great job and can’t wait to see it finished. Love your blog/vlogs!!!
Arlene says
its looking fabulous but how on earth are they painting the exterior in all that snow? Is that even advisable?
jennasuedesign says
It hasn’t snowed or rained since the big snowstorm (thankfully!) and they cleared all the snow from the roof yesterday and got it done 🙂
Nancy says
Can’t wait to see it all pretty and done up! As an observer, bedroom #2 needs a headboard and the wires from the wall lights hidden. Your parents room also needs a nicer, higher headboard and the curtain rod needs to be up higher above the window fram. The kitchen window frames maybe should be grey not white cause if will blend too much with the tile work. The sliding laundry door would have looked cute with chicken wire too…
Ashley says
I think I like the look of the laundry room door (reserving final opinion until I see finished product, because that always makes things nicer looking!) but it seems impractical.
We have 2 bedrooms and a family room with a TV by our laundry room and the door is hollow core and I’ve considered replacing with some sturdier because the noise of the washer and dryer is a bit much, even when the laundry room and bedroom doors are all closed. Lace seems like it would just create a lot of noise for whatever is nearby.
I don’t remember seeing a floor plan for this house – are there other rooms right there that this might be an issue for?
Tara says
Yay, it is looking so good!! I am excitedly following along with each update – the final product will be fun to see! Keep up the hard work!!
Kristi says
I love, I mean absolutely LOVE the way this is taking shape! Question… how do you clean brick floors? I love love love them but I’m not sure how one actually cleans them since they are so rough and porous.
jennasuedesign says
The surface is actually pretty smooth, not like your traditional brick 🙂 My mom cleaned them over the weekend using paper towels/a sponge and soapy water. Just like any other tile!
Kristi says
awesome! Thank you for responding. I really want to do this in the future and I couldn’t picture cleaning up ‘messes’ from my husband or son in the bathroom. haha TMI?
Jenny says
I just found your blog today as I was searching “reclaimed wood hood vent” on Pinterest. Everything about this house is awesome! I’m so excited to see you finish it. Also, in the past few days/weeks I have also been searching for brick veneer tiles and I also looked at the same ones you got from Lowes. I’m so excited to see how yours turned out (you should add your review and pictures to Lowes’ website). We are planning to do a brick backsplash and I can’t decide which brick to go with. Also, did you or your contractor put in the kitchen floating shelves – any advice or info on those? I am also planning to do floating shelves but I am worried about how strong they will be and how much weight they can hold (heavy dishes). Thank you so much for sharing! I am very inspired by you!
jennasuedesign says
Thank you Jenny, glad you found my blog! My contractor installed the shelves using Silicate Studio brackets, you can read about them in this post: https://www.jennasuedesign.com/2017/01/chaos-at-the-cottage-flip-episode-10/ They can hold a ton of weight. Hope this helps!
A Speckled Trout says
What I wouldn’t give to go to the open house!!! Kudos to you for all the hard work. I am inspired.
Emma says
OMG Jenna Sue, I am so excited for you! It is really starting to come together and looking just beautiful 🙂 I literally stalk instagram and Snapchat looking for your updates – lol! You have really brought us along for the ride and I for one feel emotionally invested in your flip! Good Luck over the next 10-days or so…
jennasuedesign says
Thank you so much Emma, I always appreciate your support! xo
Stacy says
Really inspired by all your hard work and vision for the whole house. And massive appreciation for the detailed posts when I’m sure you just want to get on and finish the space.
A little part of me went ‘eeek!’ when I saw the brick backsplash above the cooker. Is the rough/porous/uneven surface going to be a cleaning nightmare?! I’m sure you’ve considered that though!
So looking forward to all the before and after shots!
jennasuedesign says
Thank you Stacy! They use a sealer over the brick, but there’s also so much variation in the color/texture that anything that got on there would be hard to notice!
Jean says
We have a stacked stone backsplash behind our stove and have never had any issues with staining and it’s not even sealed. Every 6 mos or so, we just give it a very light scrubbing and it still looks new!
Jenni says
I literally thought to myself, “You’ve got to be kidding me” when I saw the pair of Jenny Lind beds – I would have died right there :). I am so happy that your weekend went so well.
At the first, I thought you should paint the window trim white in the kitchen, but now that the sink is in, the dark hardware seems to go well with a window trim that is darker too, so my vote would be for keeping it stained.
I have been encouraged by your posts when I work on my own projects. I am struggling with refinishing a coffee table – it has been a laborious process that I’m not sure will turn out well in the end, but when I’m in the middle of a hard spot I imagine you in the darkness of your home in a power outage painting, and that keeps me going :).
Stacy G. says
Me too! I want a set of Jenny Lind beds for our guest room. I keep scouring Craigslist, but I am not having any luck.
jennasuedesign says
I appreciate the kind words and glad I can help to encourage you in your projects, Jenni!