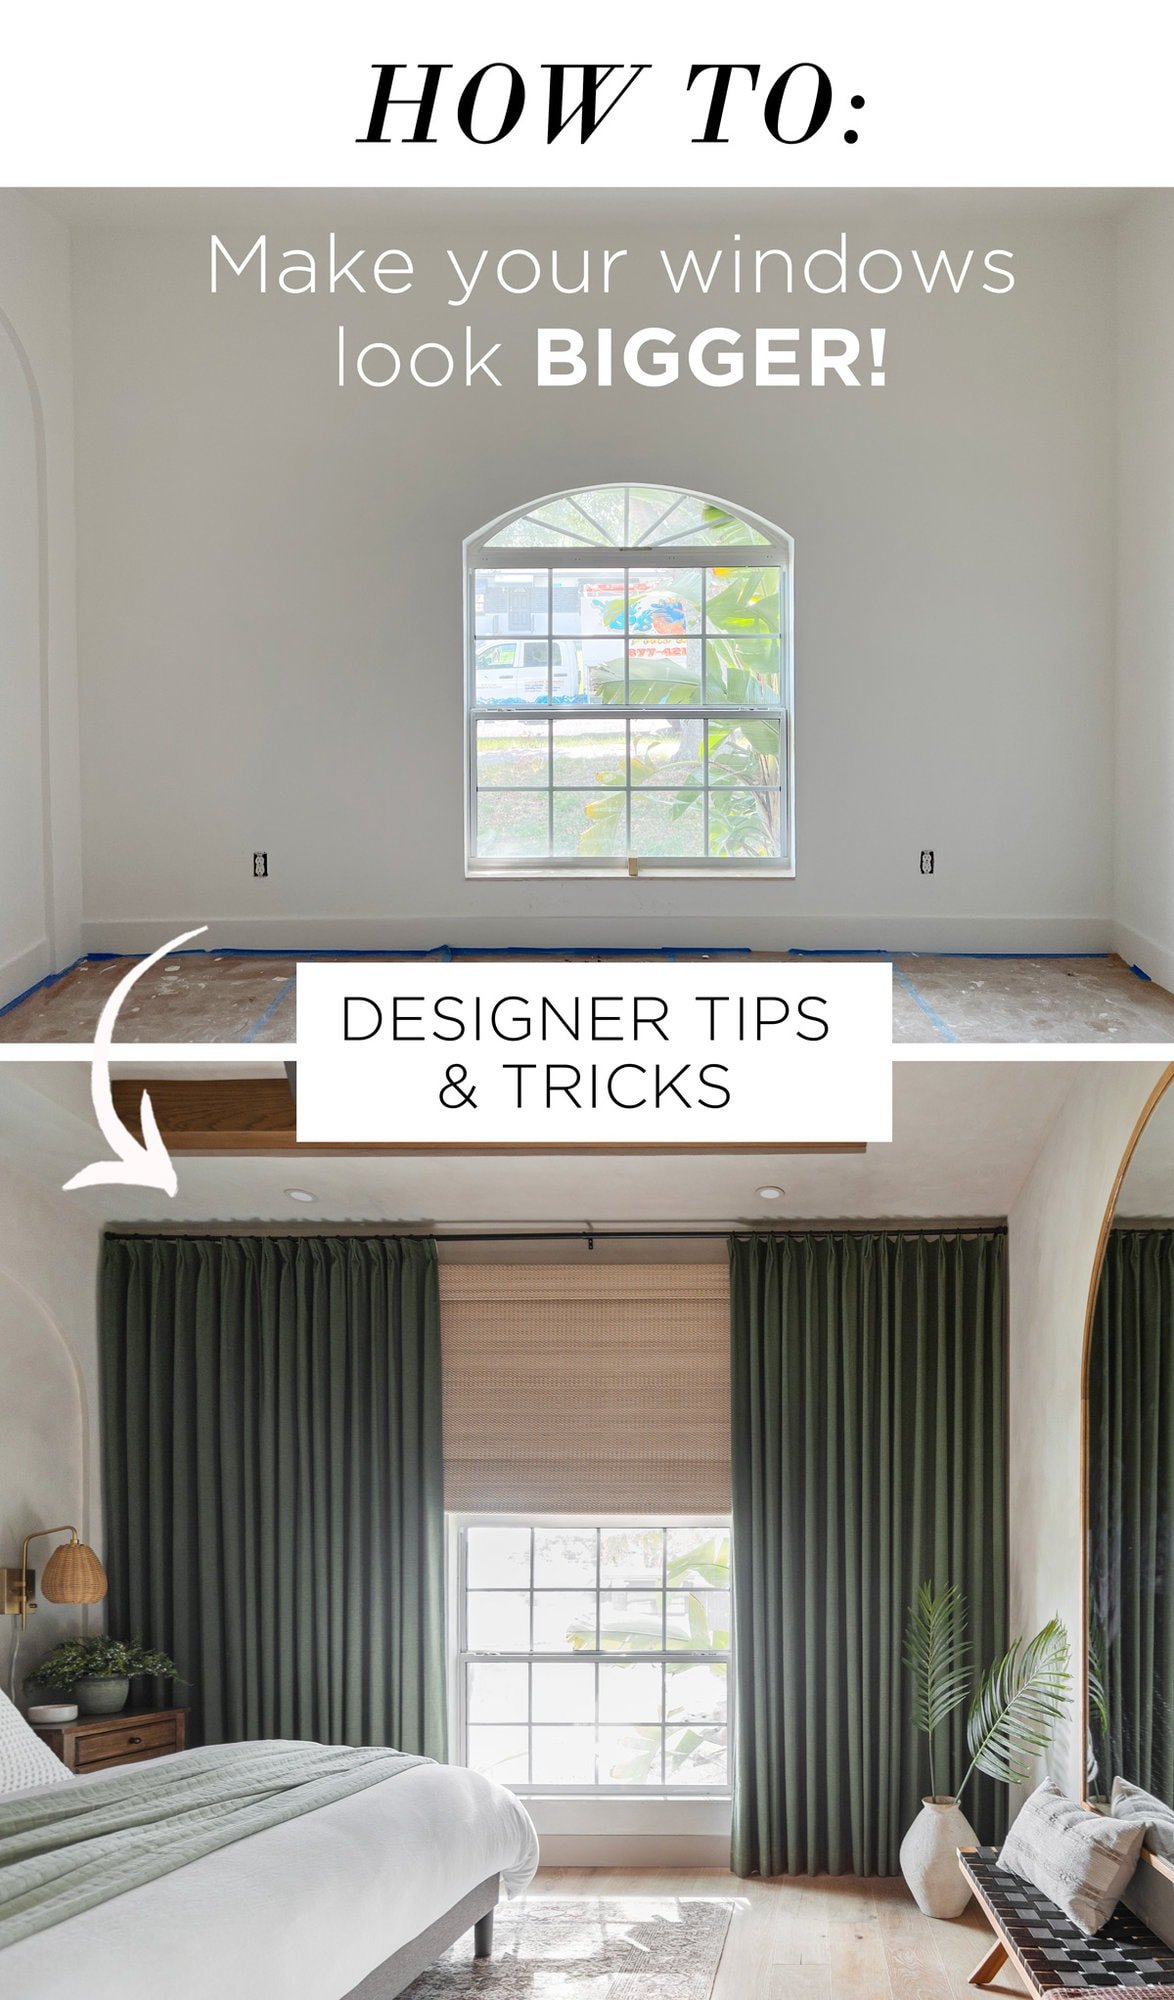
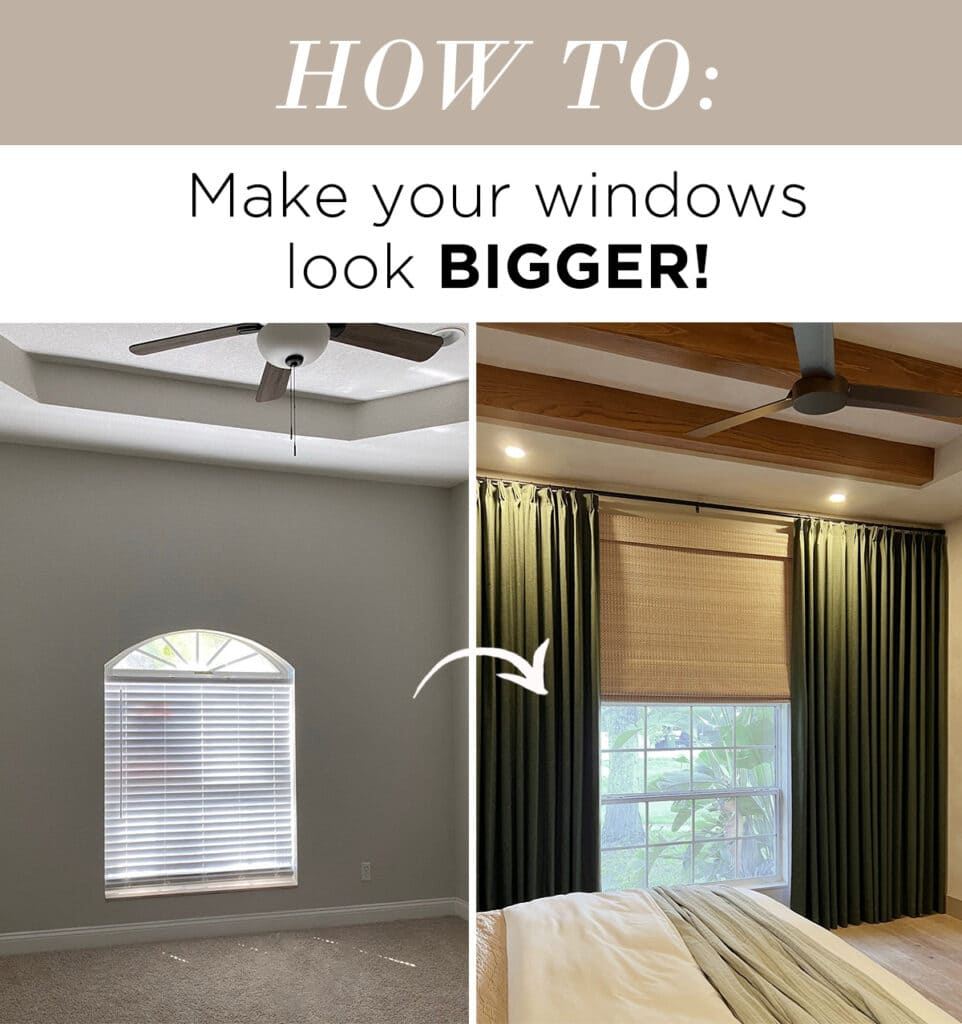
Do you have a small, off-center or awkward shaped window that you can’t figure out what to do with? This post includes my tricks to fix those issues, make your window appear larger and room feel more balanced!
Jump to:
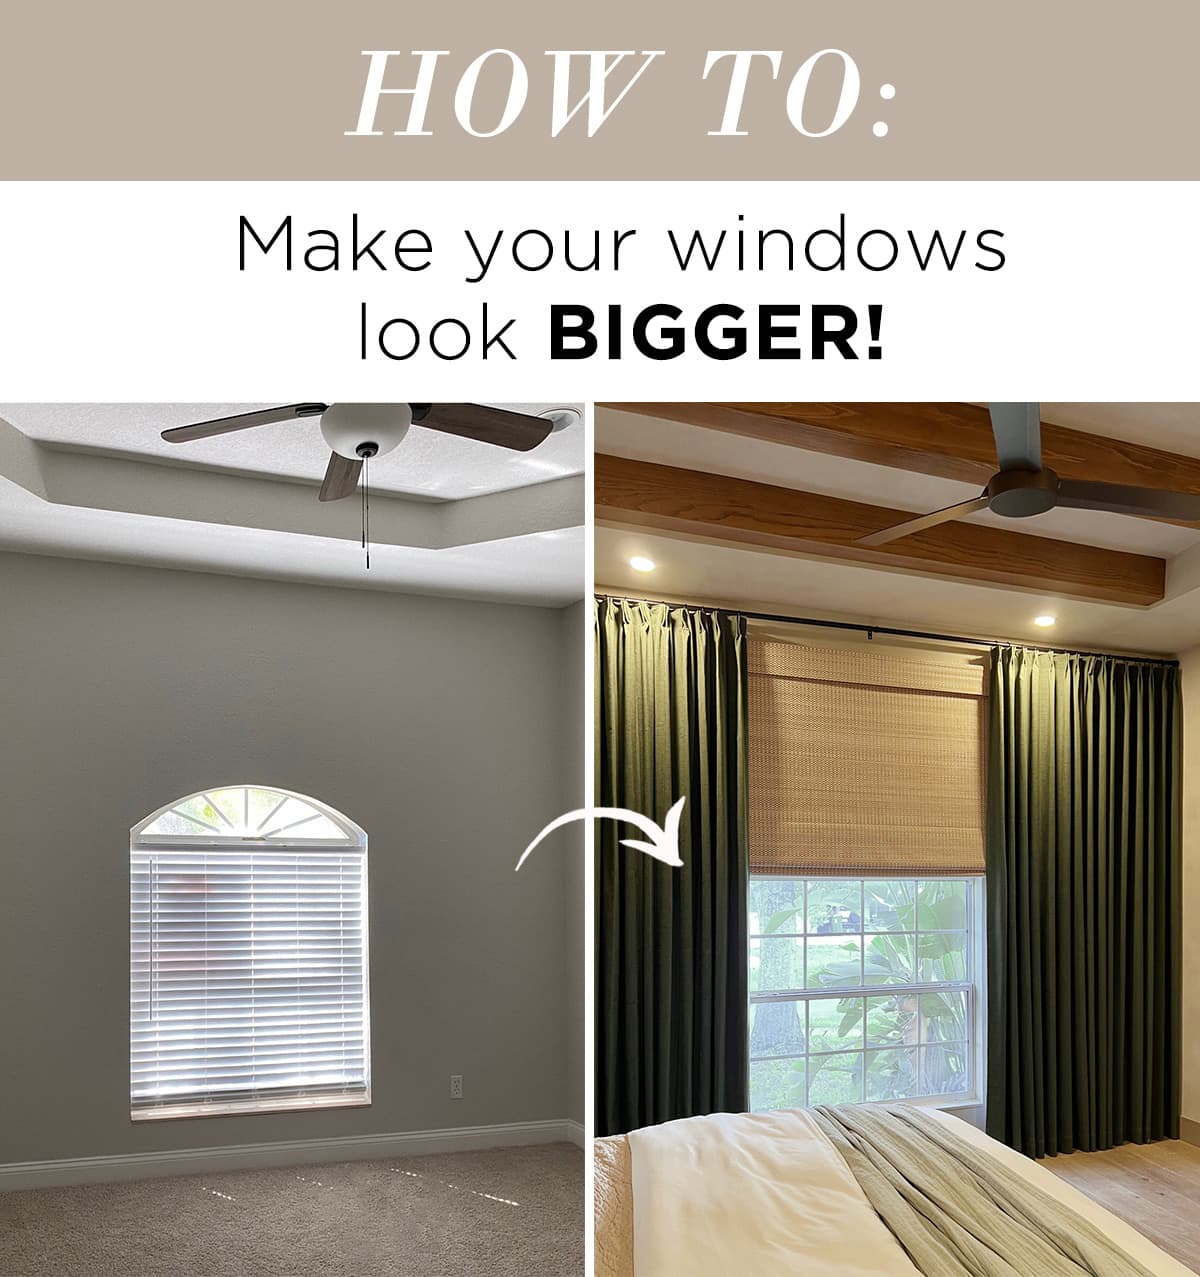
Before: Low and off-center window
You may remember how this odd window looked originally in our Modern Mediterranean bedroom…
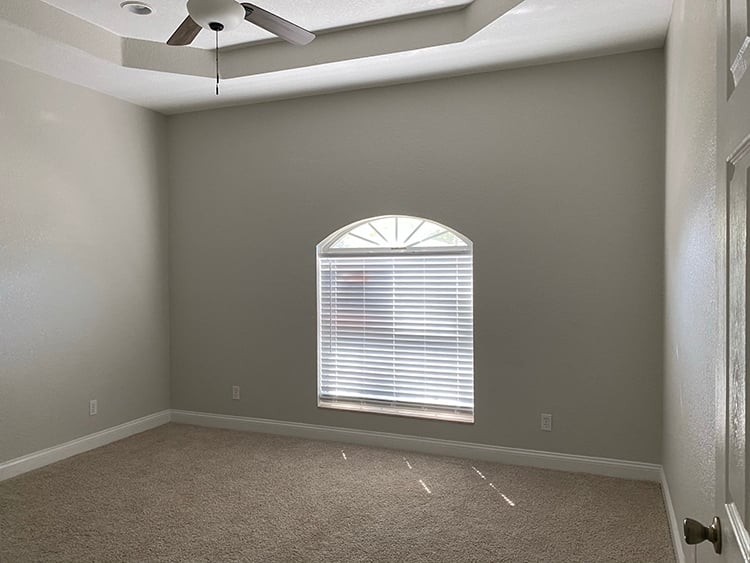
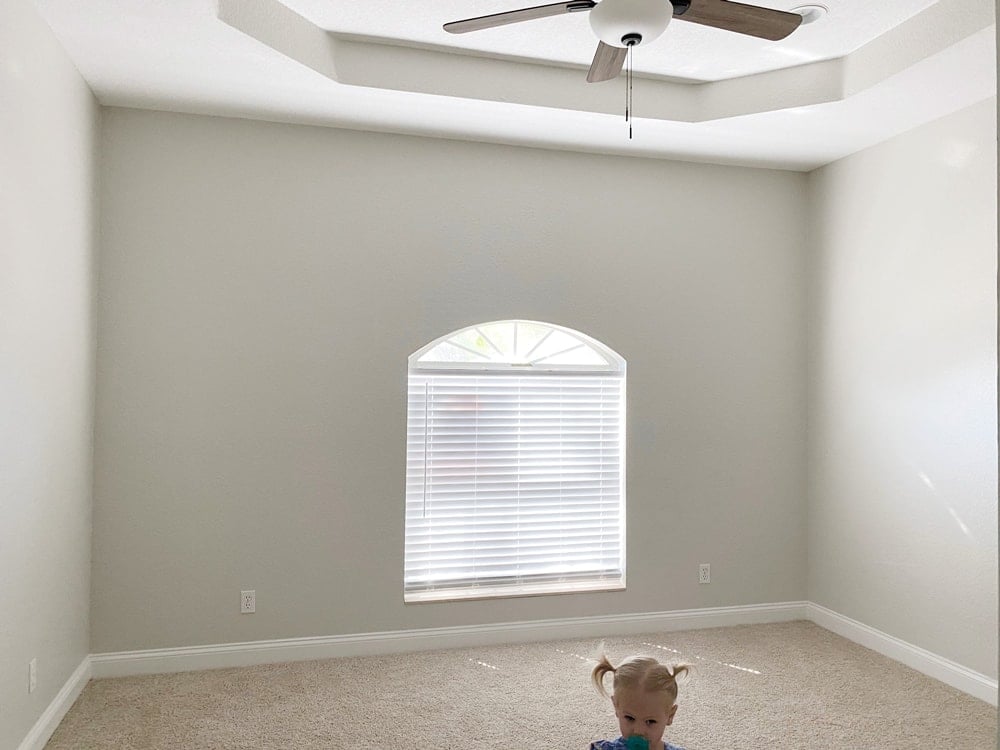
There were a few challenges that had to be addressed:
- Too low on the wall
- Off-center
- Arched top that allowed light in
The Solution
The best way to make a window appear taller and block the light from the arch is simple: outside-mount blackout shades. To help disguise the off-center position and make the window look wider, tall and wide curtains are the way to go.
Choosing window shades
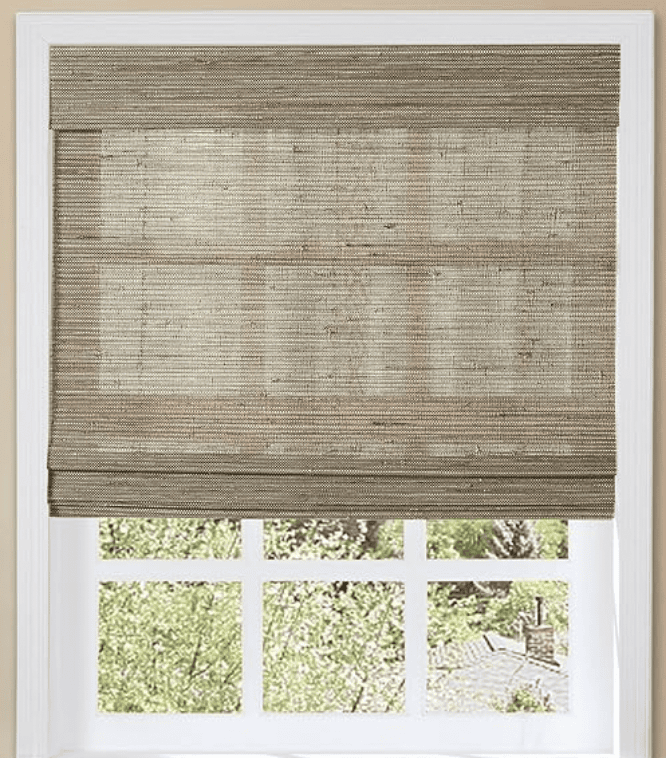
You could use any style of blinds or shades, but I personally prefer the look and functionality of cordless roman shades. I wanted a textured, organic feel for this Mediterranean style room, so I opted for these woven bamboo shades (in Pattern 1):
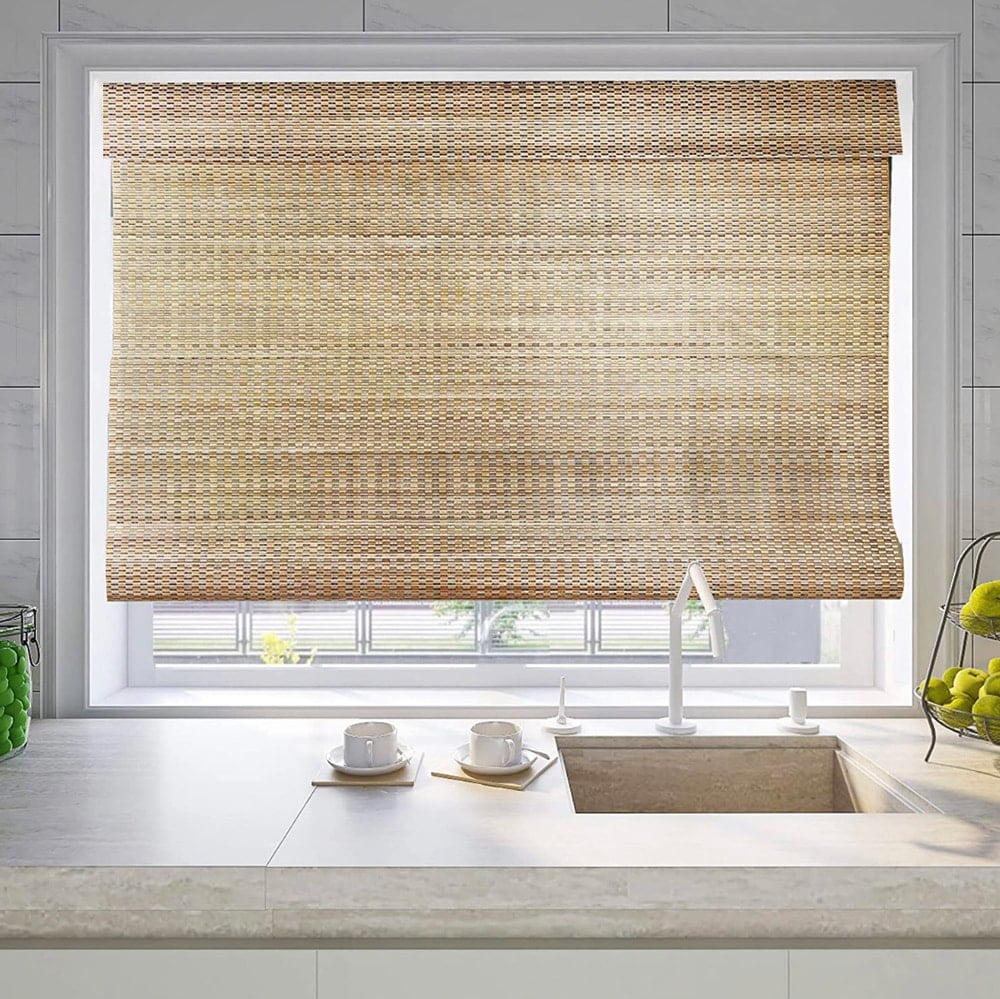
I landed on these after scouring Amazon for the best price on custom cordless, woven shades with a blackout liner option (and positive reviews with customer photos!) Customizable shades are key, as you’ll need to order them in a specific size to fit your window.
What size shade do I need?
In order to give the illusion of a taller window, you’ll want the height to match the distance from the bottom of your window to within ~a foot from your ceiling. The shade should be mounted slightly below the location of your curtain rod, which is typically a max of ~5-8″ from your ceiling (unless they are very tall ceilings).
To find the width, add ~5″ to each side of the window for sufficient overlap, so the shade should be 10″ wider than your window.
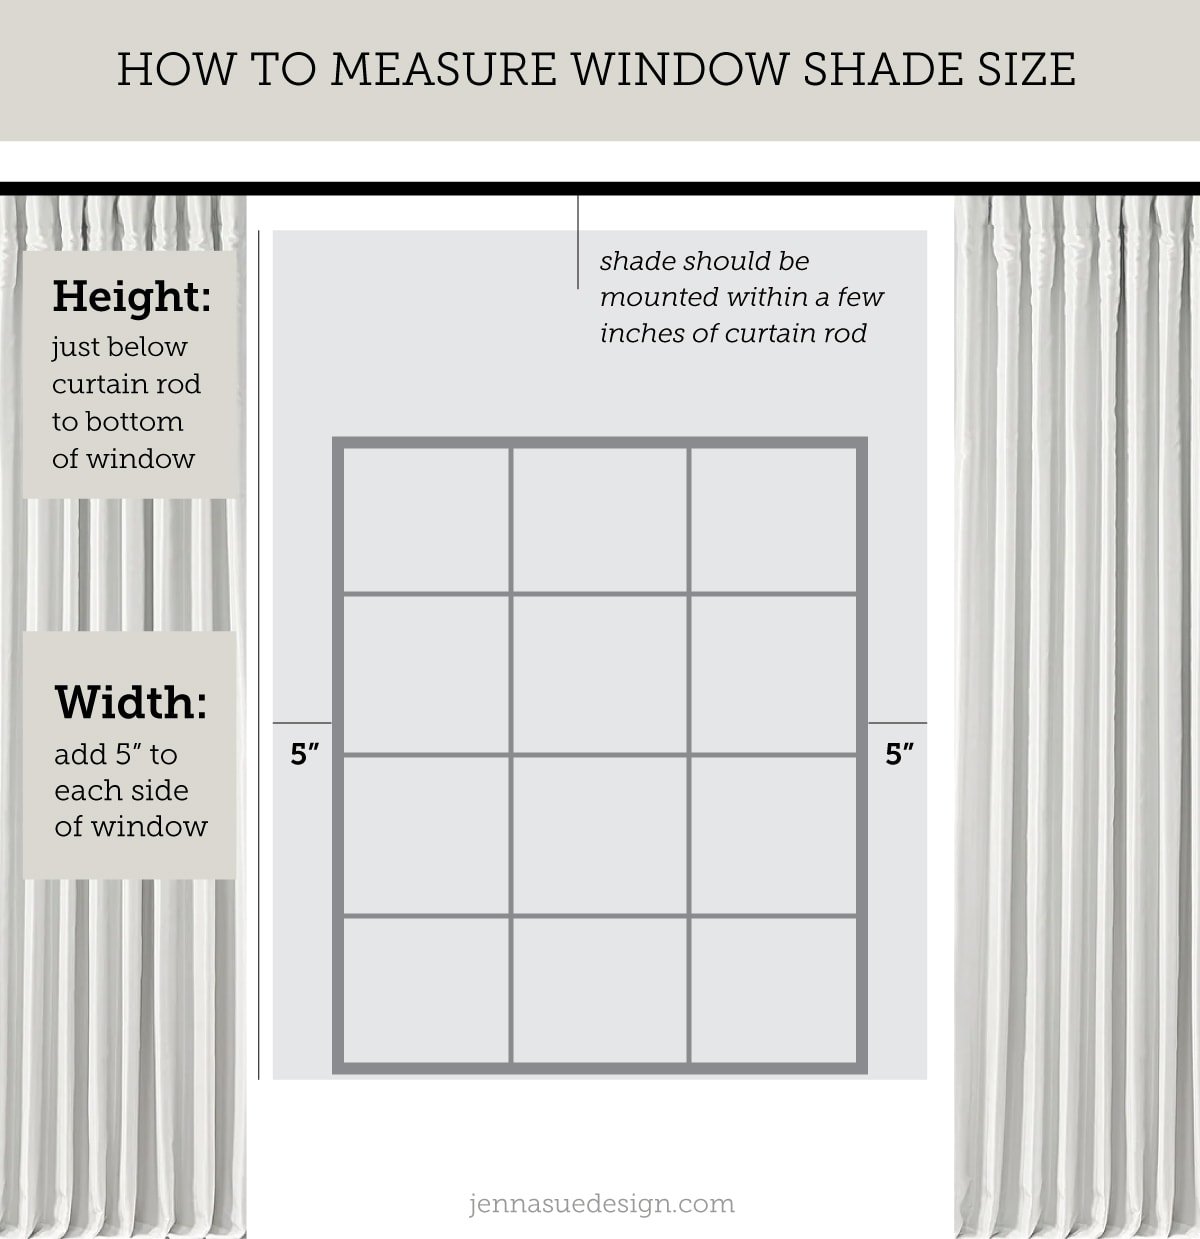
For reference, our window measured 51″w x 62″h, and I ordered a 61″w x 100″h shade. Our ceilings are 9’4″, and we mounted the shade 7″ below the ceiling.
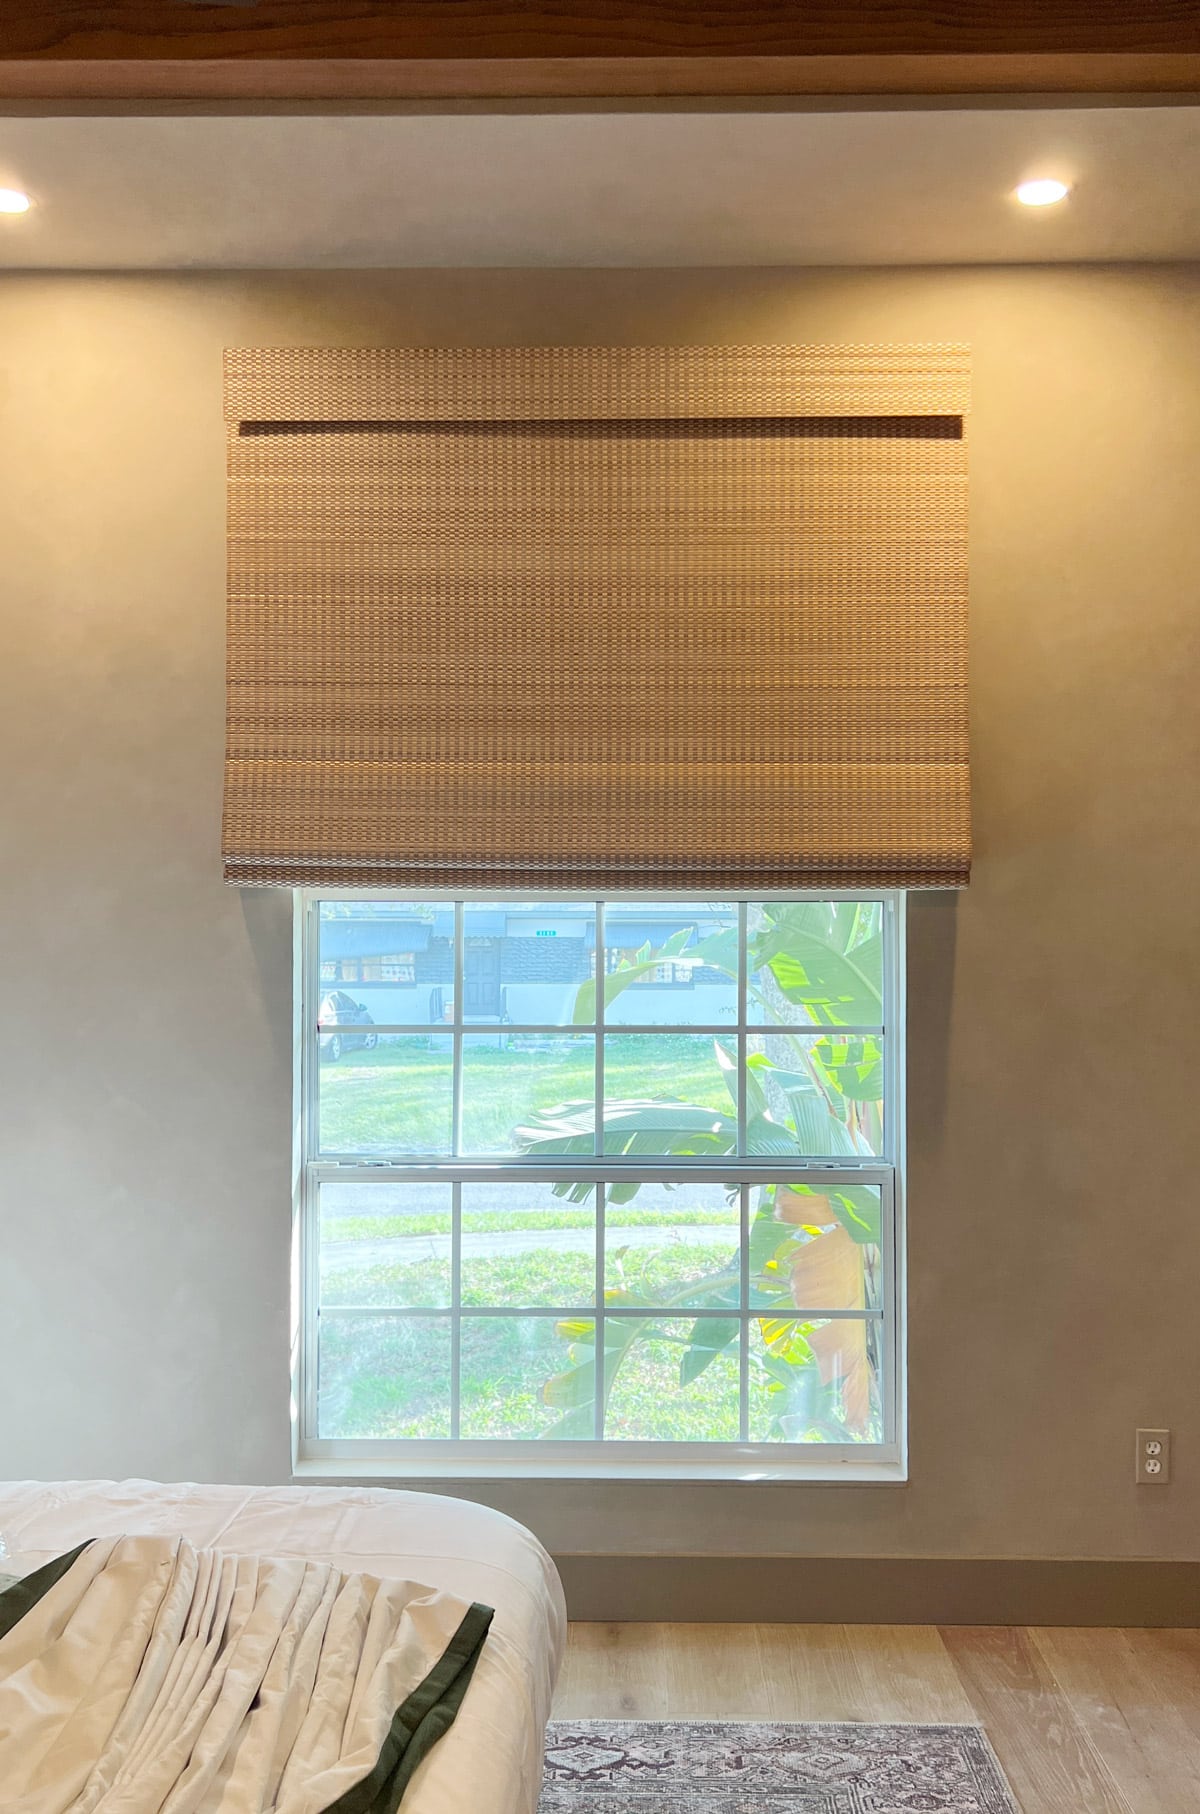
Look at the difference—you’d never know there was an awkwardly low window there! The key to this is effect is to use a blackout liner to block the light so you don’t see anything underneath. The other customization options (cordless vs corded, fabric vs woven, color and pattern) are a matter of personal preference. I just find cordless cleaner and easier to use, and you can never go wrong with organic woven materials.
Choosing curtains
There are a lot more options out there when it comes to curtains. Here are the decisions to consider, and my recommendation for each:
Curtain header style
For a designer look, choose a pinch pleat header style. I avoid rod pocket, back tab, tab top and tie top as they don’t open and close as easily, and I personally don’t love the look of metal rings on grommet curtains.
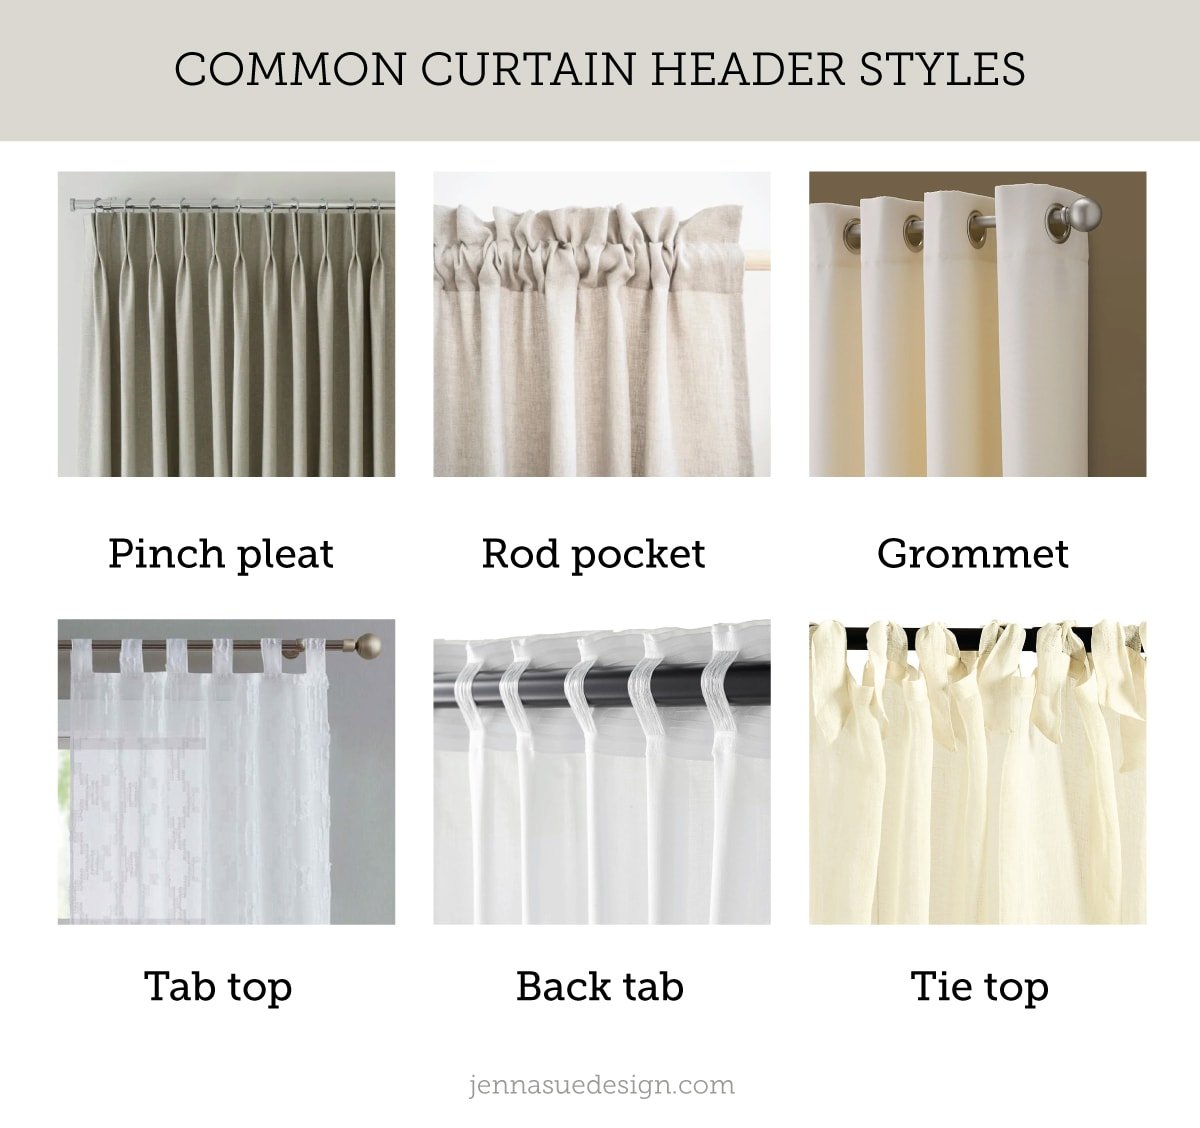
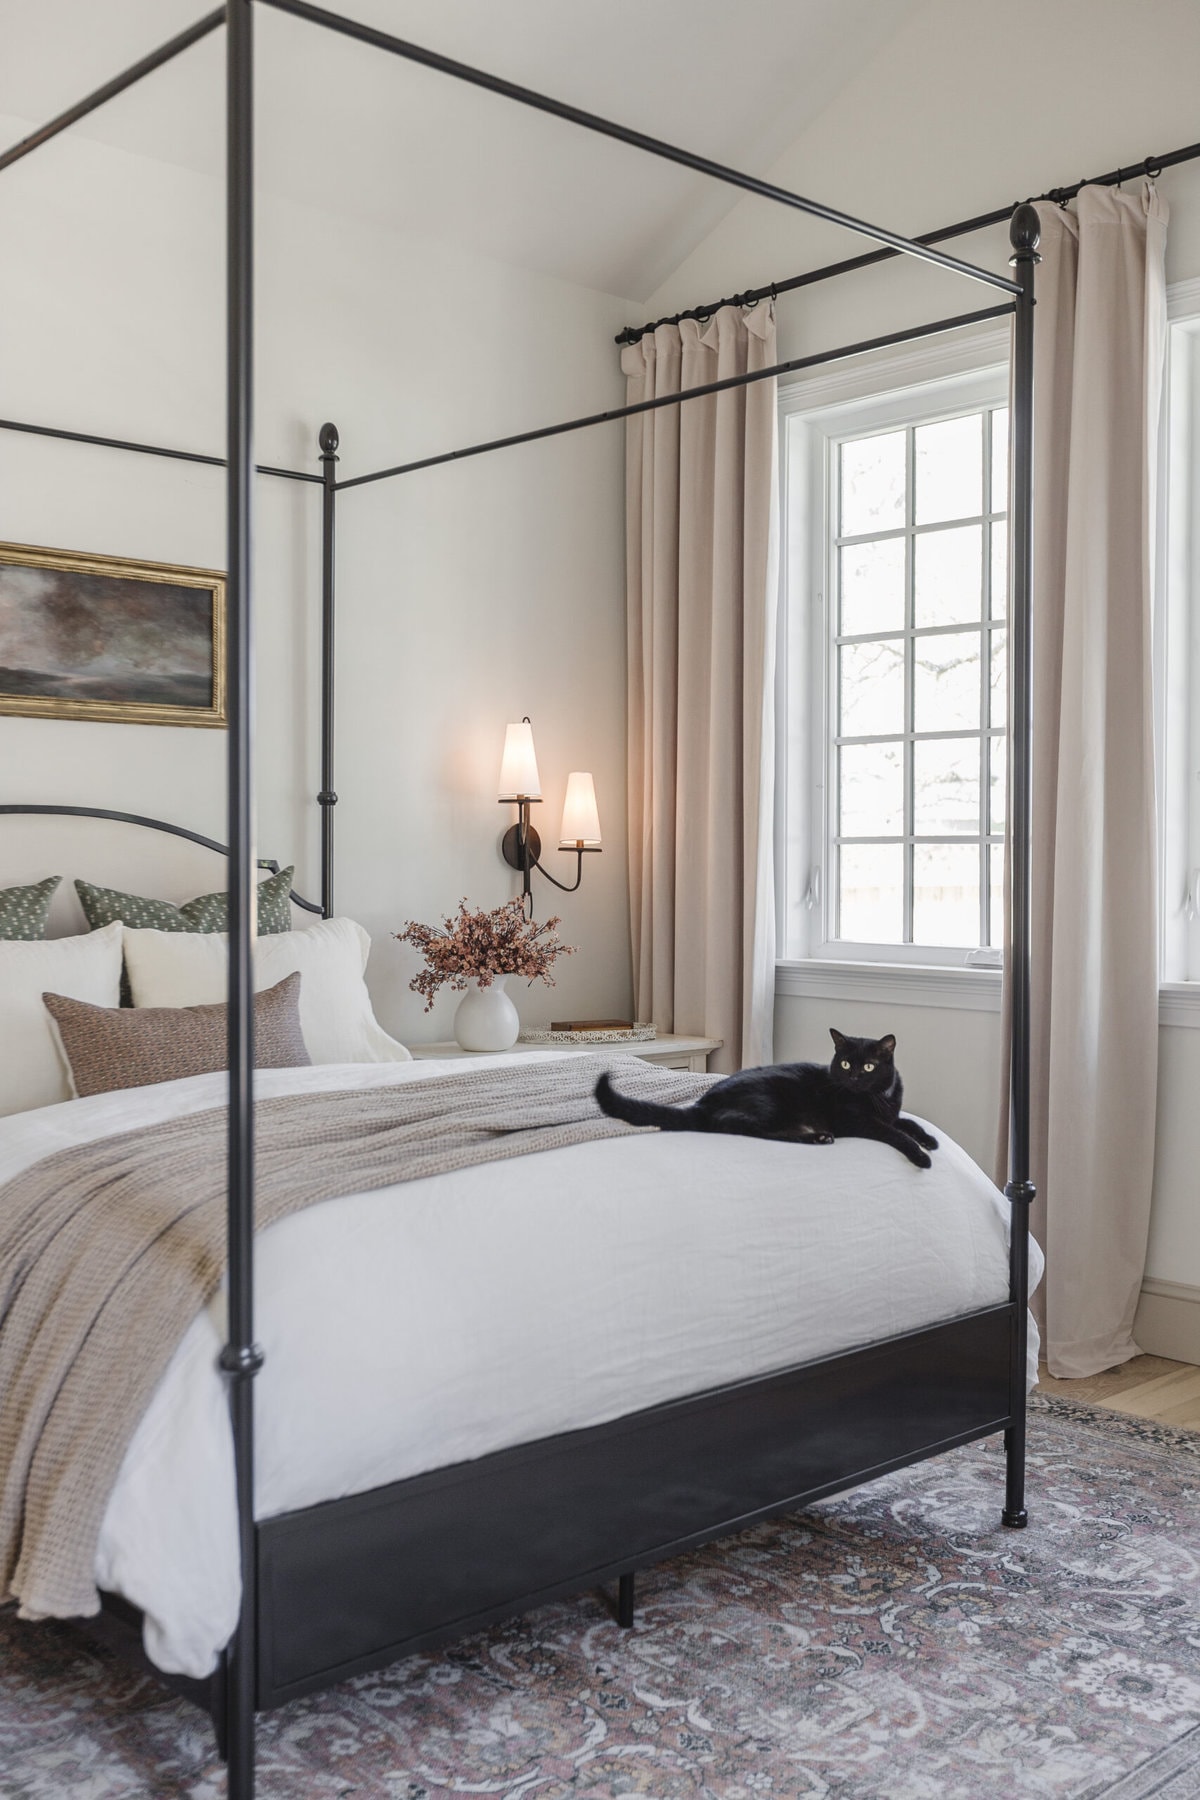
Pinch pleat headers provide the most polished look, and are most often used by designers. That said, they are the most expensive option. If they don’t fit the budget, use clip rings on the back of inexpensive curtain panels (like I did in our bedroom):
Curtain material
This is largely personal preference, but if you want that high-end designer look, choose a linen or linen-blend fabric. Pure linen is one of the most expensive fabric options, but there are some great affordable faux linen options out there today!
One of my favorite budget sources is Two Pages on Amazon. Their Isabella line is made from a high quality linen-cotton blend, with a ton of different color and header styles, and the size is completely customizable. I chose the Hunter Green fabric with a blackout liner.
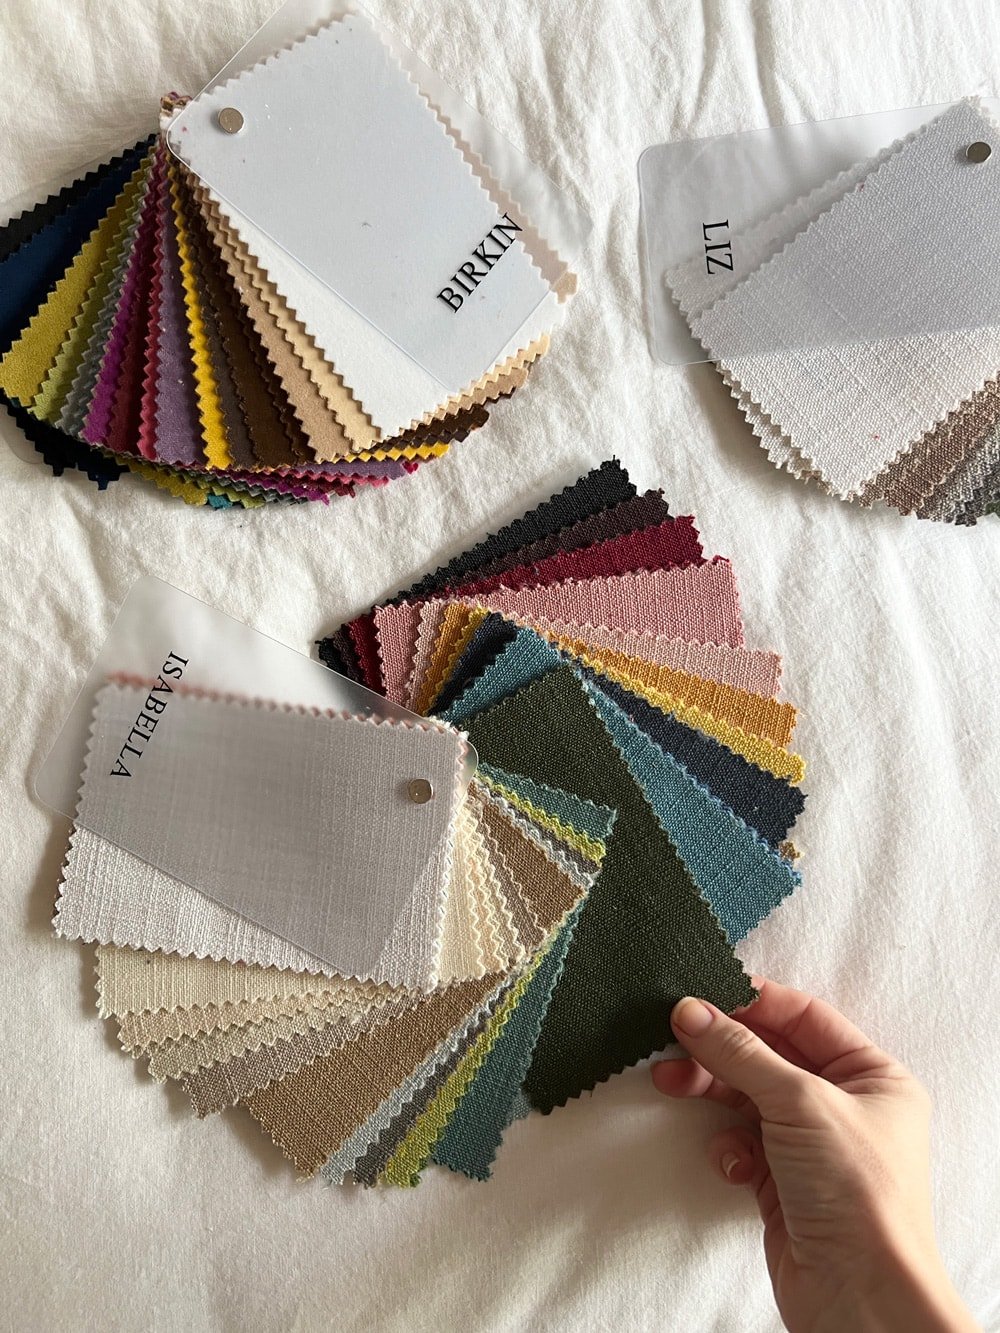
Adding a blackout or privacy liner will help disguise the sides of the window by blocking the light and making it appear wider.
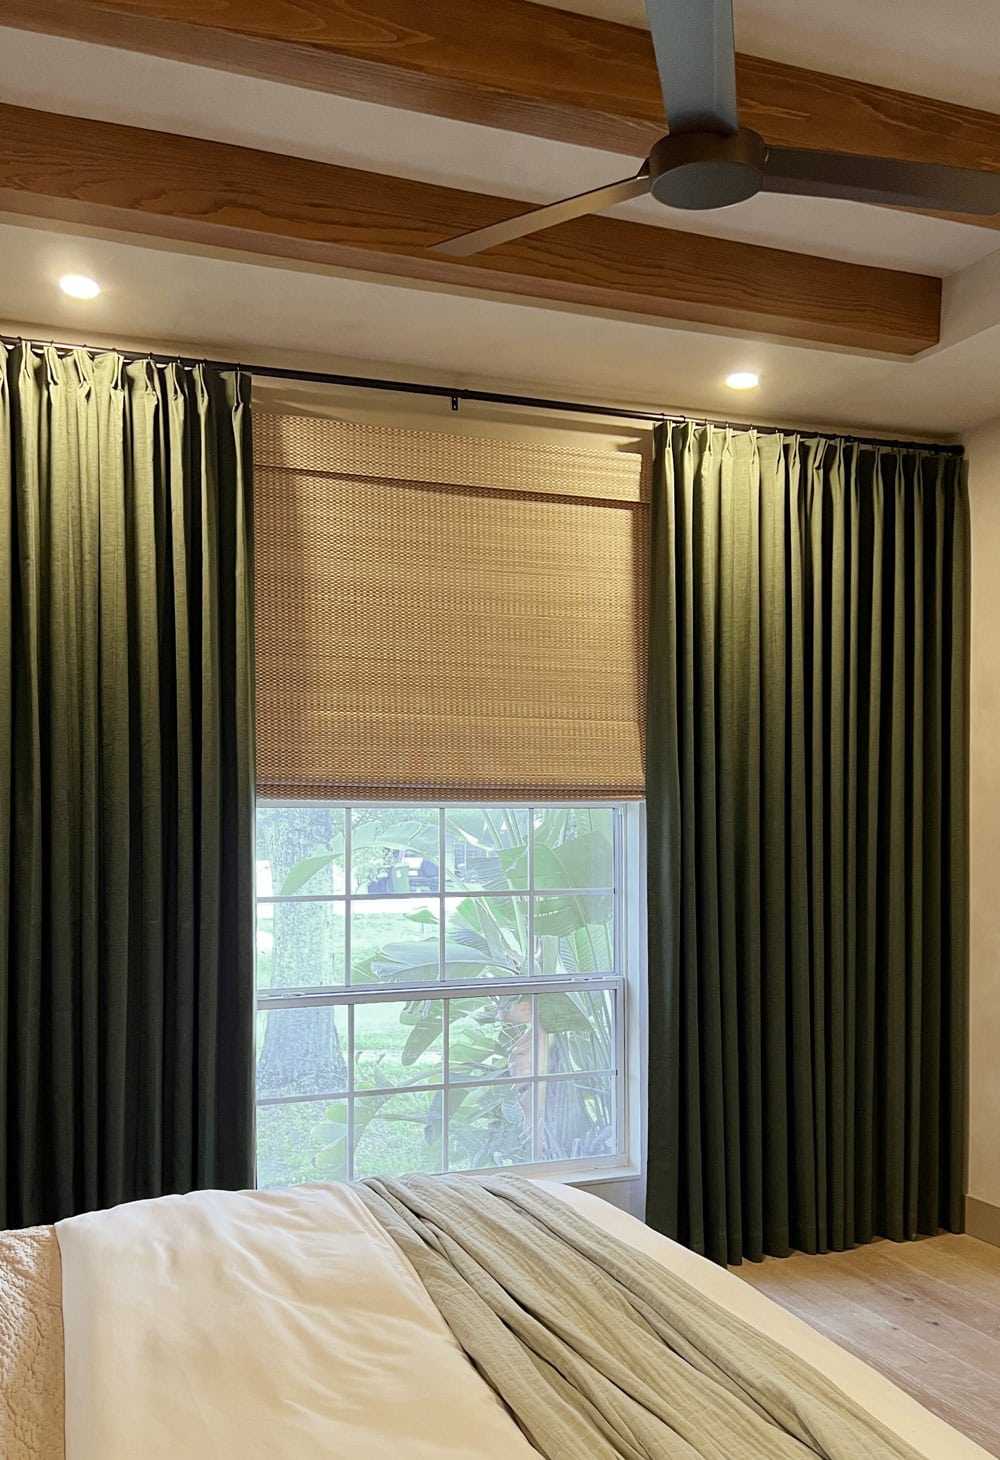
Curtain size and length
This is the most important to get right (and the most common mistake!) My general rule of thumb is to mount the curtain rod within several inches from the ceiling, and have the curtains kiss the floor. This provides the most polished and tailored look, while making your window appear larger.
This diagram is a general guide and may need to be modified based on your specific room’s configuration/layout, but it’s a good place to start:
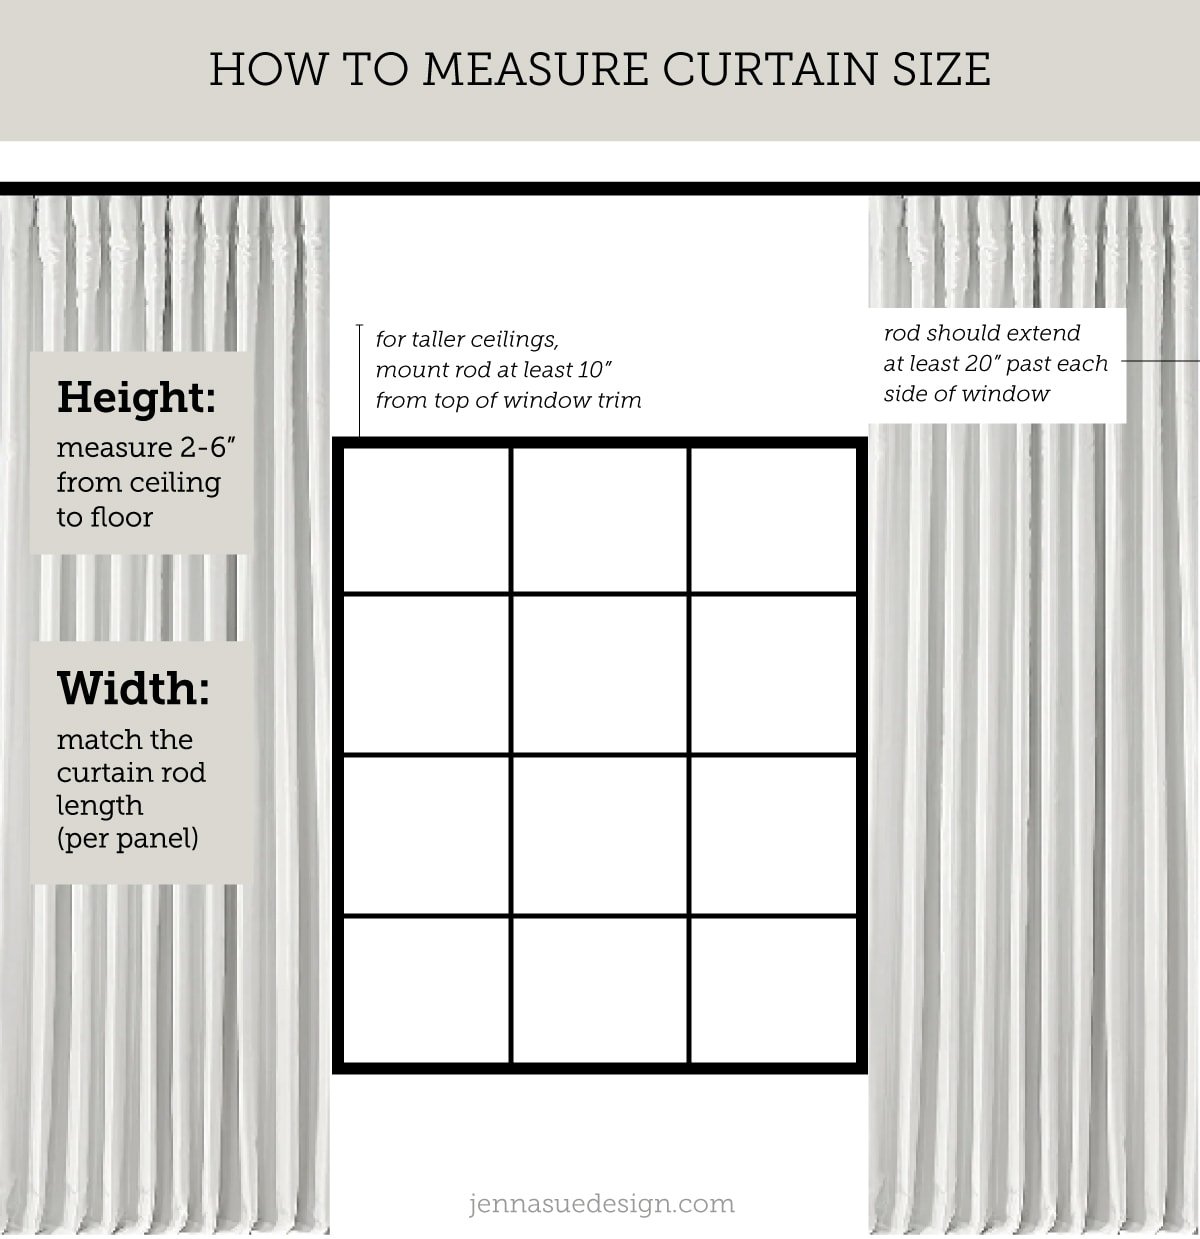
For example: if your window is 40″ wide and the rod extends 20″ past it on each side, each panel should be 80″ wide for a full pleated look when closed.
Note: This rule does not apply to pinch pleat curtains—for those, you can order the exact width you need since the curtains have built-in pleats when fully extended.
I wanted mine slightly fuller, so I added an extra 5″ of width to each panel. I also made my left panel 10″ wider than the right panel to account for the off-center wall—that way, the fullness would match on both sides.
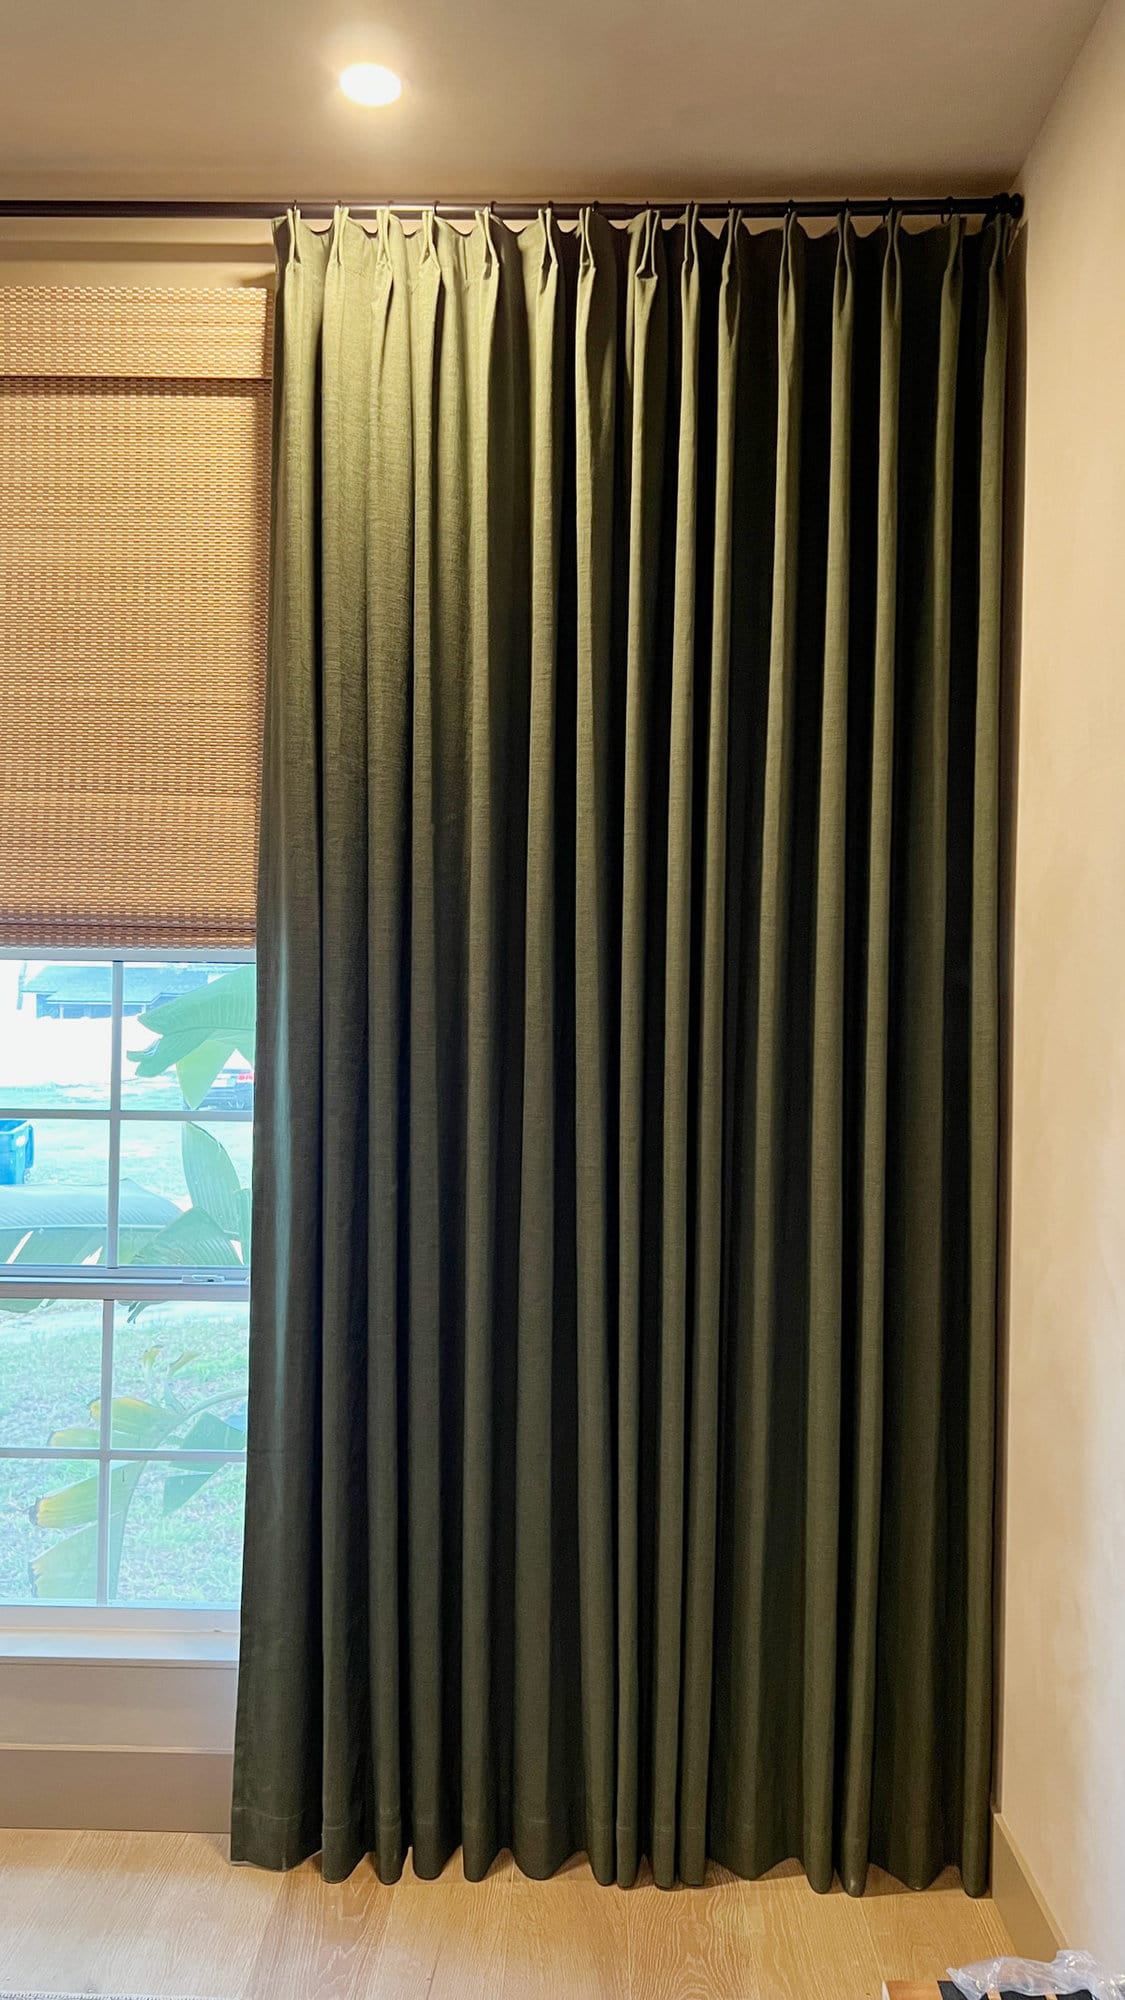
I also chose to fill the entire wall with curtains to eliminate any awkward space from the off-center wall. You certainly don’t have to do this (and I wouldn’t in most situations), but a wall of drapery can feel luxurious and give off hotel vibes in a bedroom.
How to hang curtains like a pro
My #1 tip for installing curtains at the perfect height—use adjustable drapery hooks! These came with my Two Pages curtains and they are an absolute game changer. Note: these only work with pinch pleat curtains.
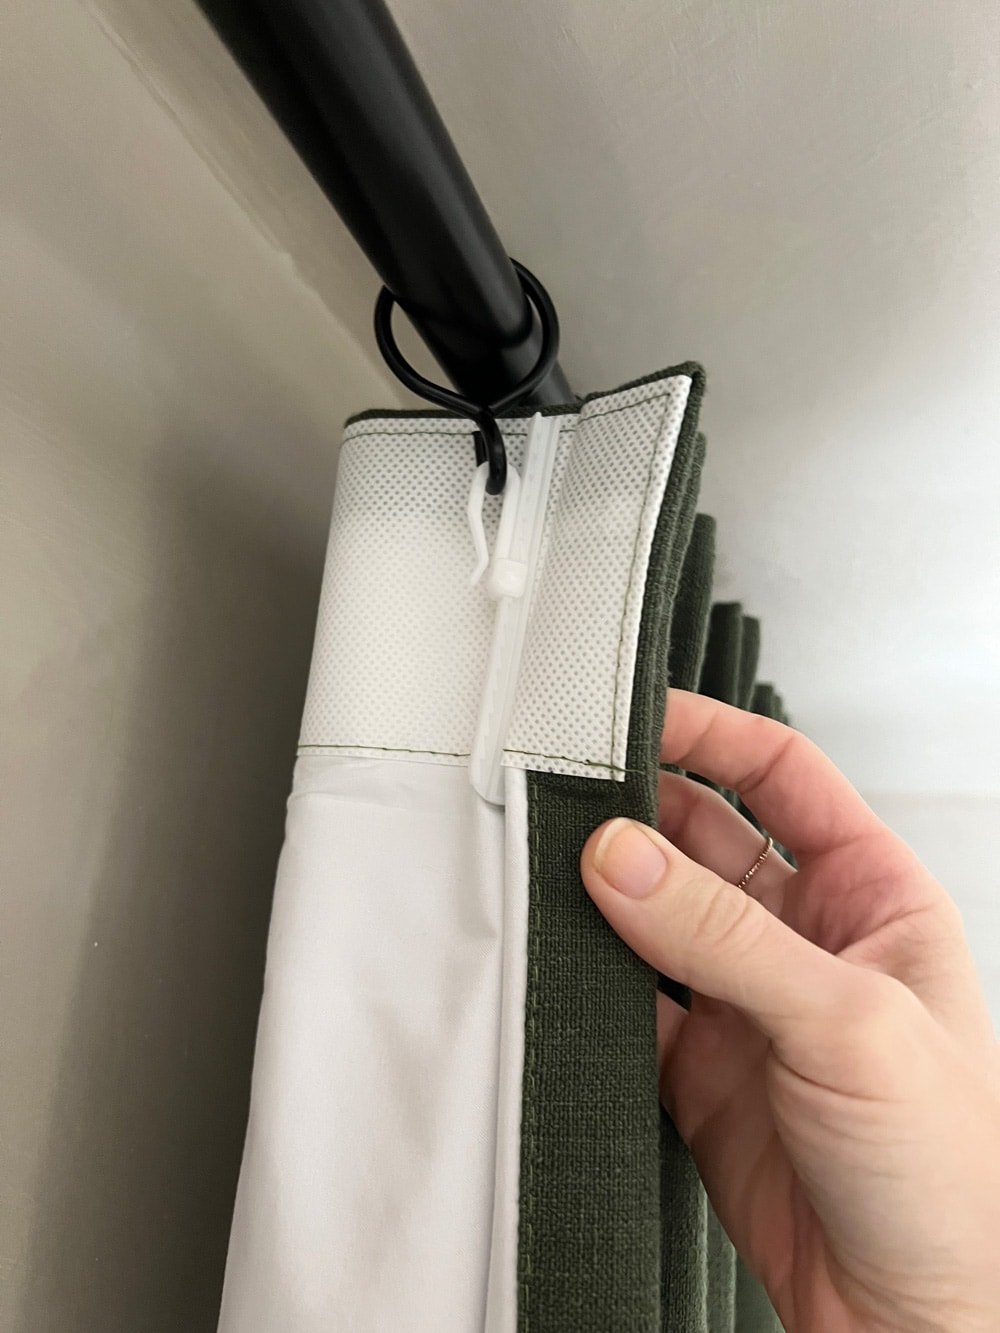
These hooks allow you to adjust the curtains up and down almost 3″, so each pleat can touch the floor at the perfect length. You don’t have to worry about installing the rod at a precise location, or the curtain hitting the floor unevenly (which always happens!) They’re truly a must-have and my favorite trick for hanging curtains perfectly every time.
Before and After
This awkward bedroom window stood out immediately, placed far too low and off-center in the room:

With a few simple window treatment tricks, the same wall now stands out as a feature of the room, making the space feel larger and luxurious:
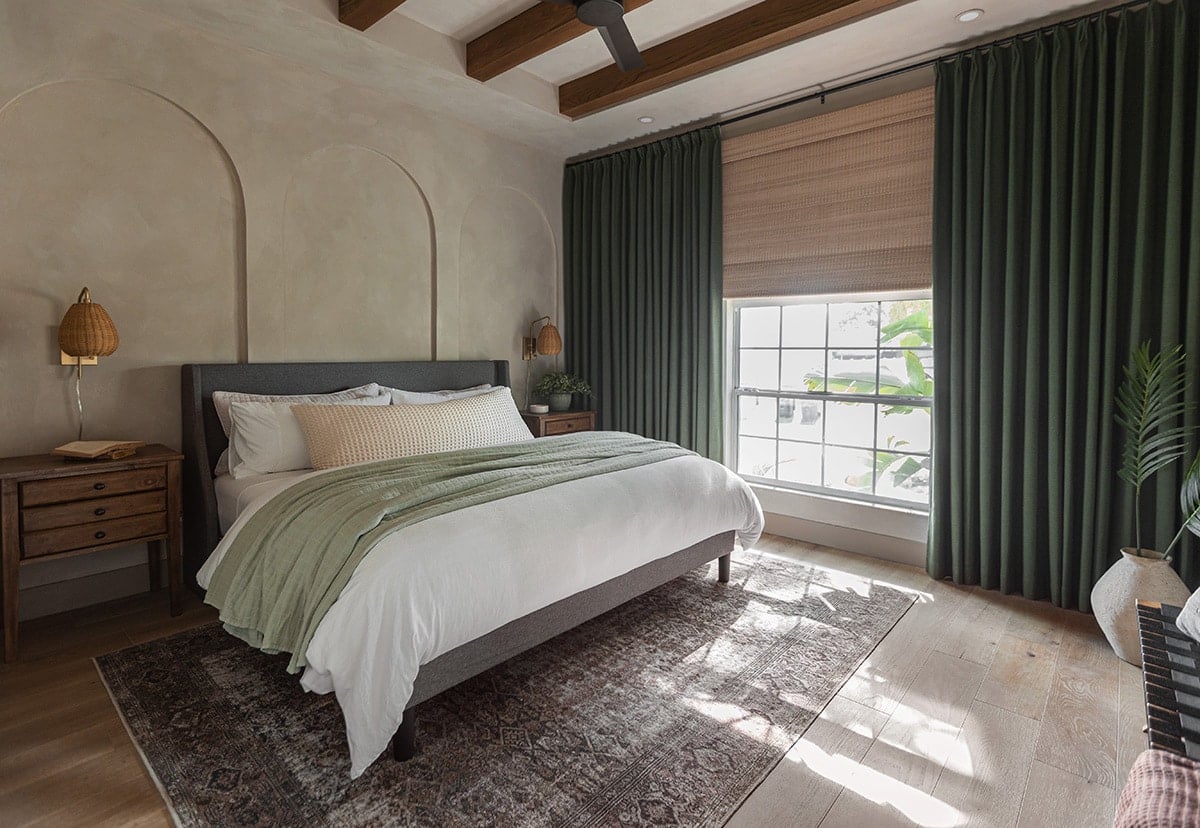
Installing shades and curtains close to the ceiling is an easy fix to make your window feel taller. If your window is off center, placing furniture against the longer wall will help visually fill the excess space and balance out the room.
Where to buy window shades
There are many great sources online for custom window shades. I find the best value on Amazon, but here are a few more of my go-tos:
- Amazon
- JCPenney
- Home Depot
- Wayfair
- Overstock
- Etsy
- Blinds.com
- Just Blinds
- Blinds Galore
- Select Blinds
Tap to shop some of my favorites:




Where to buy curtains
When shopping for curtains, keep in mind the key features to look out for:
- Size: choose panels at least 50″ wide and close to your ceiling height
- Header style: I opt for pinch pleat when possible
- Fabric: you can’t go wrong with linen/faux linen, textured cotton blends, or velvet
Here are a few of my go-to sources:
Tap to shop some of my favorites:


Where to buy curtain hardware
Once again, Amazon is my go-to here—you just can’t beat the price or selection. Here are a few other budget-friendly places to shop curtain hardware:
Here are some of my curtain hardware go-tos:


Window treatment Q&A
While this answer can vary, the common rule of thumb is between 1/2 and 2/3rd the distance between your window and ceiling. For ceilings up to 10′, mounting the rod within a few inches of the ceiling is a great way to make them feel taller.
For a tailored designer look, aim to have your curtains kiss the floor. Use adjustable drapery hooks to easily fine tune the length after hanging.
To make the window appear larger, mount the brackets at least 20″ past the window on both sides if room allows. For larger windows and walls with plenty of empty space, mount them as wide as you’d like!
Each panel should be at least the length of the curtain rod for a fuller look. Example: if your window is 40″ wide and your curtain rods extend 20″ on each side, each panel should be 80″ wide to maintain a pleated look when fully closed. Note: this rule does not apply to pinch pleat curtains, which have the pleats already built-in.
To make your window appear taller or wider, install outside mount window shades larger than the size of your window. For a cleaner and custom look, inside mount shades are a great option.
I hope this post sheds some light on how to choose the right shades and curtains, so you can feel confident choosing window treatments moving forward. If you found this guide helpful, don’t forget to bookmark or pin it for later!




Allison says
Very helpful post! I wish I knew about the adjustable drapery hooks sooner. I tried these with Ikea curtains (not pinch pleat) that have heading tape and they seem to work!
Jenna Sue says
The drapery hooks are a game changer! I love the Ikea curtain hack too.
Meghan says
Hi Jenna,
Thank you for the resource of these curtains! I got the samples and am trying to decide on color. However, I am having a hard time finding the option to do a blackout liner as you did. Two Pages just states that the curtains are light reducing by 70-85%. Is there something I am missing?
Thank you!
Jenna Sue says
When you click Customize Now on the Amazon store, you’ll see all the different liner options. There’s a 90% blackout and 100% thermal blackout liner: https://amzn.to/3P30WSr