Update: Links to all sources here!
Oh happy day… the kitchen reveal is finally here! I can’t believe it! Five long months of countless hours, days & nights; blood, sweat and tears have finally paid off.
And it truly is our dream kitchen.
But you can’t fully grasp and appreciate how far it has come unless you’ve seen how it looked five months ago. Let’s take a trip down memory lane, shall we?
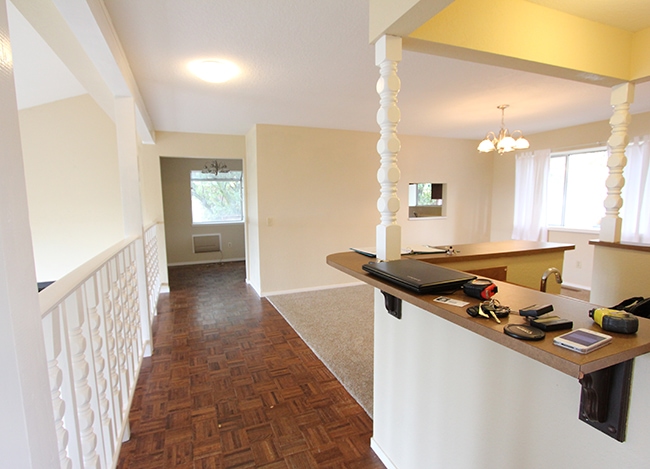
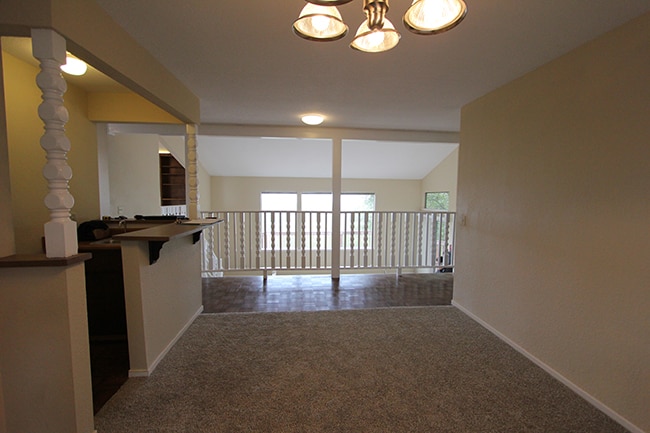
When you first walked into the front door and turn to your right, you stepped into a dining area with a funky 70’s bar.
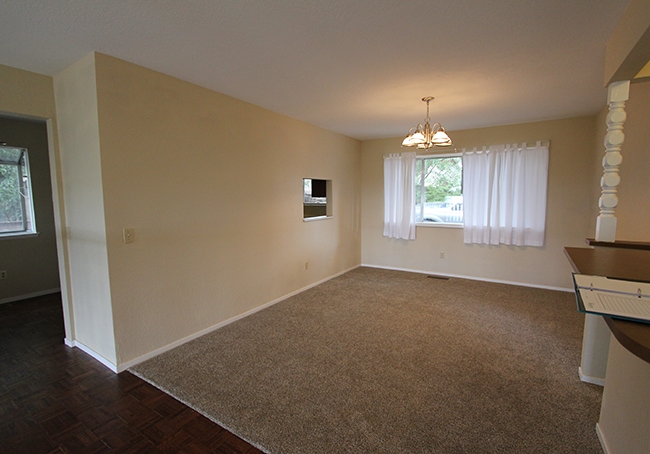
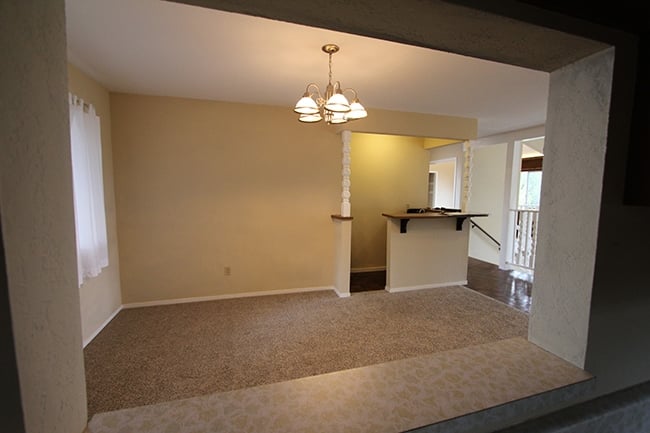
Here’s another view:
The dining area is open to the living room, divided by railing:
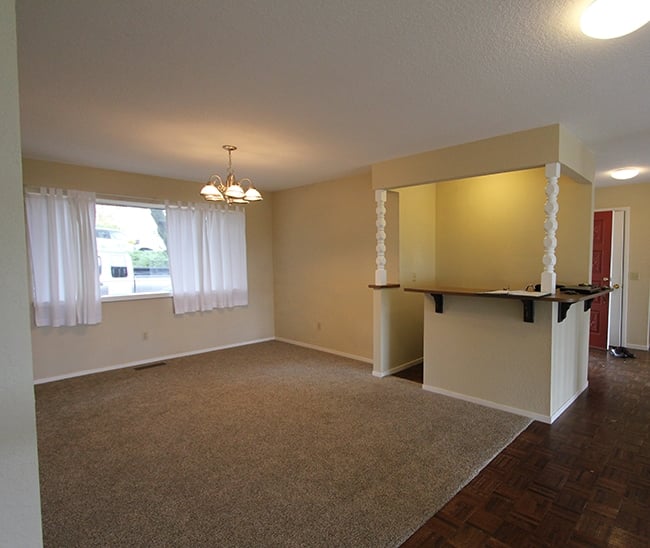
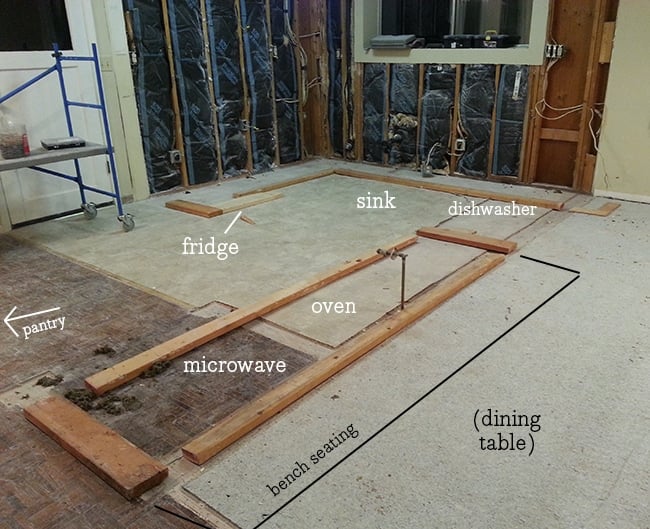
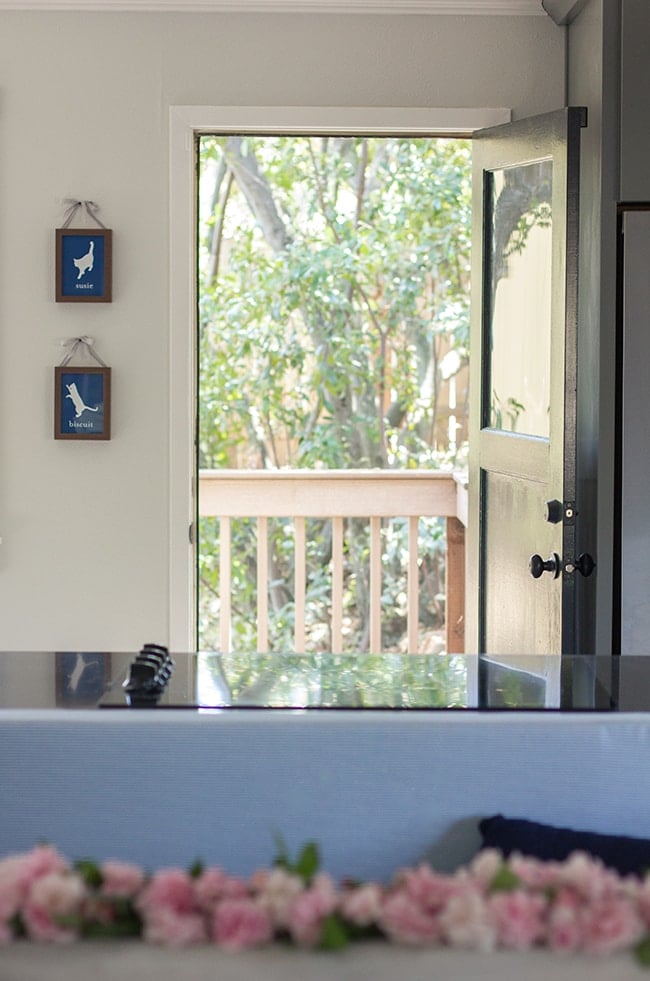
Straight ahead is the kitchen door which goes out on the side deck. Just to the right of that was the very small closed off kitchen. Also from the 70’s.

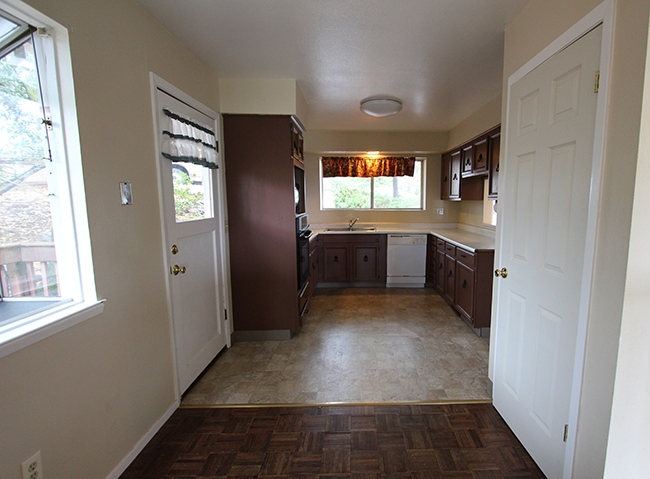
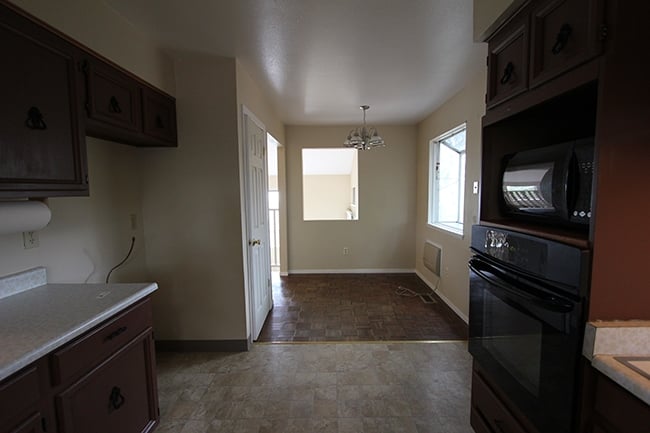
Here’s the view from the sink, opposite of where the photo above was taken:
I knew the second I walked in that the wall needed to be taken down, and the entire room gutted and reconfigured.
We didn’t waste any time.

We worked with a kitchen designer at Lowe’s who helped us find the perfect setup.
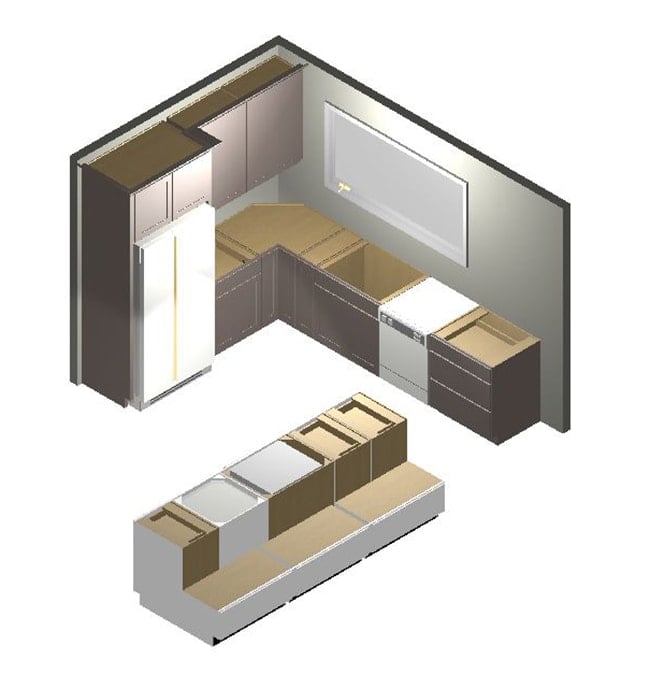
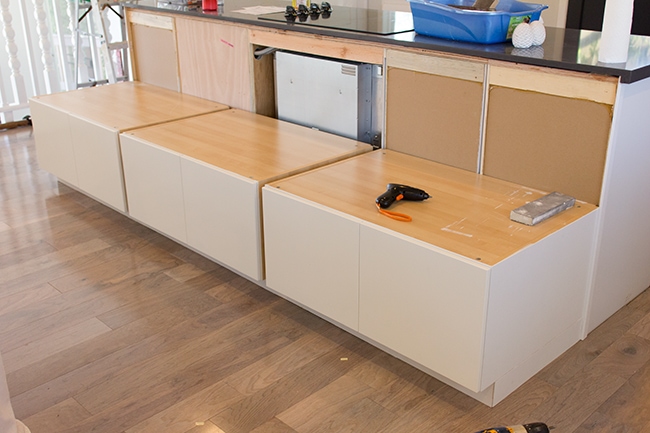
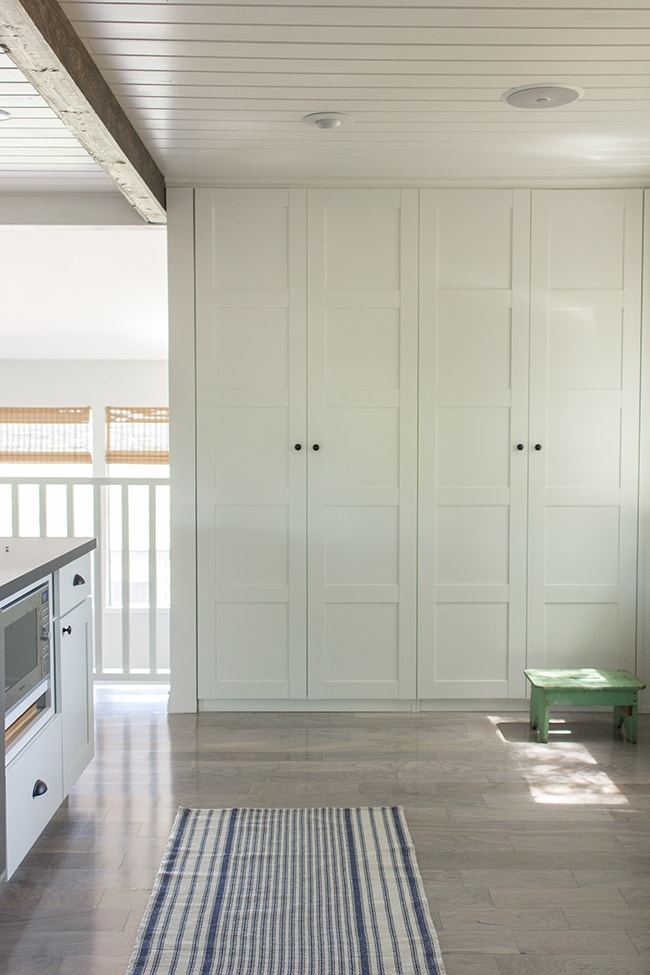
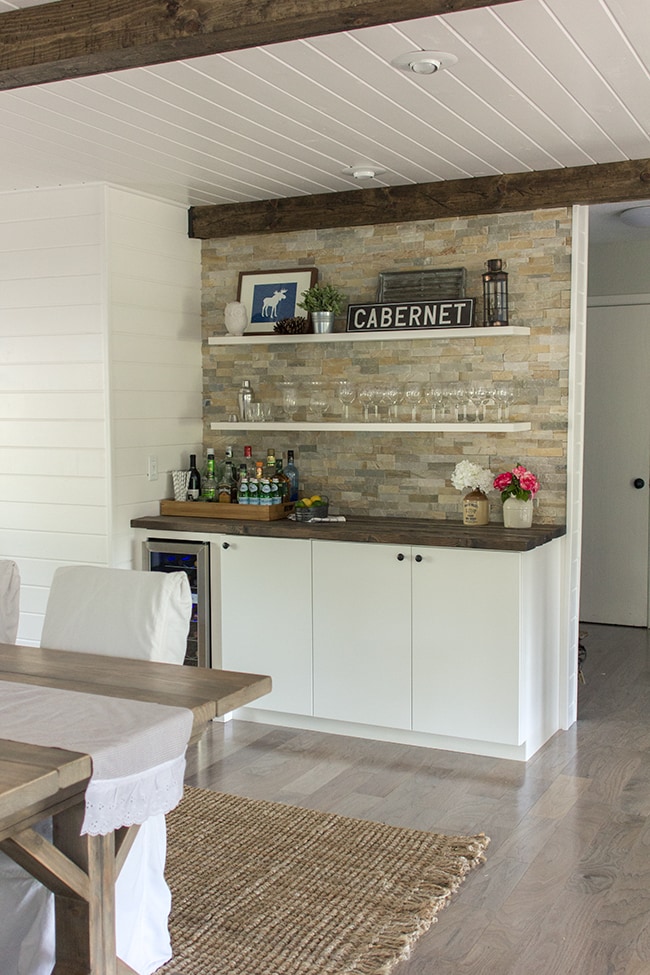
I also supplemented the storage by making a pantry, bench seating, and a bar using Ikea cabinets and wardrobes.
Every surface was ripped out, rewired, new drywall, new floors, new electrical and plumbing, you name it.
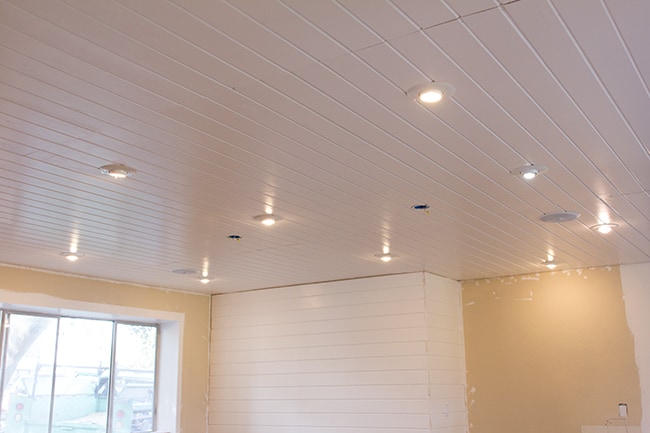
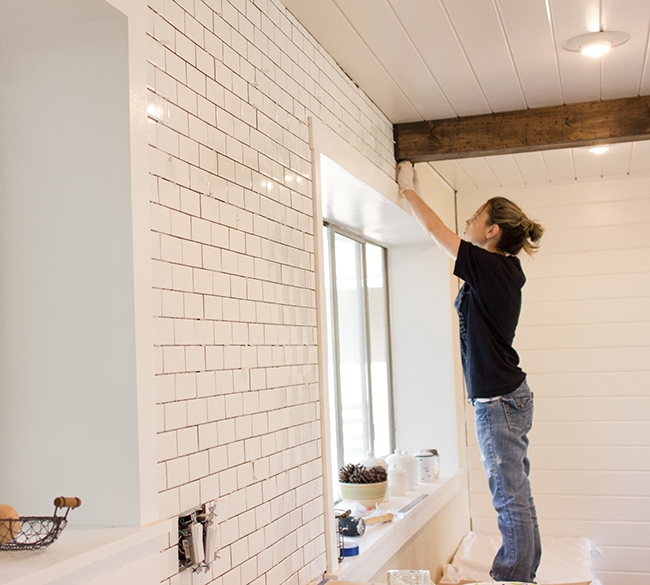
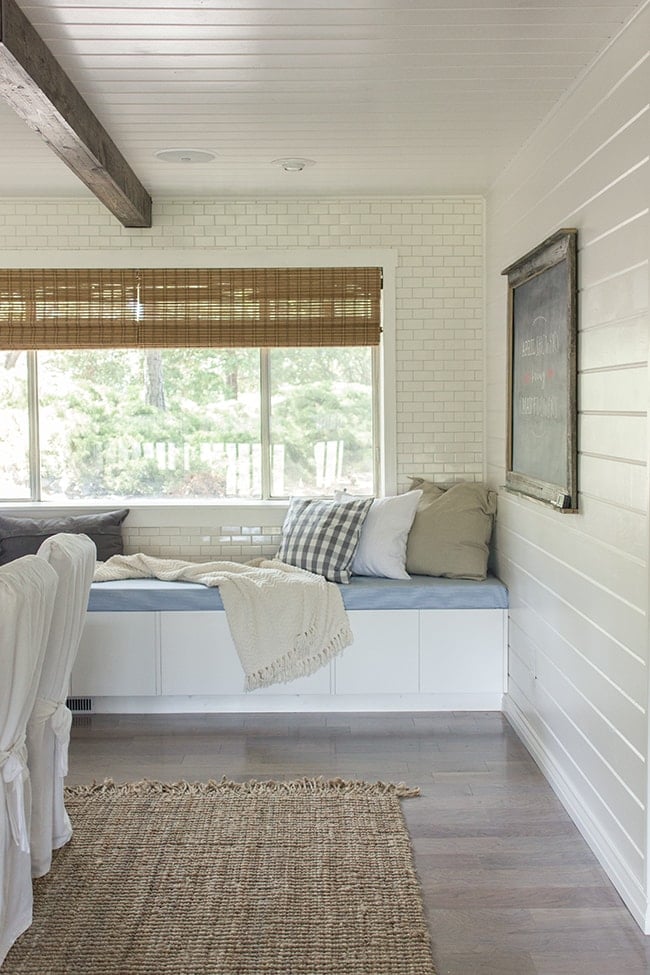
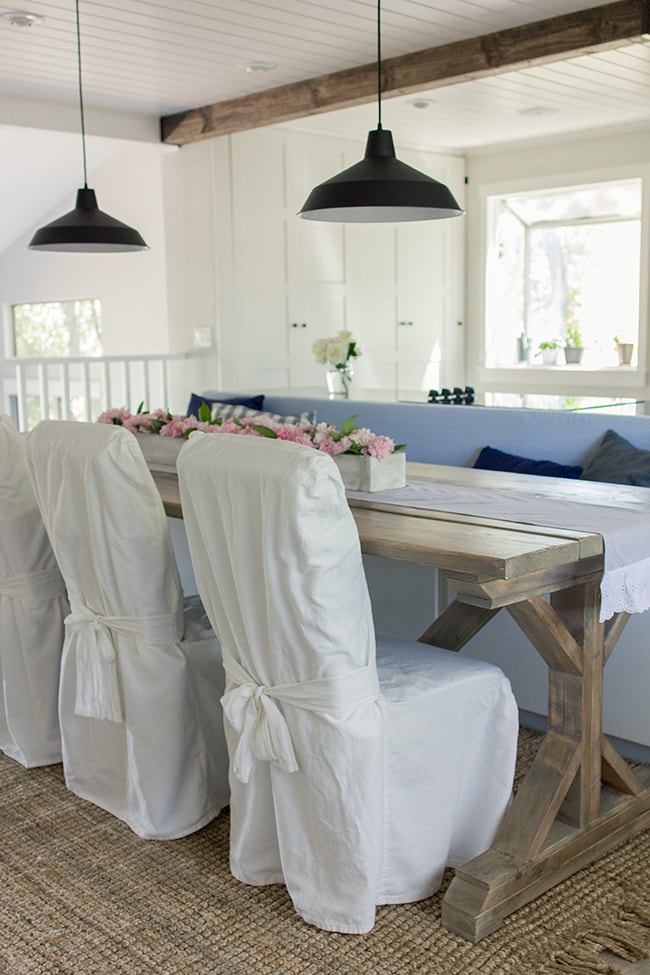
We trimmed the windows, planked the ceilings, built beams, planked the walls, added recessed lights and speakers…

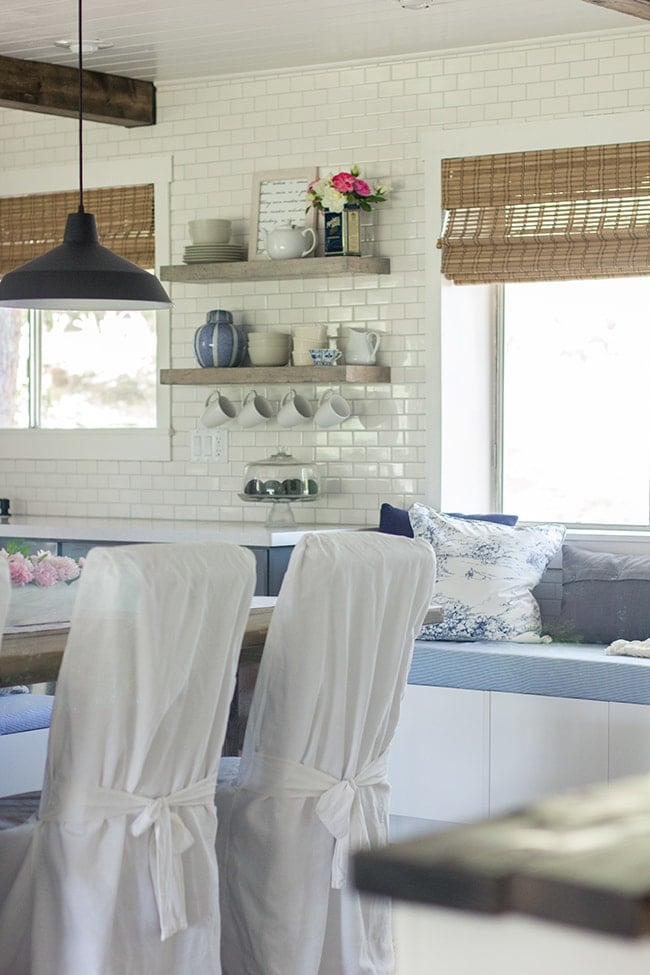
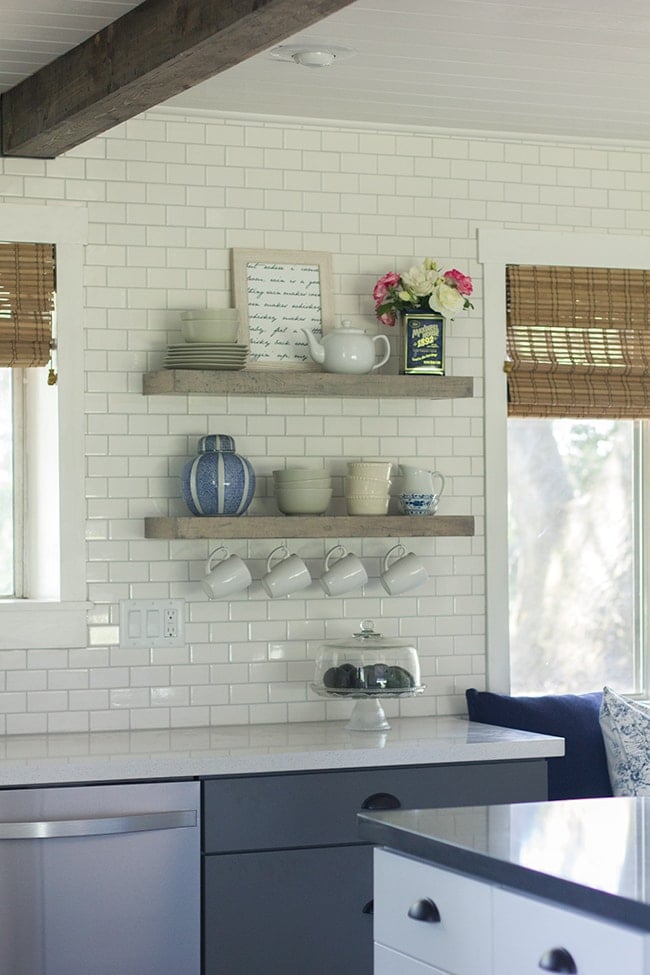
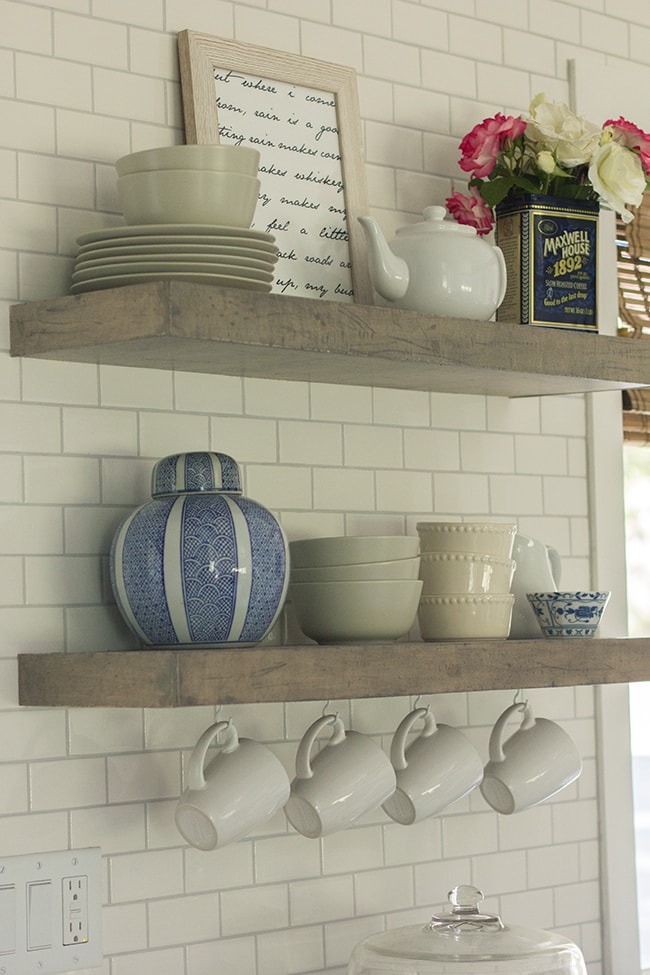
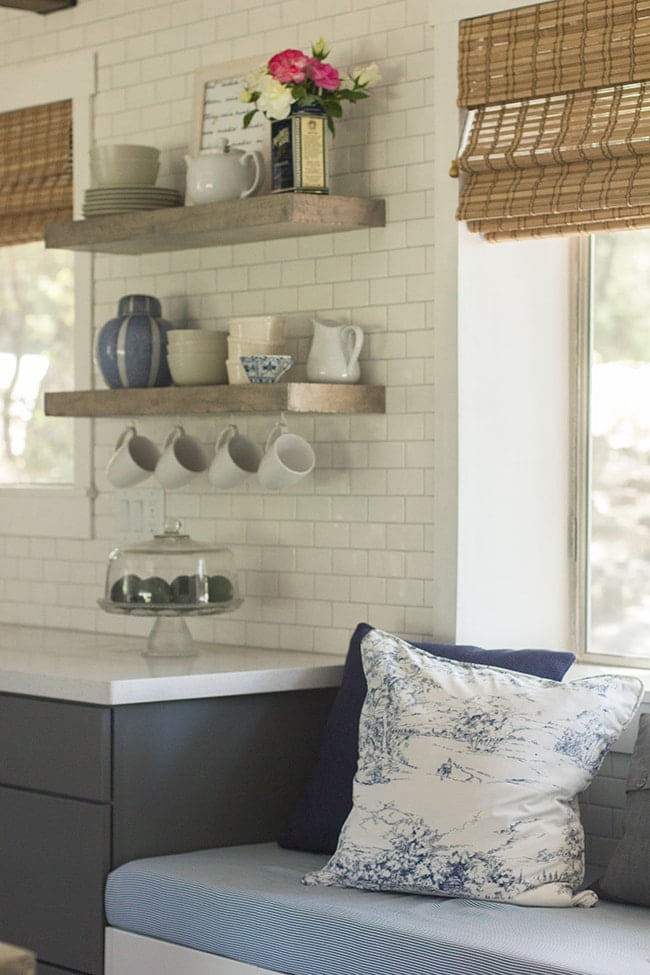
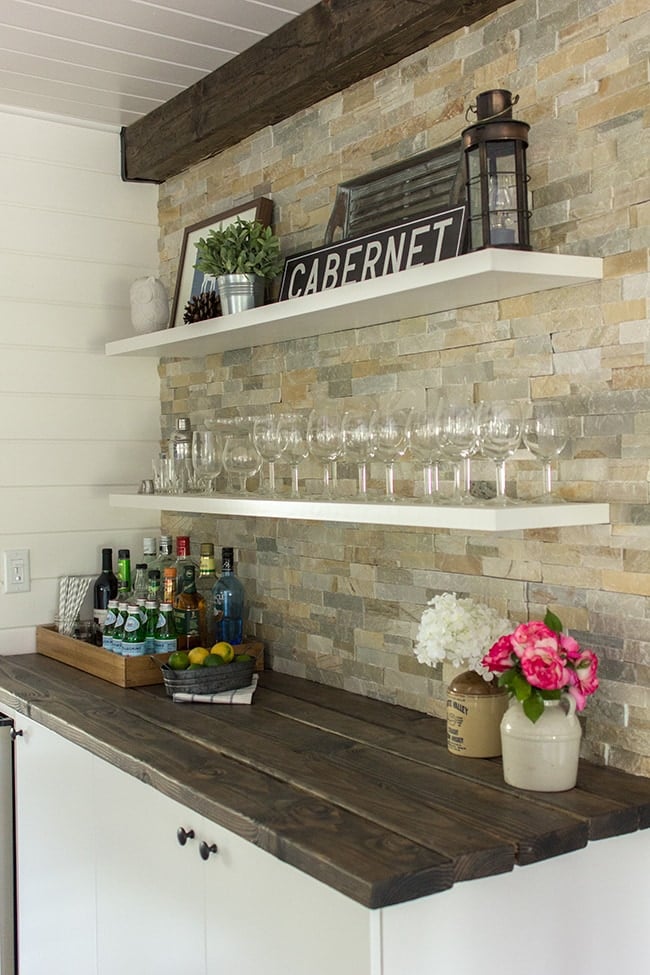
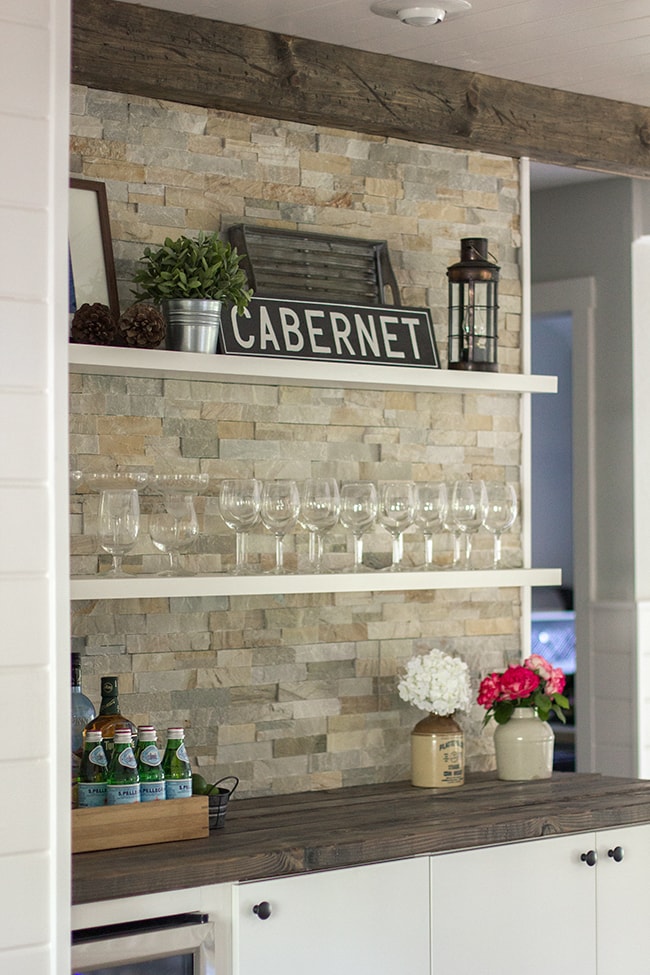
Tiled the backsplash wall, tiled the bar wall with stacked stone, built some floating shelves…
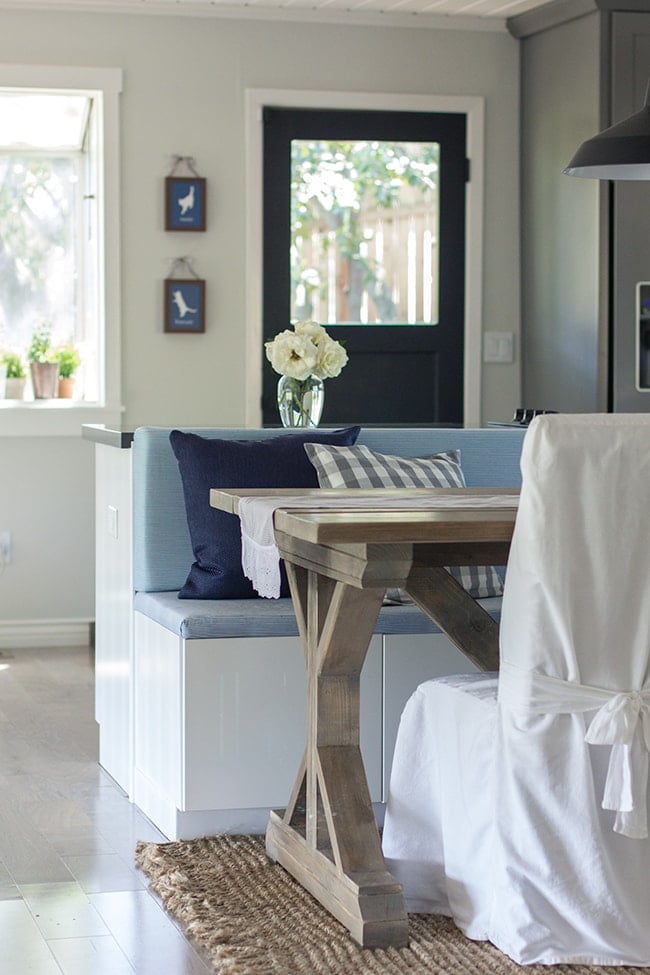
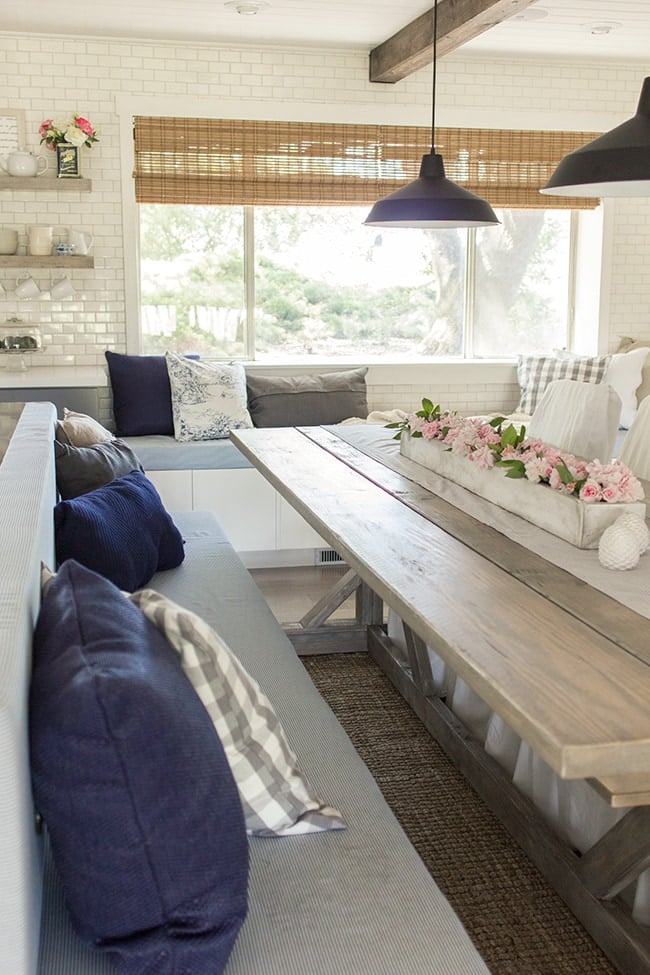
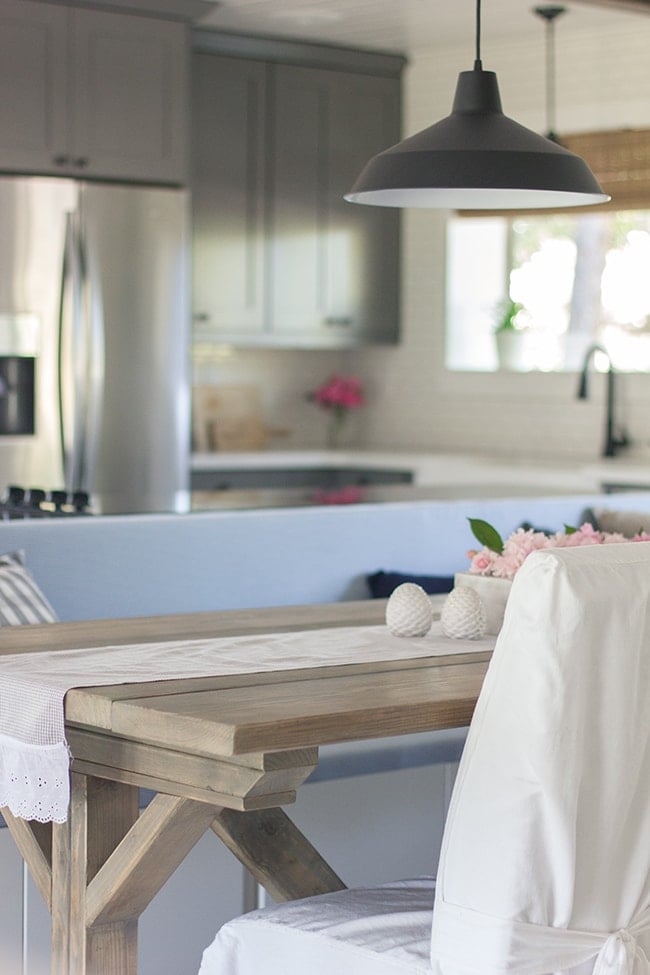
Built the bar and bench seats, built our dining table, replaced the outdated stair railing…
And so much more. There were lots of struggles and setbacks along the way, but we survived and now we’re able to enjoy this space with friends and family for years to come. I appreciate all of your encouragement and thoughts along the way—thank you for following me on this journey!
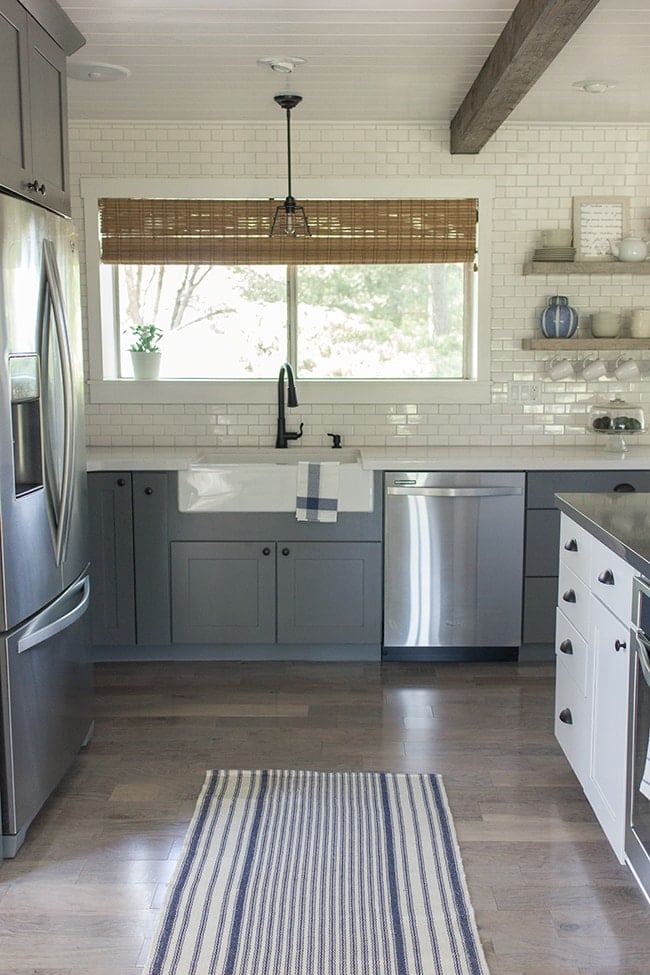
Without further ado… the after photos:
Thanks to my parents for letting me raid their property for all the pretty pink flowers this afternoon. Aren’t they gorgeous?
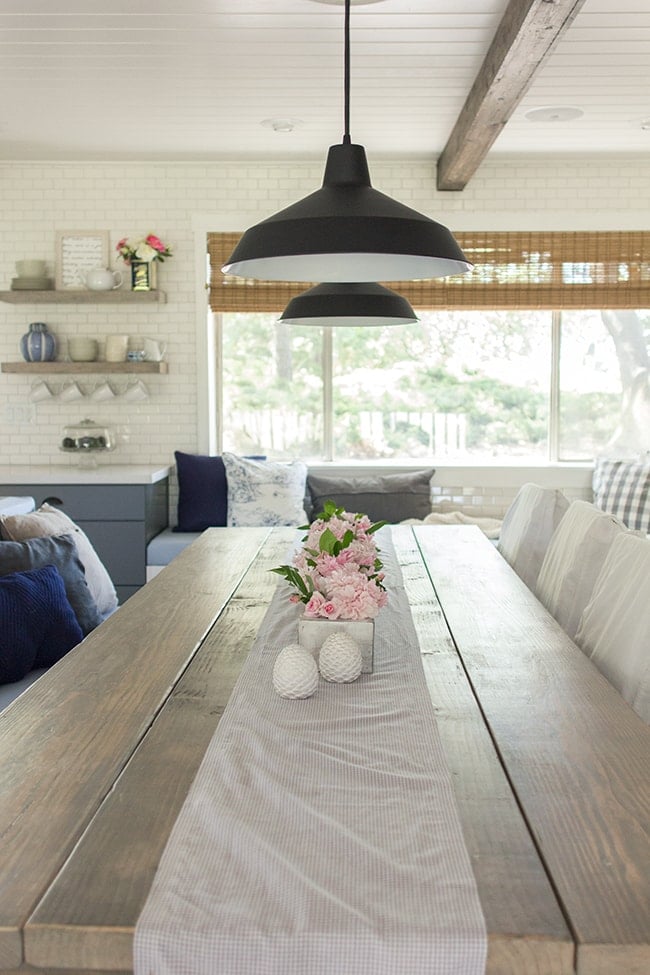
I made this no-sew table runner last week with a couple yards of fabric from Joann’s, some ruffle trim and hem tape.
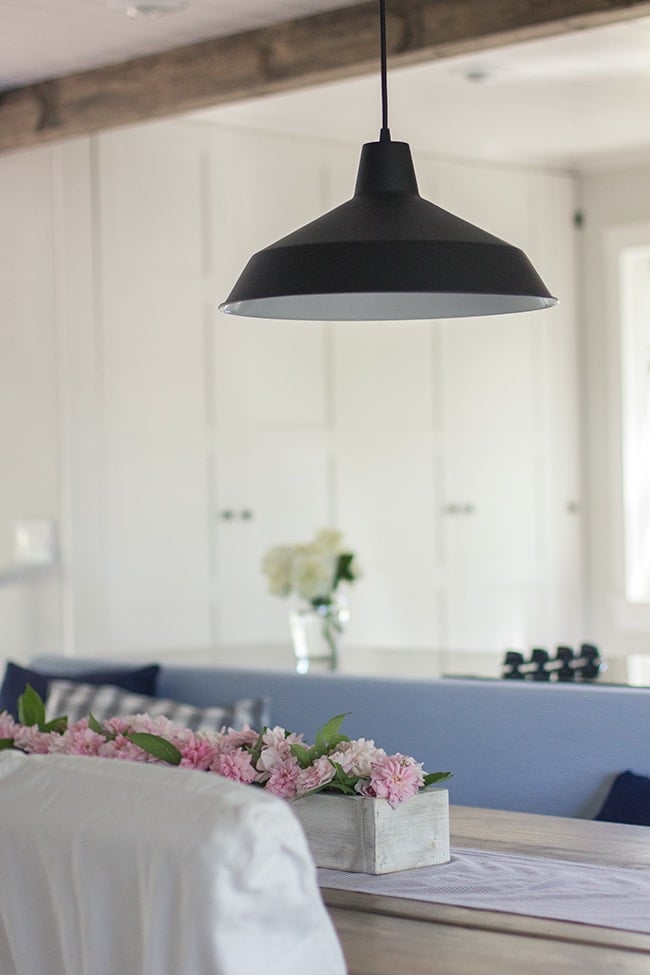
The flower box was super simple—a 1×4 cut into pieces, secured together with wood glue and my nail gun, then painted/sanded/stained.
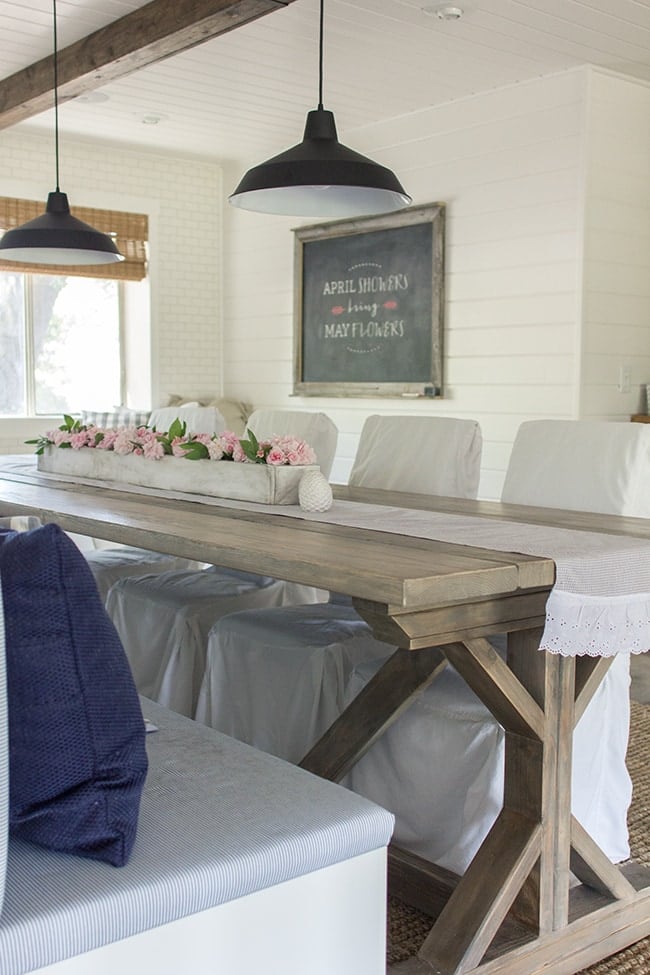
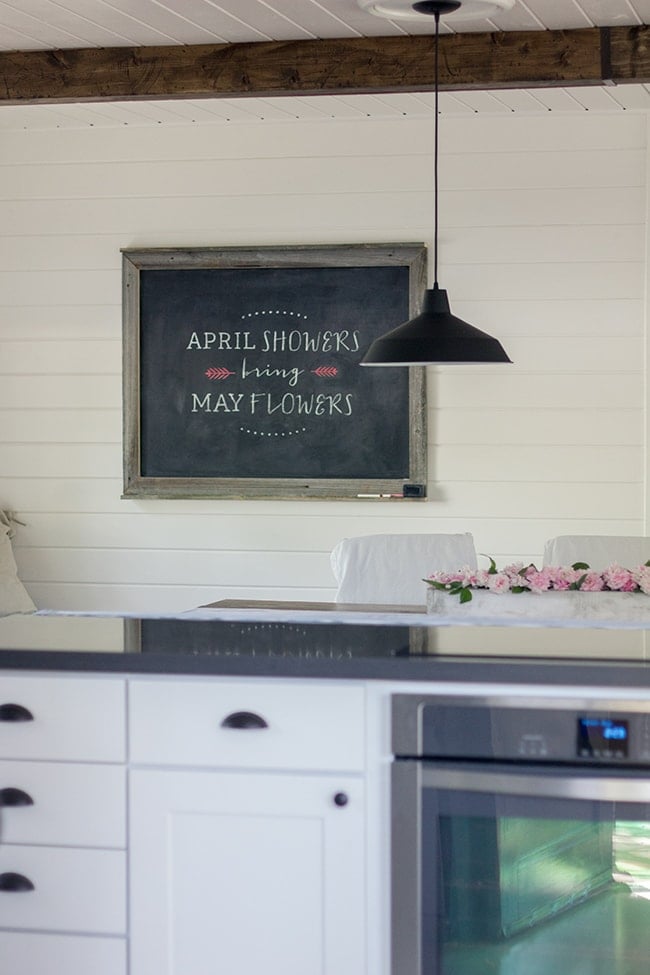
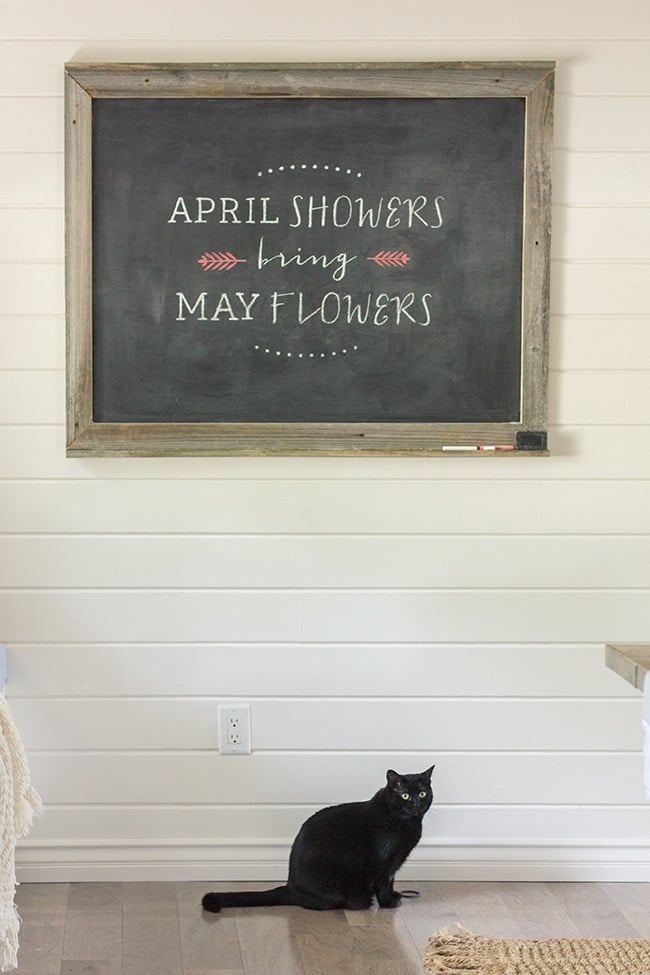
The chalkboard on the back wall was a last minute addition, and it’s one of my favorite things in the room.
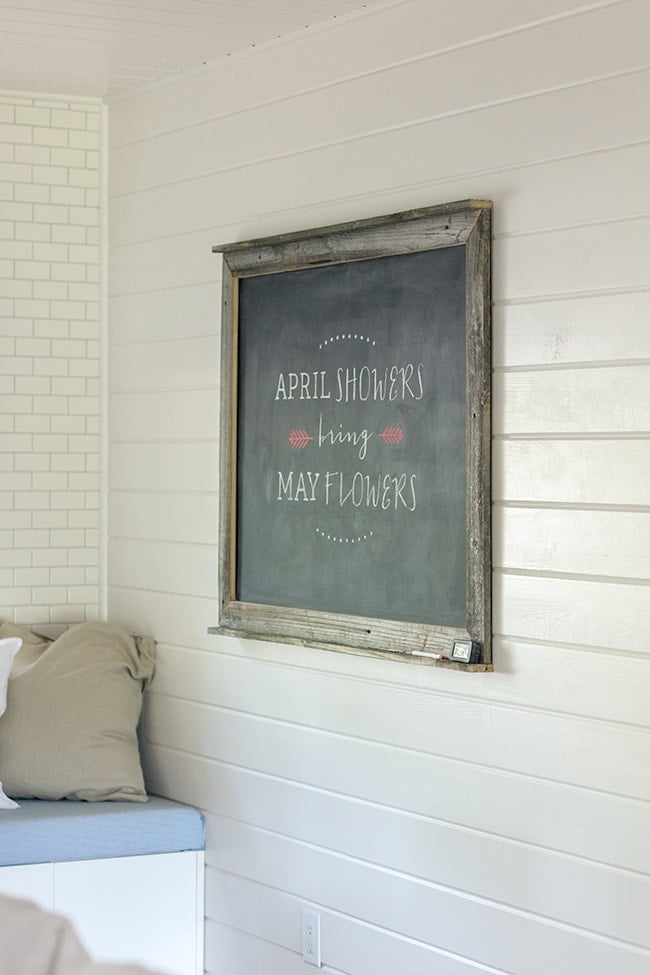
More to come about it in a future post… (hint: a giveaway is involved).
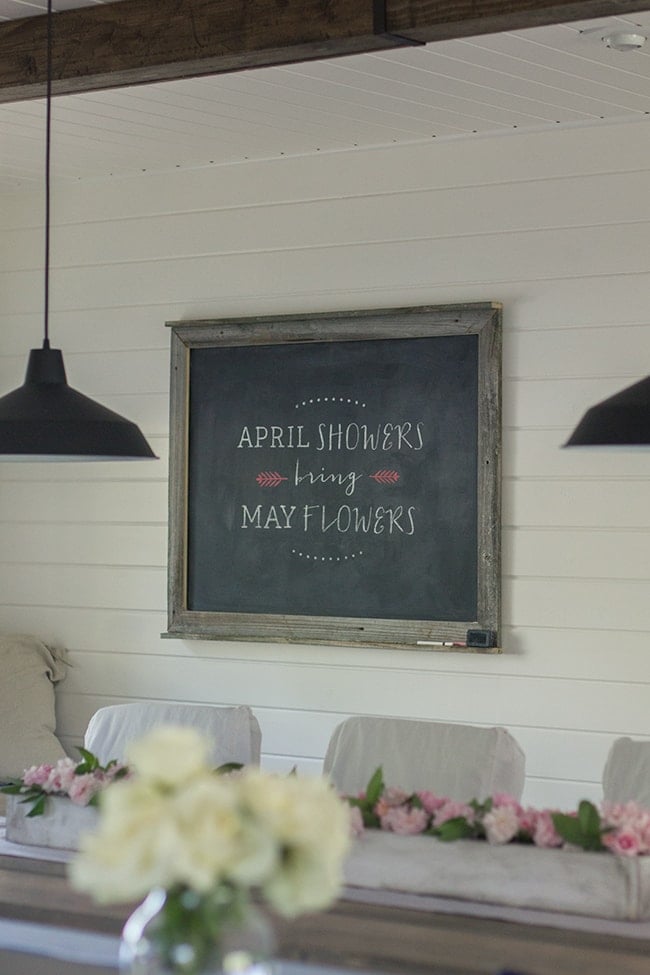
I had fun drawing on it last night…

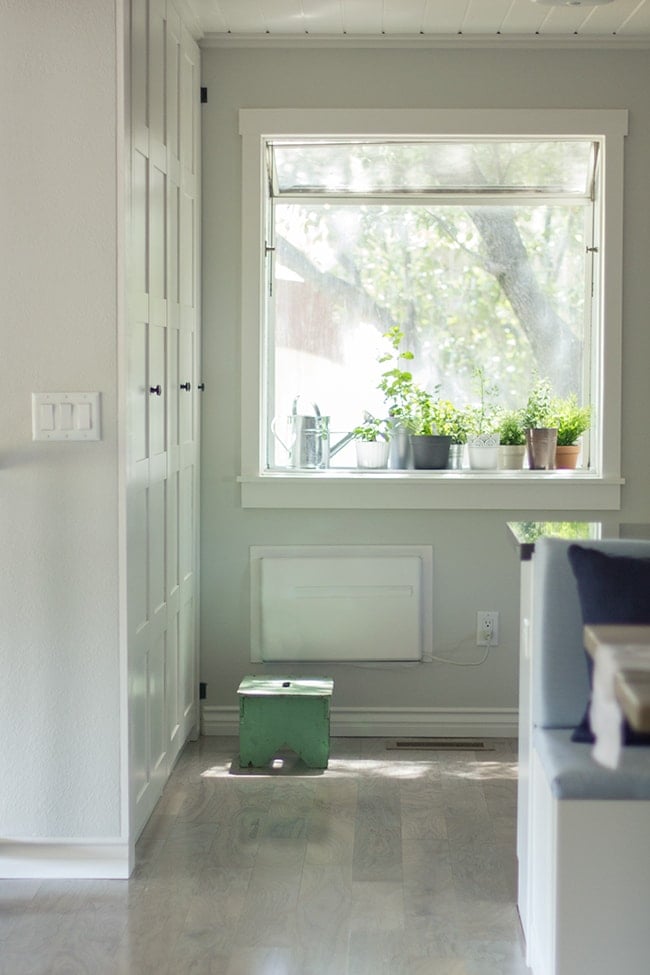
I’ve also decided to become a botanist.
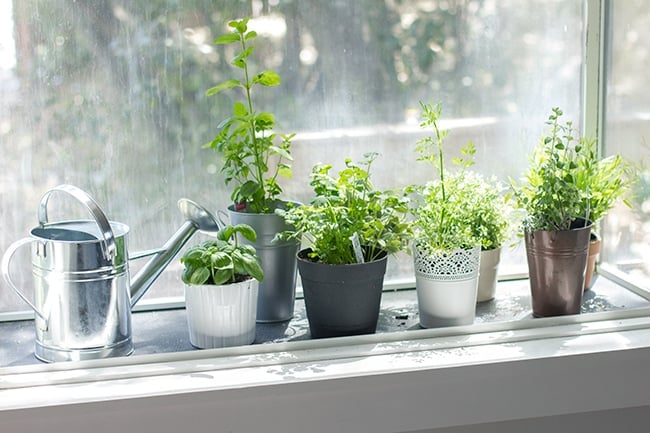
Okay, not really. But I did start an herb garden, and after managing to kill all of our plants in FL, I’m determined to keep these babies alive. And cook with them.
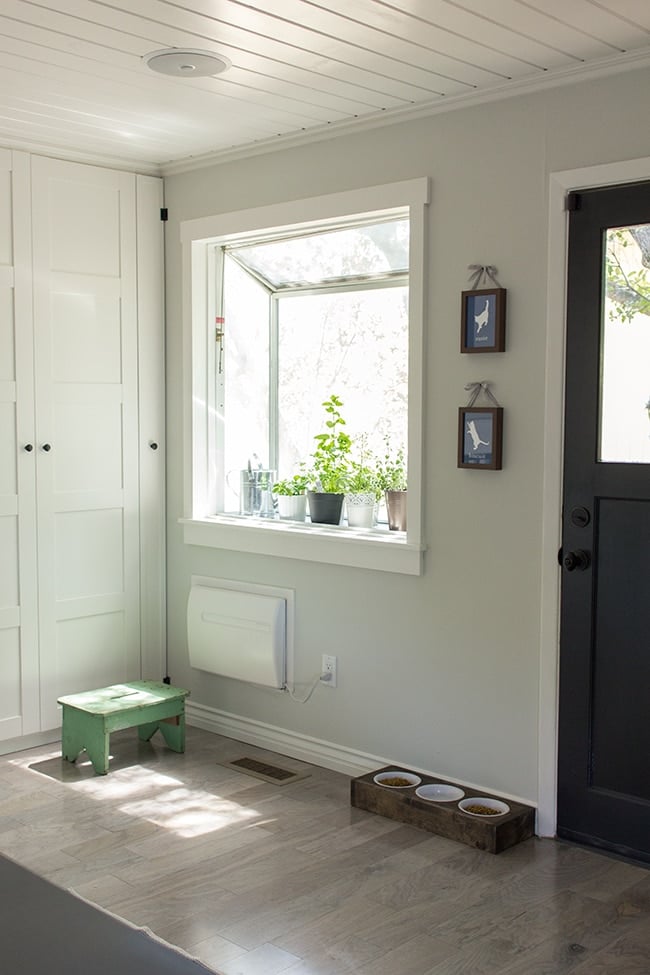
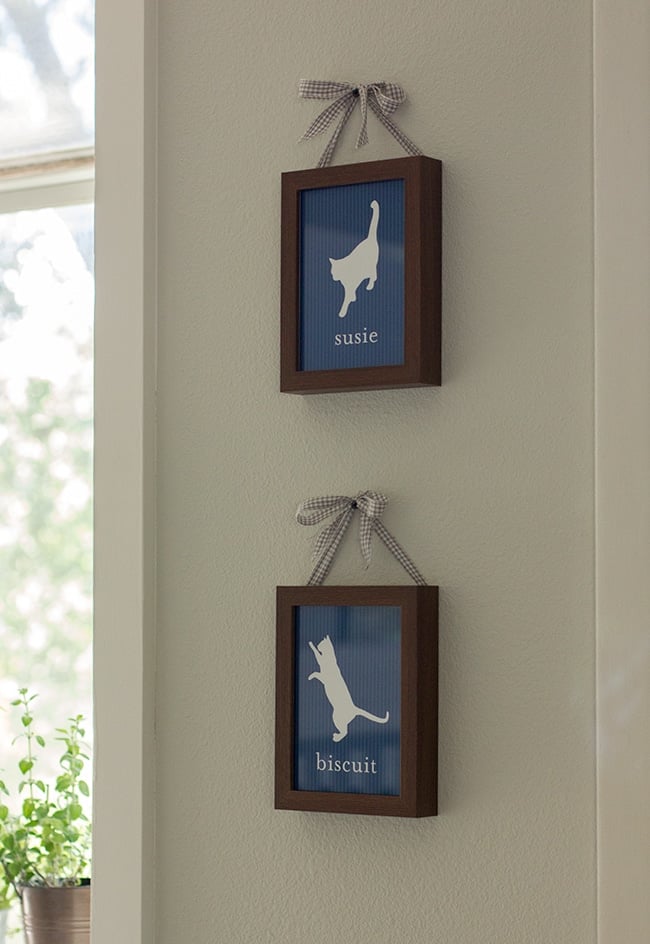
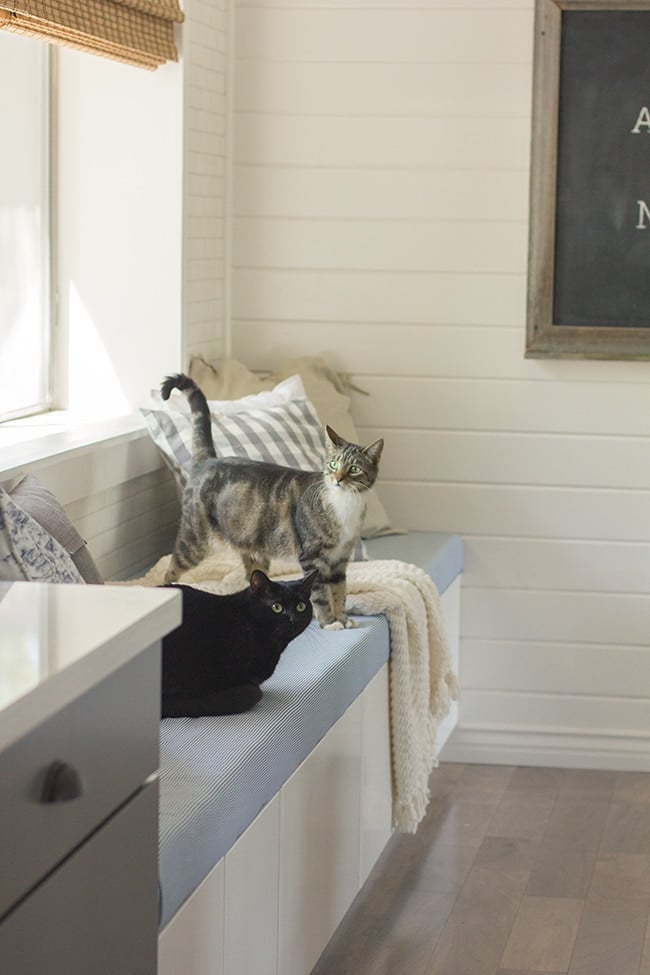
Biscuit and Susie also have a little spot for them here.
I made prints of their silhouettes (you can get them for your furbabies at my shop), framed them in cheap Ikea 5×7 frames and stapled some scrap fabric to the back for a little extra specialness.
I also built them this food/water station yesterday out of scrap wood.
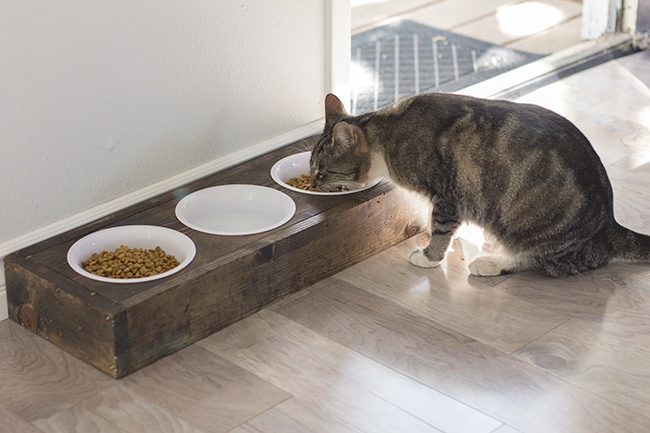
They seriously love it. They eat like 5x/day now.
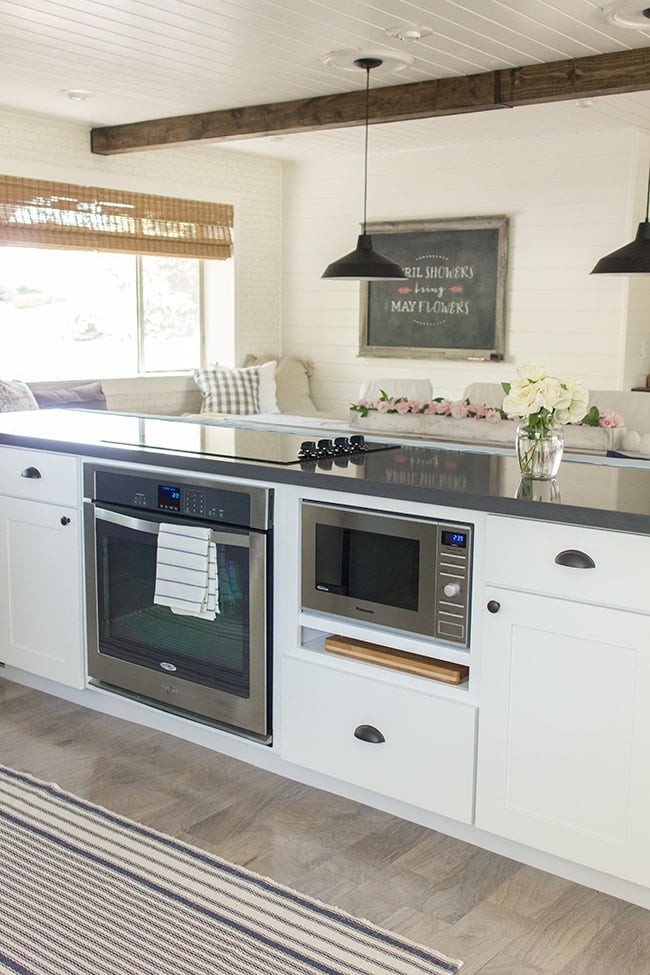
Still also loving these appliances in the island. No cramped cooking here.
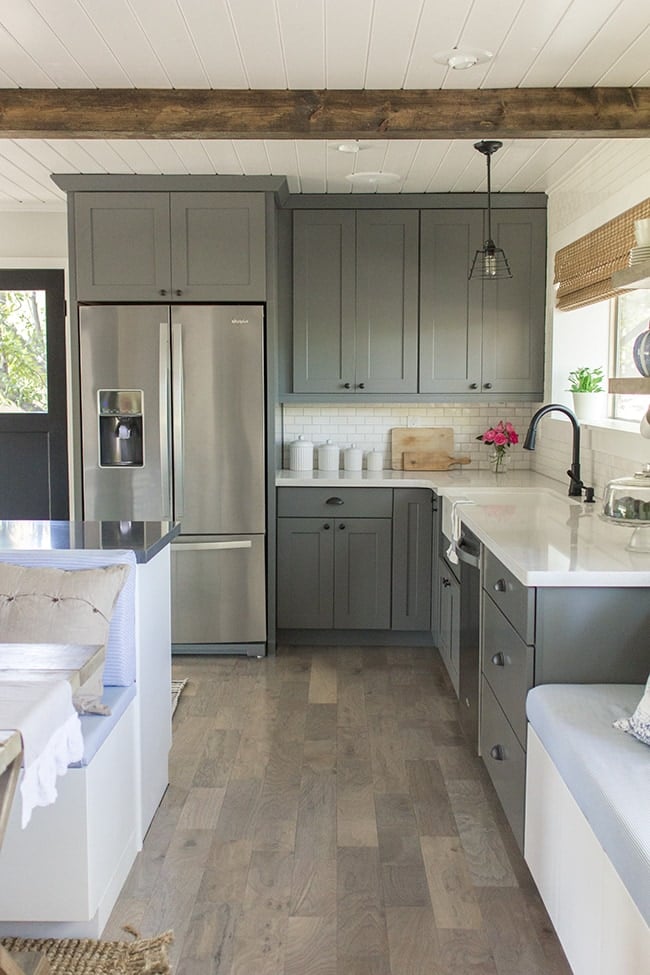
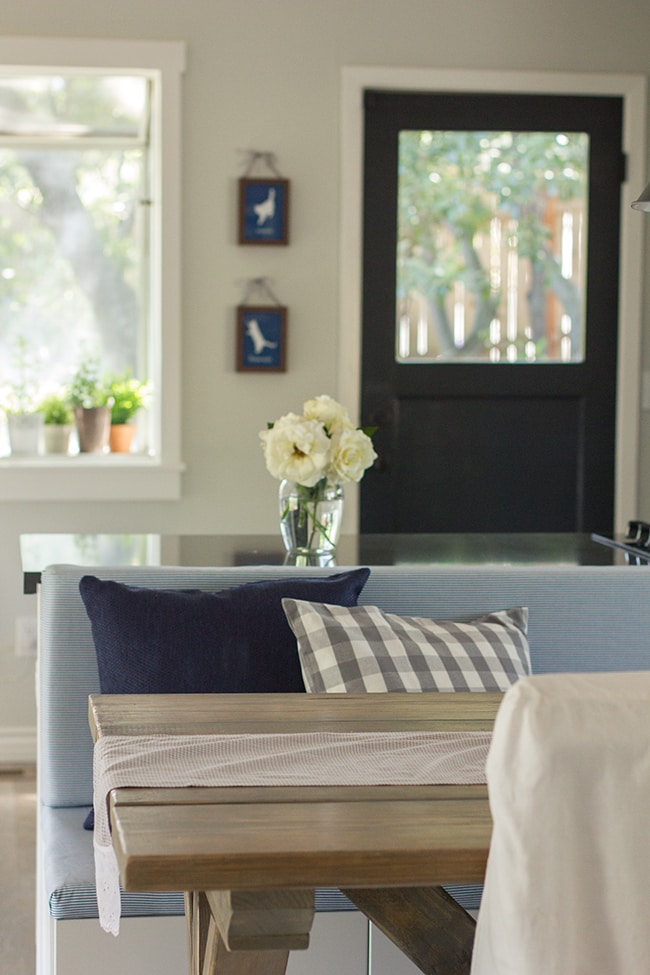
I kept the color palette to whites, blacks, grays neutral brown/beige/ivory tones, and navy blue.
This way I can easily switch it up throughout the seasons.
It’s also very relaxing.
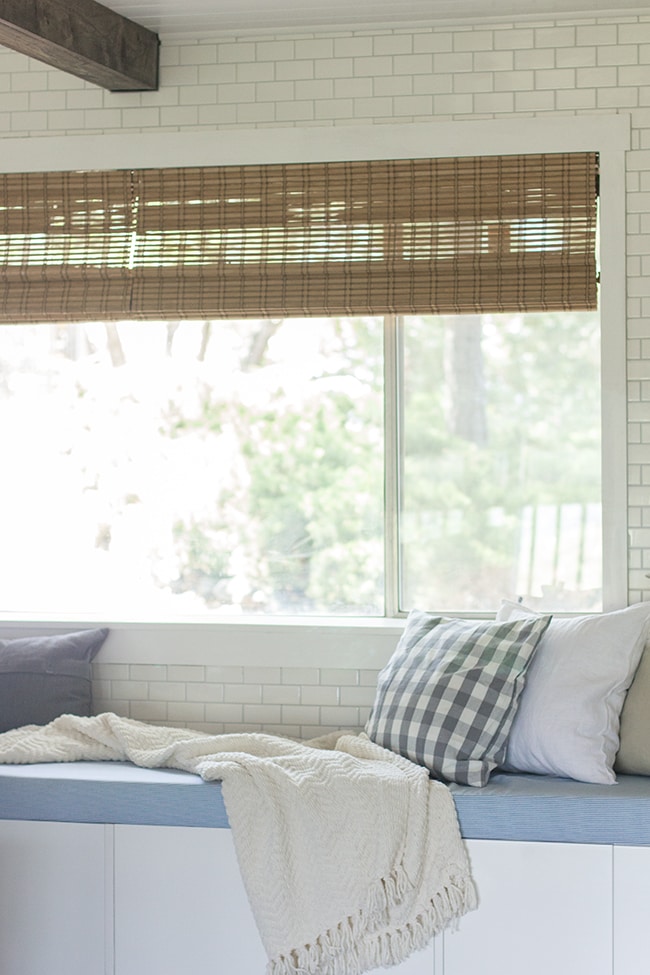
Good thing there’s lots of seating to curl up onto.
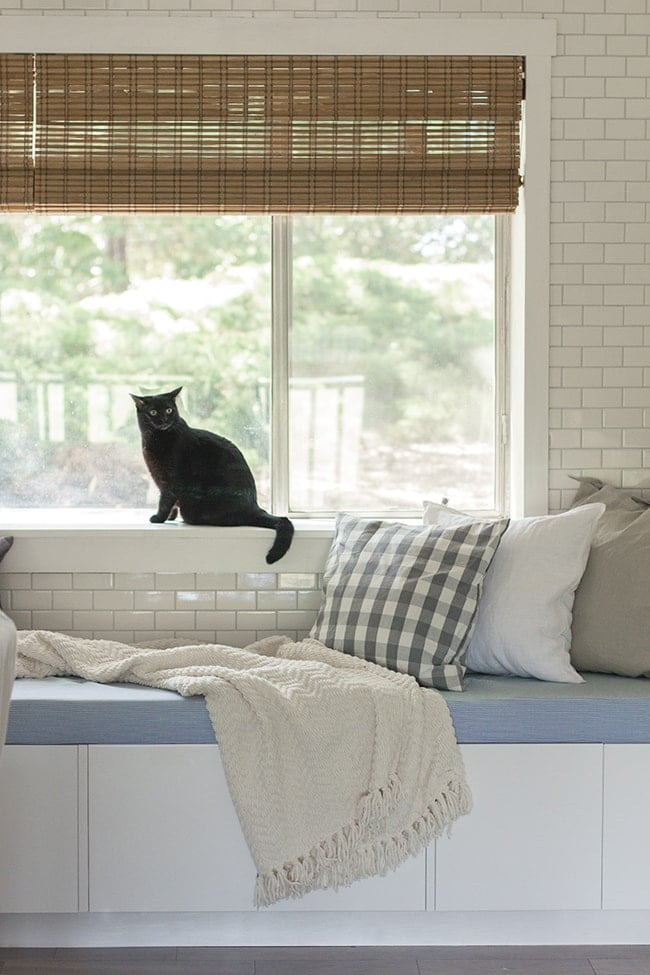
And thank you guys for weighing in on the bamboo blinds situation. I changed my initial choice after reading through the comments and went with the medium tan/brown.
I think it was the right choice!
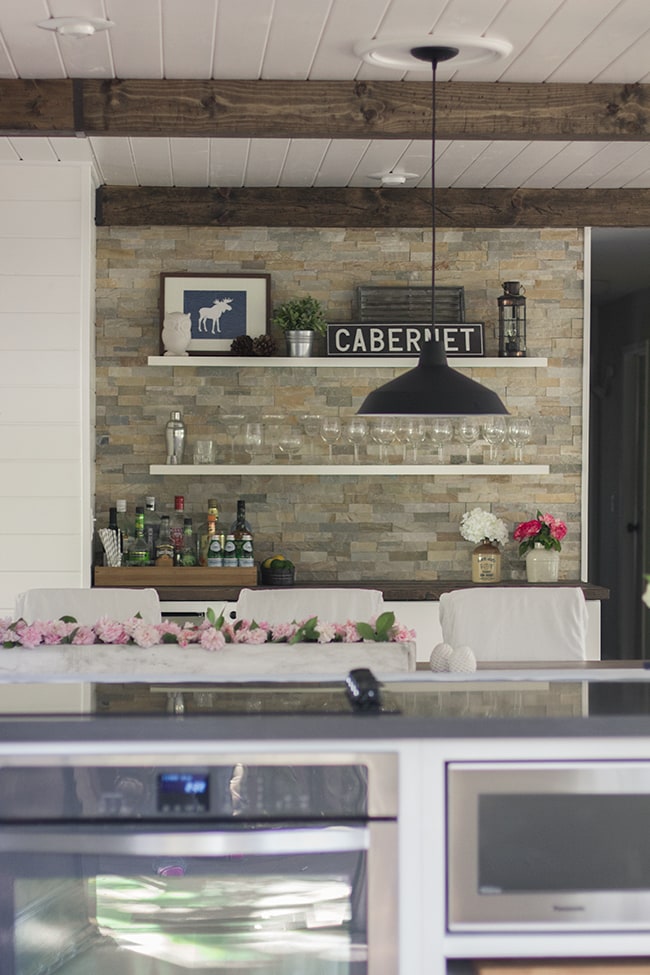
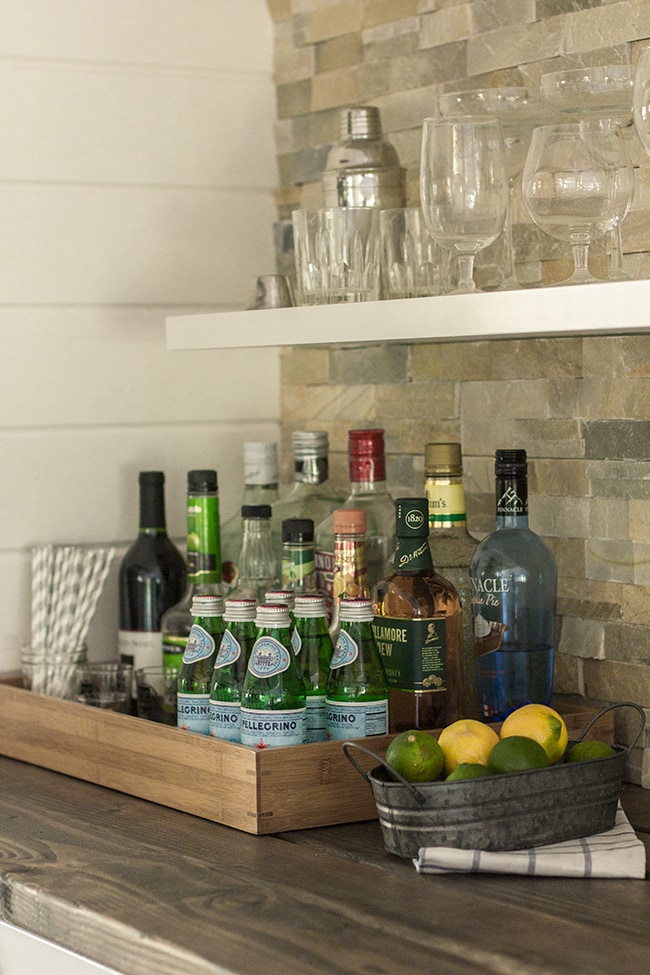
Our bar is stocked and ready to entertain.
Which is a good thing, because we have guests coming from Florida on Friday, and a big housewarming party next Saturday.
I’m excited to test it all out!
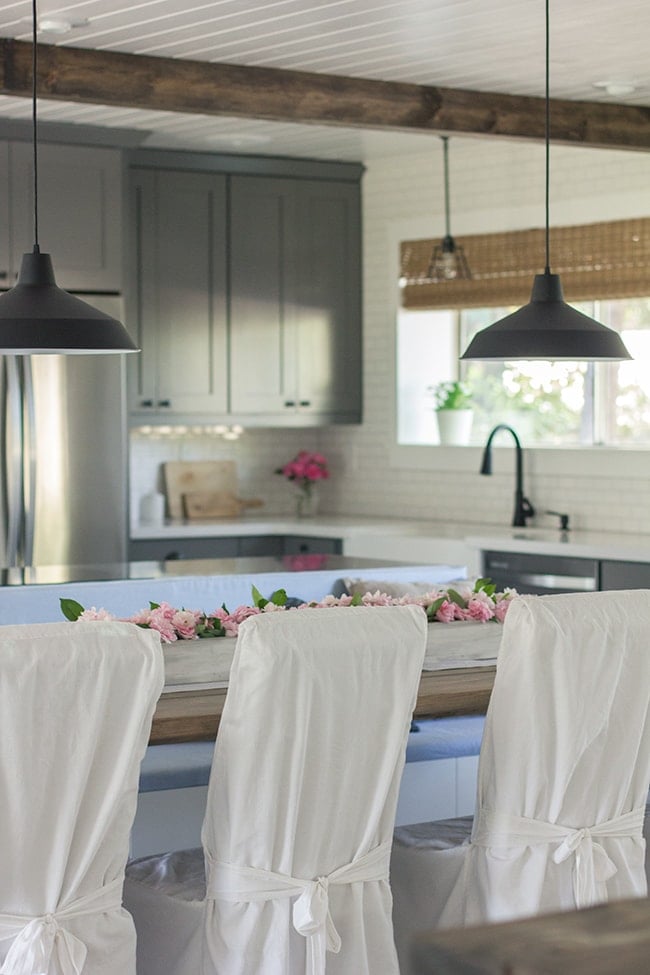
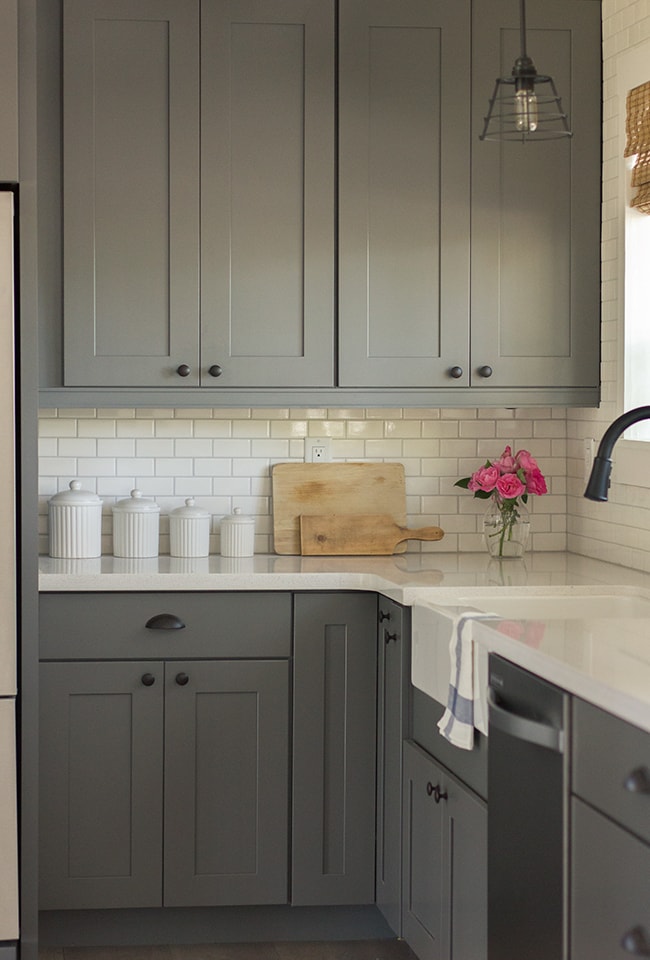
Here’s a shot with all the lights on. There are 13 recessed lights, one pendant over the sink, and two pendants over the dining table.
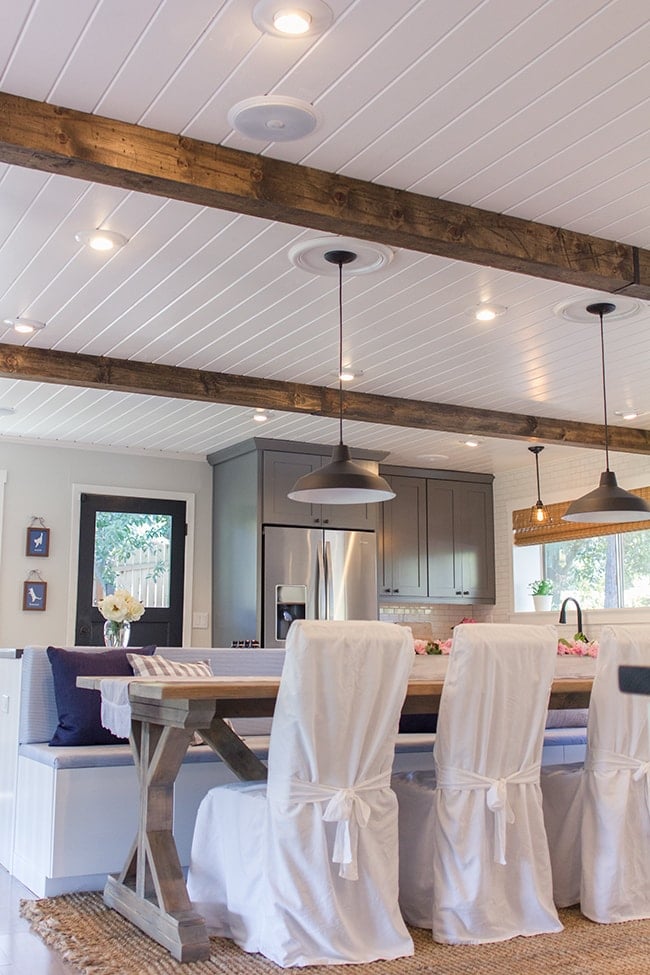
I’m mildly obsessed with these pendant lights.
And that’s the story of our kitchen.
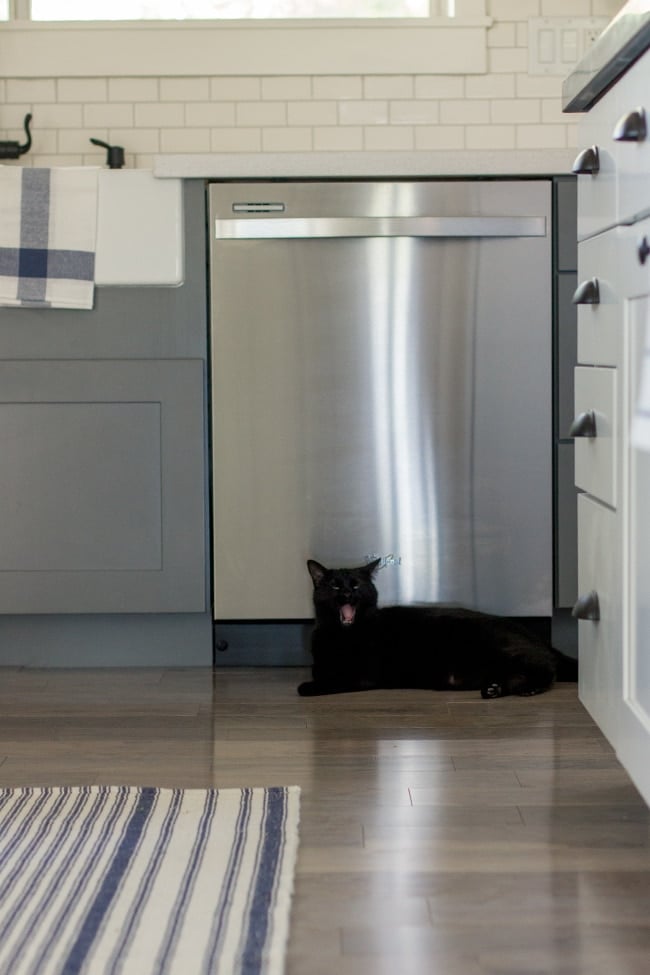
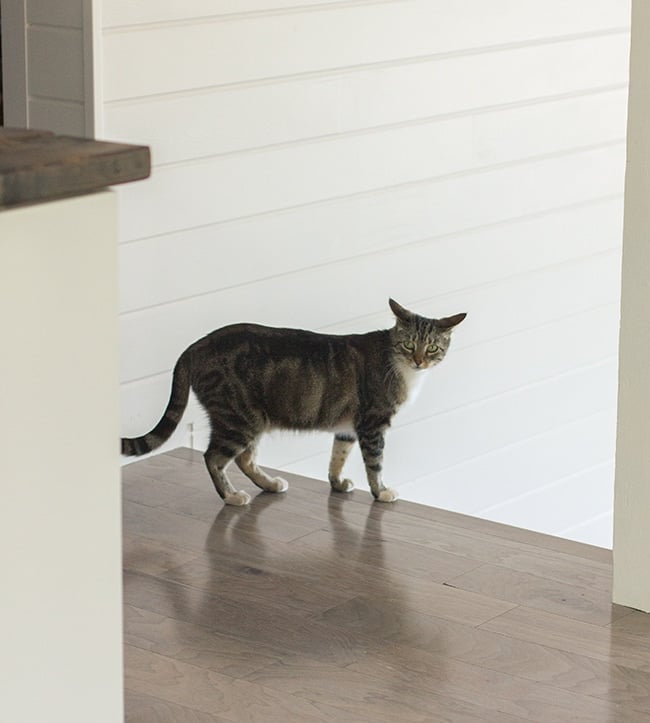
Just for fun… here’s some kitty outtakes:
We tried to get them to sit next to each other and pose. It didn’t last long.
She chooses the most random places to plop down and rest.
Update: A few of you have requested wider angle shots so you can get a true before/after comparison (it’s a little confusing since we converted two rooms into one, I know!)
I can’t seem to find my wide angle lens that I used in the before’s (I haven’t used it since those photos, and now I’m freaking out a little because it’s apparently missing…) so I did the best I could with my 24mm lens. Also, the wide angle lens makes the room look a lot larger than it is, so the new photos are a much better representation of size and scale.
To get oriented, here’s a before + after shot right at the entrance. The back of the foyer is the bar wall (the wall was there already, it’s just barely cut off in the before photo—we did rip the bar out though):
Same position, rotating just to the left (the sunken living room is on the opposite side of the railing)…
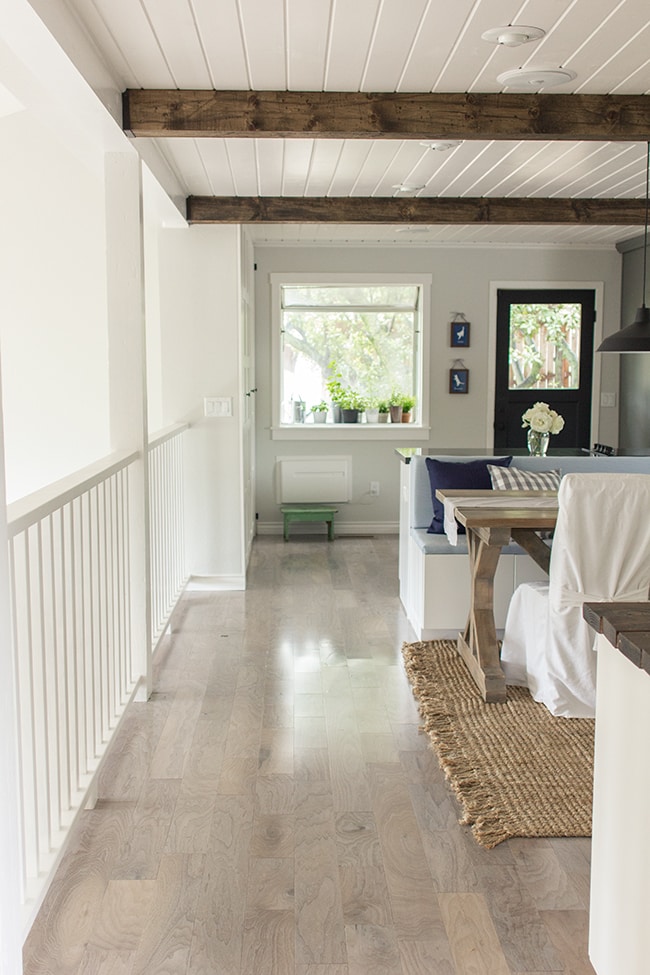
Take a couple steps forward to the dining room (now it’s one big open room):
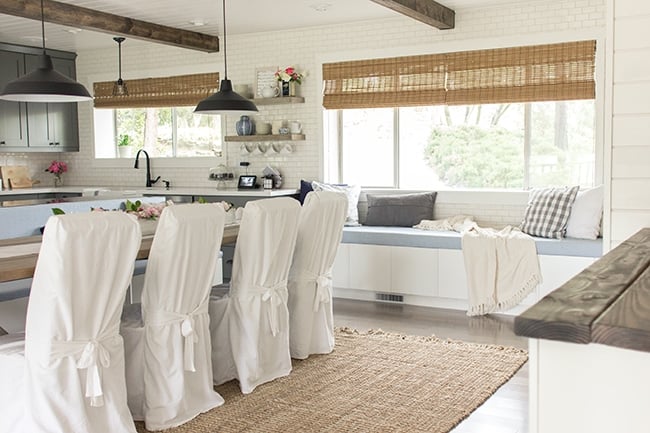
Keep going forward and the kitchen was on the right:
Now walk to the sink, turn around and here’s the area you were just standing in (it’s now a built in pantry):
There was a wall here before… not anymore!
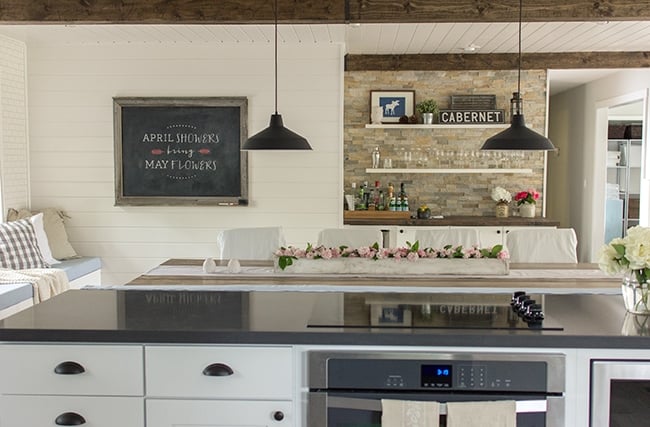
Looking back at the dining room from the kitchen area again:

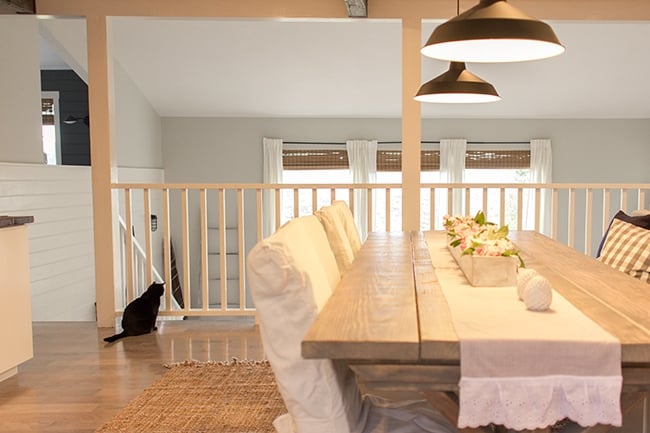
And here’s a shot from the dining area window, looking back out towards the living room:
Hopefully that helps to clear up any confusion!
If you missed any of the Kitchen Chronicles, here’s how it all went down…
Kitchen Chronicles: Planning Stages
Kitchen Chronicles: Demolition
Kitchen Chronicles: A blank slate (+ more house updates)
Kitchen Chronicles: Trimming out the Windows
Kitchen Chronicles: Finished plank ceiling & wall
Kitchen Chronicles: The cabinets & floors are in!
Kitchen Chronicles: DIY Wood Beams
Kitchen Chronicles: New Hardware & Paint
Kitchen Chronicles: The counters are in! (+ pendant light & faucet preview)
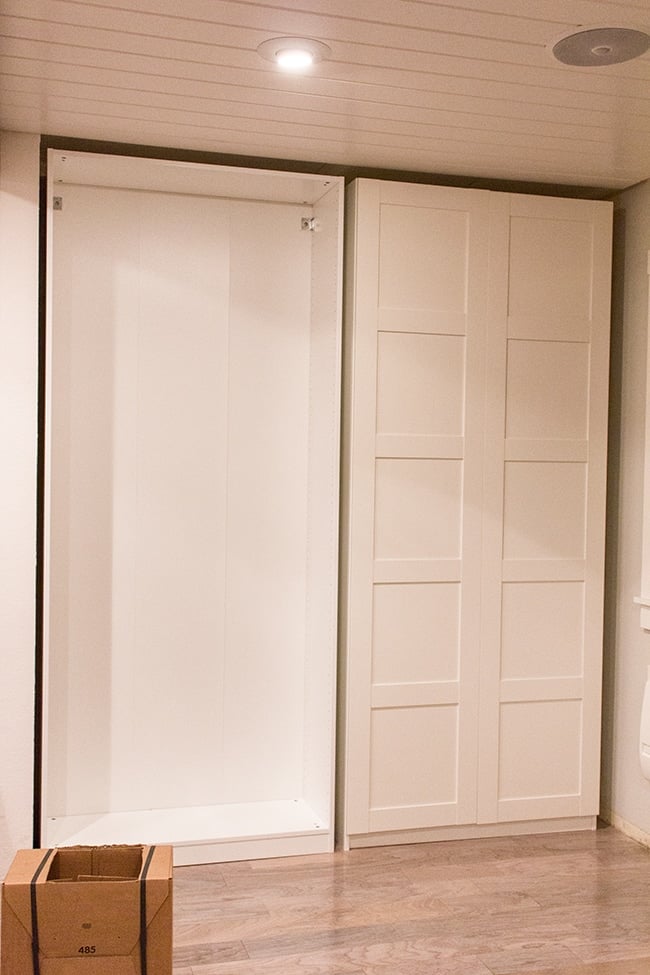
Kitchen Chronicles: An Ikea Pax Pantry, Part 1
Kitchen Chronicles: Ikea Pax Pantry Reveal!
Kitchen Chronicles: Building a Bar
Kitchen Chronicles: Building a Window Bench Seat
Kitchen Chronicles: A DIY Subway Tile Backsplash, Part 1
Kitchen Chronicles: A DIY Subway Tile Backsplash, Part 2
Kitchen Chronicles: Stacked stone bar wall & DIY floating shelves
Kitchen Chronicles: DIY floating rustic shelves
Kitchen Chronicles: Upholstered Bench Seating
Kitchen Chronicles: Building a Fancy X Farmhouse Table
Don’t worry, I have a full source list AND price breakdown coming up. I haven’t even started to add it all up yet so this should be… interesting.
I’m happy to answer any questions you may have in the meantime. We’ve learned so much along the way and I feel a lot more confident going into future projects (we have 3 bathrooms on our to-do list… bring it on!)
We’re currently on our way to San Francisco to pick up our friends from the airport and will be celebrating our birthdays this weekend, but I’ll stop in Monday with the source list/budget breakdown.
Have a wonderful Spring weekend 😉


Barn Door Hardware says
Amazing! It looks fabulous. Perfect….
Ideal Home Improvement says
What a difference! Sometimes you have to wonder what they were thinking back in the 70's!
Bespoke Kitchens makers in Cumbernauld says
You shall use pure black colours for cabinets which will match the sink tap too. This is just my way of thinking. It will look so attractive.
Jenna Sue says
Great question! The smaller hand tools are used most often (screwdrivers, tape measure, pliers, hammer, crowbar, level, etc). We definitely use our drill the most (a good driver and drill bit set is crucial). We also have little hand-sized cordless drills that are convenient for lighter duty jobs.
Aside from that, our miter saw has been essential for nearly every project, and our pneumatic nail gun is also used a lot. Other good ones to have around is a hand sander or belt sander, and a jigsaw. Those are just the basics but it also depends on the type of job you're doing. Hope this helps!
mtadams1208 says
Your kitchen looks great! With all your home renovations, furniture building/redoing, what tools (power tools and otherwise) do you own? We will be being a house soon and will need to start buying those types of things and I don't know where to start. I've used every power tool known to man in a shop setting but am unsure of what will be the ones we would use time and again for home renovations and other projects. Thanks!
Ashley@Biggerthanthethreeofus says
You guys killed it! So in love! Especially love how the table and bench seat turned out.
Anonymous says
Gorgeous! I love the colors and the layout. I am curious about the long term functionality of the range in the island without a splashguard between it and the bench seating. I'd love to know how it works out with splatters over time…and the amazing solution I'm sure you'll think of if it becomes a problem 🙂
francisms32 says
Love it!!! I'm a regular here on your blog therefore I know the kitchen has come a long way!!! Great job!
Anonymous says
Absolutely stunning!! I love every detail in this kitchen – beautiful!
Shayna Orrino says
My heart fluttered through this entire post… I am wildly in love with everything you've done! Now, I just need to book my ticket for a visit! 🙂
Melissa Sabra says
Your kitchen looks amazing – what a transformation! Can't wait to see what you guys do next 🙂
the plant gardener says
lovely~
Chrissy @ Adventures in DIY says
GORGEOUS!!! Love everything! I especially love the planked ceiling with the wood beams. *Swoon*
Krista thehappyhousie says
Wow wow wow wow wow. You have done an amazing job on this kitchen. So spacious and light and airy but with lots of warm rustic touches! Gorgeous!
Jenna Sue says
Just updated it with new photos!