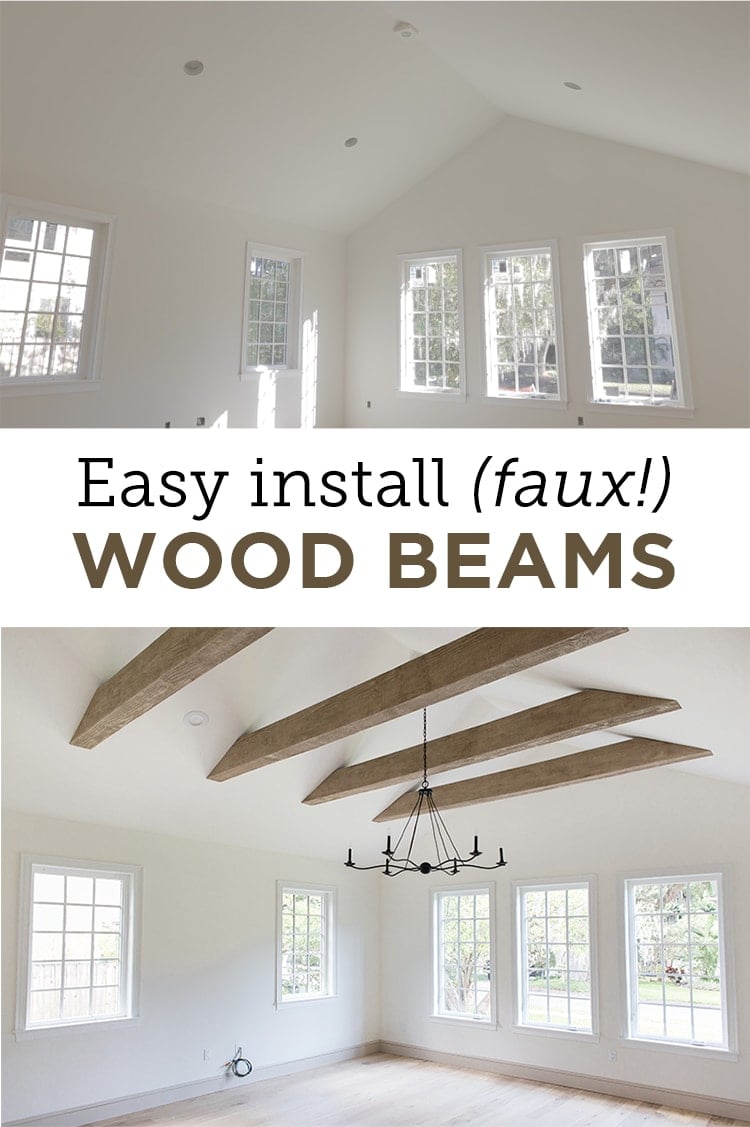
Another project that began months ago has finally come to an end—and what a beautiful ending it is!
Watch below to see the Before, After and install in action:
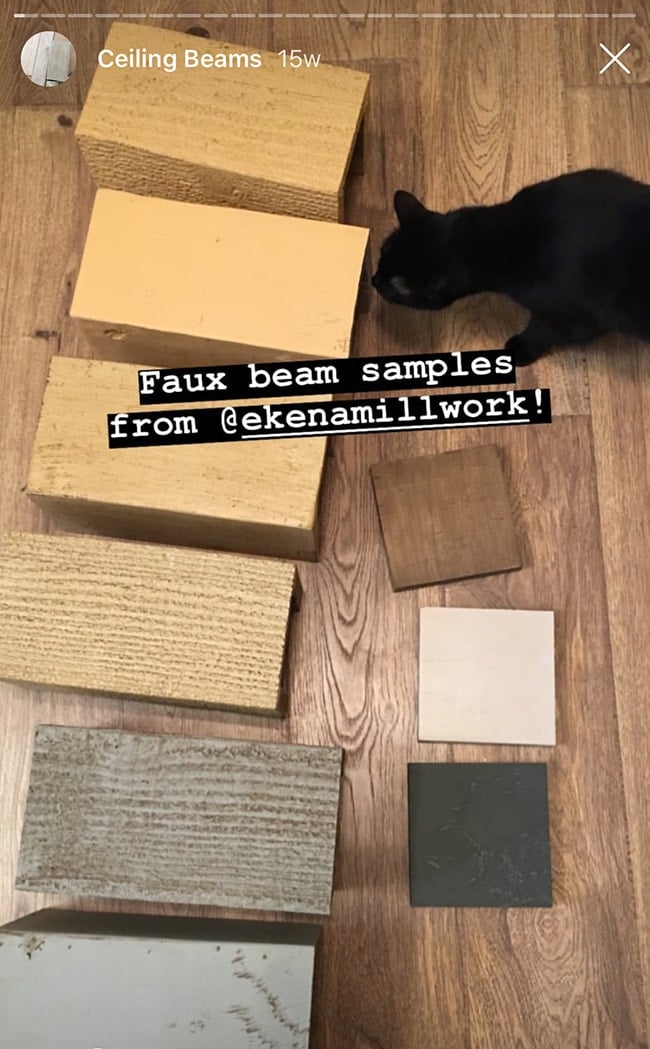
If you’ve been following my Insta stories, you may remember seeing my first post four months ago, the day I received my beam samples (does anyone else use Instagram as a timestamp for everything in the past…?)
But technically this project started long before, when we were planning the design of the Heights House. Vaulted ceilings with wood beams were one of those “must haves” on our list, and we opted to use them in both the living room and master bedroom.
I spent a lot of time researching our best options, and quickly decided faux beams were the way to go—they’re more affordable, more customizable, and significantly faster and easier to install. Plus, nowadays you can’t even tell the difference from real wood!
You may remember I DIY’ed my own wood beams in my California house five years ago, and even wrote a tutorial which ended up being one of my most repinned posts of all time.

Those were great and served their purpose, but I was not up for repeating the same DIY in this house for many reasons—one of which is that I planned to run the beams horizontally rather than following the angle of our vaulted ceiling. This also meant that the beams had to be super lightweight since they’d only be supported on the ends.
Recently I’ve been introduced to ultra light urethane moldings, and have used them in several of my projects (like our living room crown molding, wall mural trim, dining room ceiling trim, guest bedroom crown and front porch corbels).

The ease of install has been a huge selling point, and they tend to cost less than real wood alternatives. Ekena Millwork is the manufacturer that supplies these products to Lowe’s (among others), and I’ve had the chance to work directly with them on a few projects over the last several months. Their selection is huge and reaches far beyond urethane moldings (they also offer real wood, PVC and metal accents for interior & exterior). I was excited to learn that they just recently launched a line of faux wood beams, and even more excited when they invited me to test them out and share the results!
The first step was ordering samples (this is critical—don’t commit without seeing them in person first!) I wanted to make sure my bases were covered so I had Ekena send a wide variety.
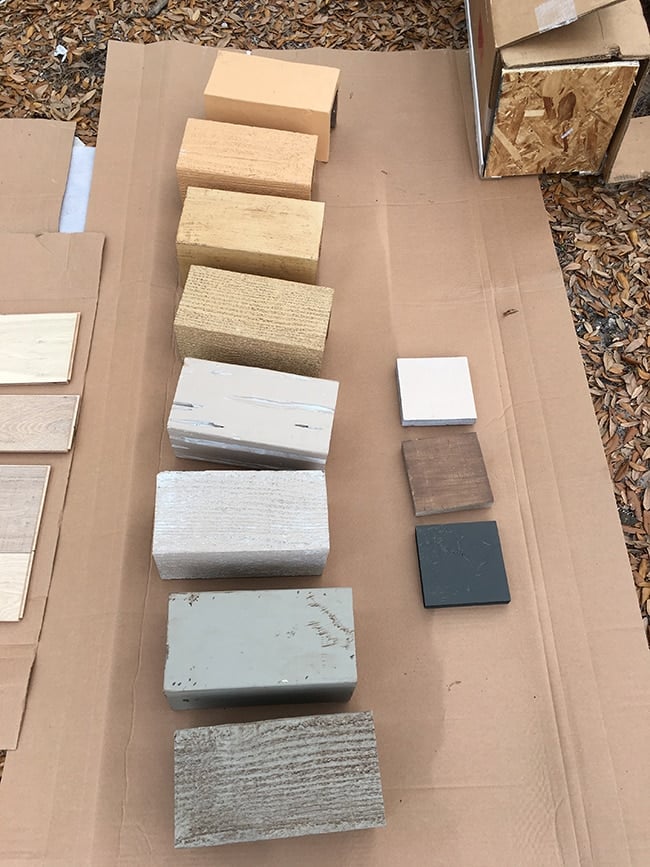
The goal was to end up with a similar look as our wood floors, for a cohesive look—I think it looks a lot more natural and ‘believable’ if ceiling beams flow with the primary wood tones in the room.
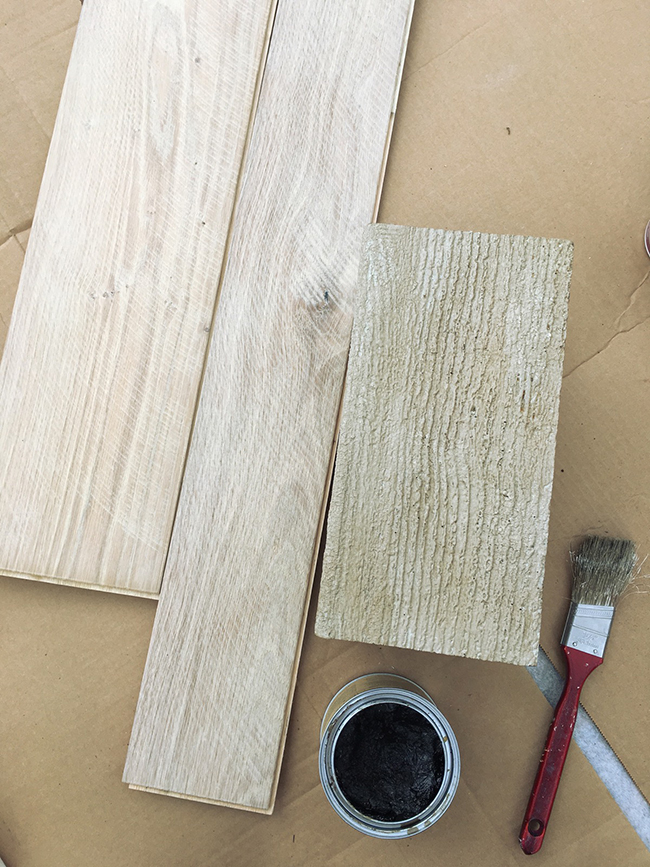
We had these french oak planks from Lowe’s installed months ago, and they’re gorgeous, but there is quite a bit of color and grain variation which makes them a tricky to match. Based on the online photos I thought the ‘unfinished’ option would be our best bet, but clearly it was way too orange for our floors!
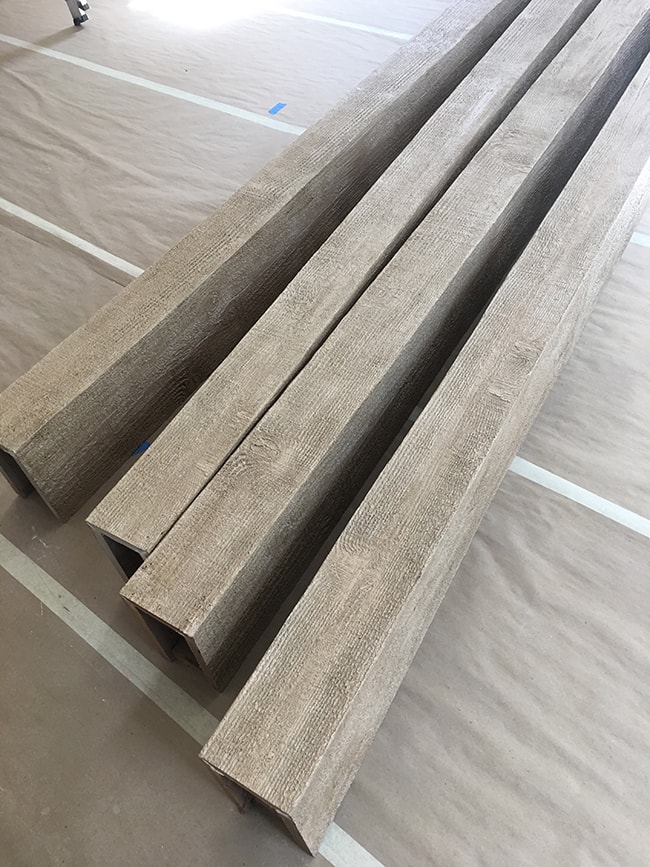
The small ‘whitewash’ sample next to it was a much better fit, but the finish was too smooth and didn’t have the grain I was looking for. Ekena sent out a second box of samples and there was a clear winner—the Rough Sawn texture in a whitewash finish:
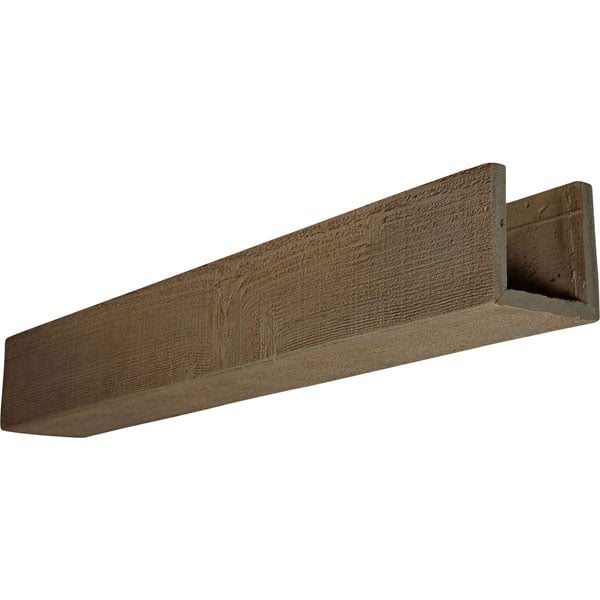
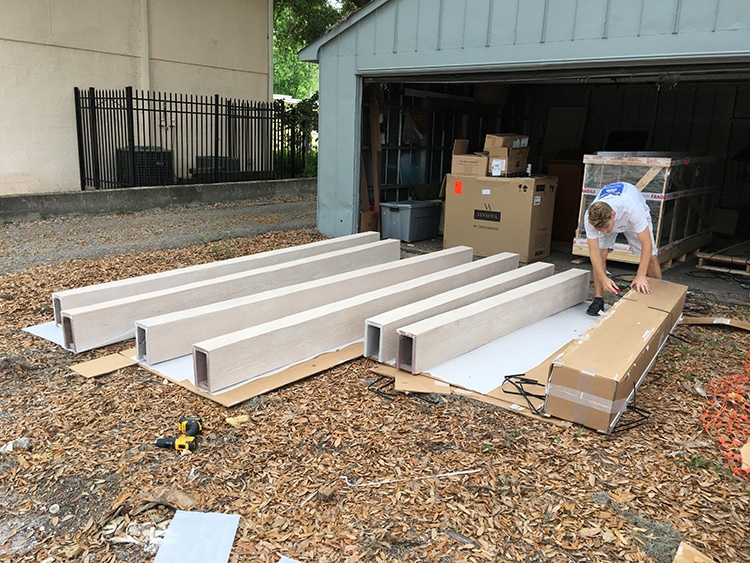
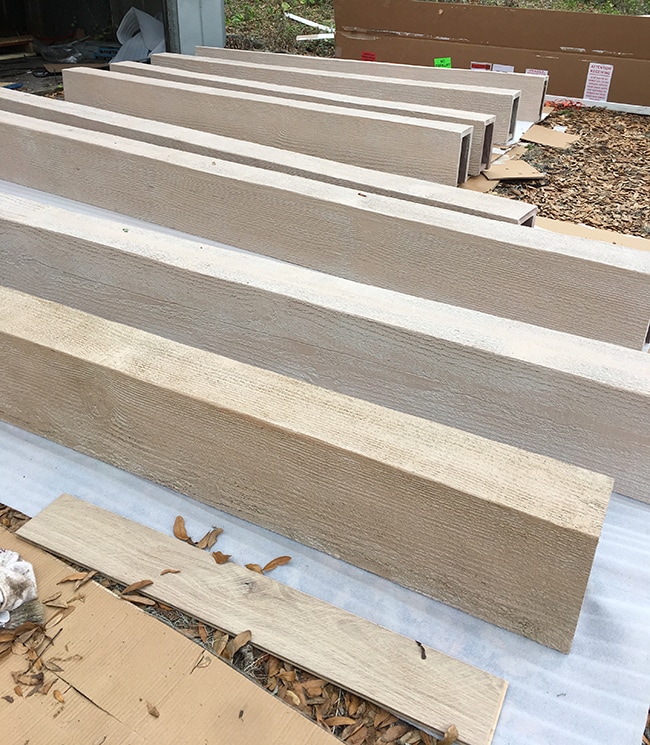
I ordered four beams for each room, in 8′ lengths for our master bedroom and 12′ for the living room. I wanted the beams to be substantial in the room, so I decided on 6″x10″ for the width/height. Since the tops of the beams wouldn’t be visible, 3-sided (U beams) were perfect. Here they are a few weeks later, fresh off the delivery truck!
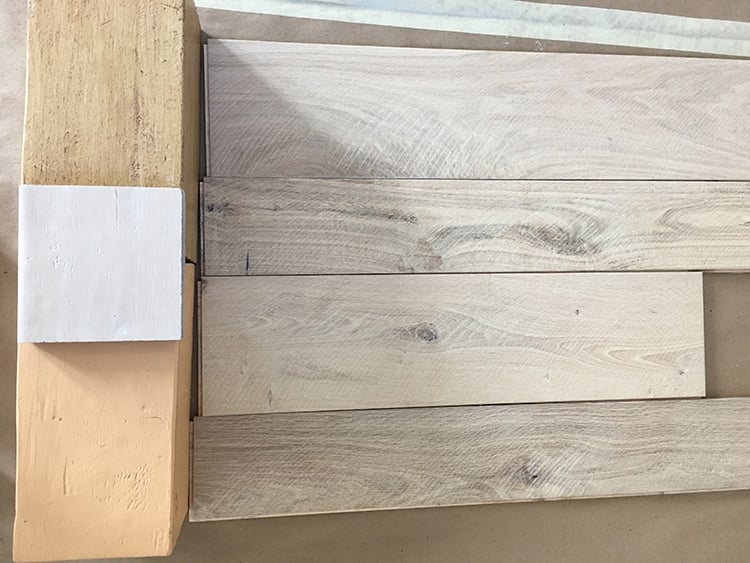
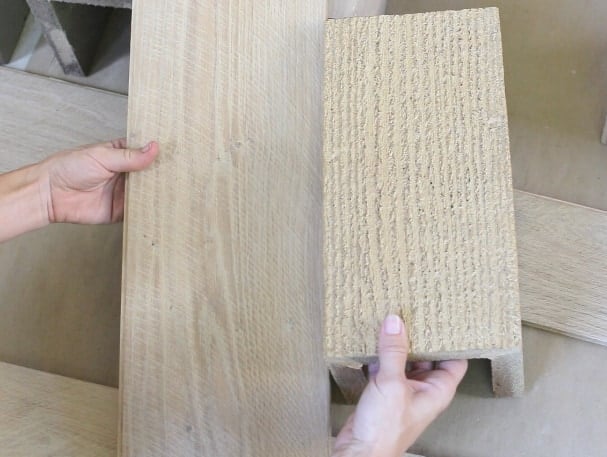
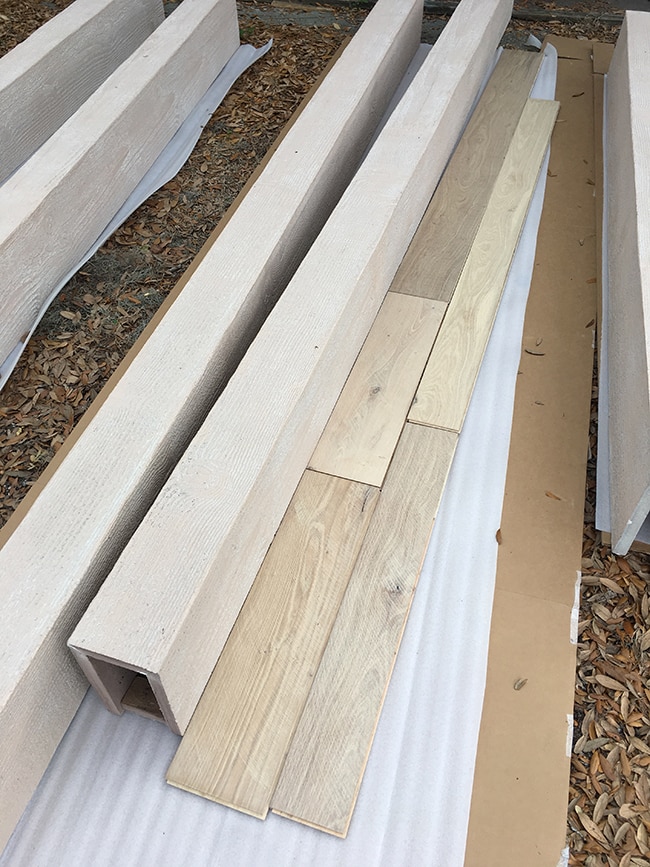
And here’s a full size beam next to some of the floor boards:
They weren’t an exact match, but I knew I could get them closer so I pulled out my arsenal of supplies…
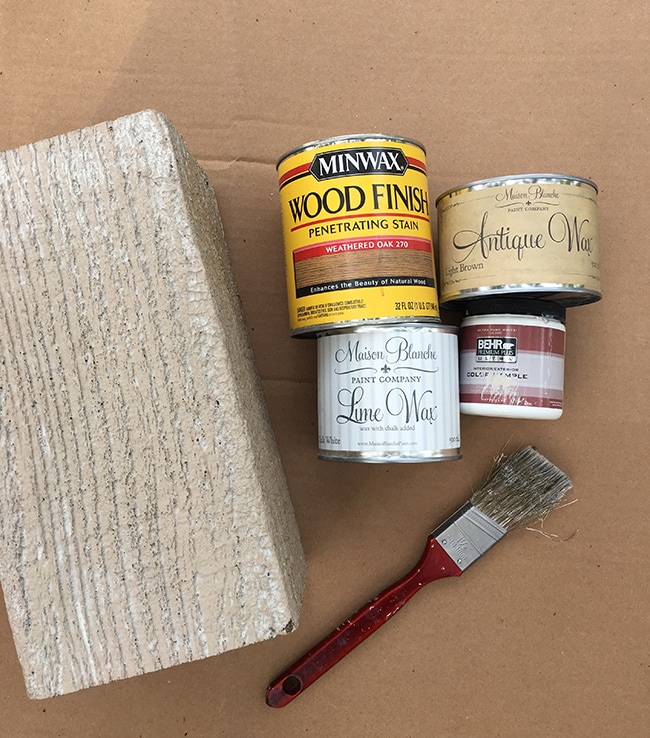
Waxes, stains and paints—I had no idea what would work, but it was a fun experiment. This is my kinda DIY!
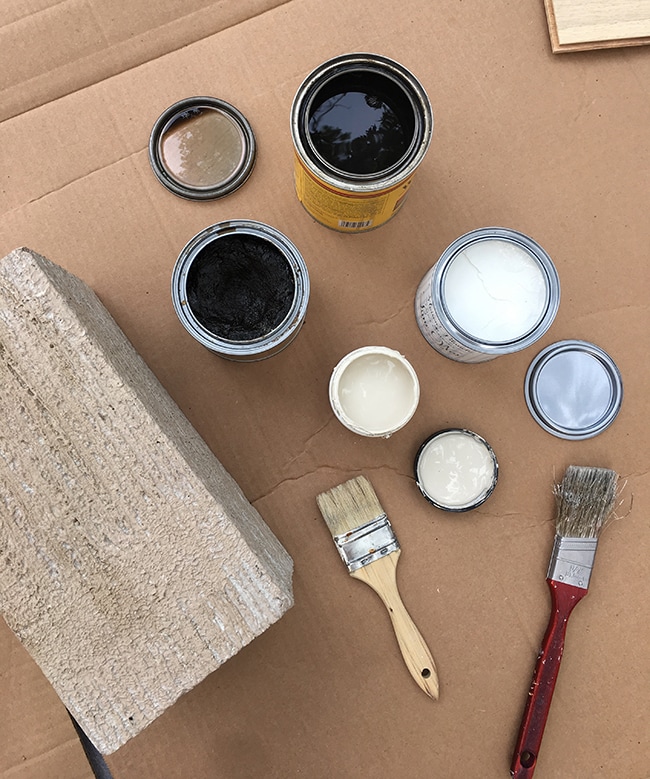
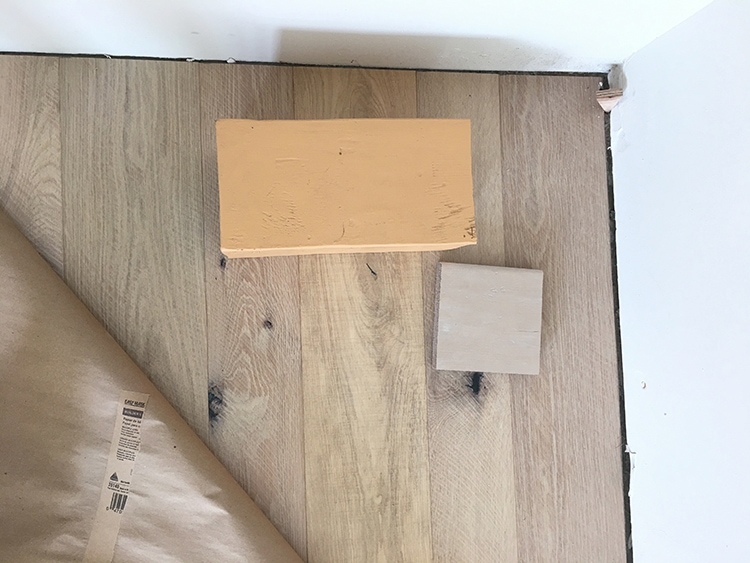
Fortunately it didn’t take long to figure out the secret sauce. I dipped my brush into my Maison Blanche light brown antique wax and began coating it…
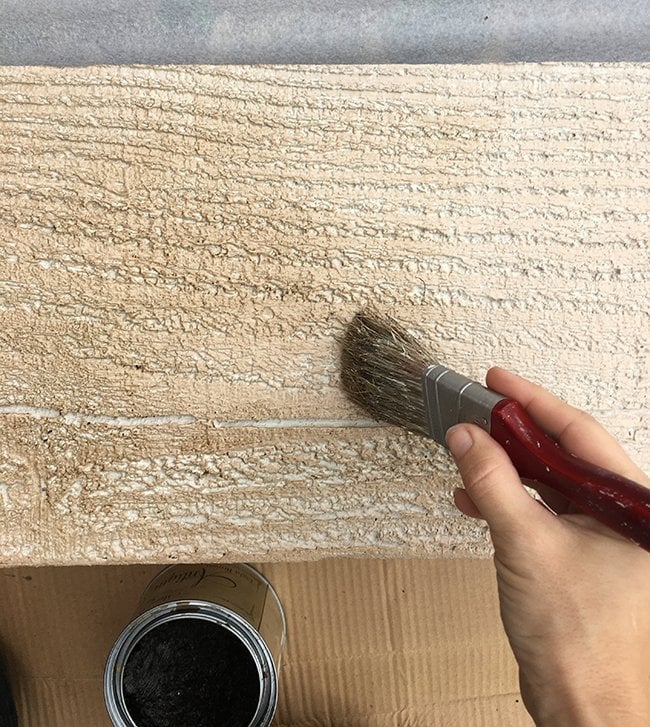
Now that was more like it!
Below you can see how it looks after the wax (top) and unwaxed (bottom).
It didn’t take long at all from there. I simply brushed it on, rubbing it into the grain, and any excess wiped off easily.
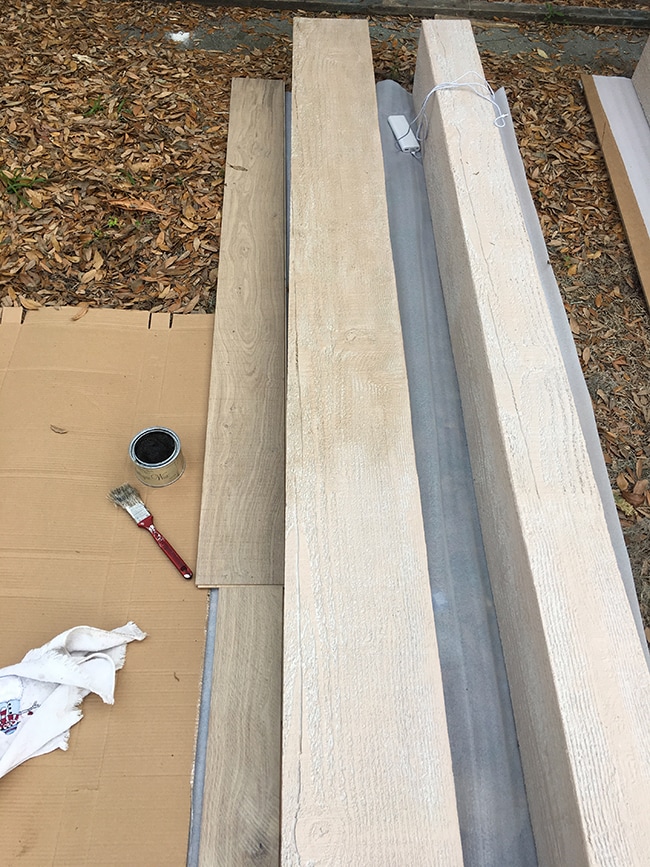
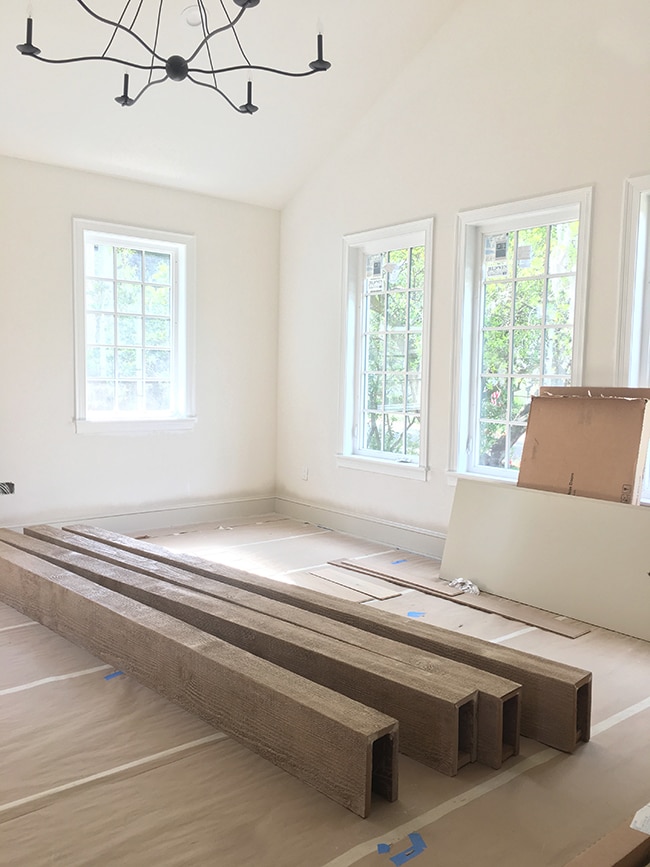
After the beams were waxed, they sat in the garage for a couple months while we waited for other projects to wrap up at the house.
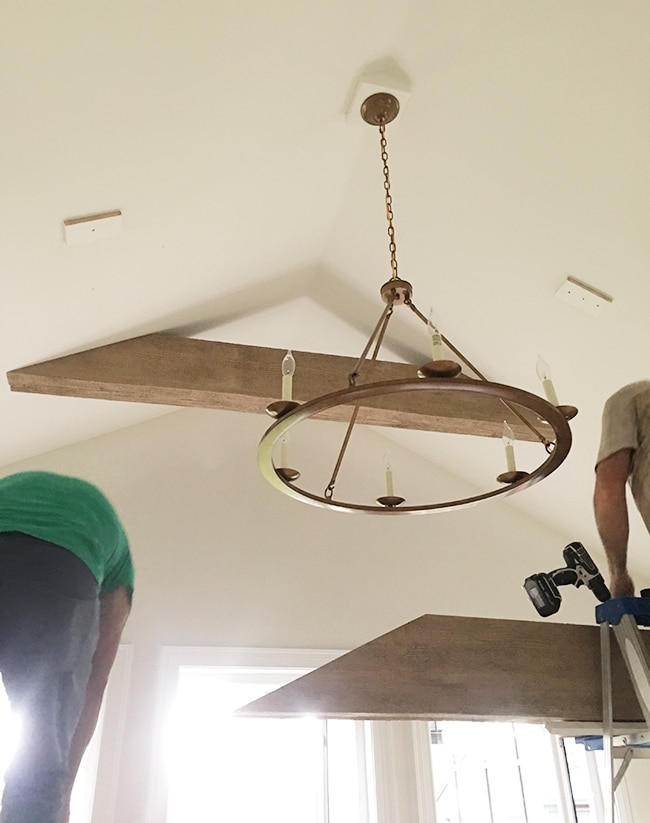
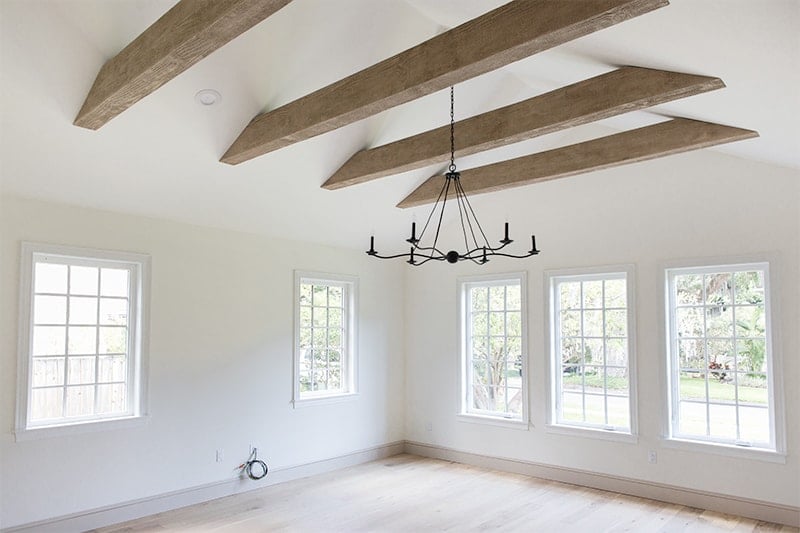
And here they are on install day!
This was definitely not a job for the two of us to tackle (can you imagine my pregnant belly balancing on the top of a 10 foot ladder trying to nail a beam in place?) so our builder enlisted the help of his best carpenter to make sure the job was done right.
First, the ceiling angle had to be calculated. This was done using a scrap piece of wood and a level.
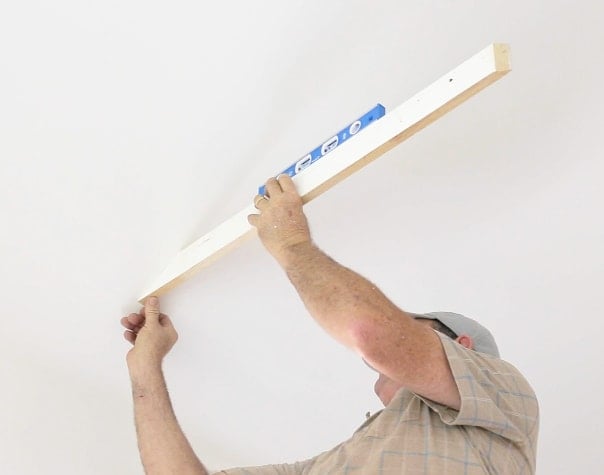
That same angle was traced onto the beam and cut off at each end with a circular saw (keeping the full 8′ and 12′ lengths).
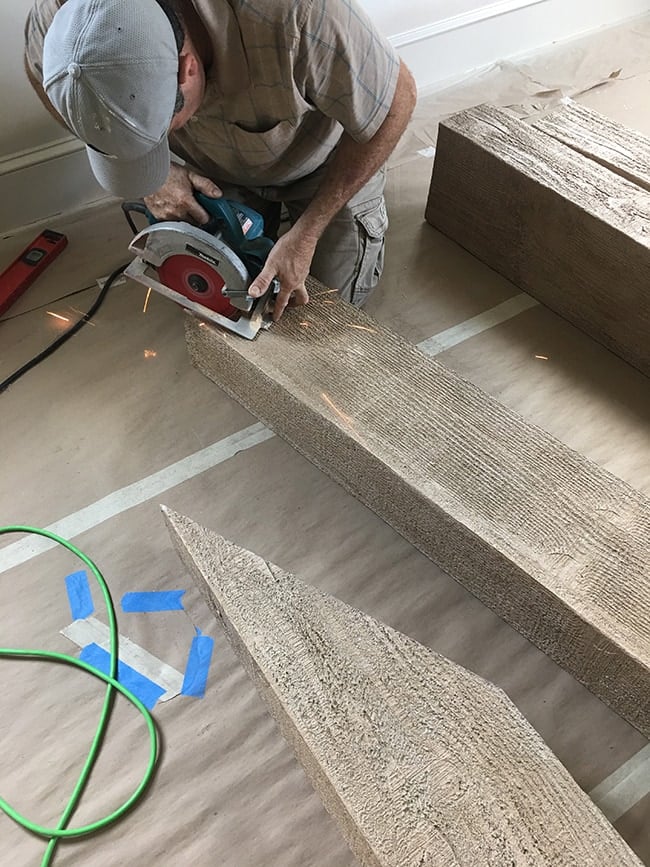
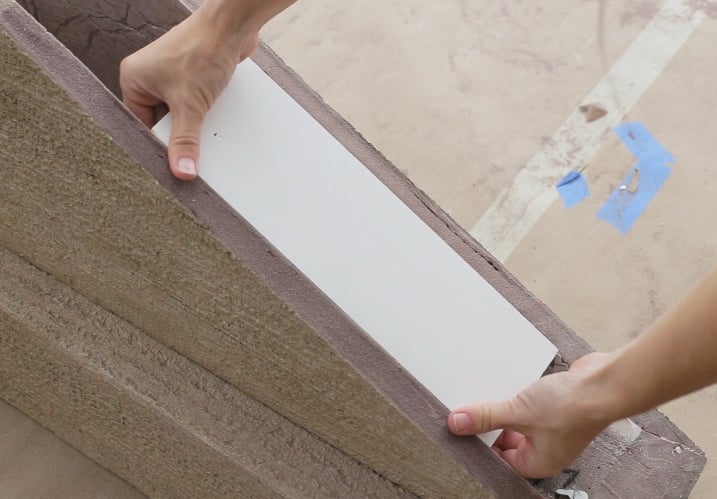
To attach them to the ceiling, we used 1×4″ scrap wood which fit snugly inside the hollow beam (a 2×4 would work just as well here).
Ideally these would be secured to the ceiling joists for maximum strength, but we weren’t landing on any studs so these heavy duty toggle bolt anchors were the way to go.

They hold up to 70lbs each in drywall, and each beam comes nowhere near close to that so we can sleep soundly at night.
Once the 1×4″ supports were in place, it was time to hoist her up!
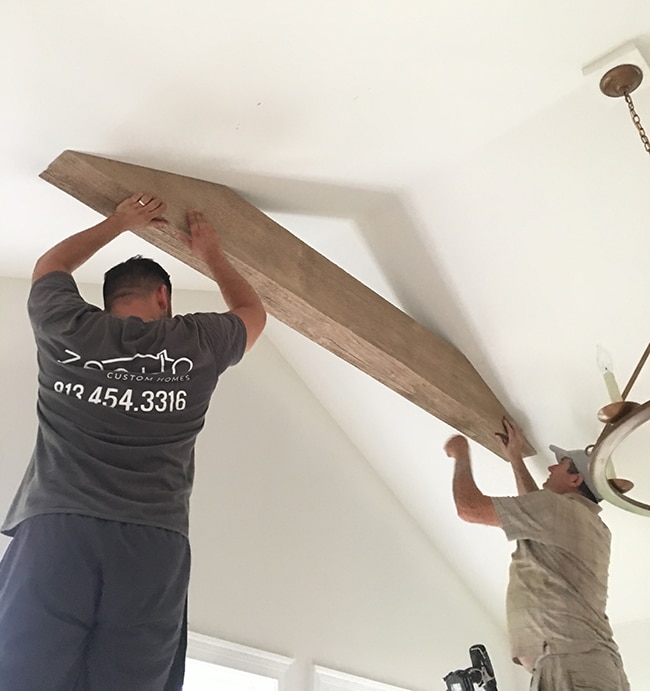
It stays put just from the snug fit around the blocks, and multiple finish nails on both sides were used to secure it.

Another view showing both supports…
And beam #2 going up…
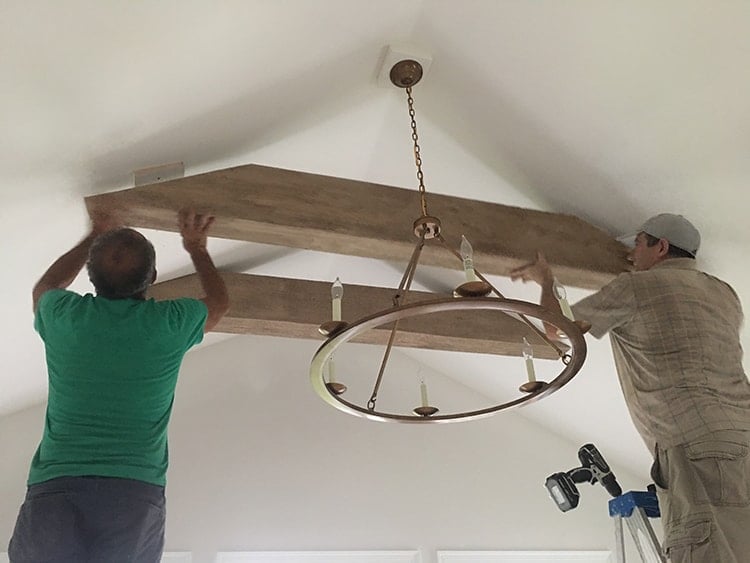
So fun to watch this all come together!
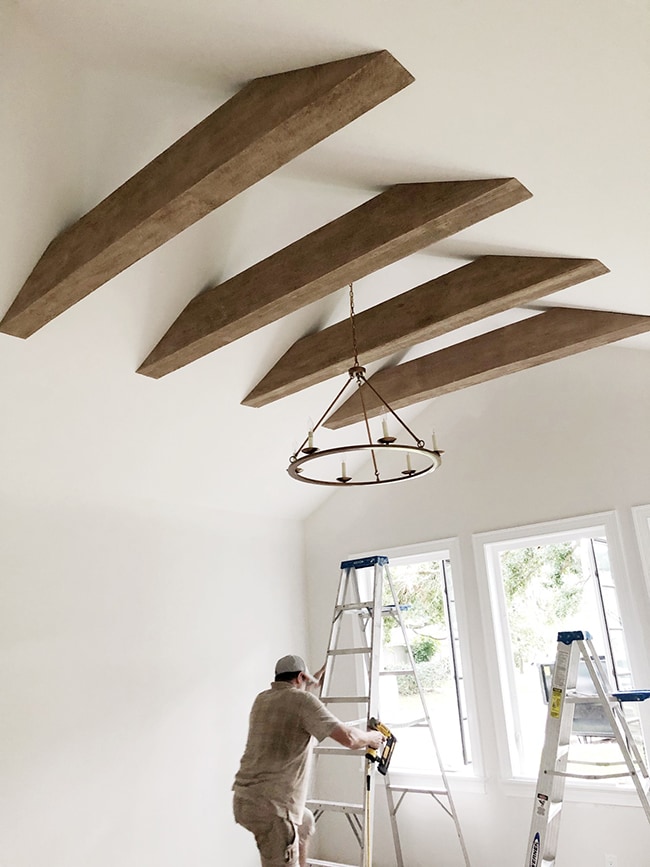
And here’s how they looked after install in the living room (ignore the poor lighting/phone quality):
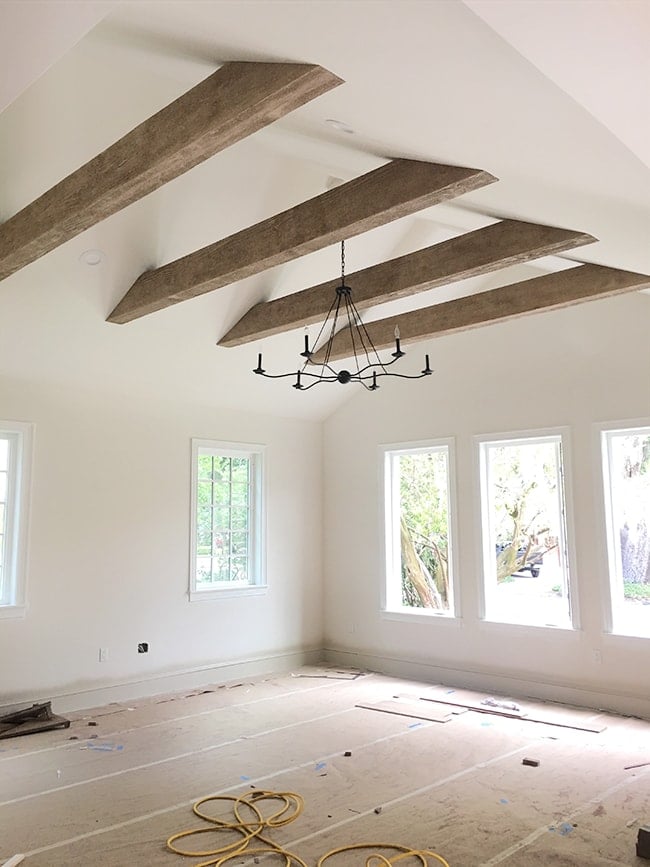
We spent our first night here a few days ago and love waking up to these views! We are slowly moving in (and still have a million projects to tackle over the next several years/months) but we finally got to uncover the floors…
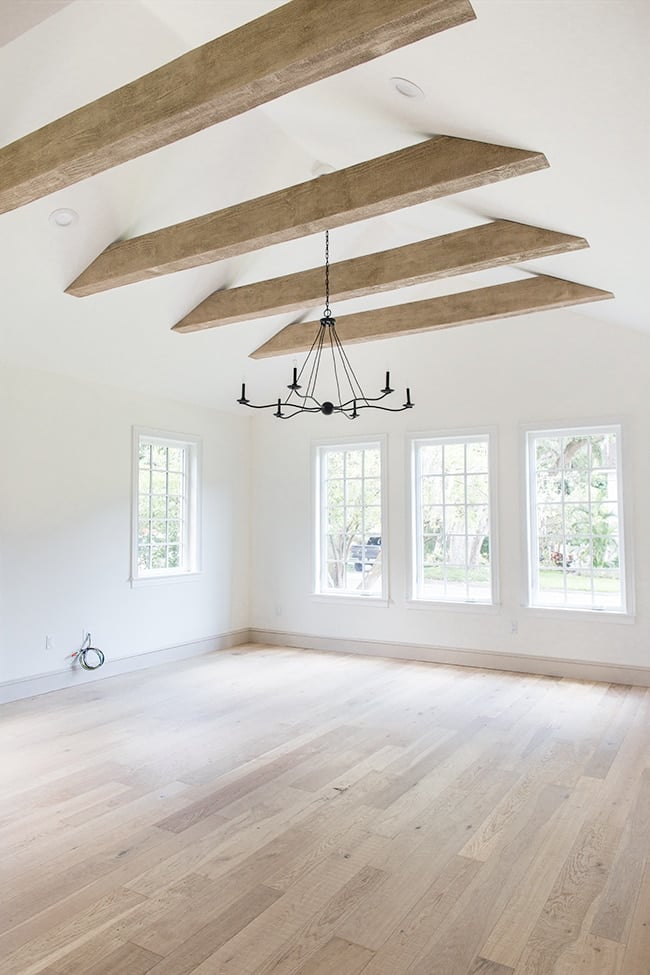
It’s impossible to capture the feeling through photos, but these beams make both rooms feel so much larger and grander.
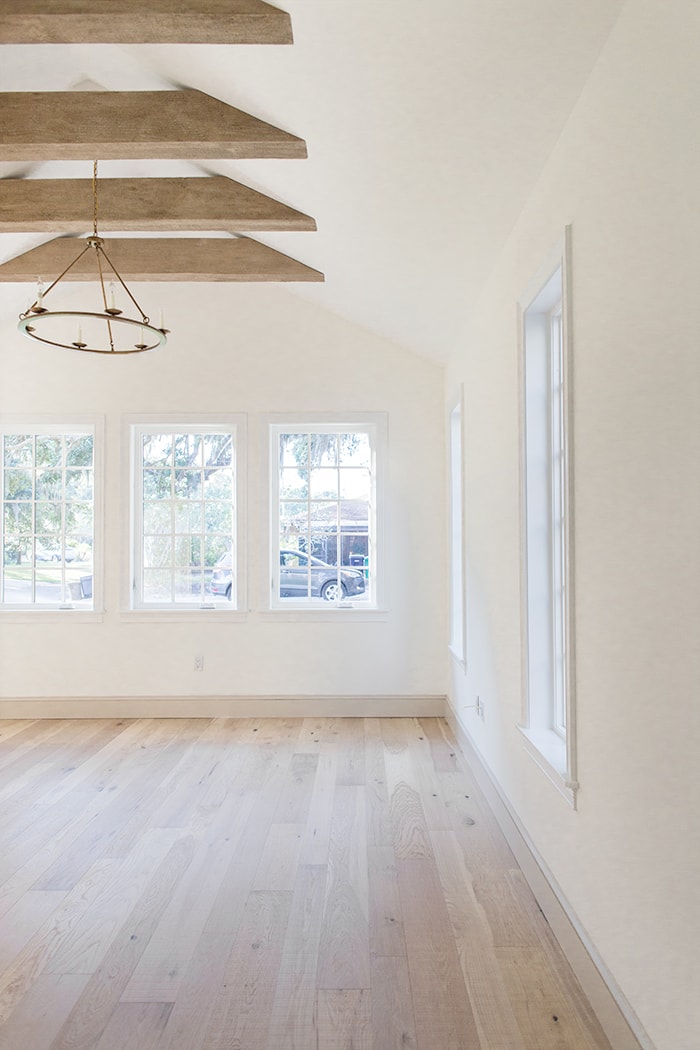
They also bring a warmth to the space, and give that classic European influence we’ve been trying to build into this house. FYI, you can find all the paint colors we used in this post.

A special thank you to Ekena Millwork for partnering with me on this project and providing a great alternative to real wood beams, that is feasible for anyone to install in their home! If you guys are thinking about adding beams to your own home (or any other architectural moldings/millwork) I highly encourage you to check them out and give them a call/email with any questions. They’re super helpful and will be glad to help you out!
And of course, leave a comment below (or find me on Instagram and Facebook) with any questions about this project and I’ll be happy to answer as well. Make sure to watch the video posted above all about today’s project for more.
Next up—a bathroom and closet renovation at the Riverside Retreat!


Datha says
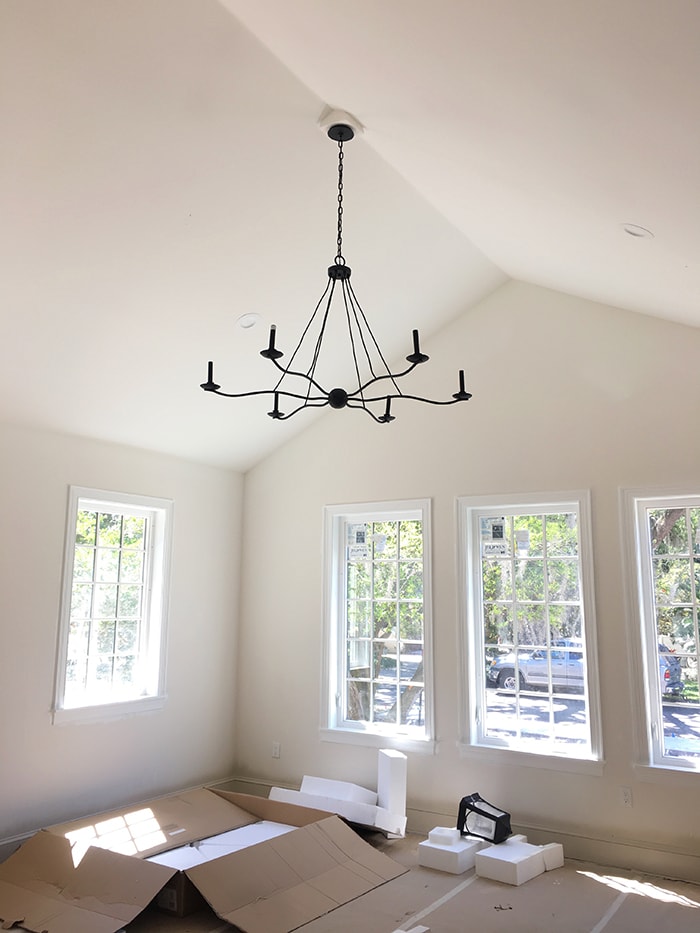
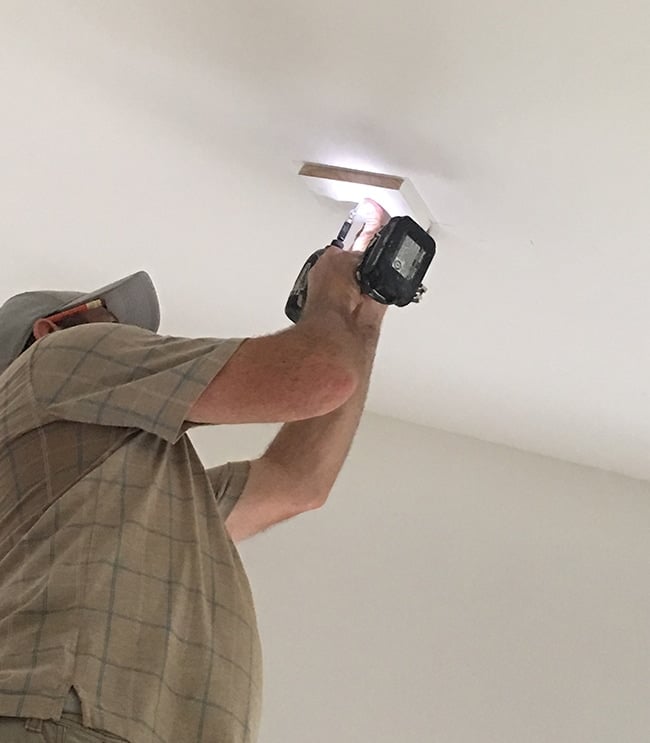
Hi there! Love this – might have to try this in my new bathroom. Could you share what the little triangle piece is holding in the chandelier? My contractor is struggling to figure out how to mount a chandelier flat on a vaulted ceiling. This is exactly what I had in mind.
Jenna Sue says
It’s just a 2×4′ square block they built in with the electrical housing and drywalled over it 🙂
Dawn says
Just beautiful! Would you be able to share cost details on the beams? What is the $ range for such a product? Thanks so much!
Sandy says
The beams look fabulous!
Vickie Barrett says
Would you share the source of the black chandelier in the dining/living (?) room. Its gorgeous. Thanks.
Jenna Sue says
Here you go! https://bit.ly/2xOpAiQ
Linda Grubbs says
Love love love those beams!?
Michelle says
Beautiful , beautiful !! The beams add so much texture. You did an awesome job with the color !! This home is so full of character ! I can’t wait to see it all finished…in due time ! With a babe on the way you’ll be nesting soon !!
Judy says
Such a lovely space. Everything turned out so beautifully! Would you mind sharing the source of the chandelier?
Jenna Sue says
Here you go! https://bit.ly/2xOpAiQ