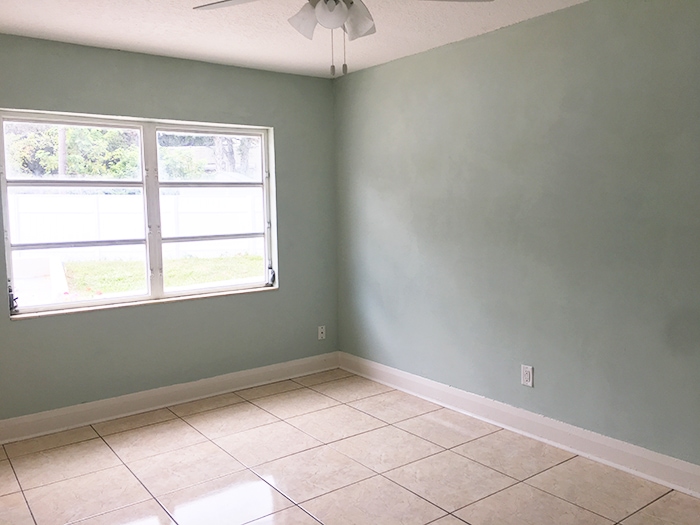
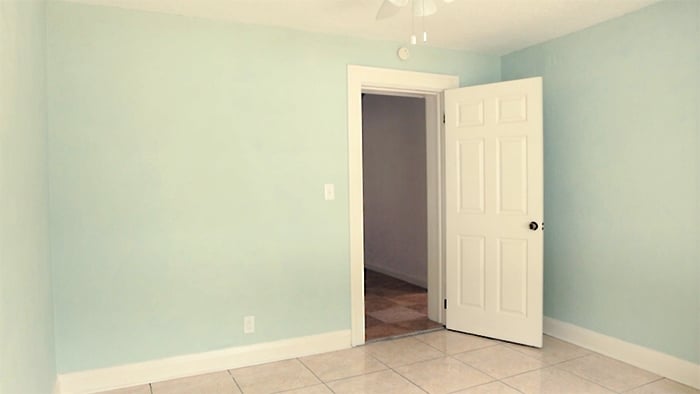
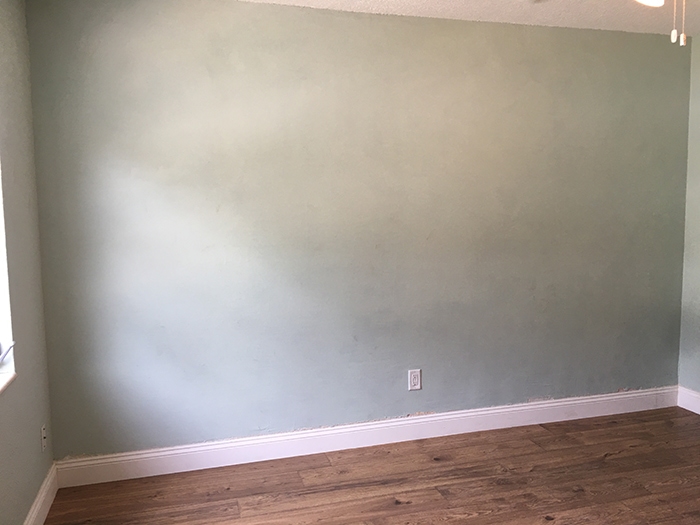
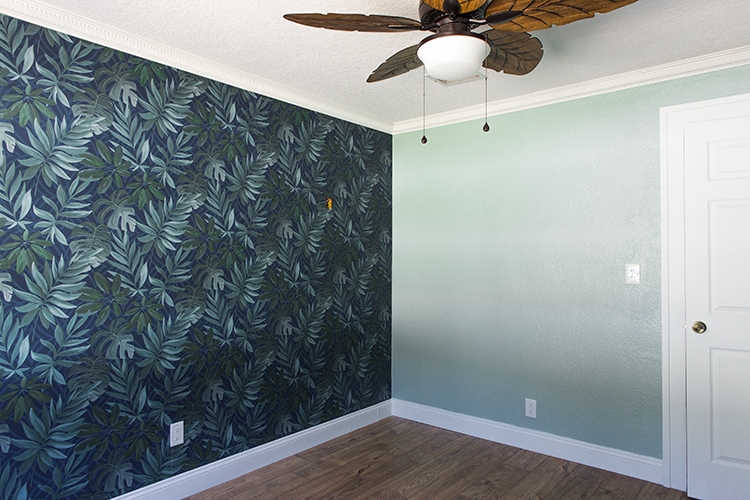
I get a lot of questions about where to begin when designing a room. There’s so many pieces that all need to work together, and it can be overwhelming—especially when you’re starting with a blank slate! That was my situation with this small guest bedroom:

After years of trial and error, there’s a certain strategy I like to follow that seems to be the most successful. It’s the same process for every room whether it’s a bedroom, kitchen or even outdoor space, and it’s becoming second nature with more practice.

Today I’m going to walk you through Phase 1 of this design process, which focuses on the large surfaces—walls, floors, ceiling and architectural details. These are all very important components as they visually make up the largest part of the design, and should be well thought out in the planning stages.
It all starts with a single piece of inspiration—this can be anything from a color to a pattern, a piece of furniture, textile, fixture, etc. Fall in love with something and use that as the foundation to build your design. Let it be your guide to envision how you want the space to feel when you walk inside. Focus on the feeling first, and the design will follow.
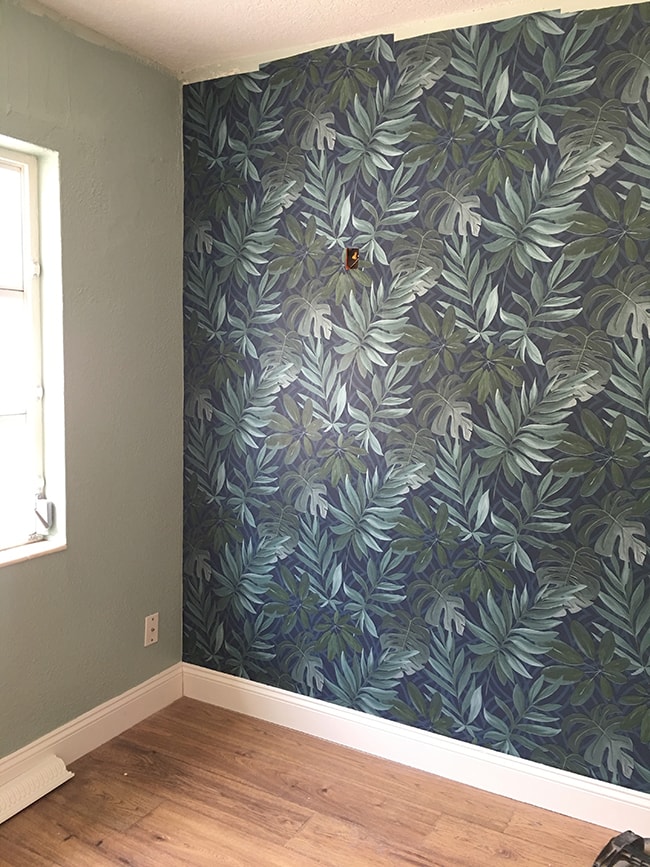
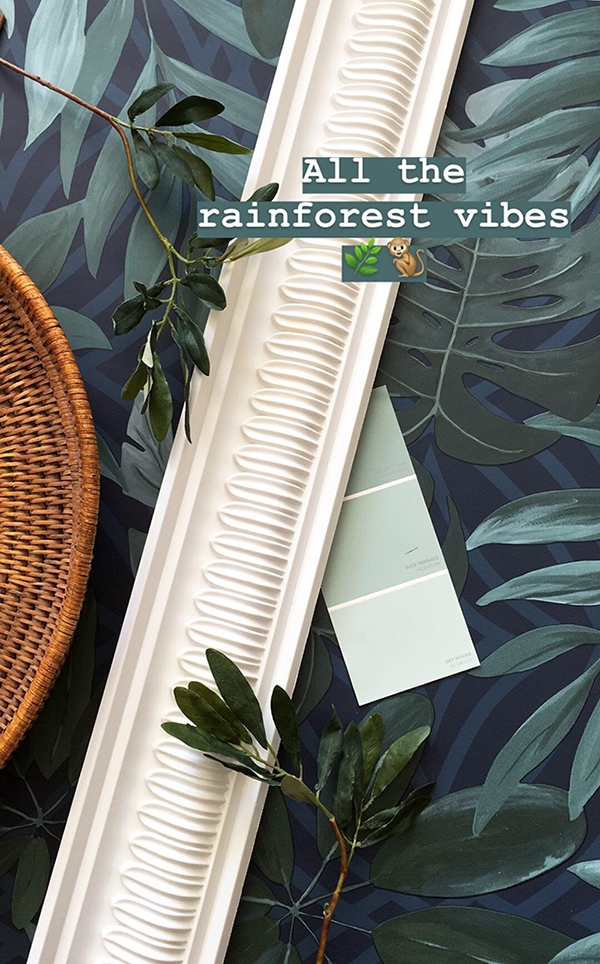
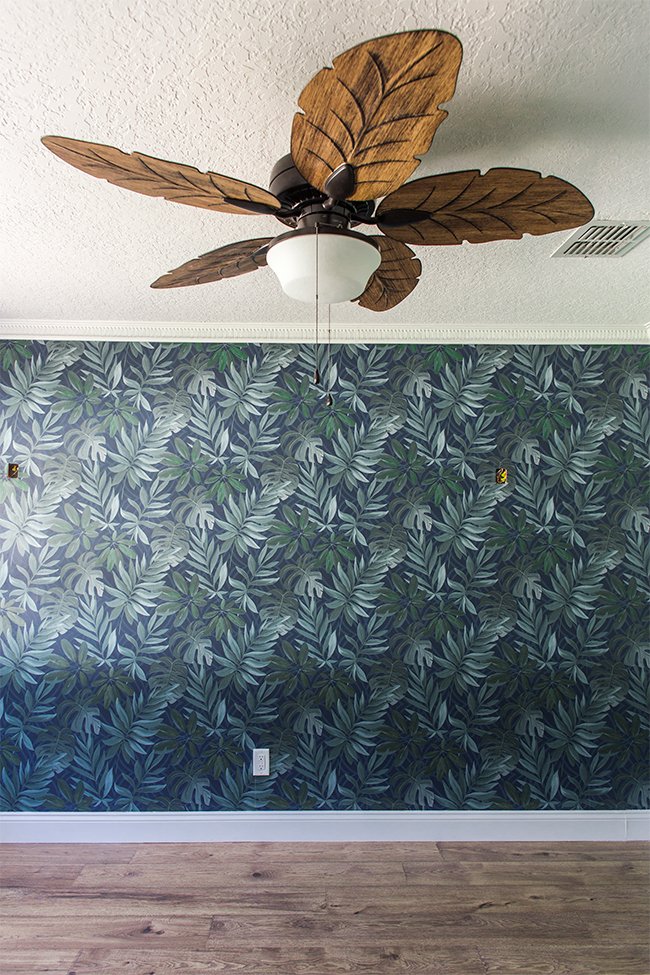
With this room, my inspiration was this eye-catching tropical wallpaper:

Since we’re renovating this house to use as a vacation rental, we’ve gotta go bold with the design (our new build will be much more traditional so I’m letting my creativity go wild in this house!) I spotted this wallpaper months ago and it instantly evoked the feeling of a youthful, tropical themed bedroom with twin beds and lush materials + colors. From there, I dreamed up our Rainforest Room:
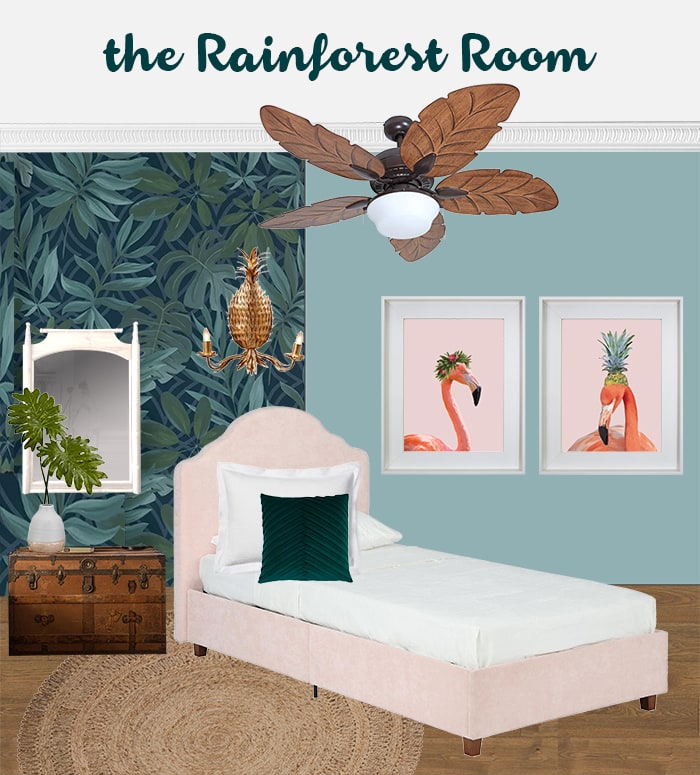
Can’t you just hear the birds chirping and monkeys howling? Maybe I should hide a speaker in there that plays jungle noises full time. Hmmm… now that would be an experience! But before we get too ahead of ourselves and talk about the furniture + accessories (Phase 2), we need to focus on the foundation of the room.
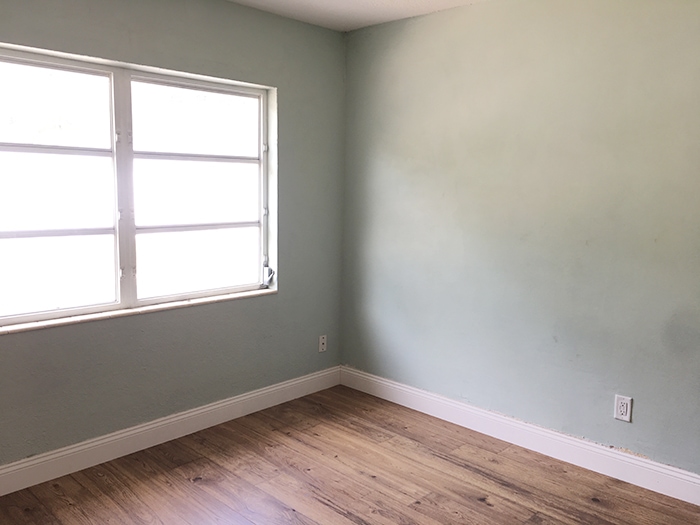
You may remember that we had Pergo laminate installed last month, so the ‘flooring’ portion of Phase 1 was already taken care of. Warm wood floors go beautifully with pretty much any design, and it’ll give the space an earthy grounded element.
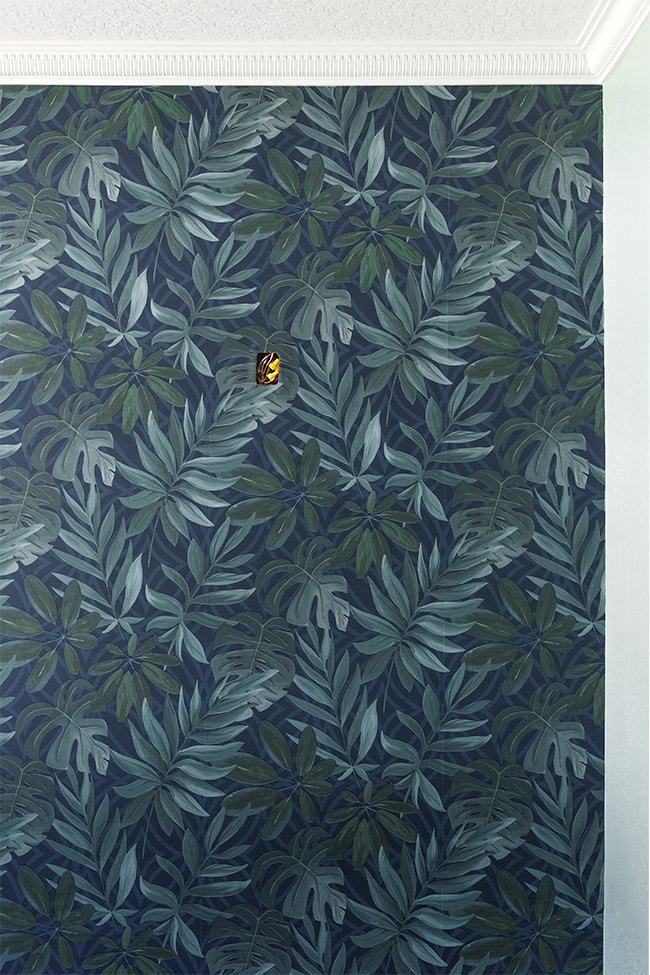
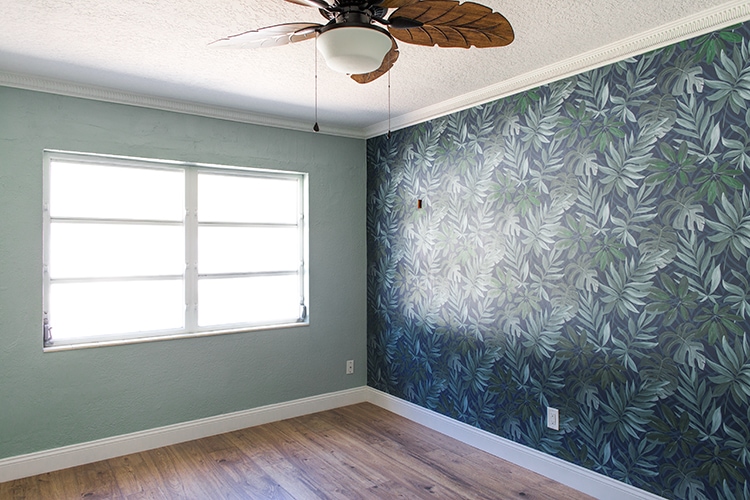
Since this wallpaper is so bold, I decided to use it on just one wall as to not overwhelm the small room. The focal wall of any bedroom is where the headboards will go, so it made the most sense to direct the attention there.
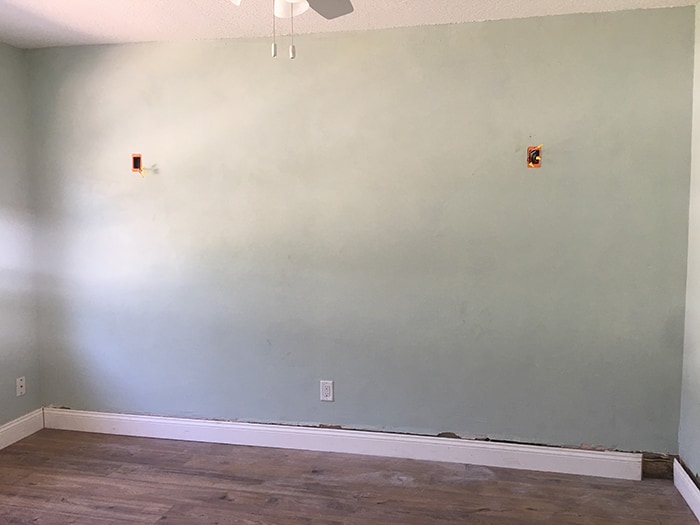
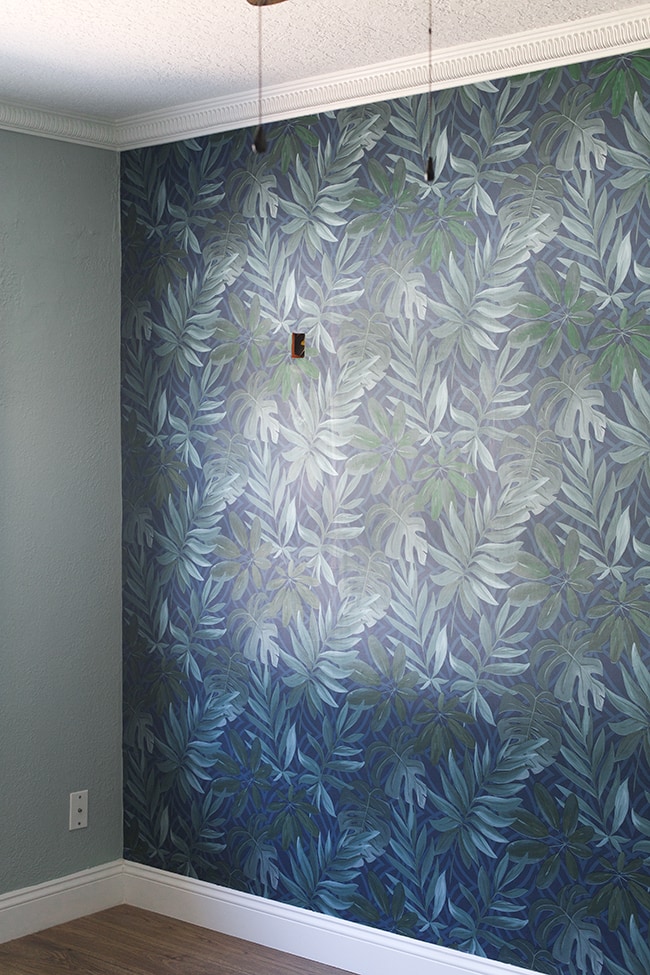
Before tackling that wall though, we had to plan out our lighting situation. You always want multiple light sources in every room, whether that’s overhead lighting, natural light, recessed lights, sconces or lamps. This room has a nice large window but only one overhead light, so we decided to add two wall sconces on for a little extra ambiance. We’ll have two matching twin beds with a sconce centered above each:
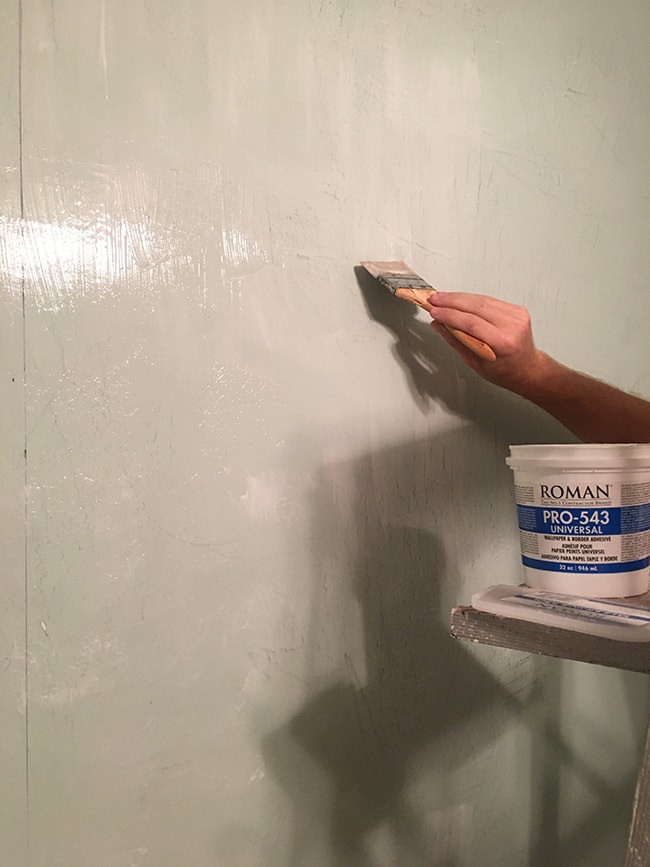
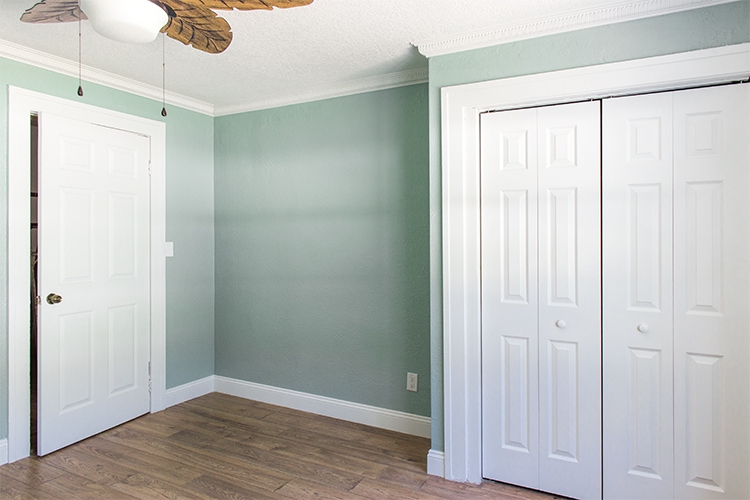
With the electricians job done, it was time to decide on a paint color for the walls. One of my favorite design tips to make spaces feel cohesive is to pull a color directly from a pattern in the room. I wanted the wallpaper to stand out but still blend in with the rest of the walls, so I selected a handful of paint swatches from the HGTV Home by Sherwin Williams line at Lowe’s that matched to a color in the wallpaper (I brought the wallpaper into Lowe’s so I could hold the paint swatches up to it):
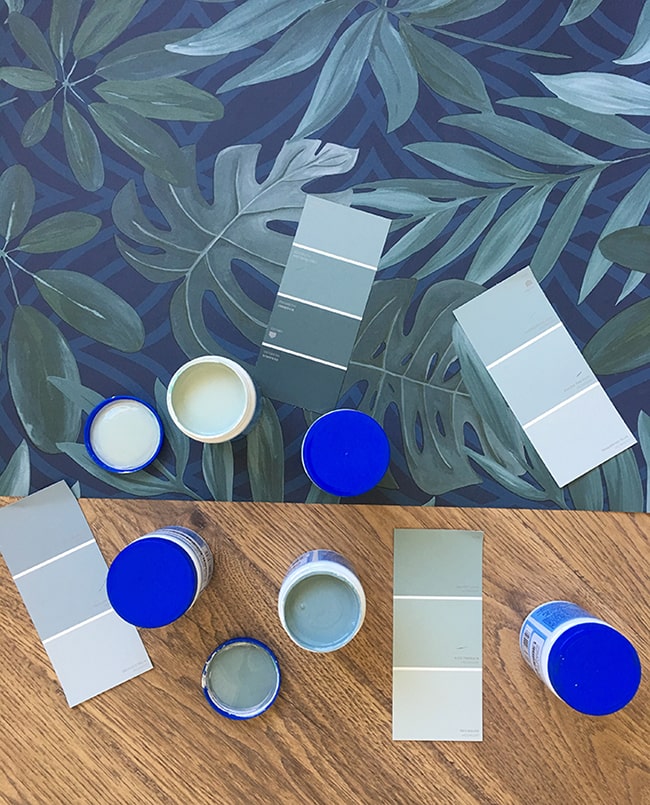
I wasn’t quite sure if I wanted a blue or green tone, so I selected 5 different shades in a range of tones.

From top to bottom: Tree Swallow, Interesting Aqua, Racing the Rain, Falkland Blue, Rice Terrace. And here they are on the wall (same order):

I’ve preached this before and I’ll keep on preachin’ it forever—always get paint samples! It’s crazy how different those swatches look not only in the store, but on different walls in your home and at different times of day. Here’s the same shot with the light turned on. See how different the colors look?

Same time of day, different wall. The colors even look different just a few feet away.

This just proves that there is no one “right paint color”—many shades can work, because they’re all constantly changing anyway!
After getting the swatches on the wall, my bluest options looked purple so those were out. It was a tough call between the other three, but in the end, Rice Terrace (the bottom shade) won out.

The swatch looked green in the store, but in this room it ranges from light to mid-toned, teal to turquoise. I tried out Sherwin Williams higher end ‘Infinity‘ line, and it covered in a single coat.

I opted for an eggshell finish, only because kids rooms tend to be considered ‘high traffic’ with a higher potential of destruction, and this paint is scrubbable so I won’t have to worry about repainting! As a future vacation rental, durability and longevity is top priority.

I also repainted all of the trim & doors in HGTV Home by SW Pure White to match the rest of the house (also in an eggshell finish because it’s what I had at hand, but satin or semi-gloss is a better choice FYI). I went for an extra crisp white to balance out all of the dark tones and give the room that nice clean contrast.

One product I recently discovered is ceiling paint—have you heard of this? It’s a specially formulated paint that is spatter resistant, blocks stains and comes in a matte finish, which is ideal especially for textured ceilings like ours.
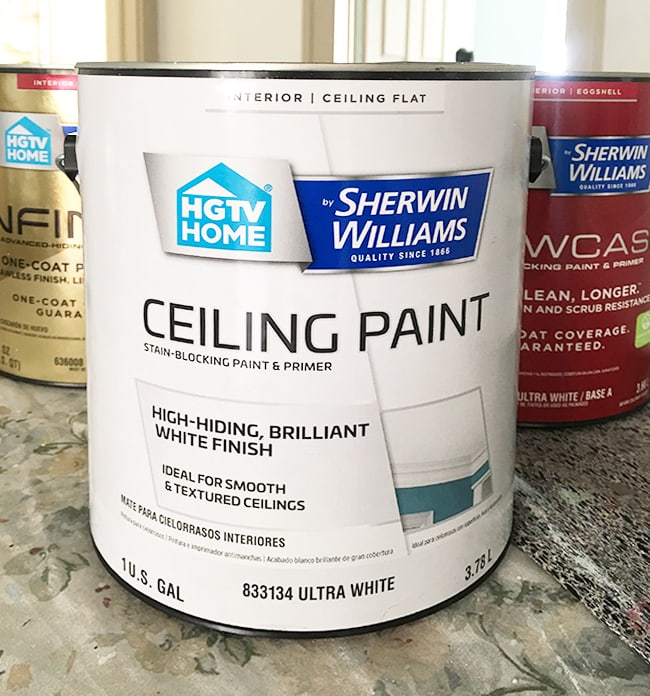
We had a few stains and this covered right over them. I plan to use this for all of the white ceilings in the house—it’s nice to have consistency and not worry about choosing the right shade of white and proper sheen.
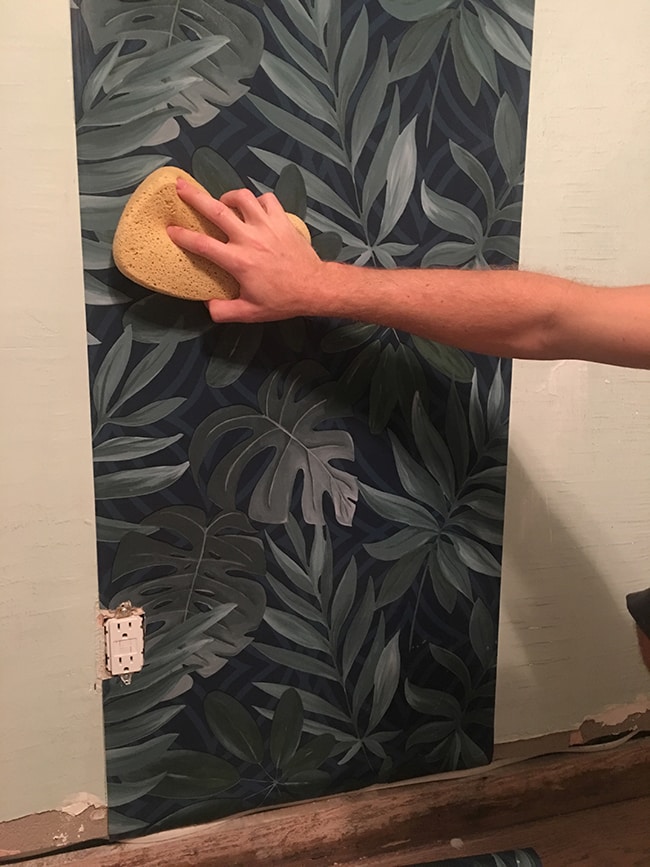
With all the painting done, it was time to install our wallpaper!
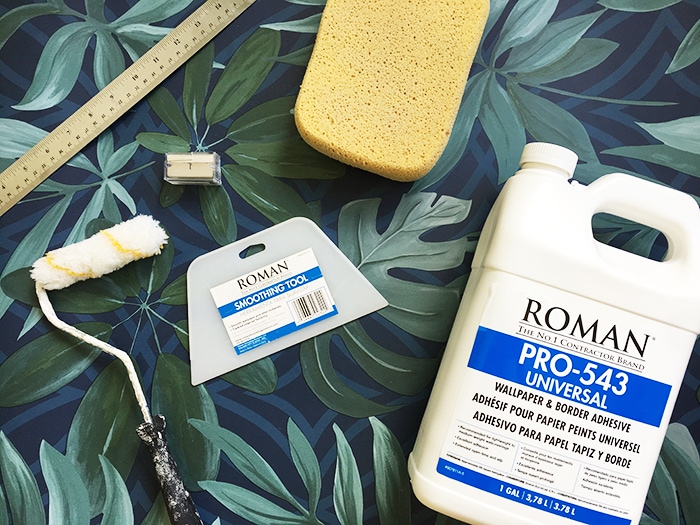
We used Brewster paper in our laundry room makeover so we were familiar with it and knew what to expect. It’s thinner than pre-pasted paper (at least the mural we used in our living room) which makes it a lot easier to cut, and it’s less messy because you can control how much adhesive is used.
Tip: the more you use, the more easily you can slide the paper into place—so use a lot! You can always sponge off the excess, but it’s hard to glue the edges back down after everything has dried. I’ve found that Roman adhesive is easy to work with and gets the job done.
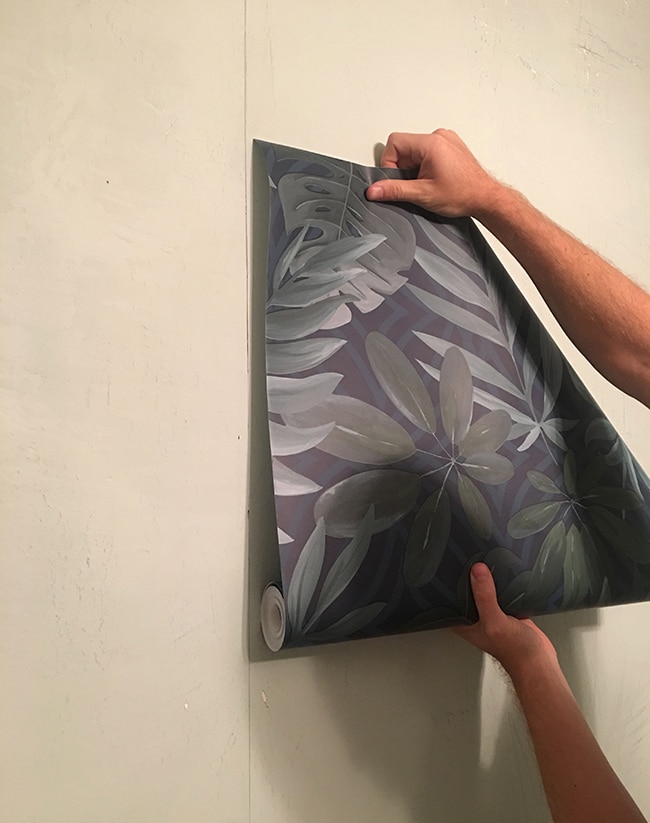
We started our first panel in the center of the wall, drawing a straight line with a laser level and working our way out from there. We knew we’d have to trim the paper along the edges of the wall no matter what, so we calculated an ideal starting point that left us with around 10″ of paper to trim on each edge.
Fortunately, we didn’t have to worry about making straight cuts at the top and bottom since we’d be covering that up with baseboard & crown.
Oh, and I should mention we got lucky because this is the only wall in the room that was (relatively) smooth—all the others were highly textured. We would have had to either cover the wall or skim coat it before installing the paper, since you’d be able to see the texture underneath. Whew, one less project!
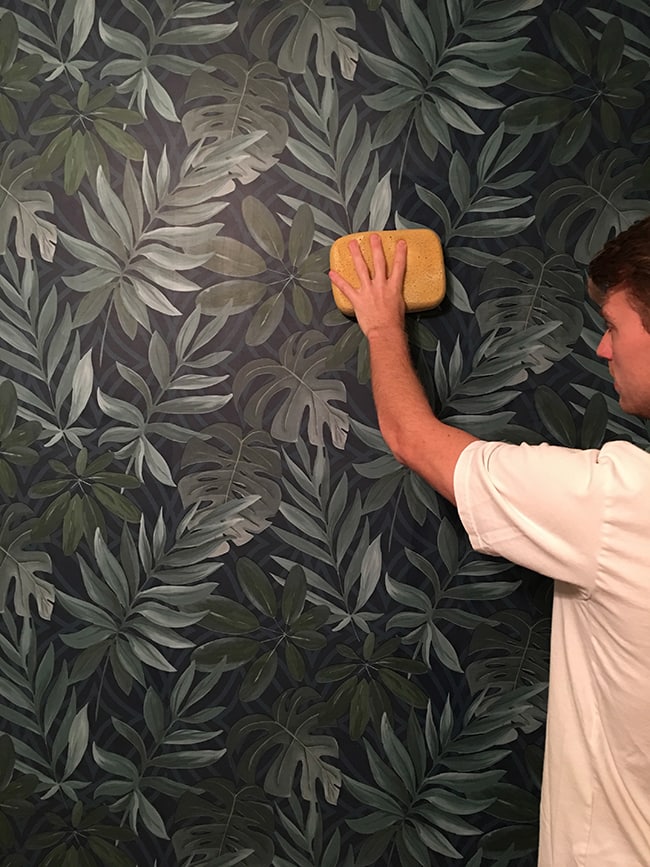
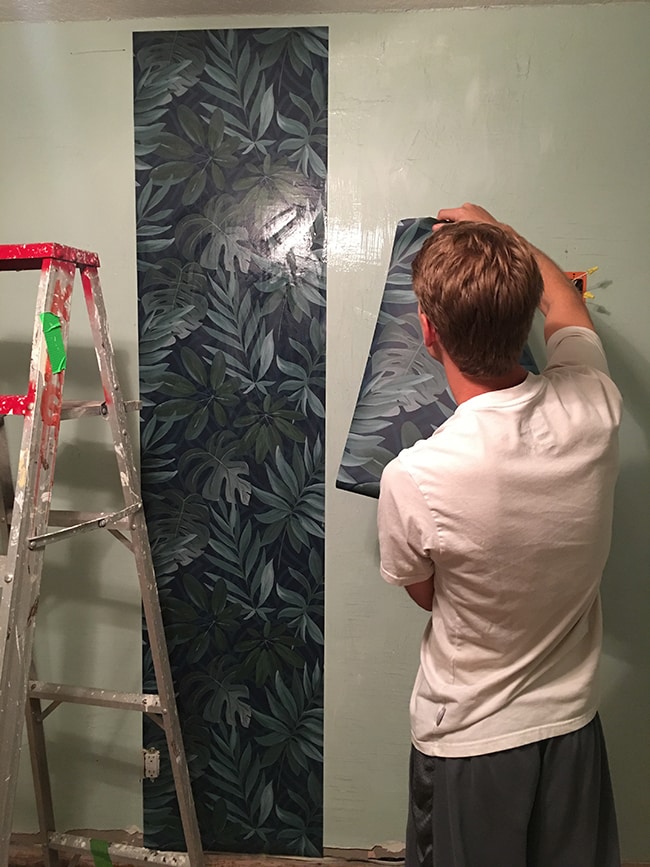
Oooh yeah… look at that dimension! Can you start to see my vision yet? ? It took us one evening (maybe 3-4 hours) to finish the wall, and to trim at the wall edges we used a straight edge and a sharp utility knife.
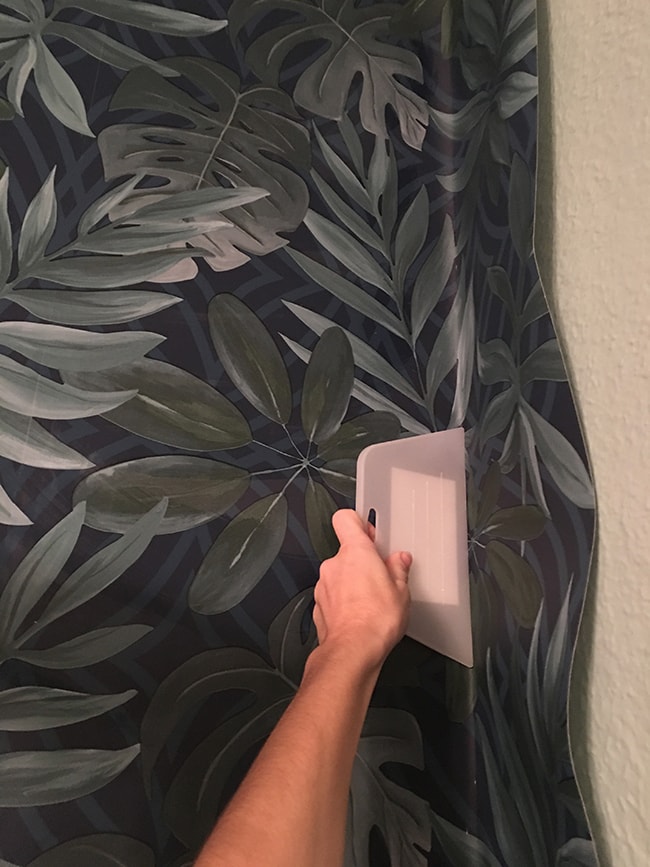
It turned out quite decent considering the bumpy walls made the corners uneven.

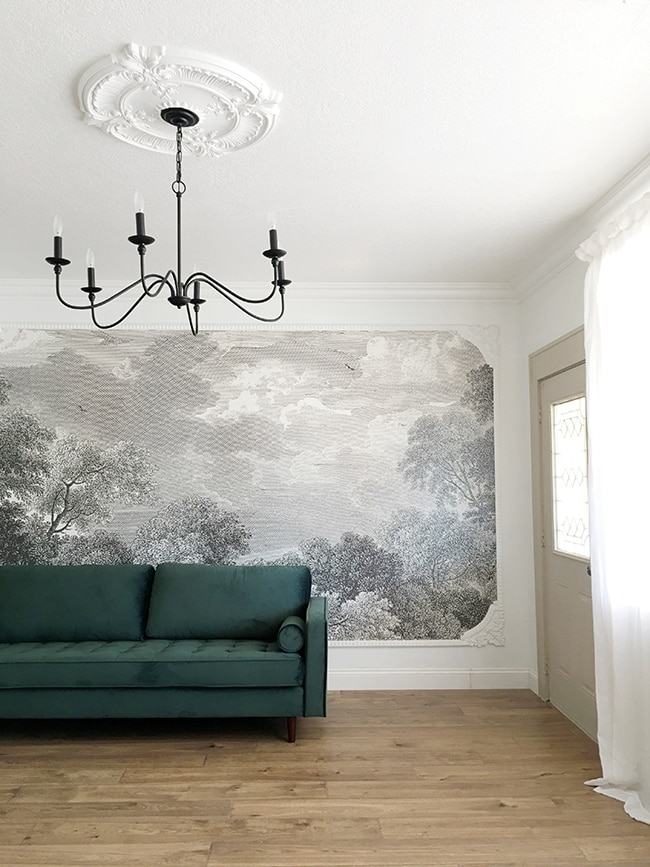
With all our surfaces covered, it was time for my favorite part—adding architectural detail! If you’ve been paying attention this year, you know how obsessed I am with finding ways to bring in unique architectural details. Like our framed wall mural and ceiling medallion in the living room…
I think of trim and molding as a necessary design element to make any room feel polished and complete. It’s like dotting your i’s and crossing your t’s. Bonus points if it has pretty detailing!
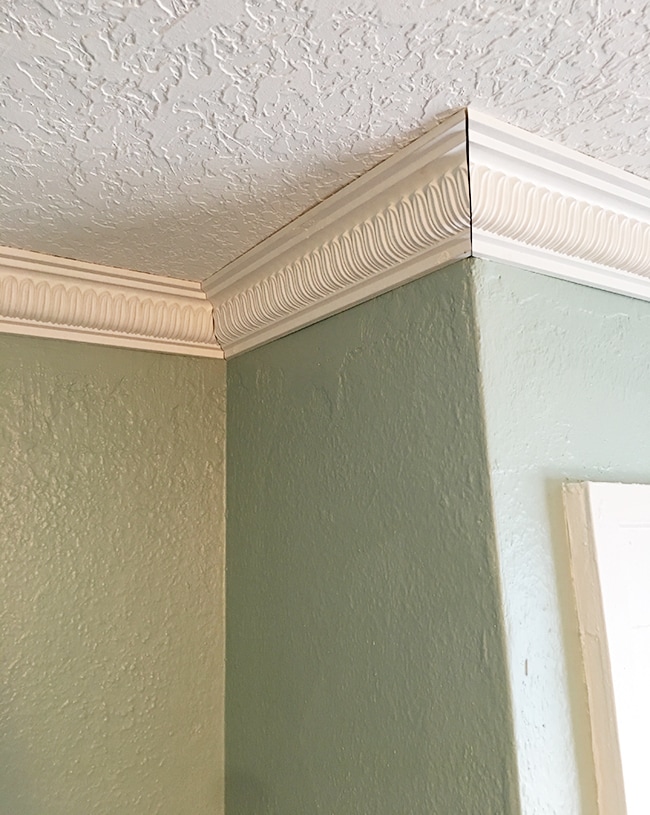
We already had new baseboard installed with our new floors, so now it was time to choose crown molding. I could have picked out any average crown molding, but I thought why not use this as an opportunity to do something unexpected?
Luckily, Lowe’s has a giant selection of fancy crown molding where you can get just about any design under the sun…
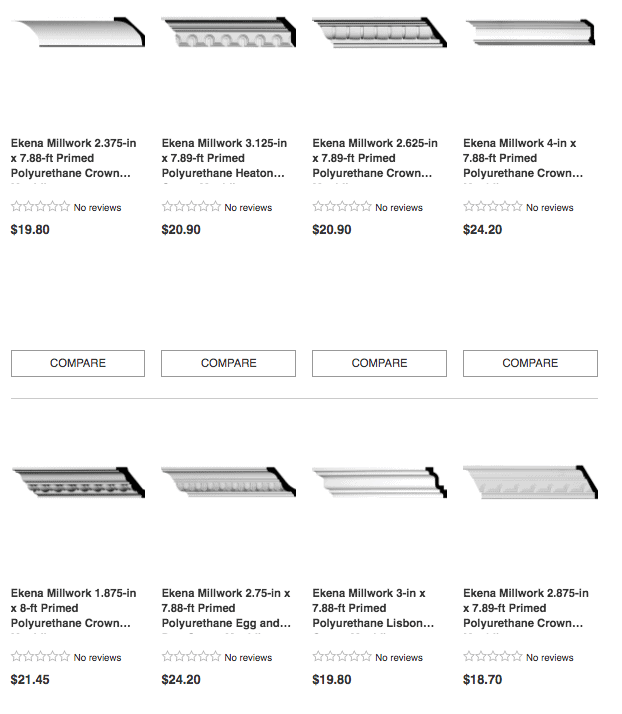
Ahh browsing for crown, I’ll take that over clothes shopping any day! Who’s with me?
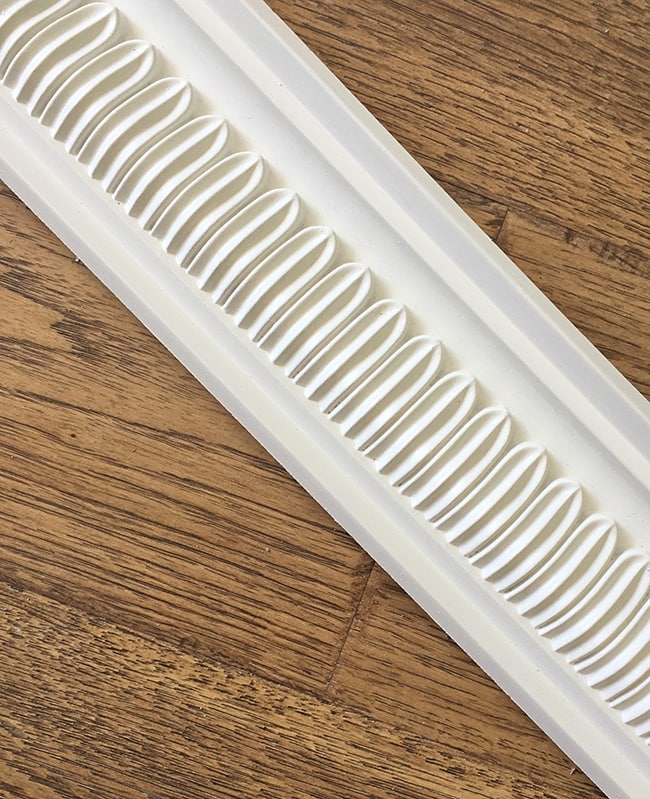
I knew I had found The One when I stumbled across this…
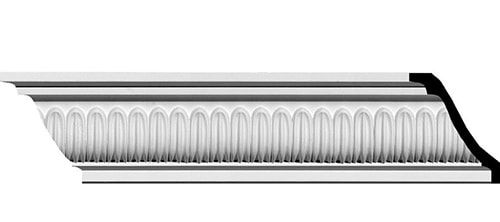
Doesn’t it remind you of leaves? That’s what I immediately thought of—it was meant to be.
This is the same manufacturer and lightweight poly molding we used for our living room crown, and we chose it again because it’s the easiest to work with. This time around I also ordered the Kreg crown guide after our contractor friend swore by it. Couldn’t hurt to try it!
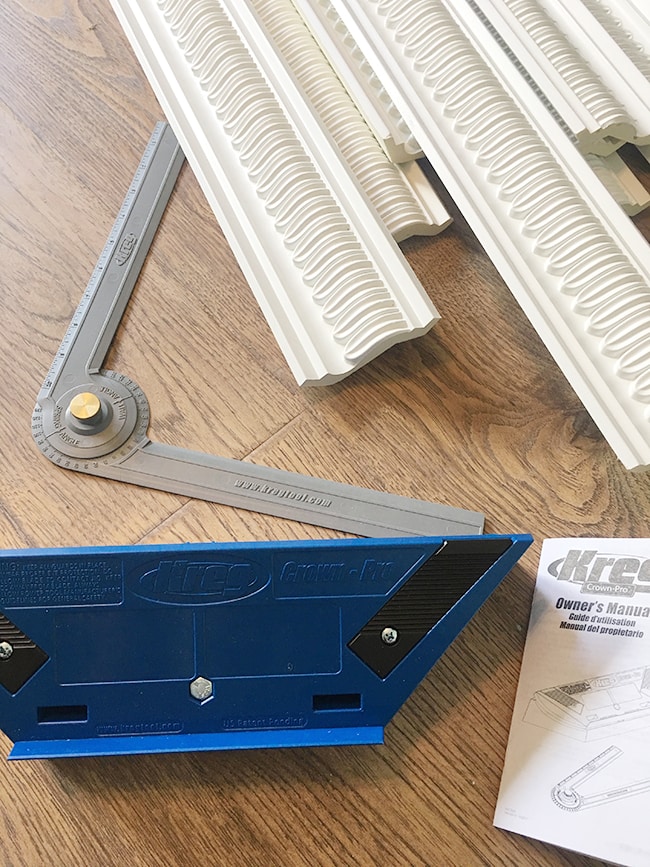
We made sure to paint the molding before cutting and installing it (this is very important, you do not want to tape off all of your walls and ceilings after the fact!) and got to work, following the instructions on our crown guide. Then we realized that our molding didn’t fit onto the guide since the back of it wasn’t flat—womp womp. However, we were still able to use the angle finder which made our lives much easier…
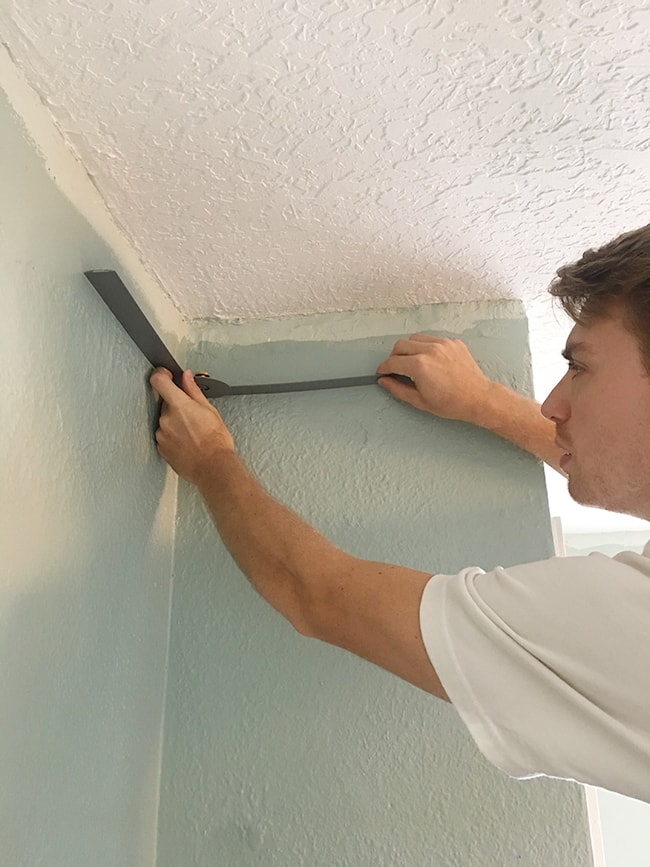
Almost all of our cuts fit together quite nicely (unlike our first living room attempt) and the great thing about this foam-like molding is that it has some flex to it, so it was forgiving with our highly uneven walls.
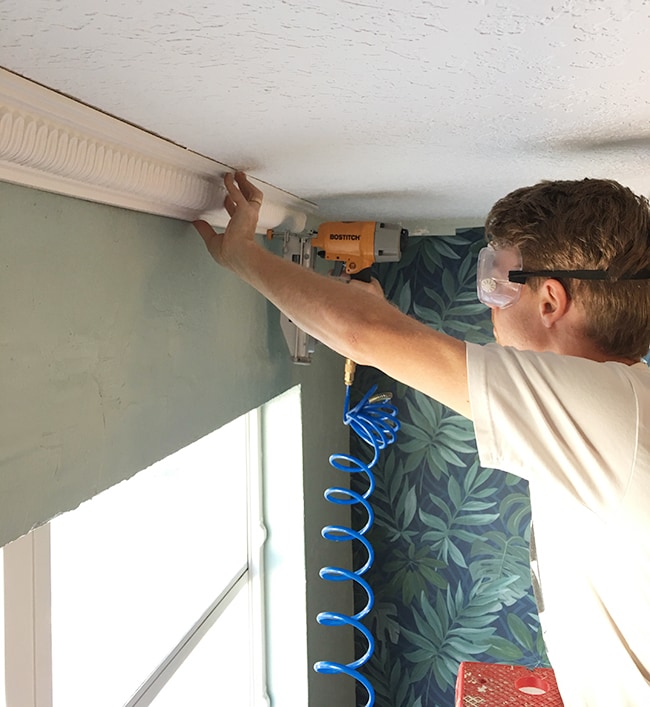
Not too bad, right? Spackle and caulk made all those gaps disappear.
With all the bigger projects out of the way, we had one last installation to tackle—our ceiling fan:
Let’s be honest, ceiling fans aren’t exactly the most exciting or beautiful thing in a room and I prefer to look at a chandelier, however, this is Florida, and sometimes you just need a little airflow in the bedroom. Since we’ll have guests sleeping here, comfort comes first, so a ceiling fan it is!
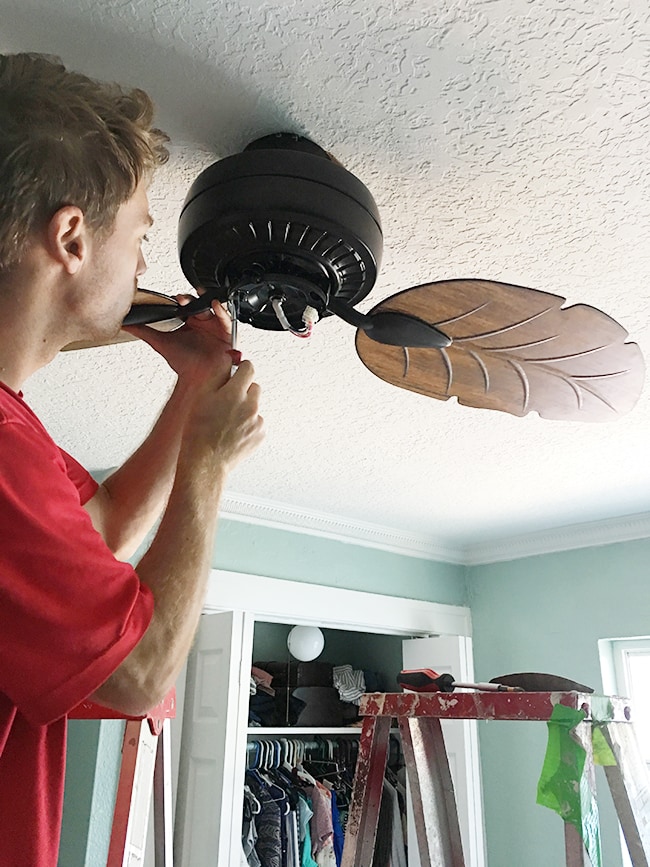
I figured I may as well make it a design feature rather than try to camouflage it, and I knew I had found my dream fan the moment I saw it in Lowe’s.
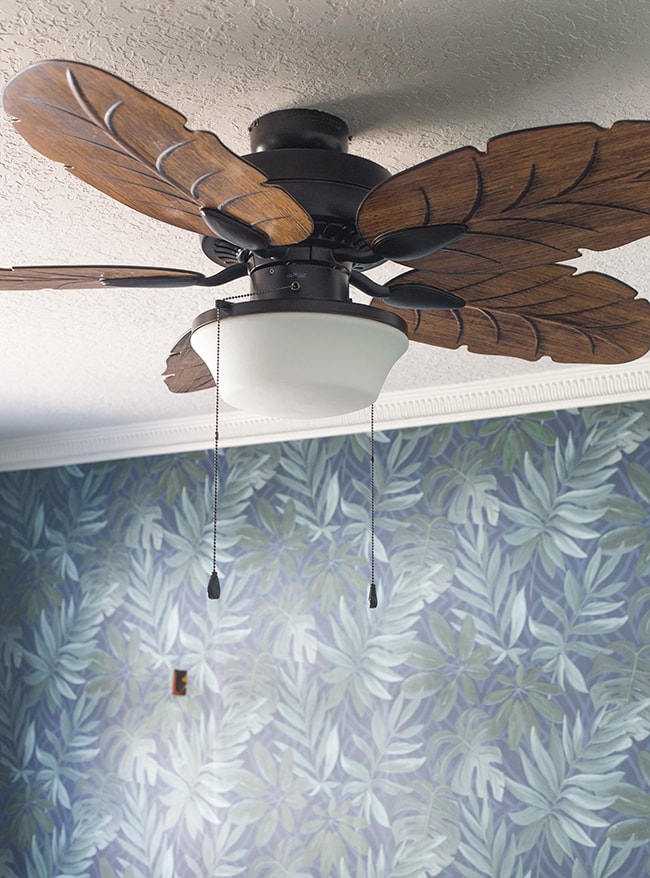
I think it gives off a quintessential tropical resort-style vibe, and it ties in nicely with the wood floors. Definitely sets the tone for the room! (psst… hover or tap the image below for all the sources):
And this crown… I just can’t get enough.
Never underestimate the power of molding, my friends.
Are you as excited as I am to see Phase 2 of this room design?
Bring on the pink velvet, gold pineapple sconces and flamingos!
Shipments have already started to arrive and I’ll be sharing them as they come in over on my Instagram stories! Make sure you’re following me there, because we’re juggling multiple projects and they’re all moving faster than I can keep up with. Lots of exciting progress is being made and you won’t want to miss a single post!


Cynthy says
That’s really cool. If you don’t mind, I would like to communicate with you about more design and fabrics. This is my blog: elmendorfteartester.com
Angie M says
Gorgeous! I am SO looking forward to the big reveal.
Jenna Sue says
Thanks Angie, so am I! 😀
Adriana says
Hi,
The room looks amazing, I was just wondering how the wallpaper sticks on textured walls?? Im dying to put some in my kids rooms but worry about it not sticking correctly or looking lumping because of the texture??
Thanks xx
Jenna Sue says
Hi Adriana, this wall had very little texture! I mentioned it in the blog post, but it’s the only wall in the room without texture. You’d have to skim coat or cover your current walls if they’re highly textured!
Montee Wellman says
LOVE!
Jenna Sue says
<3
Kristen Eff says
Not that your room looks like a thrift store, it’s the same feeling of excitement. You know what I mean. 😉
Jenna Sue says
Haha, I totally get it! It’s definitely a pretty eclectic collection 😉
Kristen Eff says
Just, wow! It’s already unrecognizable from the original. It’s super fun to watch the transformation. It’s kind of like seeing what someone else scored from the thrift store. This is gonna look soooo good in the rental photos!!
DJ says
Looks beautiful! Thanks for the super helpful post! Just wondering what software you use to create your design board? Thanks! (Sorry if this comment came through twice).
Jenna Sue says
Thank you DJ! I’m using Photoshop 🙂
DJ says
Oh my gosh, so pretty and such a helpful post! Thank You! Just wondering what software you use to pull the design board together?
Amber M says
This is AMAZING!! Gives me inspiration for my small rooms. What software are you using to help you visualize your plan? That’s my biggest problem- I can’t see the whole picture and it makes me scared to make a move or the next move.
Jenna Sue says
Thanks Amber! I use Photoshop 🙂
Valerie says
Hey Jenna, I’ve been a long time follower and am wondering if there’s a reason you switched to SW paint? I know in the past you used to favor Valspar – and with that in mind, that’s the primary brand we used in our new house the other year. Just curious! (I know it’s a sponsored post but Lowes carries Valspar so I wasn’t sure if there was more to it.) Thanks!
Jenna Sue says
Hi Valerie, I switched over to SW this year largely because the color selection — it’s easier to stick with colors you love once you find your go-to’s (saves time and decision making), and I most designers I follow recommend colors from their line. I don’t notice any difference in quality between the Valspar signature though, so there’s no right or wrong. It just a personal preference 🙂
Victoria says
Completely on board with the design plan! It’s going to look great. Dying over the paper and sconces but perhaps a bit much for every day.
Foam moulding though, isn’t that a fire risk? I’ve seen videos of the speed fire spreads on polystyrene moulding so wasn’t sure about foam…
jennasuedesign says
Yes, this design is too bold for our next house, so I’m enjoying it now while I can! I used the word foam because that’s what it feels like, but it is technically polyurethane. Not sure about the fire ratings — you would think they’d have to pass some sort of testing in order to be sold? Either way, we have plaster walls which are a fire deterrent!
Terri says
I always look forward to your Wednesday updates and love this bedroom for children! Can’t wait to see it all pulled together! Beautiful as always.
jennasuedesign says
Thanks so much, Terri! Excited to share the finished room with you 😀