Well my friends, the moment we’ve all been waiting for is finally upon us. It’s ORC Reveal day.
If this is your first visit, here’s the weekly recaps:
Week 1: Introduction & Inspiration
Week 2: Demolition & Design plan
Week 4: Tile & Shower
Week 5: Walls & paint
And here we are in Week 6—the process seemed to move really slow during the first five weeks but there was a lot going on behind the scenes, and it all came together literally in the last few days (just in time!). I was somewhat on the fence about participating in this challenge in the beginning because I know how stressful renovations can be, especially when you’re DIY’ing most of it, and especially when there’s a time constraint, so I’m overjoyed that we were able to pull this off. And I have to admit—I am more proud of this renovation than anything I’ve ever taken on. I challenged and pushed myself as designer and DIY’er and I hope it translates through these photos.
Now let’s get down to business!
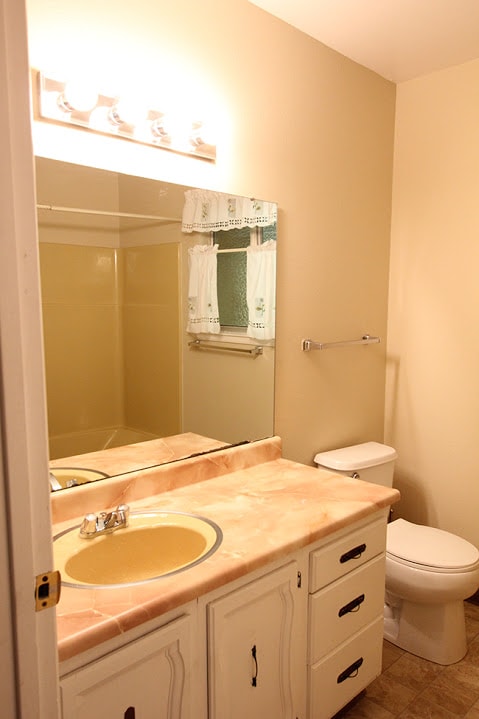
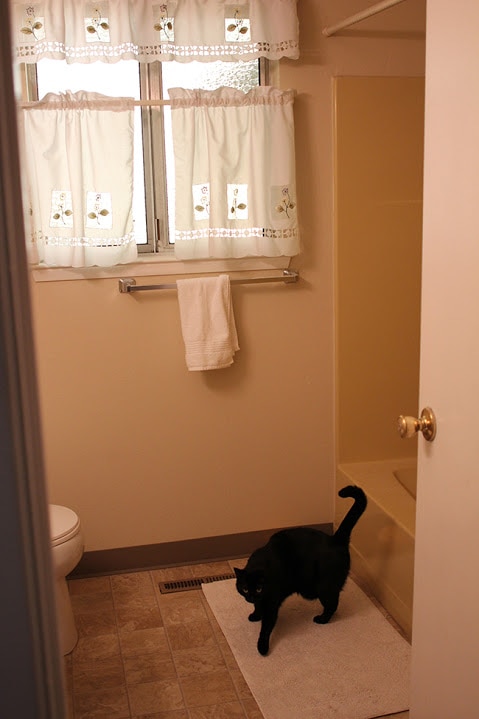
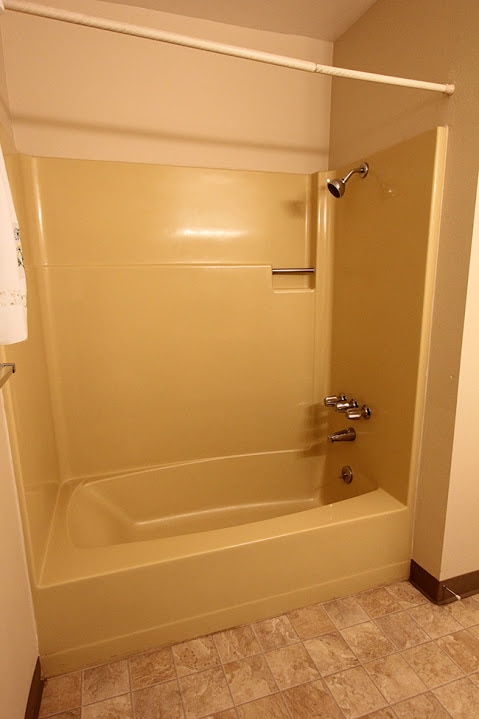
Six short weeks ago, we were living with “that 70’s bathroom”…
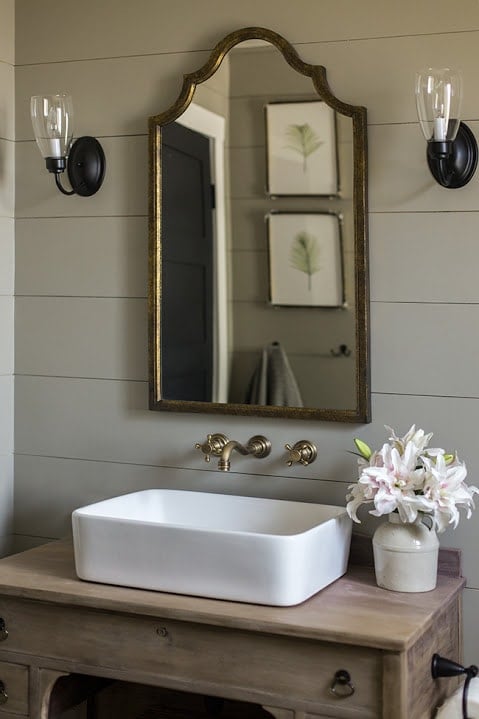
After many long days and nights of shedding blood, sweat and tears, I present to you our new guest bathroom:
In the initial stages of my renovations I like to choose a handful of adjectives to describe the style/atmosphere I hope to achieve with the end result. It helps me stay on track when looking for inspiration and planning the details. For this room, I went with “natural romantic vintage boho”—a bit riskier (design-wise) than my traditional modern farmhouse look.
But I figured if I’m going to experiment, why not in a guest bathroom?
I find that you can blend nearly any style as long as there is some element of consistency and cohesiveness to tie it all together.
Mixing metals, bold patterns and playing with tone-on-tones makes for a layered effect with lots of interest packed into a tiny space… I see more design risks in my future.
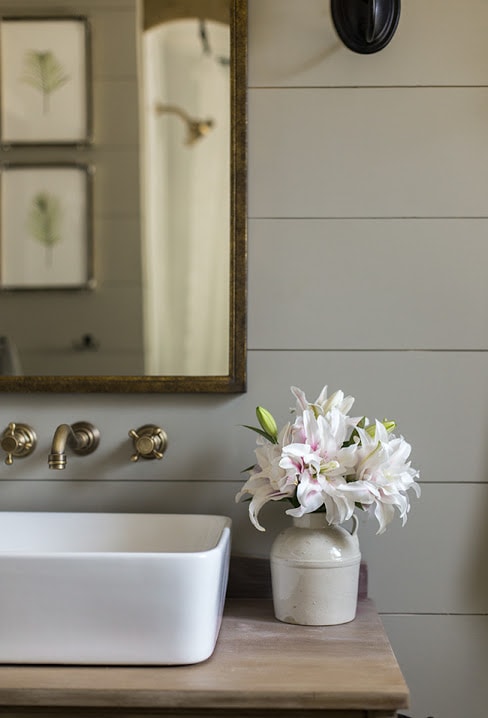
And this nook…. swoon.
I treated myself to a new camera before this shoot (Canon 6D) and wow, wish I would have upgraded sooner.
It captures the details and atmosphere beautifully…
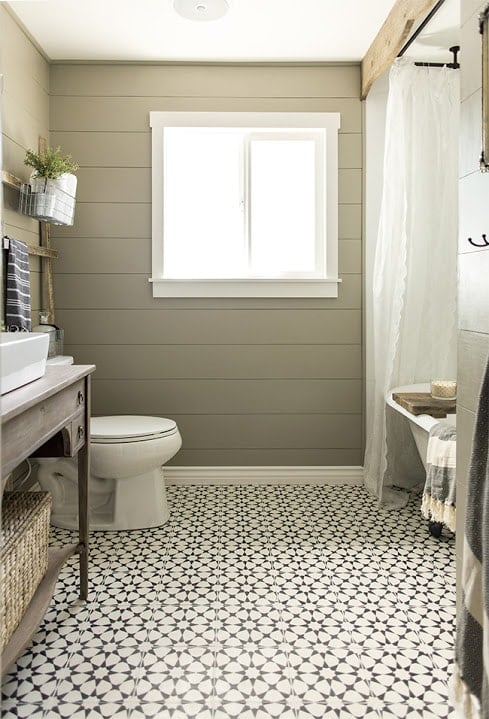
It also makes the room appear a bit larger. It’s still a small 7′ x 8′ space, but when it’s filled with pretty details and moments, you tend to focus on those instead…
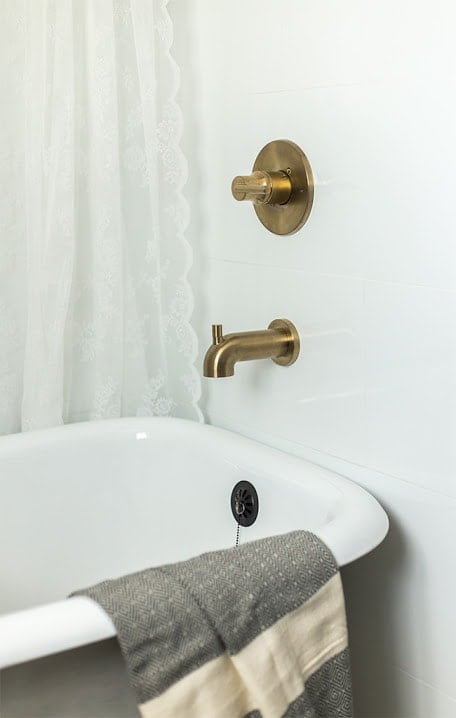
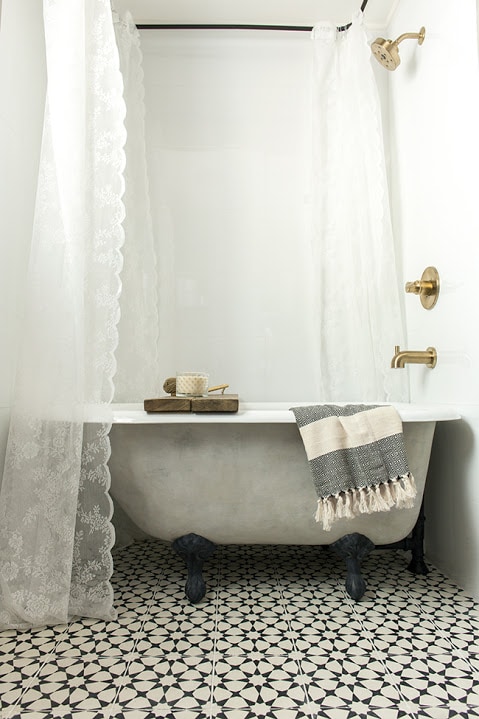
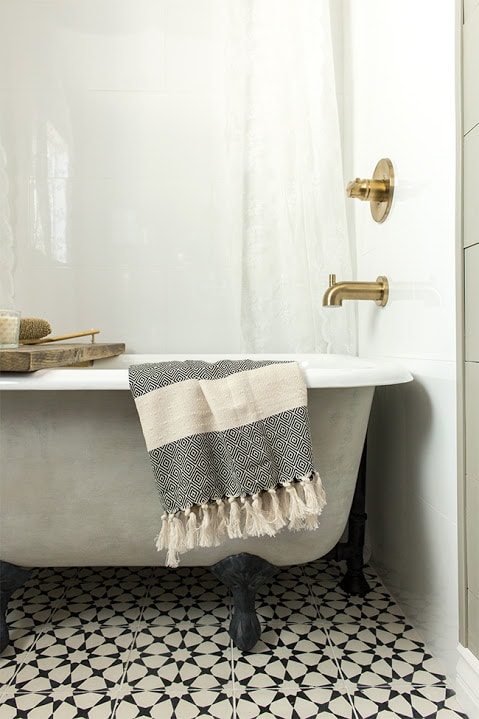
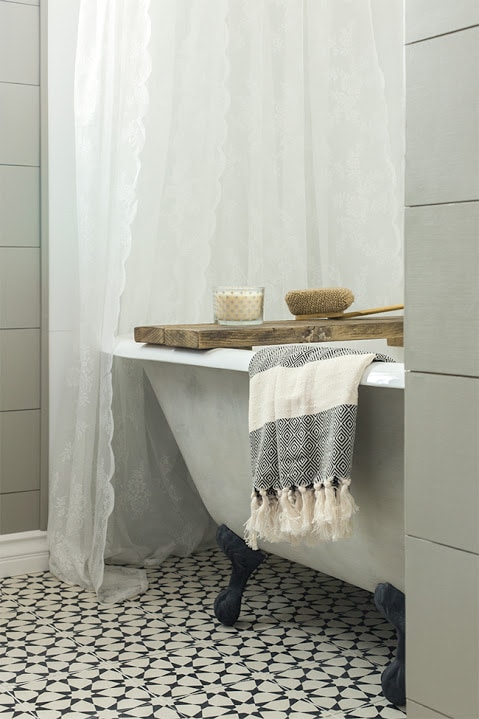
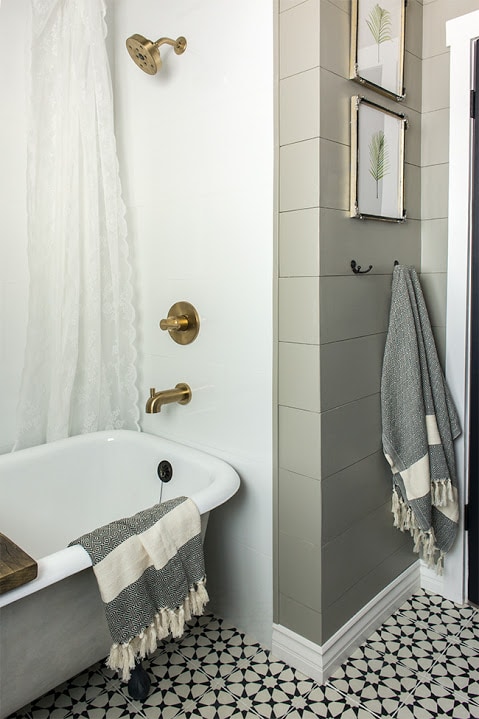
So glad I took the time to add a patina on this tub. It’s subtle but adds so much to the room. You can read the full tutorial on that here.
I made this valance in about 30 minutes from a piece of reclaimed wood (leftover from our laundry room barn door) and a jigsaw (tutorial to follow).
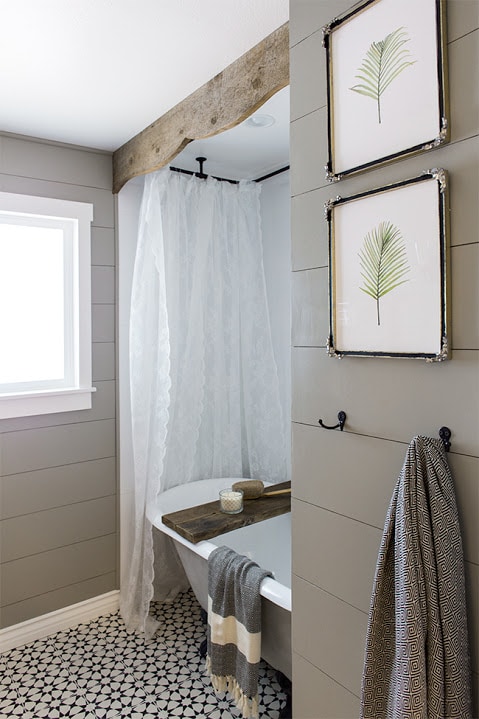
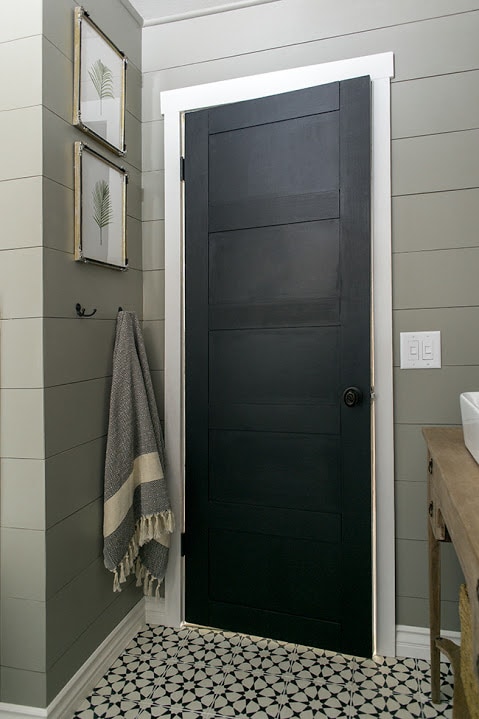
Every single detail, like this DIY paneled door, was very thought out. Planning is the most important part.
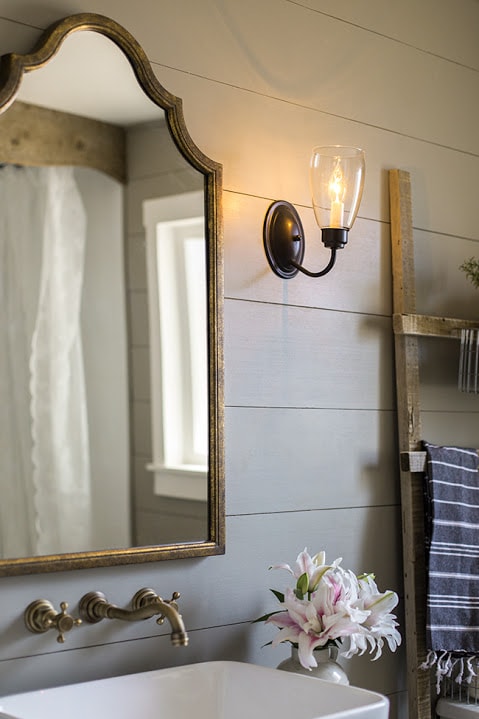
Lighting is also critical, especially in a space where the mood is essential. These candelabra bulbs on dimmers will make the perfect glow for evening bubble baths.
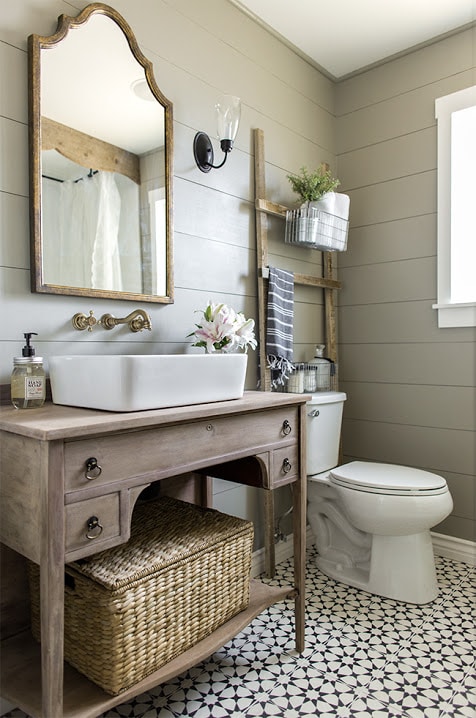
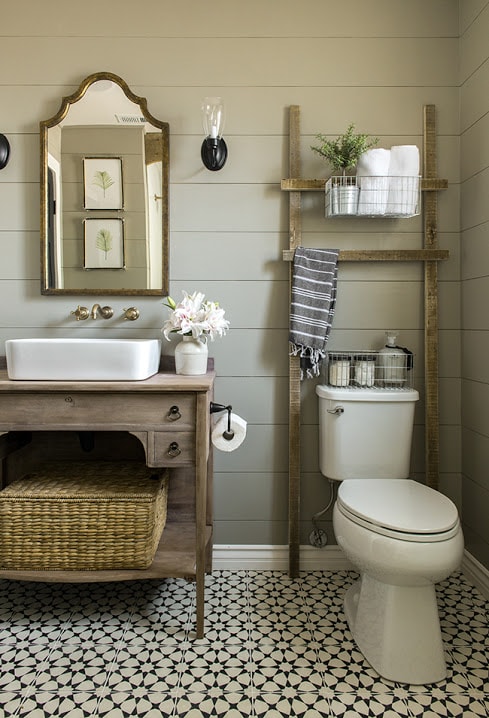
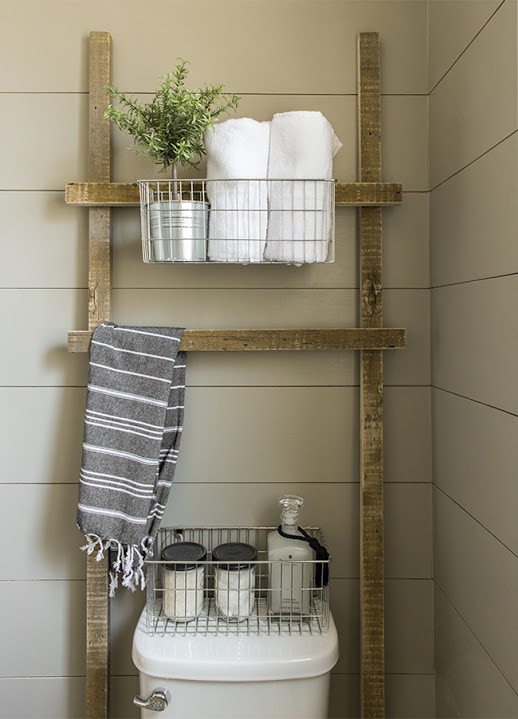
An easy DIY ladder made from reclaimed wood is a fun way to utilize the wall space for extra storage.
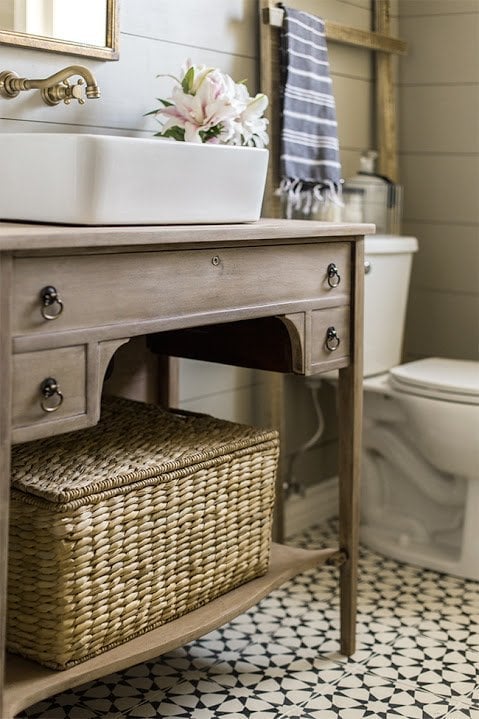
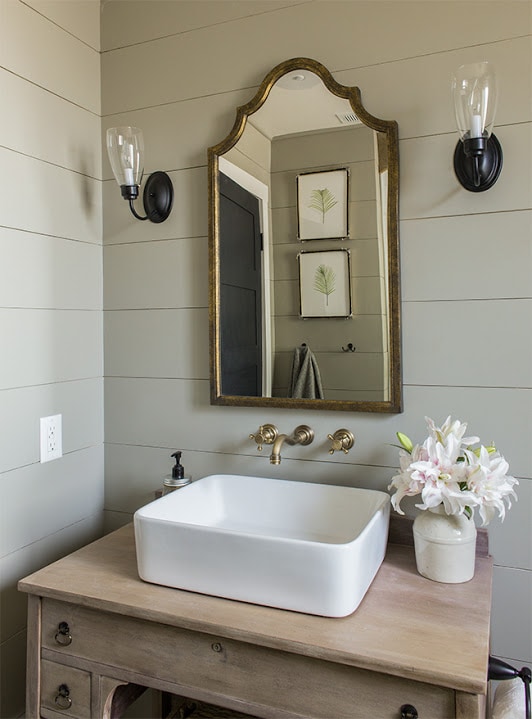
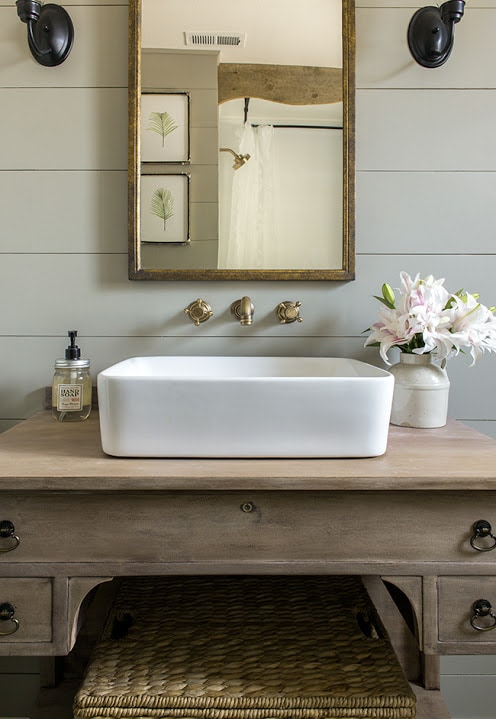
This vintage buffet-turned-vanity (a repurposed Craigslist find) is one of my favorite parts of this room.
Sources
Floor tile: Cement Tile Shop
Wall color: Valspar’s Gray Silt (satin)
Door color: Valspar’s Dark Kettle Black (satin)
Trim & ceiling color: Kelly Moore’s Swiss Coffee
Vanity: Craigslist (DIY refinish tutorial)
Vanity knobs: Ebay
Mirror: Discontinued, similar here
Sink: Wayfair
Sink Faucet: Amazon
Sconces: Discontinued, similar here
Woven basket: Pottery Barn
Metal wire baskets: Overstock
Plush white towels: Mark & Graham
Turkish bath & hand towels: Etsy
Artwork: Minted
$6 Door knobs: Ebay
Clawfoot tub: Vintage Tub (custom paint tutorial here)
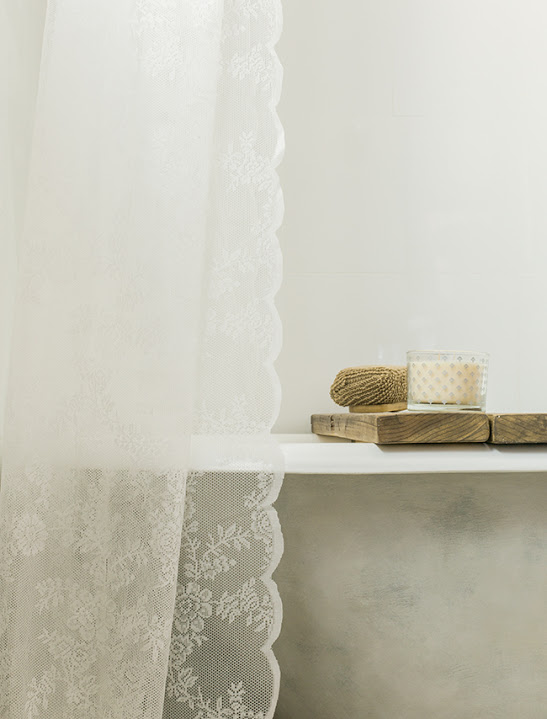
Lace curtains: Ikea
Toilet: Lowe’s
Shower faucet: Amazon
Shower wall tile: Floor & Decor
And now I’m ready to pop open a bottle of champagne and take a nice, long bubble bath to celebrate and soak it all in. I haven’t taken a single bath in this home since we’ve lived here so it’s about time!
Because this renovation moved a lot faster than my normal process, I want to take some time next week to go more in depth about the design process and finishes/products I chose, the costs, and tips/advice for those of you looking to recreate this look. If you have any questions, please leave them below in the comments and I’ll cover them next week. A huge thank you to those who have been following along with me on this journey since the beginning! Your encouragement (both on this blog and instagram) has been so helpful in motivating me to push through those tough days and end up with a result I truly love and hope my guests will enjoy for years to come.
I’m so excited to see how the other participants rooms turned out! Let’s go find out:
Hi Sugarplum
The Pursuit of Style
Savvy Home
Trademarked by Calling it Home
I’ll be sharing more on instagram if you can’t wait another week! Don’t forget to check back then for more on this renovation and to find out what’s next for this blog (hint: big changes are coming…)


Shana Frye says
The ladder was my weekend project. Still staining and gonna whitewash but it’s together.
Bob says
Hi, i spent about $500 on the floor tile at Wayfair. What size SPACERS did you use and what color grout?
Love it, thanks!
jennasuedesign says
Hey Bob! I don’t remember exactly but most likely 1/8″. I think the product page should have recommendations but ultimately it’s more of a personal choice.
Fred says
Beautiful work and great pictures. But they take a very long time to load online. Really do not need to full resolution of that nice camera for a web site.
Terry Ellen Cross says
What a lovely space, just gorgeous! Do you mind sharing the lens you’re using with that Canon? It’s time for me to upgrade too and I’m so dragging my feet! I love my old 40D but I’m sure it’s a dinosaur!
jennasuedesign says
Thanks Terry! I use a 50mm 1.4 🙂
Bradye says
Hey! Did you ever finish a tutorial on the vanity/sink? I am really wanting to do that & have no clue where to start
jennasuedesign says
Yep, search for vanity and it should pop up!
laura gattis says
Hey there! We’re in the middle of dropping in a half-bath remodel and am loving this for inspiration. You did a beautiful job! I ordered a similar sink faucet from eBay but the knobs were individual (instead of all being connected on the backside of the wall). Was yours like this when it arrived? Our plumber said there was no way he could mount it. Would love if you had any feedback on this and if you encountered the same issue!
Thanks so much!
Jess Cook-Slade says
Just, Wow! Your remodel is impressive! You are very talented. I came to your blog after searching for plank ceiling diy inspiration. I found the results and instructions to be just what I was looking for! I then stumbled upon this awesome bath redo which totally echos the look I’m going for in my upcoming bathroom! I am living in an early 80s ranch with that same, slightly more updated, size and layout. How exciting to see the dramatic possibilities for such a small area. One question… Did that room have a popcorn ceiling also? If so, how did you remover or cover it? Thanks so much for sharing!
jennasuedesign says
Thank you Jess! No popcorn ceilings in this house, fortunately.
Nicolle says
Love this bathroom! Can you tell me the (visible) width of the shiplap? Are the planks 6″?
jennasuedesign says
Thanks! They’re around 8″.
Katie Vaughan says
Hello!
I just love this bathtub/fixture combo. I’m thinking of installing something very similar. Can I ask how well the curtain keeps water from coming out in the opening where the shower head sticks out? This is my only hesitation. I am afraid there will be water all over the floor! Was considering installing velcro dots so that perhaps the shower curtain could overlap just underneath the shower head. Your feedback is appreciated!
jennasuedesign says
I haven’t used the shower with the lace curtains but I’d recommend attaching a liner as well if you plan to do that. Hope this helps!
Katrina says
I’m just getting ready to plank my bathroom and was wondering how it’s holding up with the moisture? Did you do anything special before installing it?
jennasuedesign says
Nope, still looks great!
stacy says
sorry, should have read your tutorial. found how to make the ladder and tub caddy. thank you anyway.
stacy says
i know it is probably easy to make but would you share how you made the tub caddy. 🙂
Sarah says
so beautiful!
robert says
I love it!! The bathroom designs are simply awesome. We had a pretty old bathroom and we replaced the tiles, added stylish bathroom accessories ( https://www.dispenser.com/bath-shower-accessories/ ) and 3-4 wall hangings ( https://www.etsy.com/market/bathroom_wall_decor ) made all the difference . How I wish I could attach the picture of my bathroom. I found this on Pinterest, check them out https://www.decoist.com/2012-05-02/19-tastefully-elegant-bathroom-designs/, they are.lovely.
Jennifer says
Hi Jenna, This bathroom is perfection down to the last detail. So nicely done. I’m obsessed with your ladder! I featured your bathroom on my “friday favorites”. You are welcome to check it out: https://themooninmae.blogspot.com/2016/02/friday-favorites-including-free.html
thanks!!
Jennifer Mae
http://www.themooninmae.blogspot.com