Want to give your outdated or factory-grade cabinets a designer look without the high price tag? Before you spend a fortune ripping them out and replacing them, try some of these tricks for a custom, high-end look on a DIYers budget. Most of these can be tackled yourself over a long weekend!
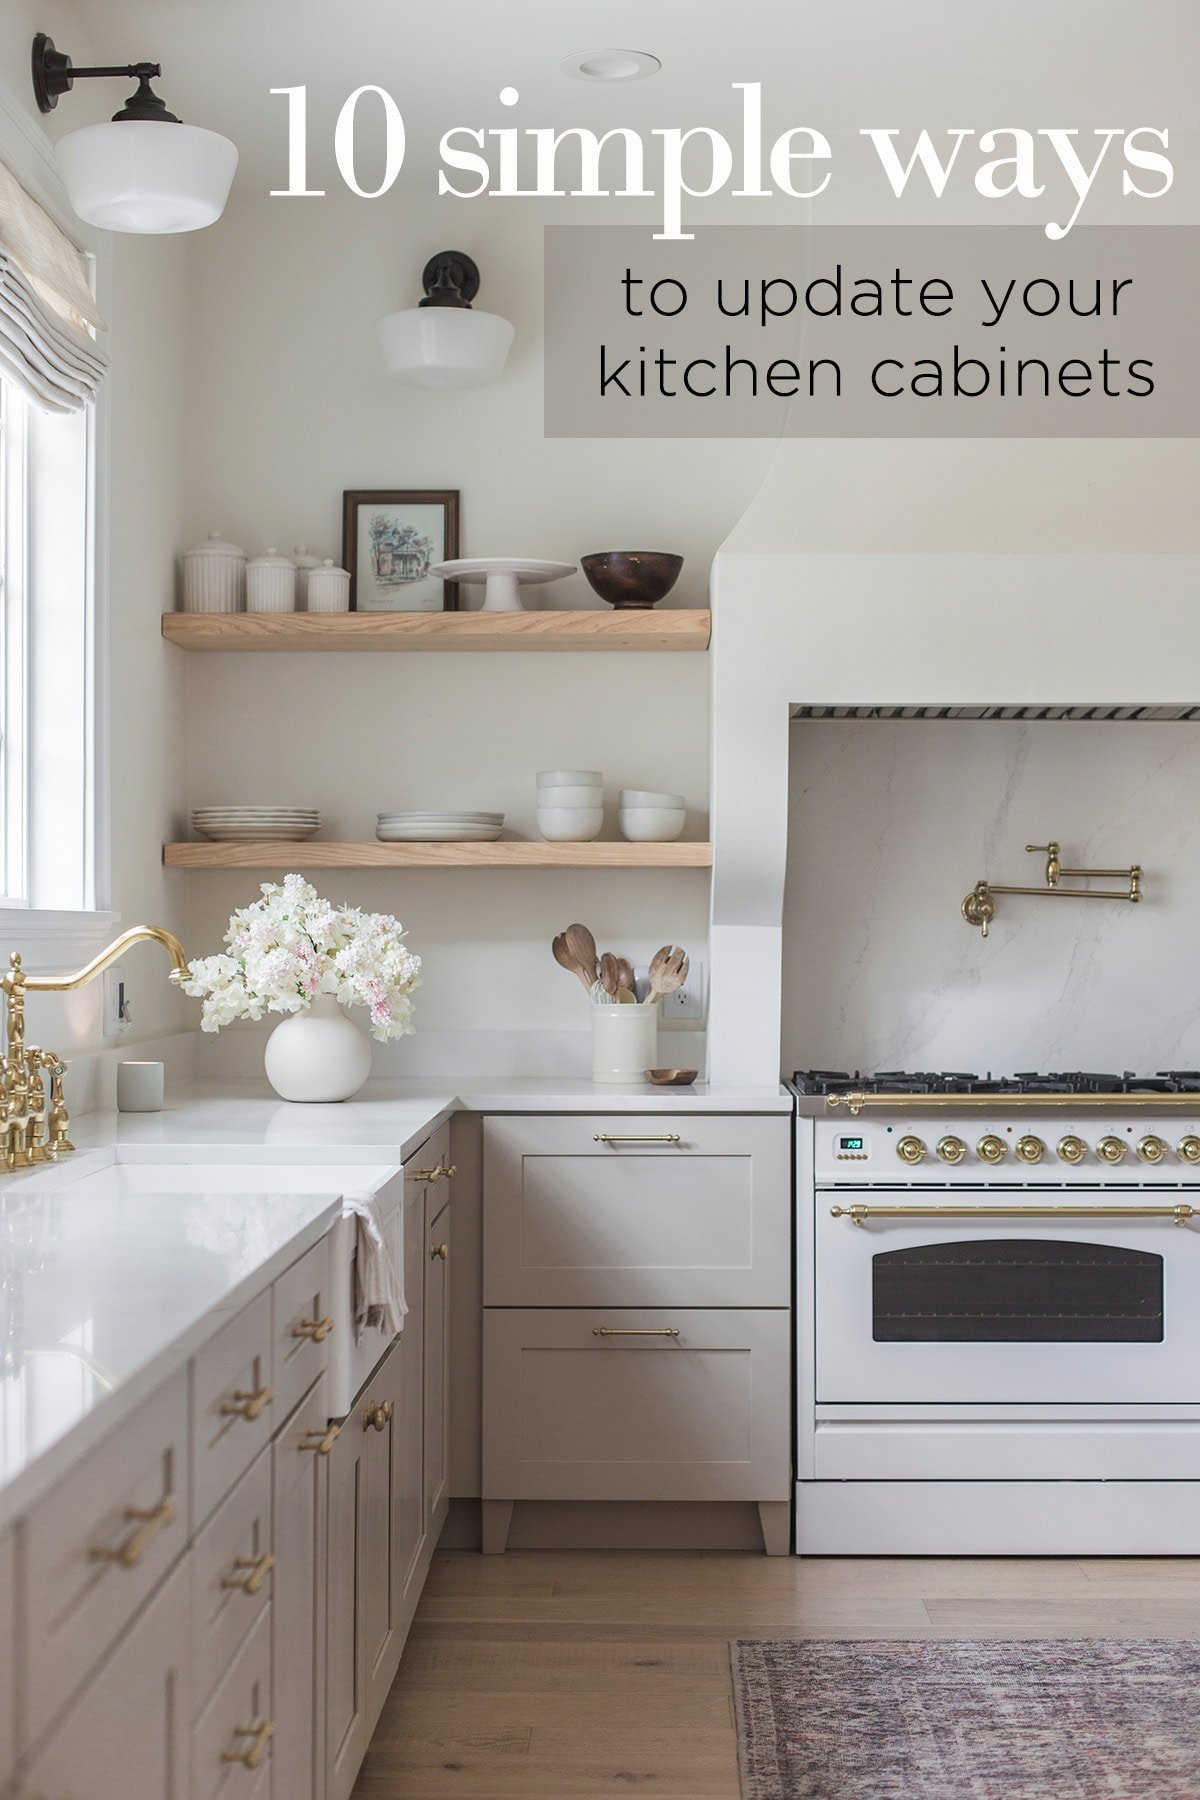
We’re currently in the middle of our Hacienda Hideaway kitchen build, and I’ve spent the last year gathering up all the dreamy inspiration to take my design to the next level. I thought it would be fun to share with you the best ideas I found—almost all of which I’m incorporating into my upcoming plans.
Jump to:
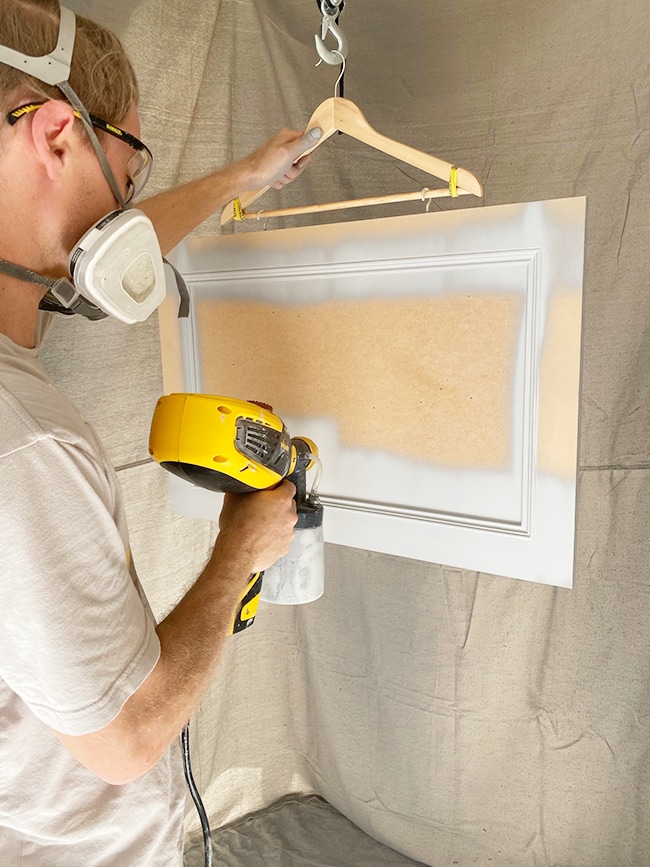
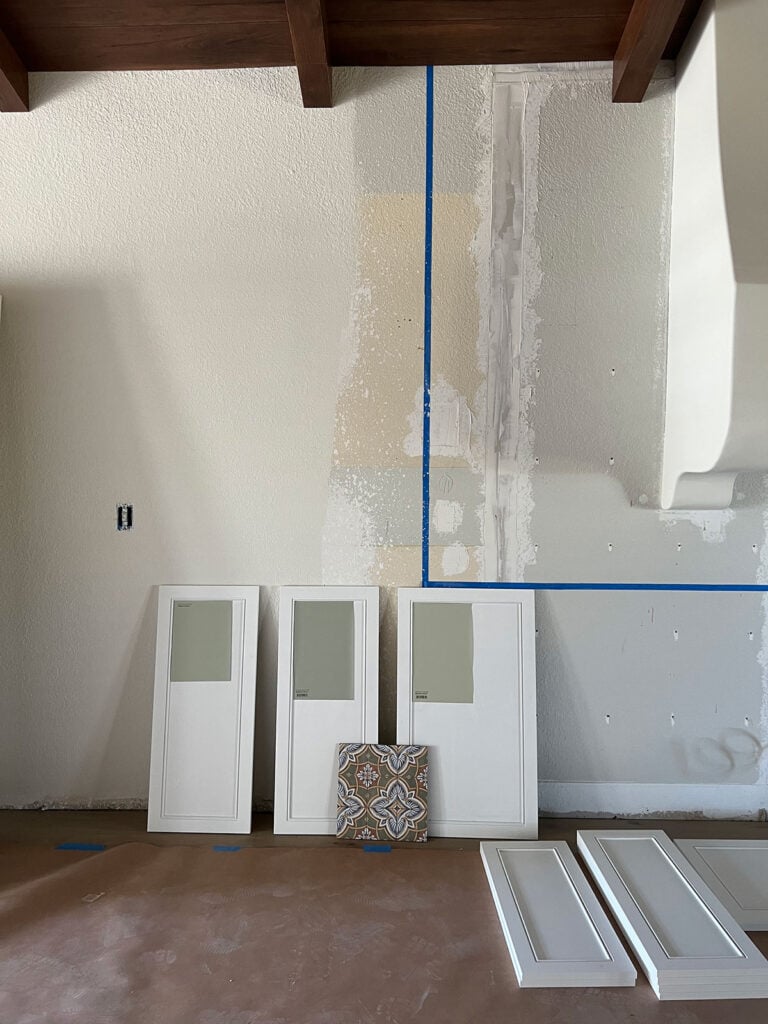
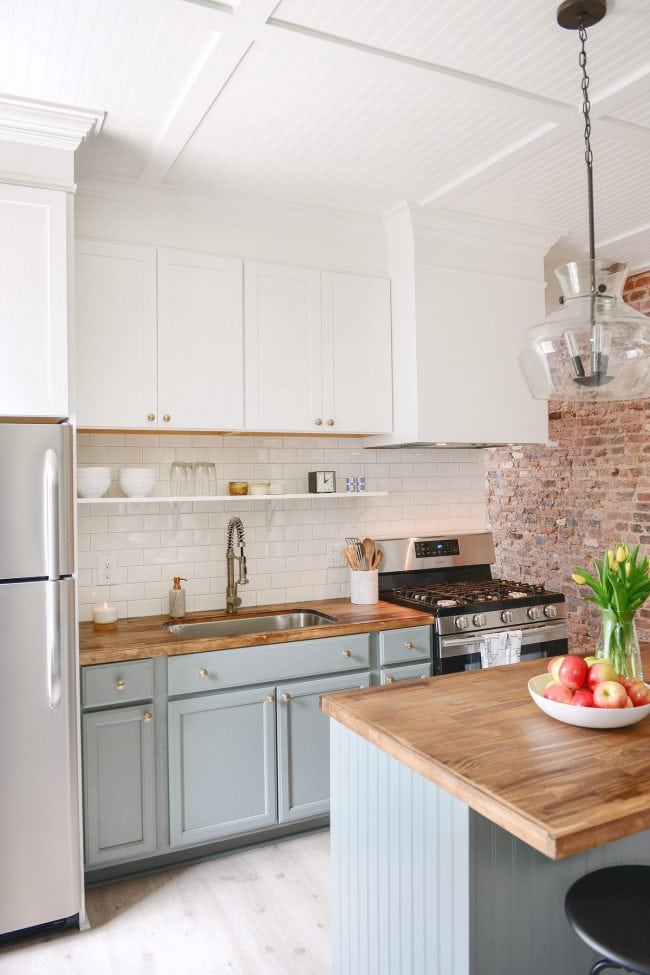
1. Paint
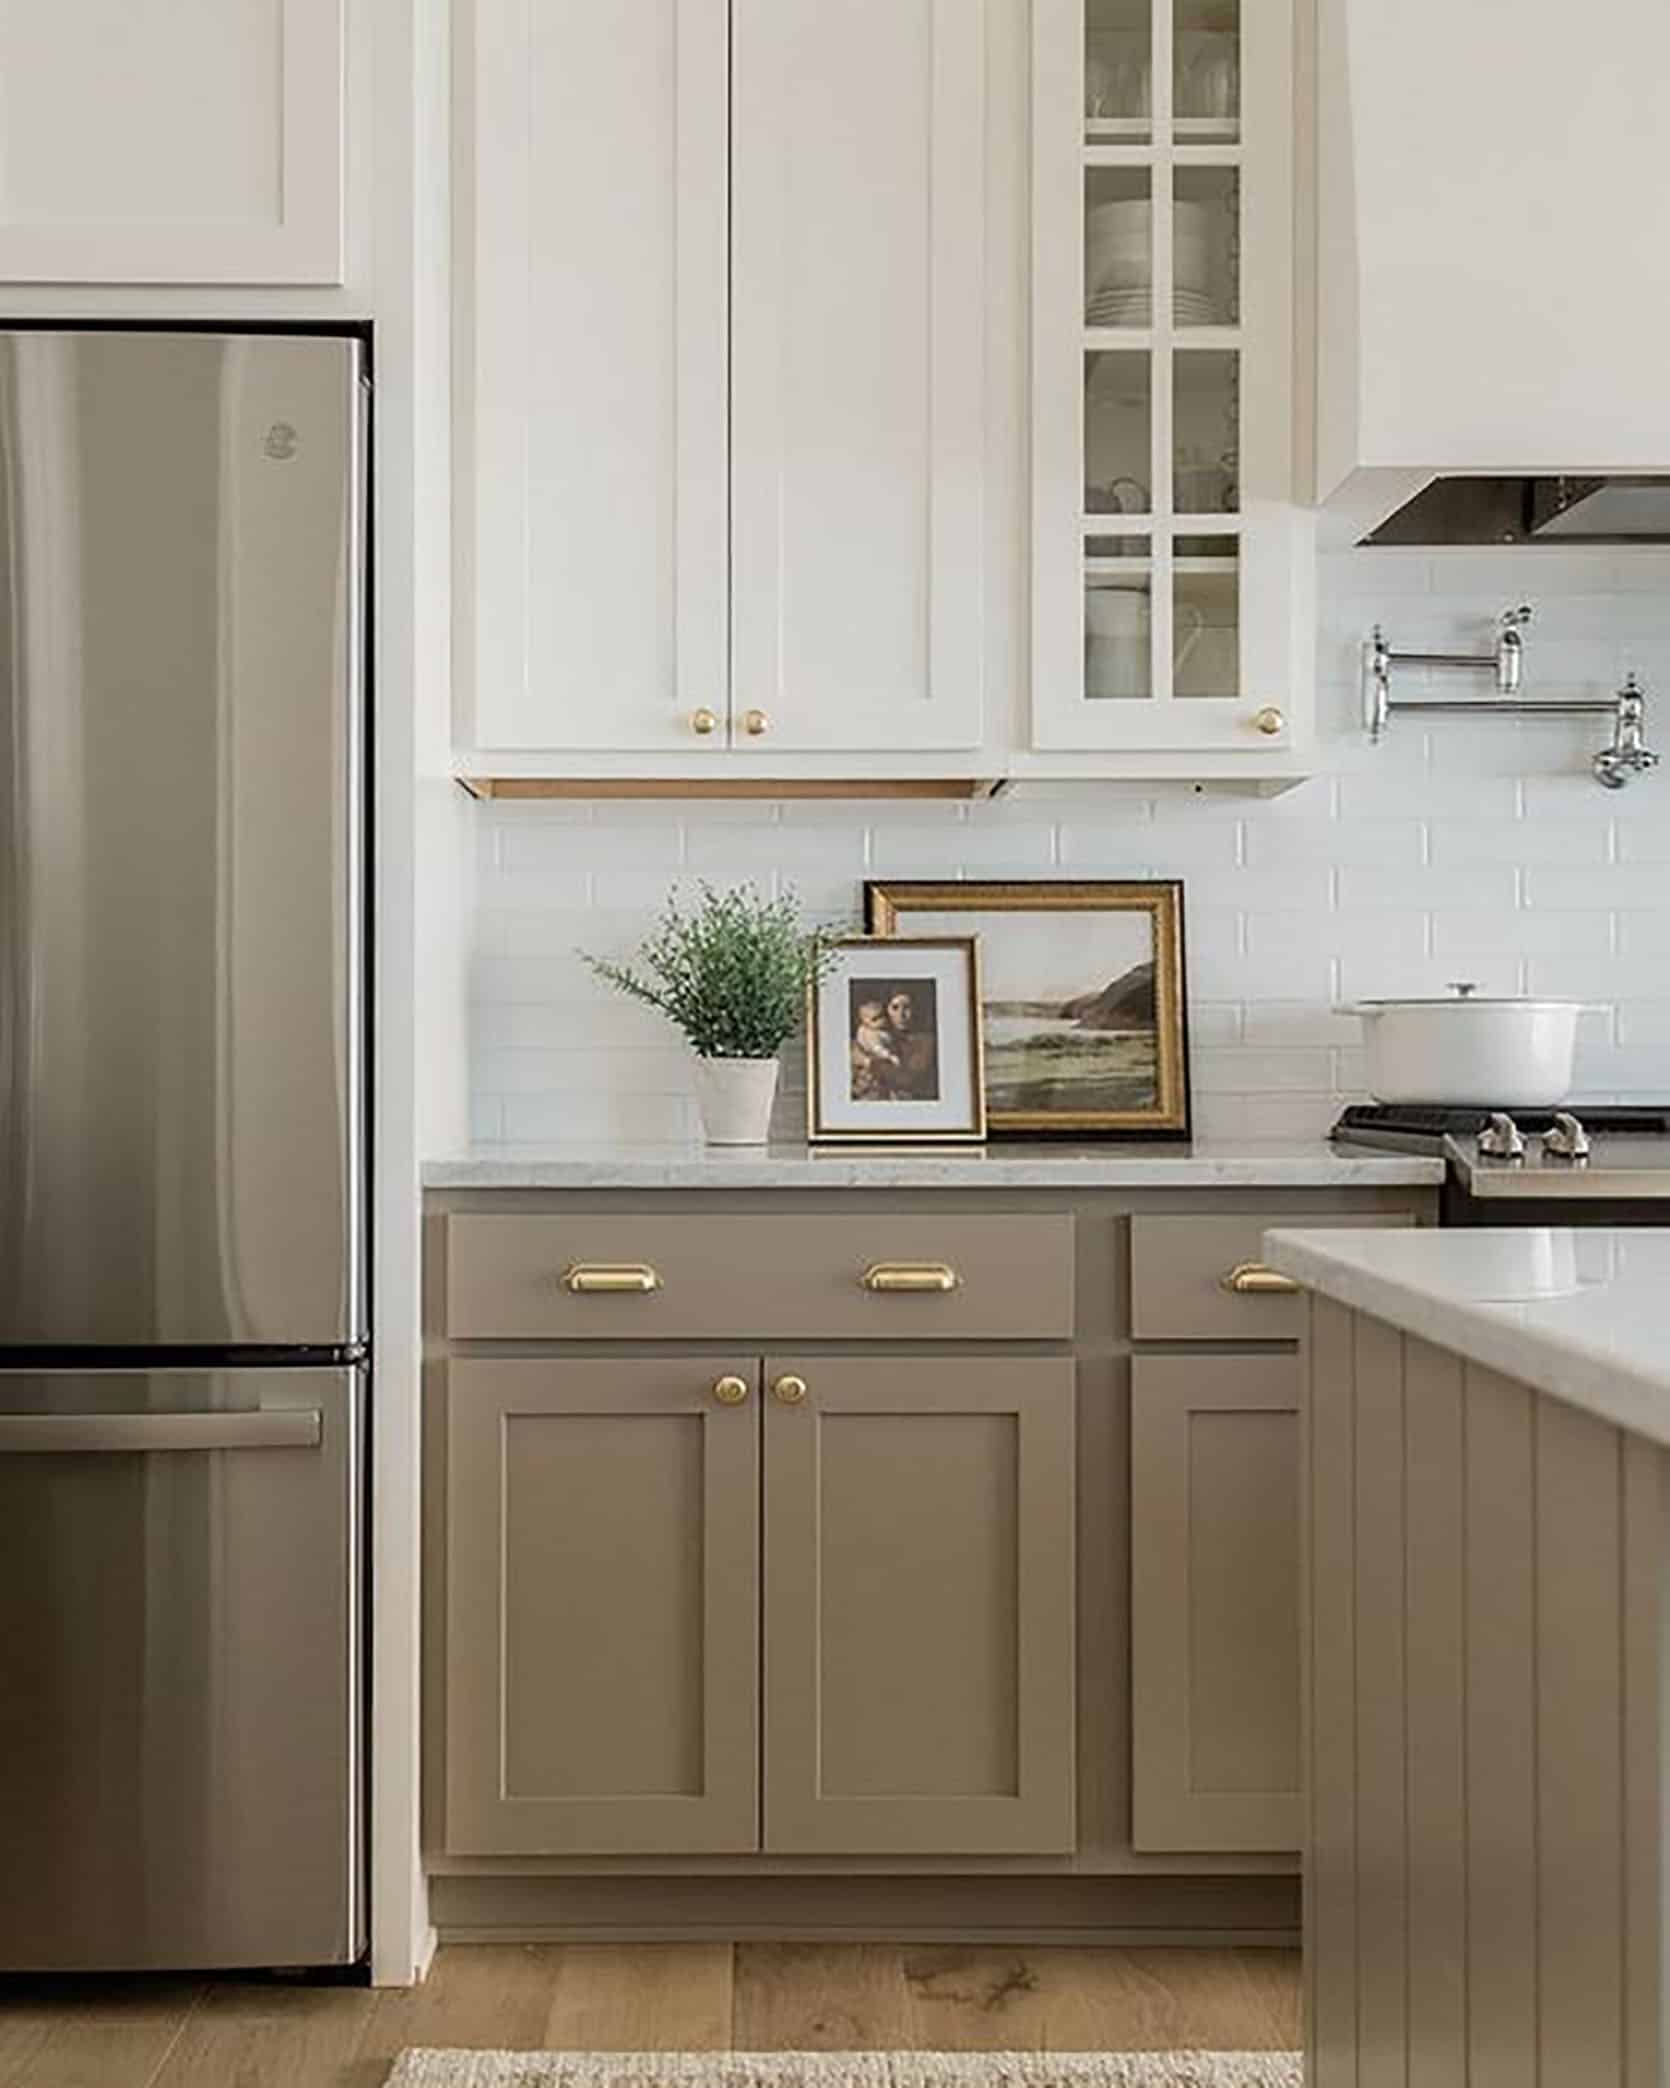
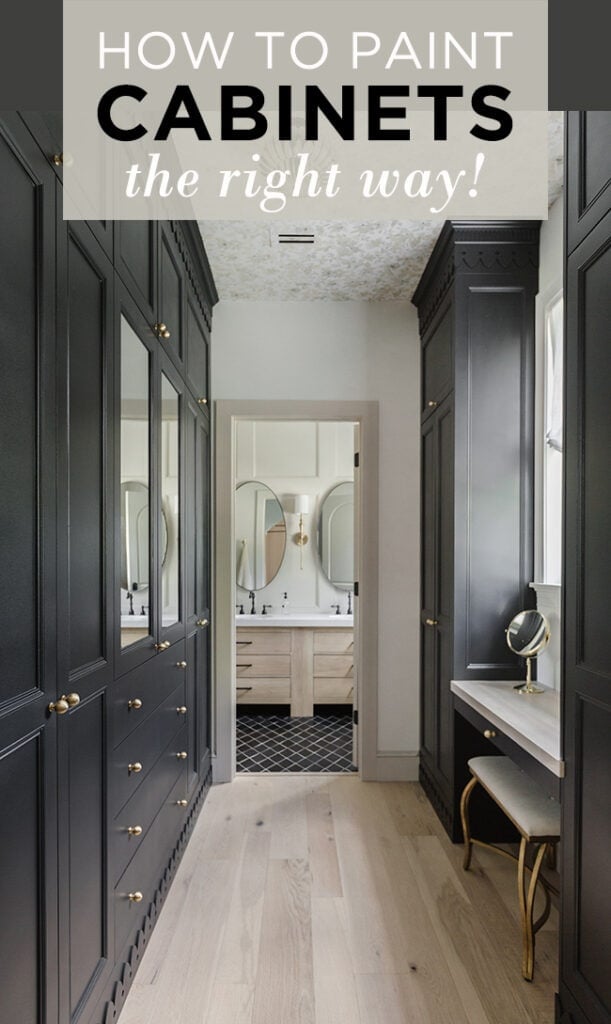
No revelation here—a fresh coat of paint is always the biggest bang for your buck. Most cabinet surfaces can be repainted with a high quality primer and specialty paint. I’ve had great results with Benjamin Moore Advance and Sherwin Williams Urethane Enamel, both designed for cabinetry and highly recommended by pros/DIYers.
If you don’t want to commit to a full color makeover, try painting just the upper, lower or island cabinets. Introducing a second color will add visual interest, and help keep the space from feeling too one-dimensional. Even using a few shades lighter or darker than your existing cabinets will give your kitchen a more custom feel.
Check out my detailed guide to Painting Cabinets like a Pro, and my Paint Roller Test results. The power of paint can’t be emphasized enough!
2. New cabinet hardware
A quick fix that can go a long way to update the look of your cabinets. Hardware is the ‘jewelry’ of your kitchen, so you can add some personality here!
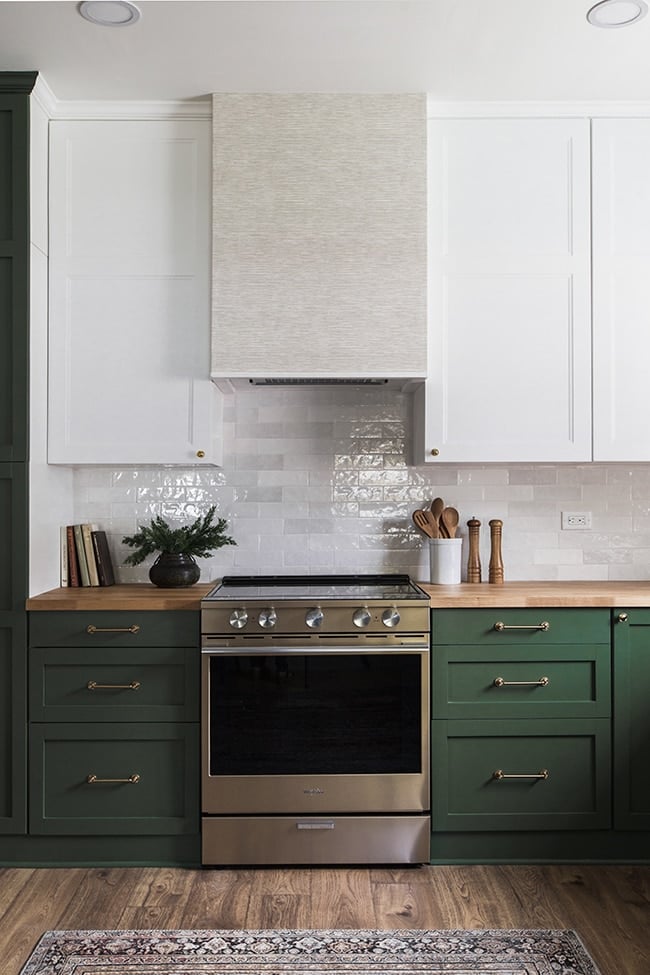
Today, there are endless options at every price point, suited for any design style. This is one area where you don’t have to splurge to find something that looks and feels high-end. Sites like Amazon, Lowe’s and Home Depot and even Etsy have a large selection of affordable cabinet hardware (those are my top go-tos on a budget).
When replacing drawer pulls, you have three options:
- Find replacements that match your existing hole center measurements
- Patch over the old holes and repaint
- Order pulls with backplates to cover the old holes
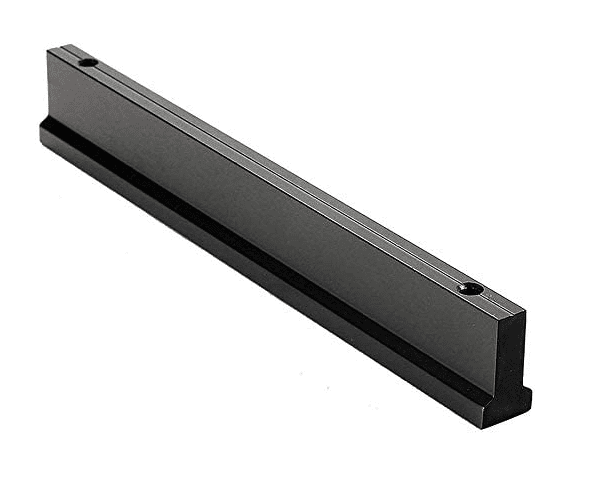
Option 1 and 3 are the easiest, but they limit your replacement choices. Option 2 requires some extra work. You could also opt for a solid bar handle style like this that will cover over the old holes.
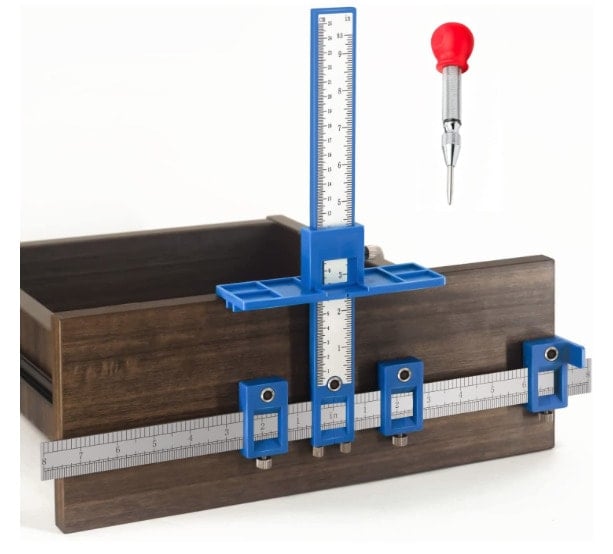
Pro tip: use a cabinet hardware jig to drill perfect holes and save time! We’re using this one for our upcoming hardware install:
3. Replace your cabinet doors
This is the biggest investment (both in time and $) on this list, but you may find it necessary to make the biggest impact. If you’re happy with the overall layout of your kitchen but have outdated or damaged doors, it’s worth looking into refacing your cabinets.
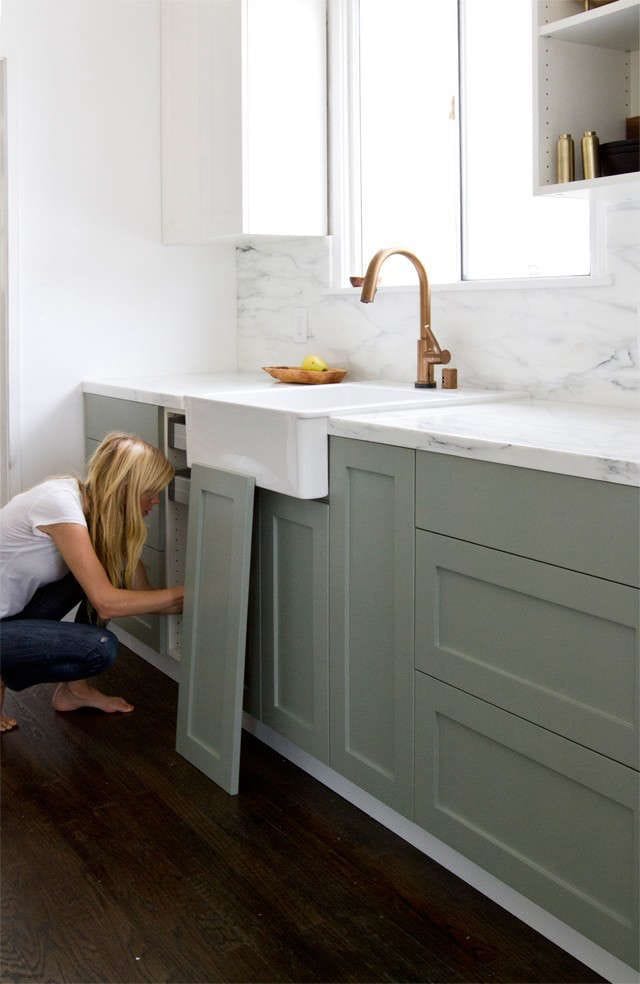
There are several companies (both local and online) who can create custom door and drawer fronts that fit your existing cabinets. With a little extra modification, you can even upgrade your doors to drawers, which are often a more efficient use of space.
We’re working with Nieu Cabinet Doors for our Hacienda kitchen remodel, and so far the process has been very straightforward. Door installation starts this week—you can follow along in my Instagram stories!
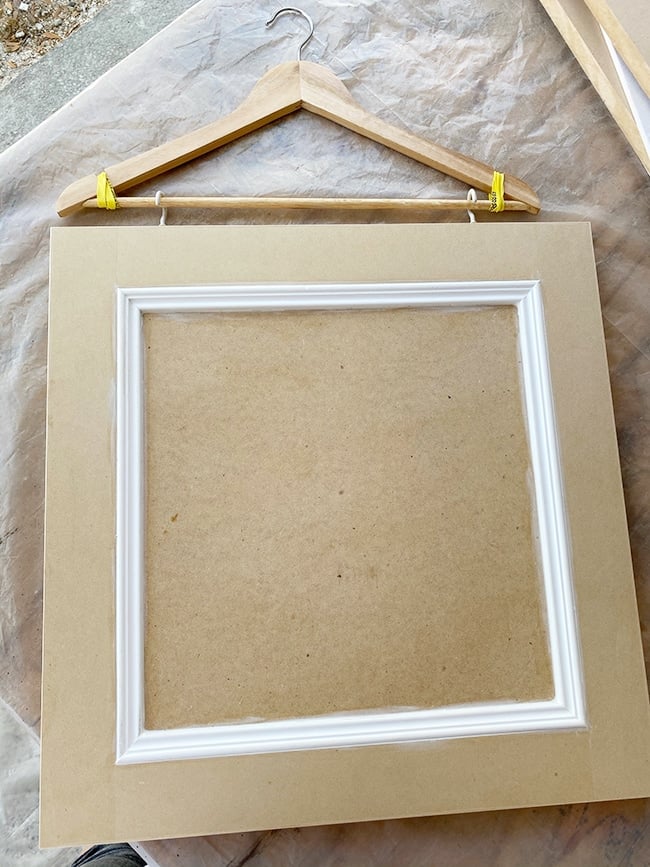
4. Elevate your doors with molding
If replacing your doors/drawer fronts completely is not an option, consider updating them with molding. This is one of my favorite simple DIY tricks for doors of any size (check out my easy DIY door upgrade tutorial).
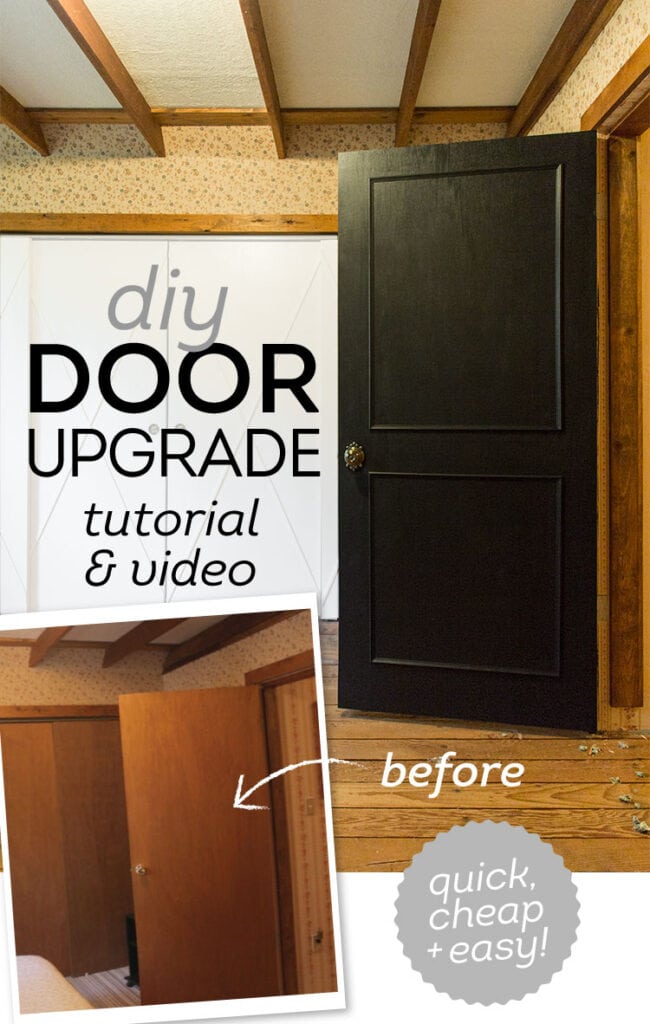
This process is ideal for plain slab or shaker style doors, when you want to take them to the next level. We upgraded our shaker closet doors with skinny molding to give it an elevated, custom look. The magic is in the details!
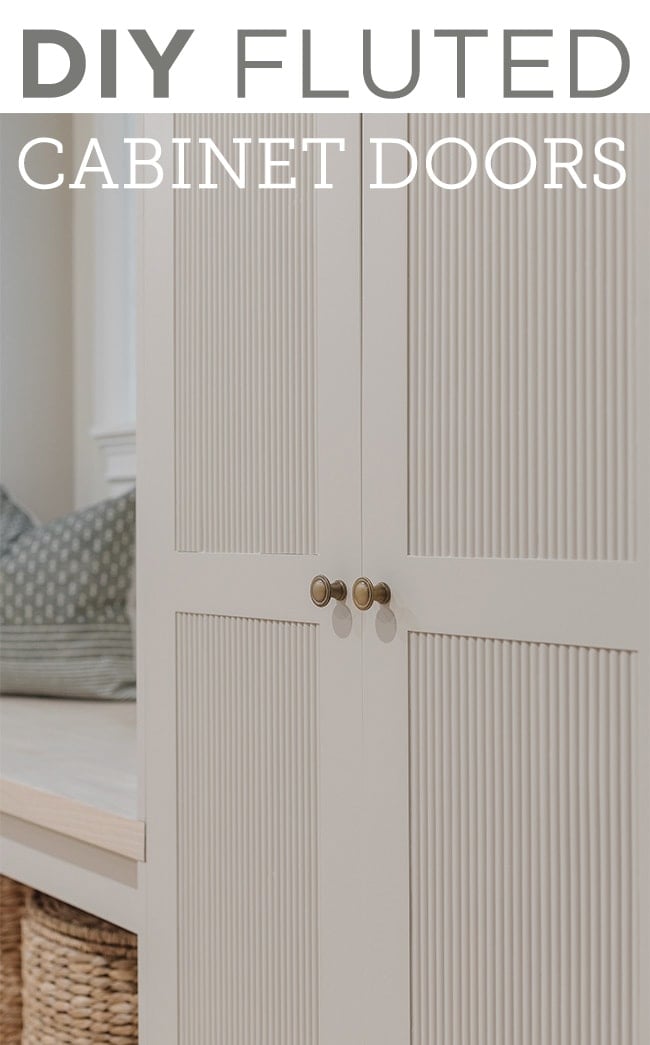
You could also experiment with other types of molding such as fluting, like we did below with these DIY fluted Ikea cabinet doors:
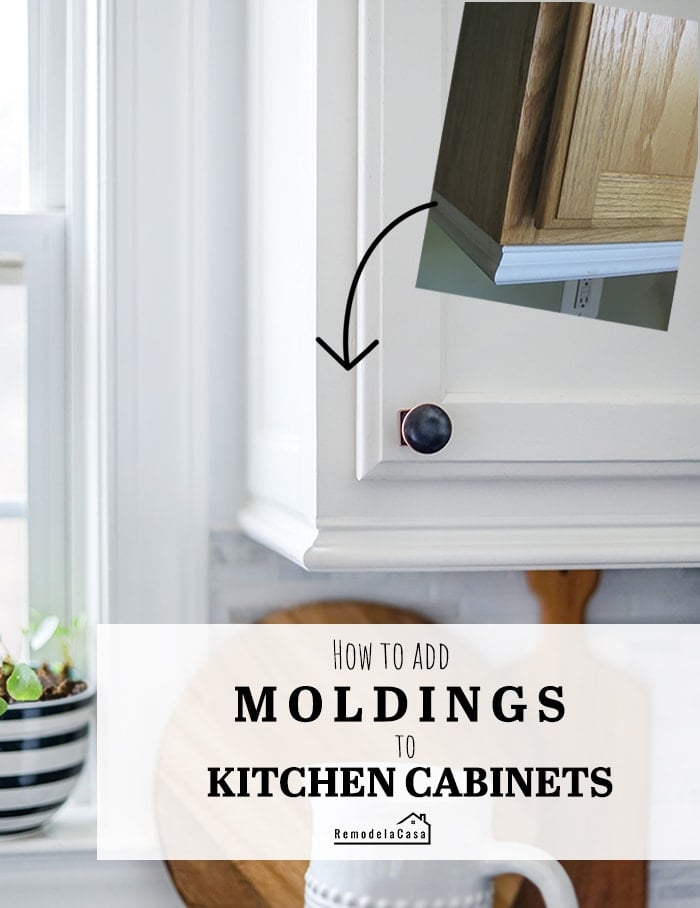
Another idea to consider: add molding along the bottom edge of your cabinet boxes for a more polished look.
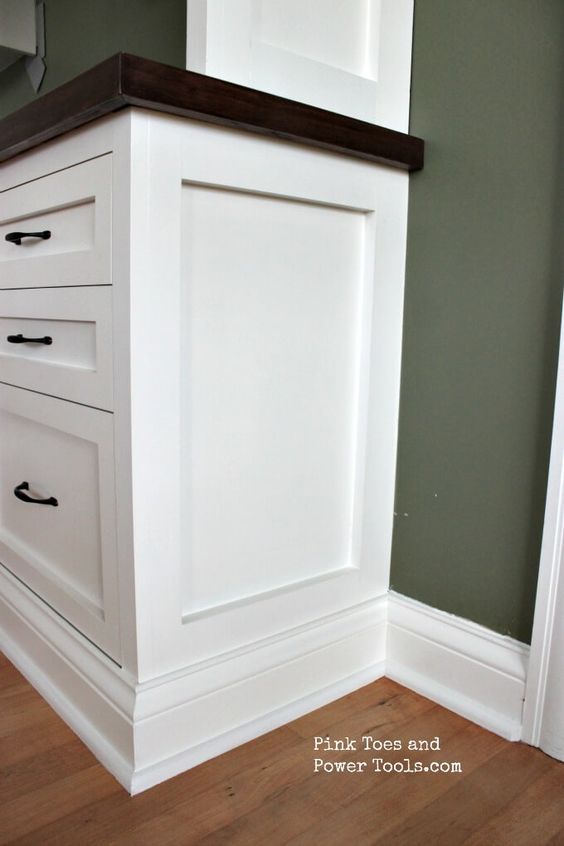
5. Don’t ignore the ends of cabinets
Cabinet ends are another (often ignored) opportunity to customize your kitchen. This can be a simple DIY using molding, or thin cover panels such as beadboard.
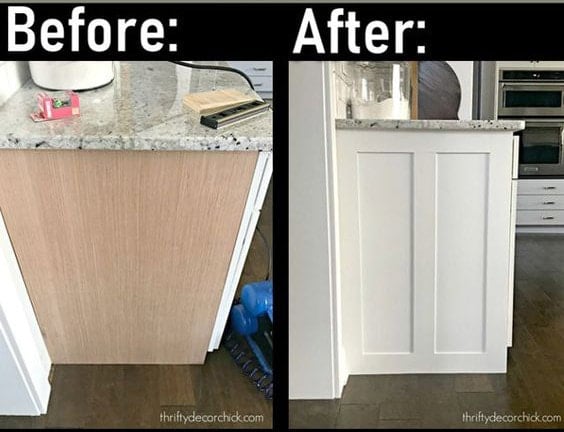
Simple shaker trim will work with nearly any style of cabinetry:
Islands are the perfect spot to add more details and help define the style of the room. In our Hacienda kitchen, we opted to clad both the sides of the cabinets and the island in vertical shiplap:

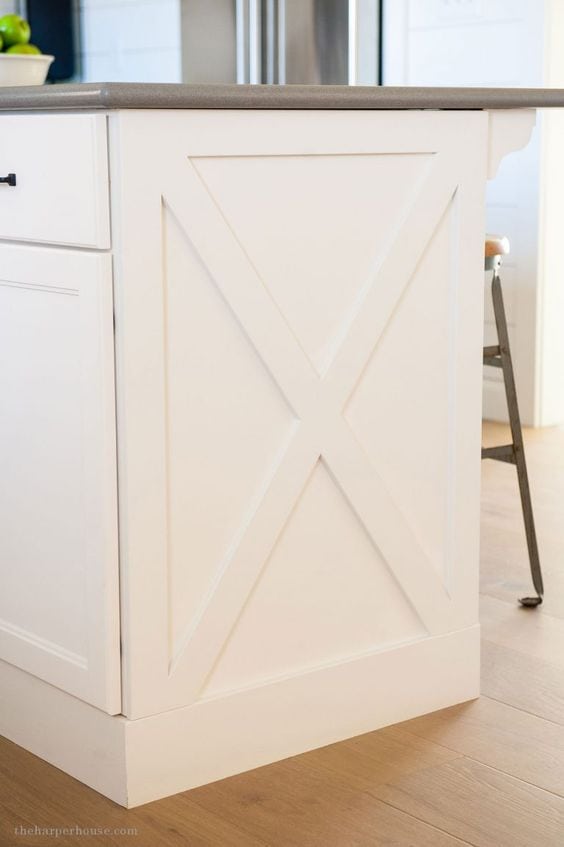
An ‘X’ shape is another popular look and easy to create with trim:
You could also make a statement with a pattern on the back of an island using wallpaper or tile:

6. Add decorative toe kicks
This custom detail was at the top of my wishlist for our Hacienda Hideaway kitchen. After gathering up inspiration on Pinterest, we came up with an arched valance toe kick design and fabricated them for our cabinetry (full tutorial coming soon!)
Most people don’t even realize there are more options beyond the standard toe kick recess, and that’s one reason they make such a statement—they’re very rare! You will spot them if you study projects from top interior designers. This kitchen by Warmington & North was a huge inspiration for our toe kick design:

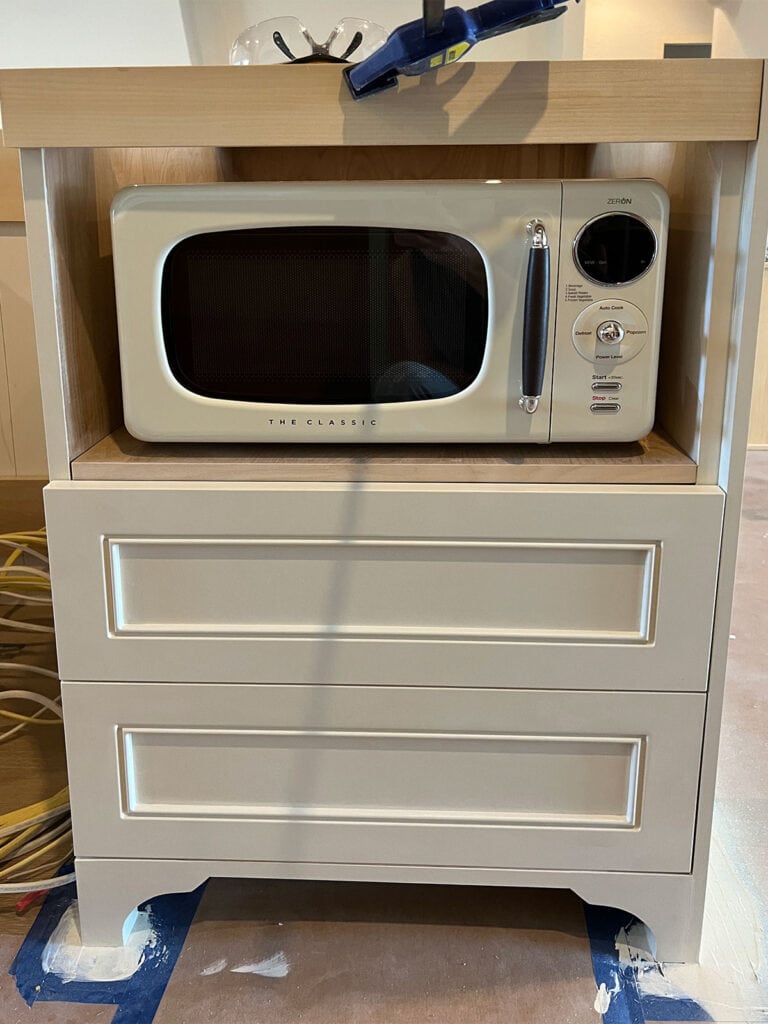
In our own kitchen, we added individual feet to the bottom of the cabinets, which is the simplest way to dress them up.
In our Riverside Retreat kitchen, we installed a flush toe kick, which only required some additional 2×4” blocking to extend the face of the toe kick, finished off with quarter round.
Any of these non-standard options will make your cabinets look more like built-in furniture and create a sense of a thoughtful, intentional design.
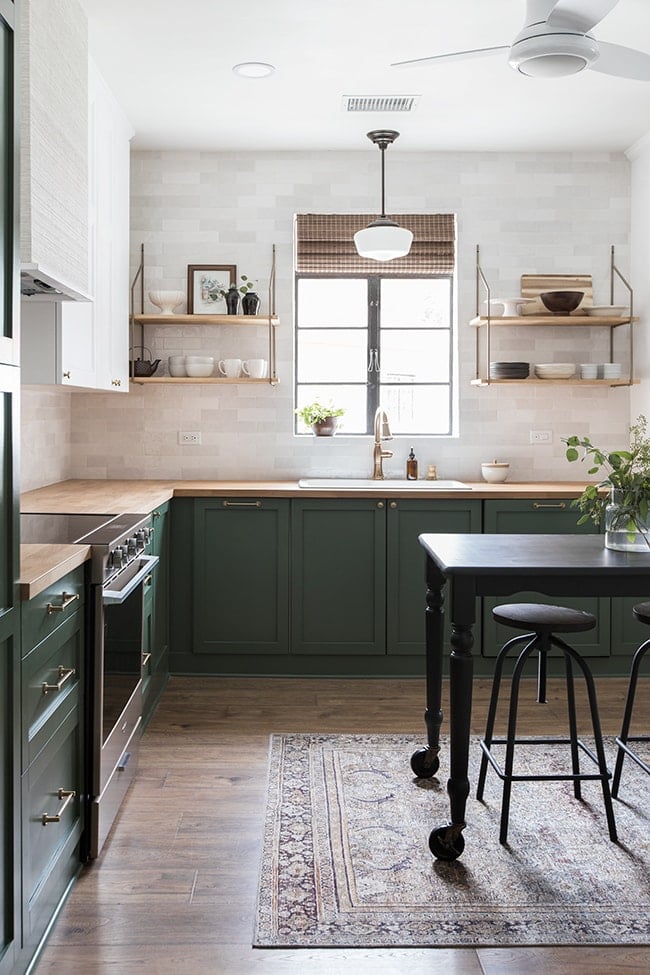
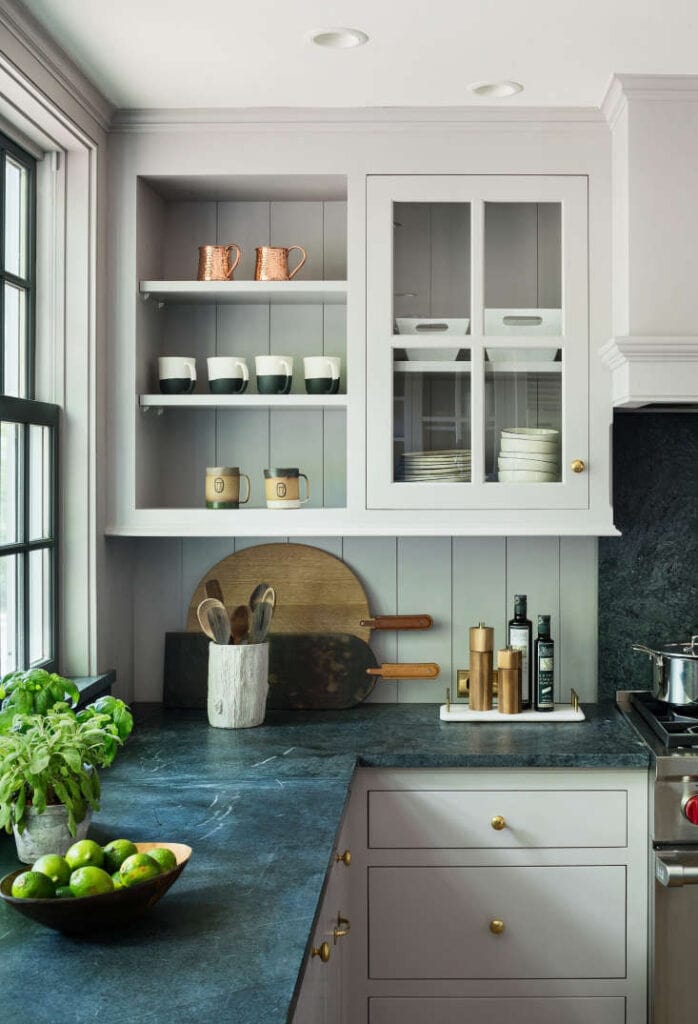
7. Go open on the uppers
If you have enough closed storage space and like the idea of displaying your favorite dishes or drinkware, consider replacing one or more of your upper cabinets with open shelving.
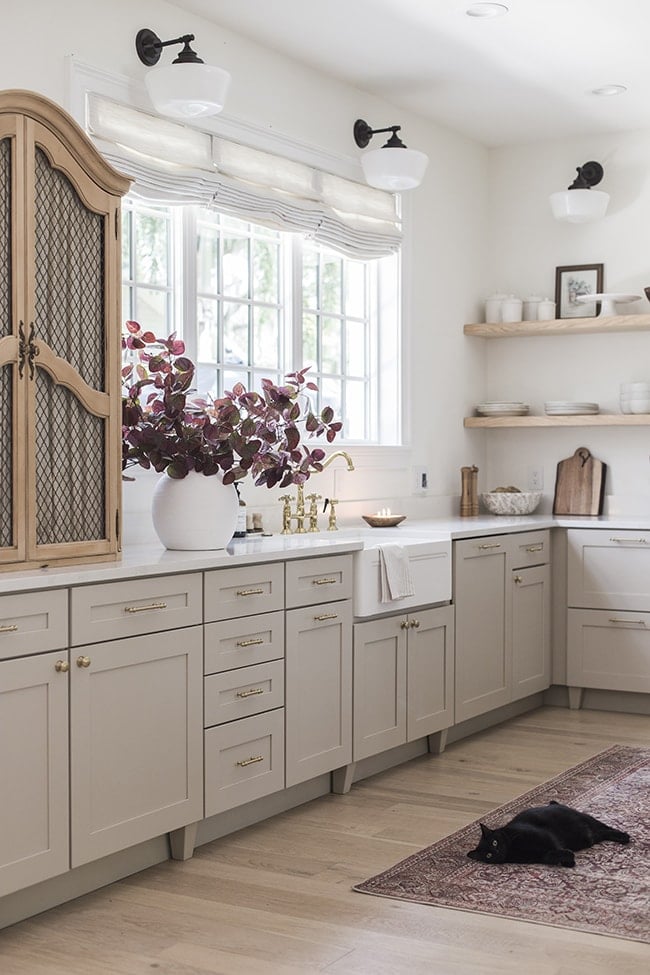
We opted for an entire wall of open shelving in our own kitchen, and love how easy it is to access our everyday dishes. While our kitchen isn’t huge and we could have used the extra hidden storage, the open shelving makes the space feel larger, and provides more character than a wall of cabinets.
I also chose this route for the Riverside Retreat kitchen, replacing the old upper cabinets with two sets of shelves.
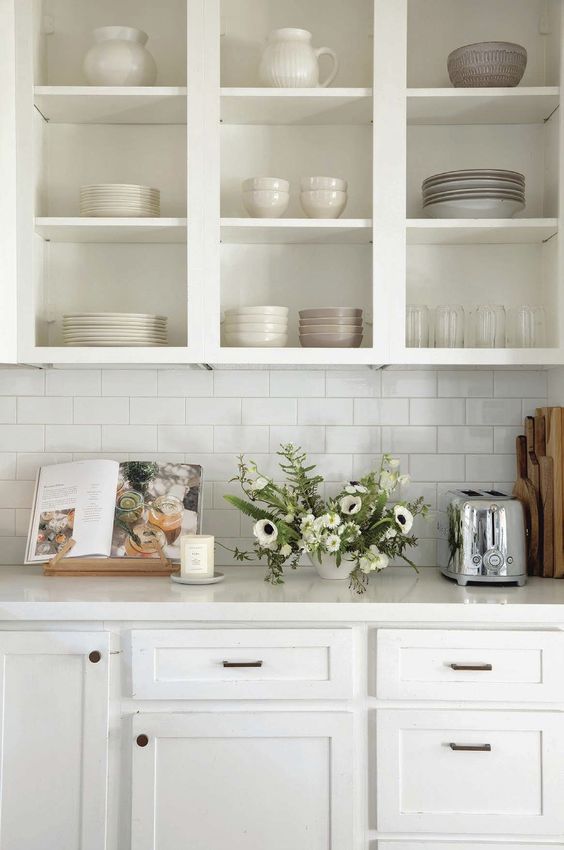
A simpler (and less permanent) alternative to open shelving would be to remove the doors from your upper cabinets for an ‘open’ feel. I love the idea of painting the boxes the same color as the wall, so they blend in and feel less like cabinets. You could have fun with it by adding wallpaper, or even peel and stick tile to the back wall.
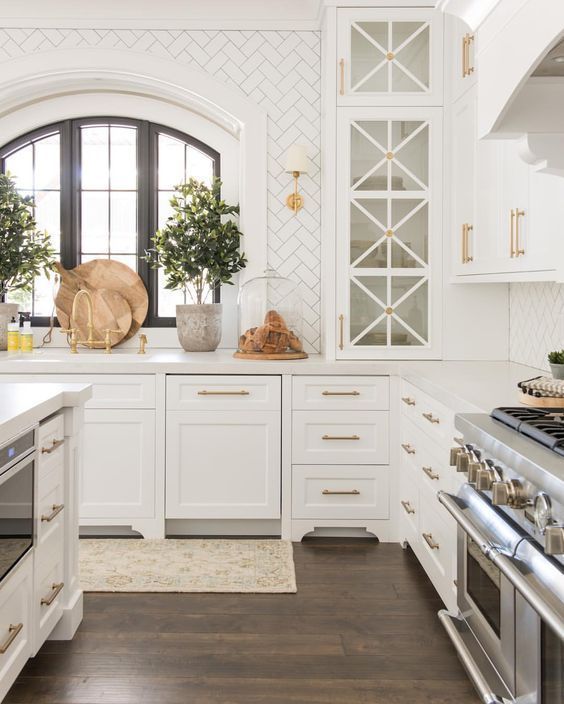
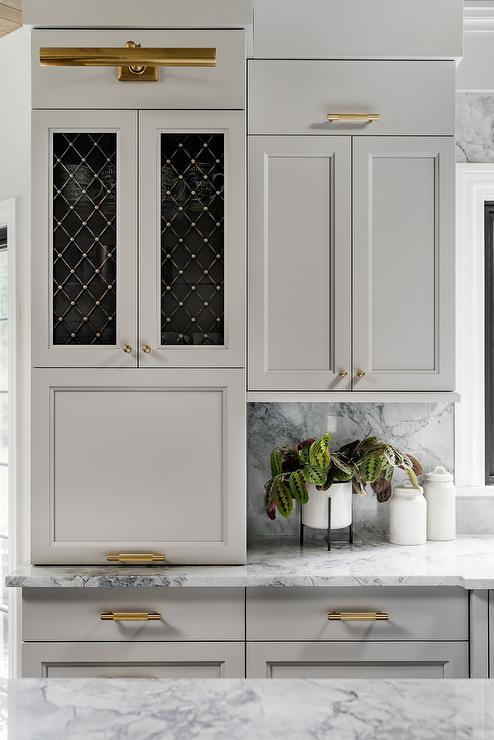
8. Add glass inserts to your doors
Here’s an alternative to removing your upper cabinet doors: add glass inserts instead! This will still allow you to display your favorite dishes while keeping them dust-free. A local glass company should be able to modify your existing doors and replace the inner panel with glass (slab doors may require additional customization).
Feel free to get creative and consider using reeded, leaded or tinted glass, or applying a mullion insert. Take it a step further with unique options like cane webbing, wire mesh or antique mirror glass.
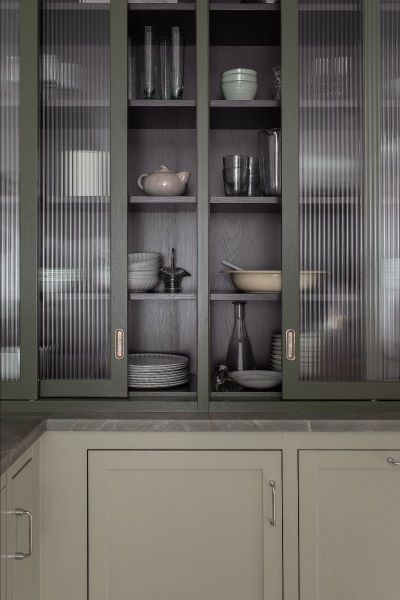
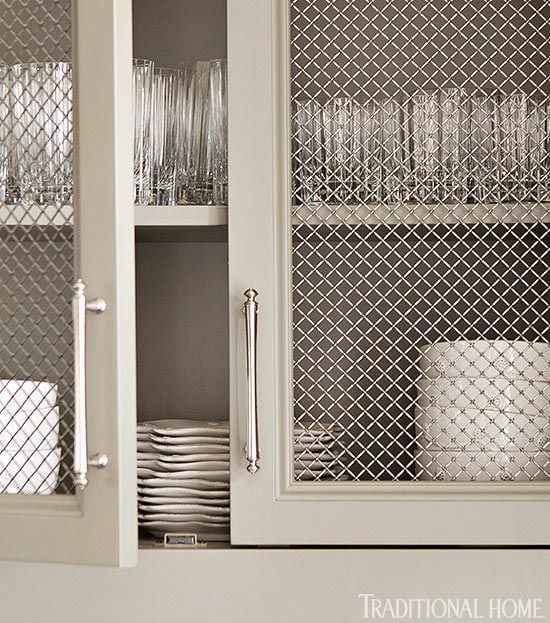
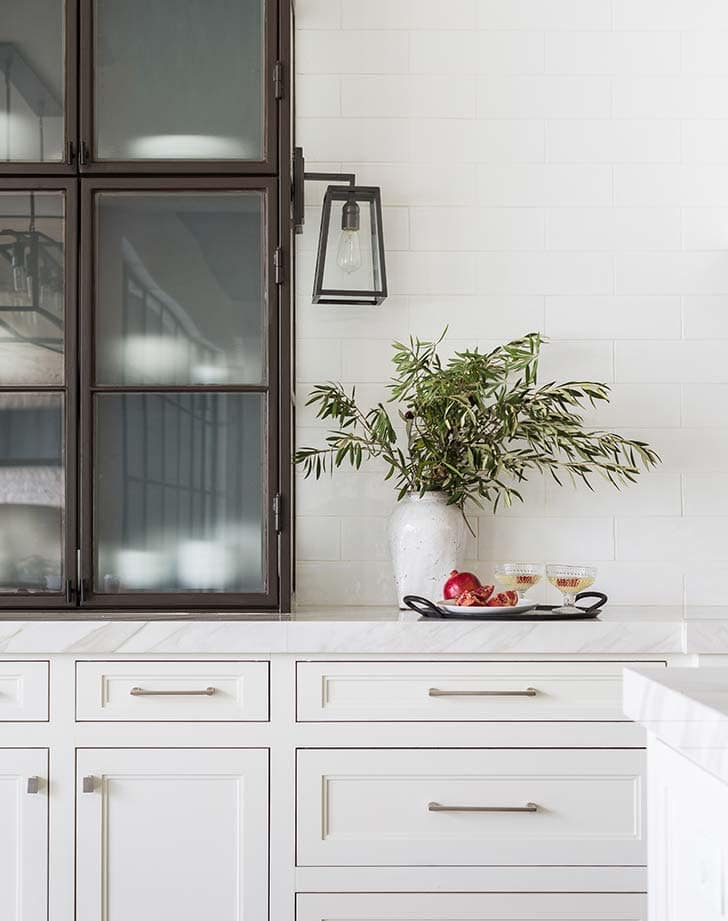
This is a great area to add your own personal style to your kitchen and experiment with something new.
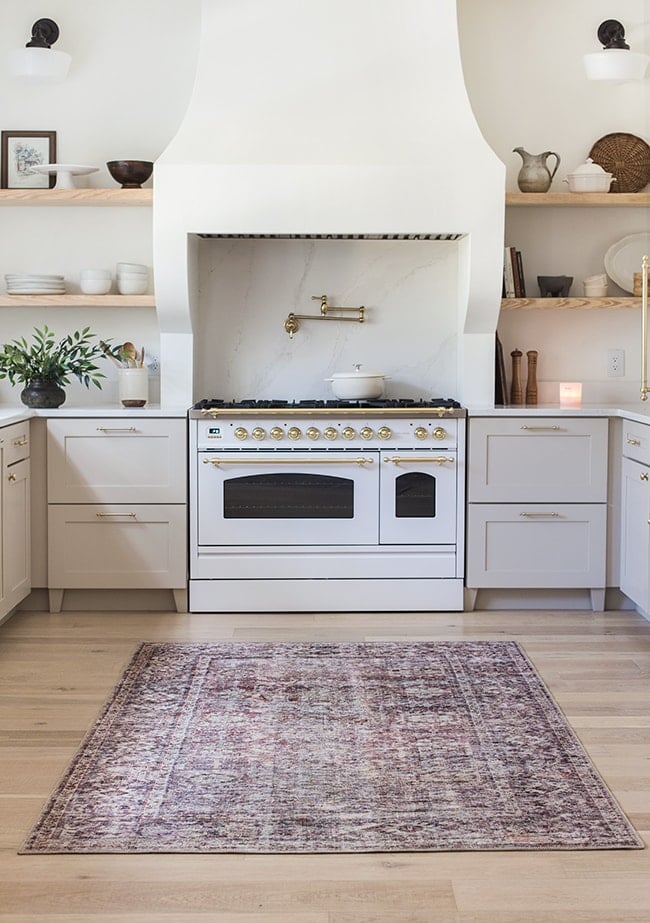
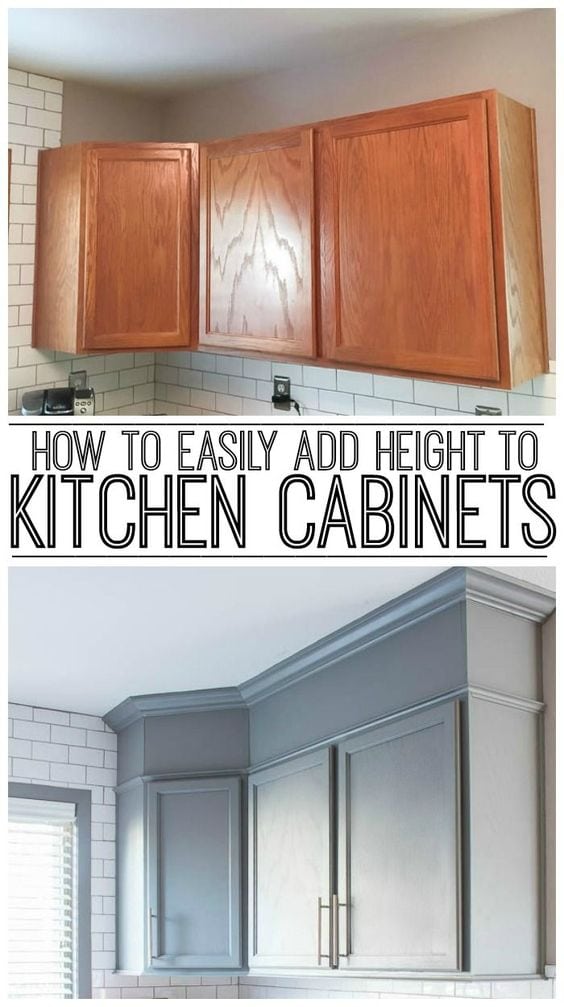
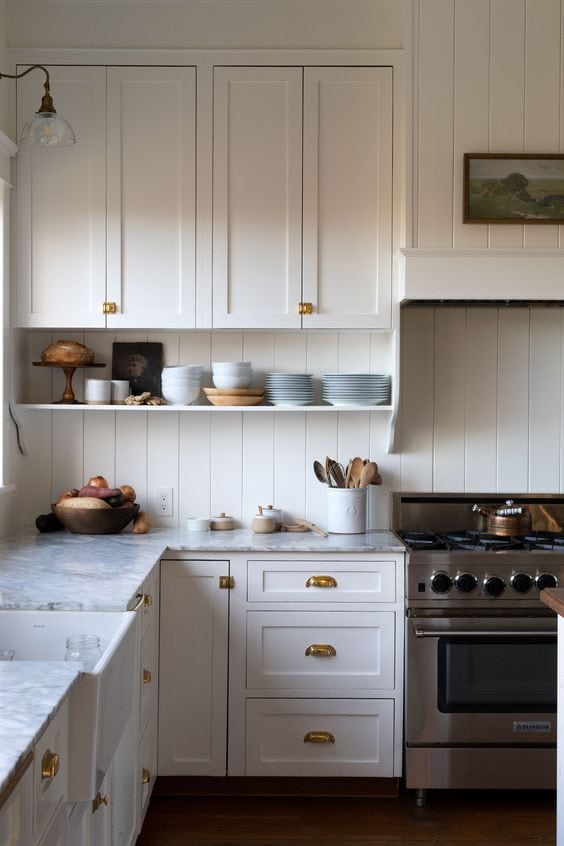
9. Extend your upper cabinets to the ceiling
Empty space above upper cabinets is one of my biggest design pet peeves, but fortunately, it’s a relatively simple fix! Filling in that gap will instantly make the room feel taller and more finished.
There are multiple ways to go about this, and plenty of great before/after tutorials online. The quickest solution requires framing out the empty space, attaching filler pieces, crown molding and painting to match your existing cabinets.
You can simply cover the gap with panels, or build functional cabinet boxes for usable storage.
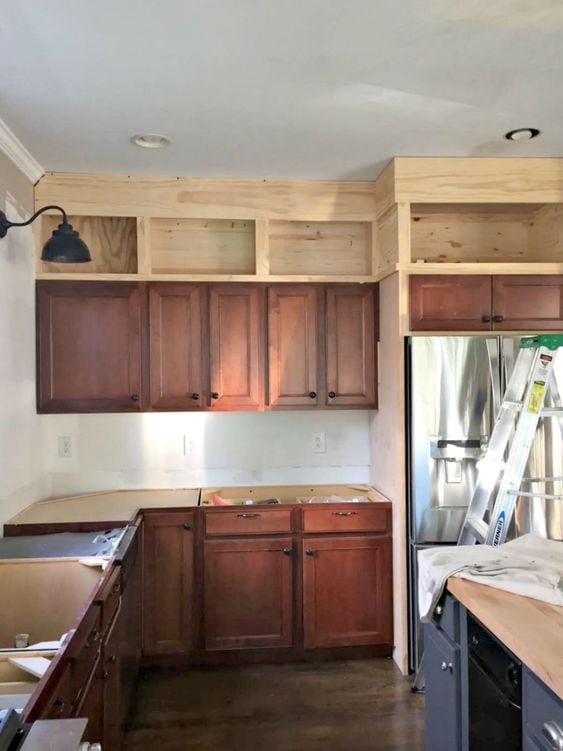
Another option is to raise the cabinet boxes higher, and add an open shelf below.
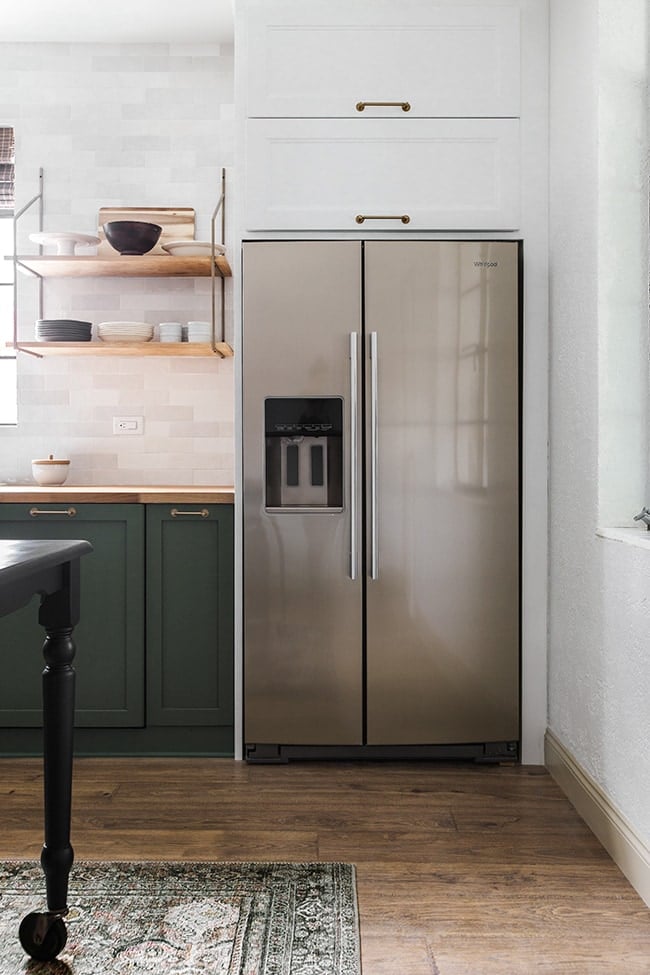
While you’re at it, consider building in a surround for your fridge, as well. Covering up the sides of an exposed fridge will instantly make your kitchen feel more polished.
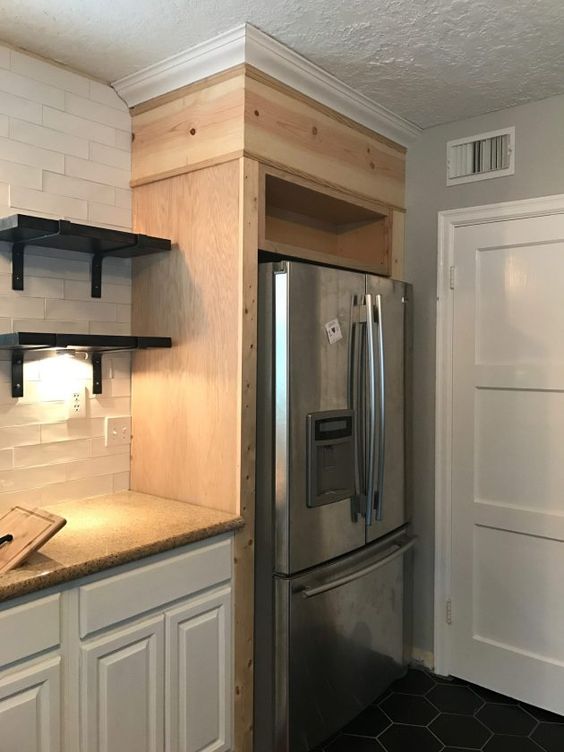
We built a custom surround in the Riverside Retreat kitchen with Ikea cabinets and plywood panels:
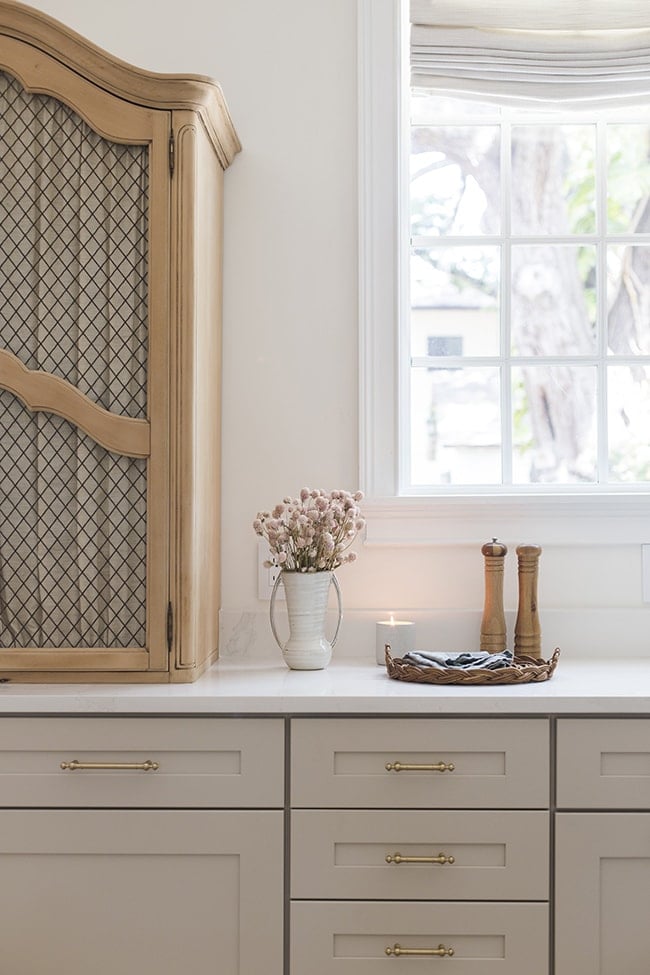
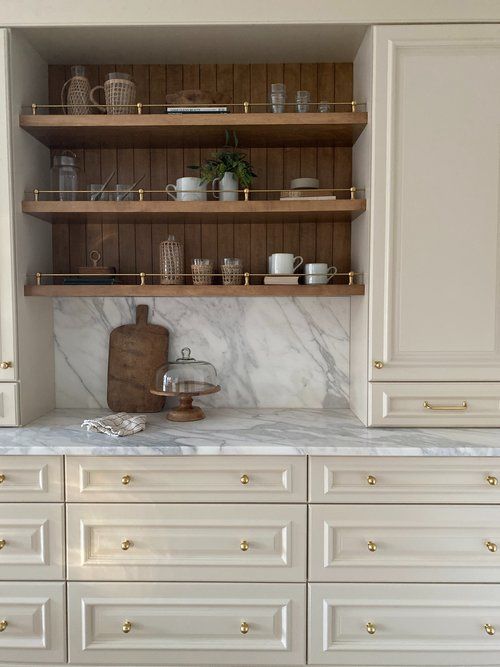
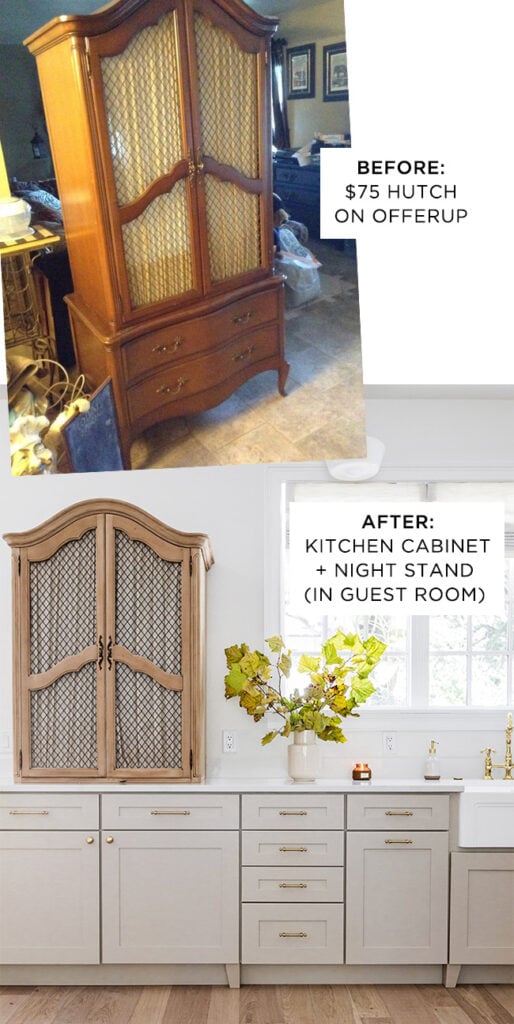
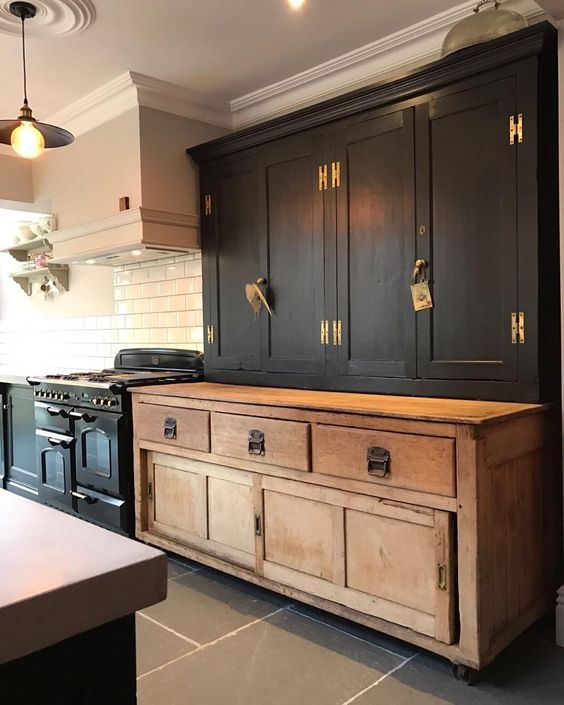
10. Incorporate an antique piece
This is my personal favorite kitchen design trick. I used two vintage pieces in our kitchen—this wood hutch that holds our drink ware, microwave and toaster:
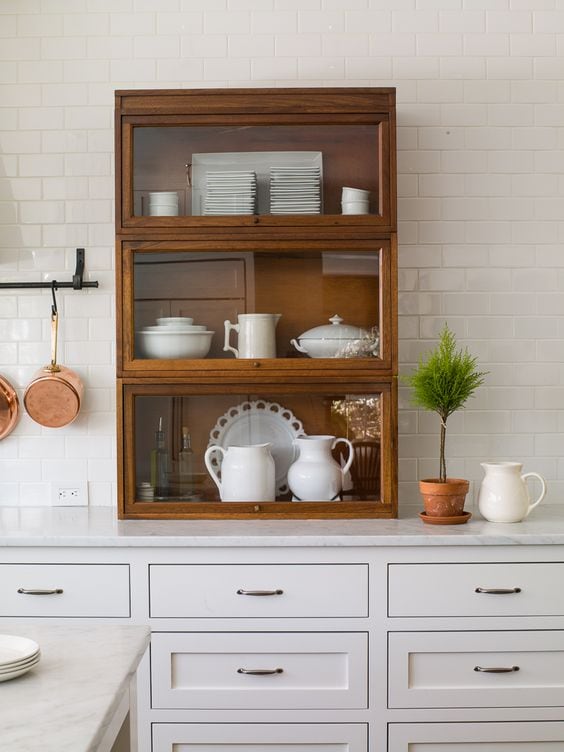
And this barrister bookcase that serves as our pantry:
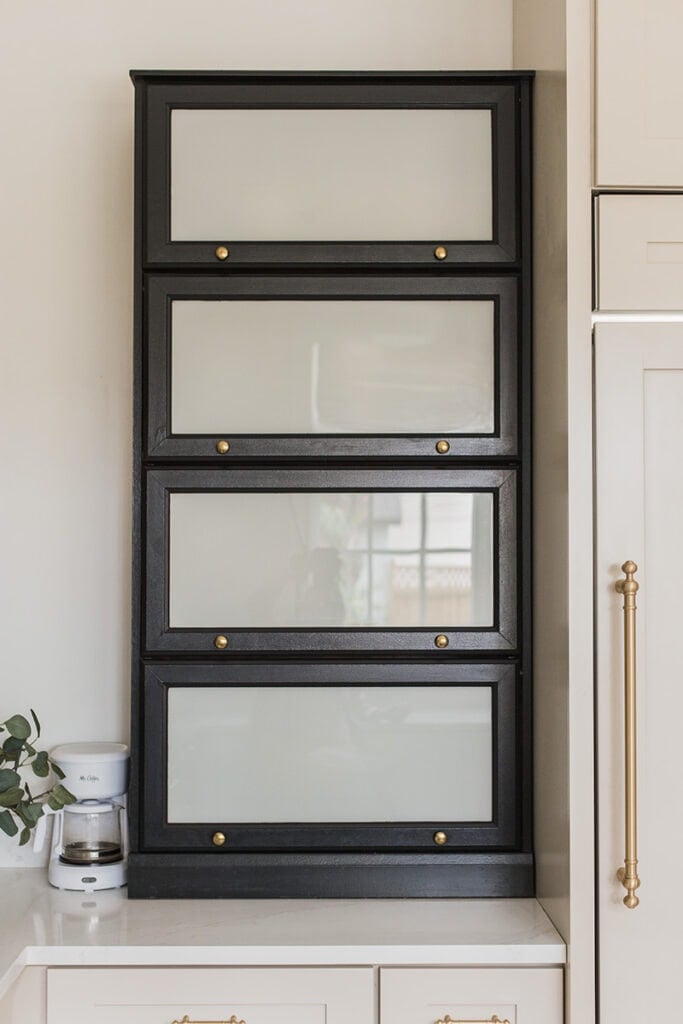
Inspired by Lauren Leiss:
Vintage pieces can easily be refinished to your taste (both of mine were) and are often much more affordable than cabinetry. They add a ton of character and will separate your kitchen from builder-grade basic.
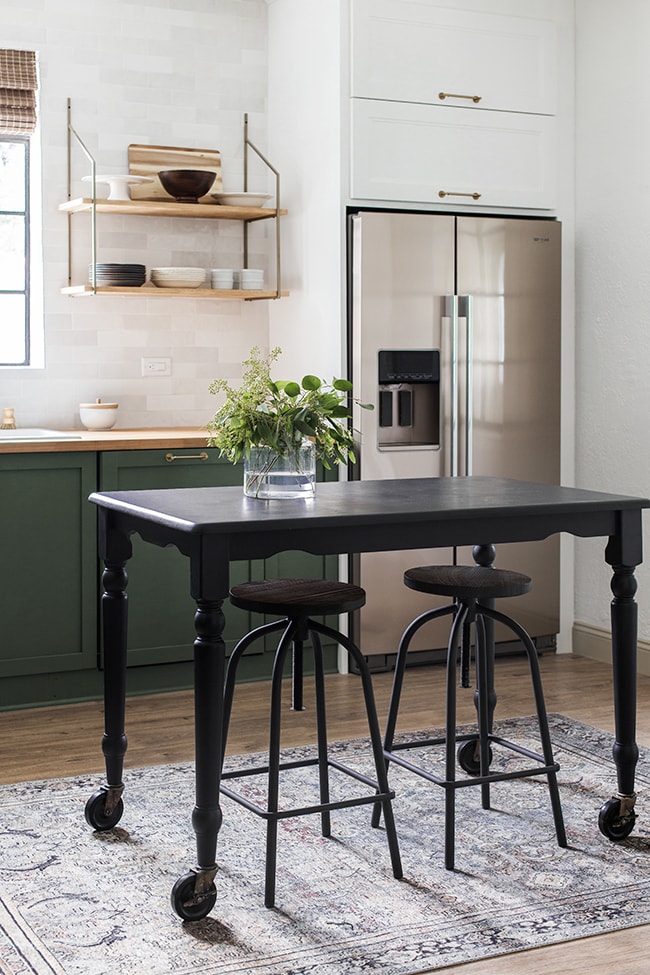
I try to incorporate at least one vintage piece into every room, and the kitchen is no exception. In the Riverside Retreat, I found a secondhand $50 kitchen table, painted and raised it with casters, and turned it into a movable island:
Consider replacing one of your cabinets (upper or lower) with an antique piece, or simply adding an old hutch if there is space.
And there you have it—ten designer-approved ways to transform your kitchen cabinets. Do you have a favorite? Hopefully this inspired you to get creative with your existing cabinets if you don’t have the desire or budget to replace them. You might be surprised at the difference one small detail can make!
Looking for more DIY kitchen ideas? Check out these favorite past projects:
- DIY Range Hood Tutorial
- Subway Tile Install Tips
- Rustic Floating Shelves
- Custom Ikea Pax Pantry
- Customized Ikea Kitchen Reveal
While we continue to work on our Hacienda kitchen cabinets, I’ll be checking in on Instagram stories with our progress. Next week: new landscaping at the Heights House!


Kimi says
I’m so tempted to take down the upper cabinets in my very small (like, 8×8) kitchen, but I’m afraid of losing enclosed storage. Shelves would just be so pretty though! Painting is high on my list this summer too!
Teresa says
I love the open cabinets. I am working on mine as well. Was thinking about curtains but luke the open concept better. Will probably paint the shelves a different color. Love all the redo ideas.
Lauren says
You are the BEST!
Julie says
I hadn’t seen your kitchen hutch “before” picture before now. HELLO BEAUTY & THE BEAST MOVIE!! (Madame de la Grande Bouche….) SO many great kitchen pictures!
Jenny says
THIS!……I LITERALLY STOPPED BREATHING WHEN I SAW EVERY SINGLE KITCHEN. Absolutely stunning kitchens. We are redoing ours and this gave me pure love!
Thank you so much!
Jenna Sue says
I’m so glad it was helpful! Thanks for taking the time to comment, Jenny 🙂
Jane says
I would love to know what color of paint you painted the whitish cabinets.
Jenna Sue says
Hi Jane, which cabinets are you referring to?
Jen says
Ok, question for you. We have 12′ ceilings in our kitchen and family room area. Grey cabinets. We did tall 42″ uppers with an 18″ upper above it and then a riser and then a crown molding. We still have like 2′ above our cabinets to our ceiling. How would you handle that? It really bugs me, but it’s not like we skimped on cabinets. I see very few options out in the design world with 12′ ceilings and how to do cabinets with those. I suppose I could do a soffit down to them but that seems counterintuitive to what is usually the norm.
Would love your advice!
Jenna Sue says
Hi Jen! With 12′ ceilings, I think you can get away with empty space at the top. My first choice would be to make them usable and add a rolling ladder if there’s room. If that’s not an option, I’d make sure the wall and cabinets were the same/a similar color so the empty space blends in better. Here’s an example of tall ceilings where the empty space doesn’t stand out too much: https://www.pinterest.com/pin/412431278383947359/
Kate says
Still waiting hoping for a response to my previous comment about curtaining lower cabinets after removing the lower cabinet doors.
Nikki says
God dammit. I just finished designing a kitchen and now I want to redo the entire thing
Jenna Sue says
Nooo! My goal with this list was to provide ideas and simple changes to work with what you already have. No need to redo it all! 😉
Ben says
Hi Jenna, love your work 👌
I have a slented ceiling in the kitchen going into the dinning room.
Can i still fill in the Gap over the upper cabinets will it look ok?
Thank you
Ben
Jenna Sue says
Hi Ben, thanks for commenting! Without seeing a photo of the space, I would still most likely fill in the gap. We have vaulted ceilings in our Hacienda kitchen and will be doing the same.
Pat says
Great post! Lots of good and timeless ideas.
Jenna Sue says
So glad it was helpful, Pat!
Wendy says
I’m loving following along with the kitchen remodel on IG! Do you have any suggestions for installing new countertops on a budget?
Jenna Sue says
Butcher block is quite inexpensive, and Ikea has some decent budget options as well. But for something higher quality and more durable, I’d look into solid surface. It’s also worth visiting a few local stone/counter suppliers to see different materials in person.
Kate says
Thank you for a lot of great info for kitchen updating. I am thinking about some of your suggestions AND am seriously thinking about replacing the kitchen cabinet doors with fabric curtains. I am surprised and disappointed that you did not include this in your list of possibles.
Jenna Sue says
That’s definitely an option, too! Although it is pretty taste specific, leaning into a cottage/farmhouse style, so not a consideration for many readers. I tried to narrow down the list to ideas that could be applied to almost any kitchen 🙂
Pamela Cribby says
Hello Jenna Sue and Lucas… I have not commented in a while.. Again.. Sending you both a BIG THANK YOU for all you do and all you share with us.. Your my Favorite DIY’ers… I love everything you do.. If you lived in my area I would hire you in a split second.. Hi to little Esme too.. Hugs from Washington…
Jenna Sue says
Thank you for the kind words, Pamela! So glad you are enjoying our projects 🙂
Mak says
Such a wonderful post! I’ve been on the hunt for some timeless brass/gold or black kitchen cabinet hardware with a backplate included. Any recommendations? Thanks!
Jenna Sue says
Hi Mak! I love these and strongly considered them for our Hacienda kitchen: https://bit.ly/3wqIJqn