Ringing in the new decade with a new kitchen!!! After months of tireless work transforming this space, I’m thrilled to share the results!
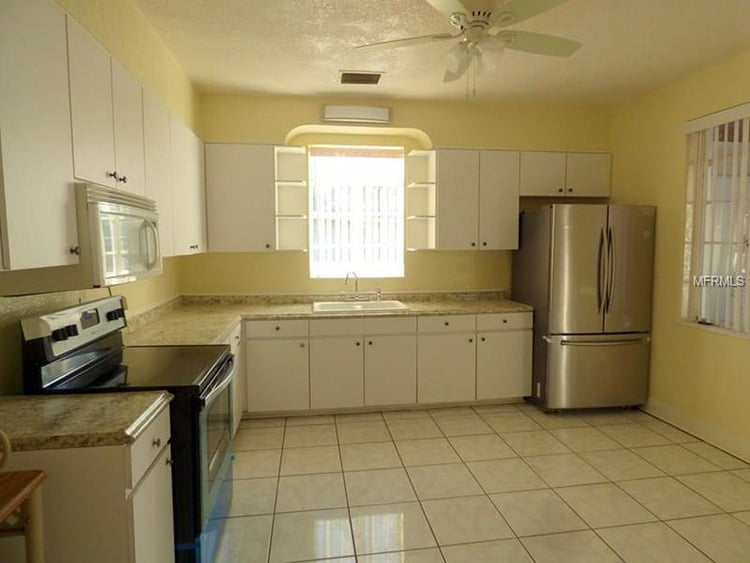
If you’re just joining the party, make sure to get caught up on the whole process with Part 1, Part 2, Part 3 and Part 4. Here’s how the kitchen looked before:
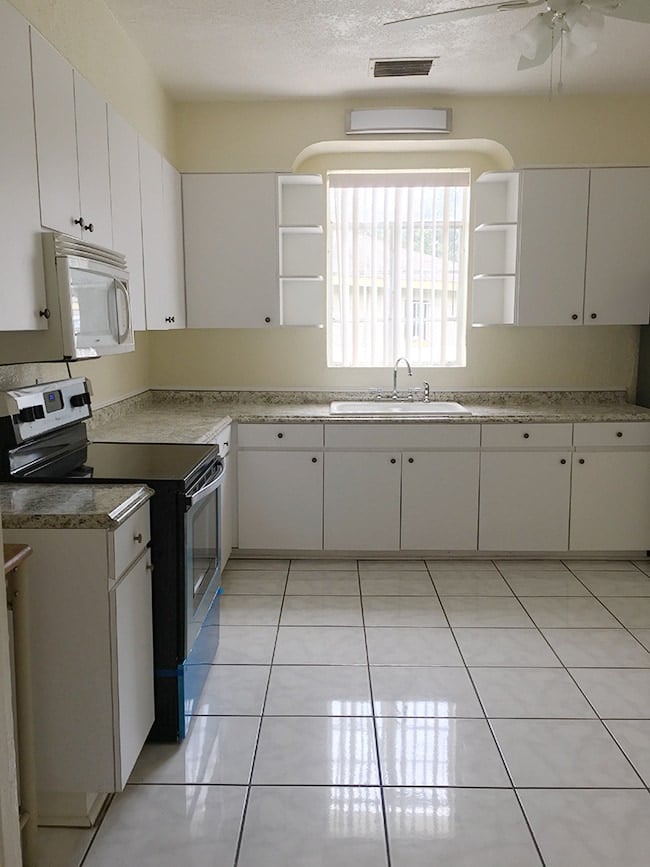
It’s your standard 13×13′ room, L shaped layout.
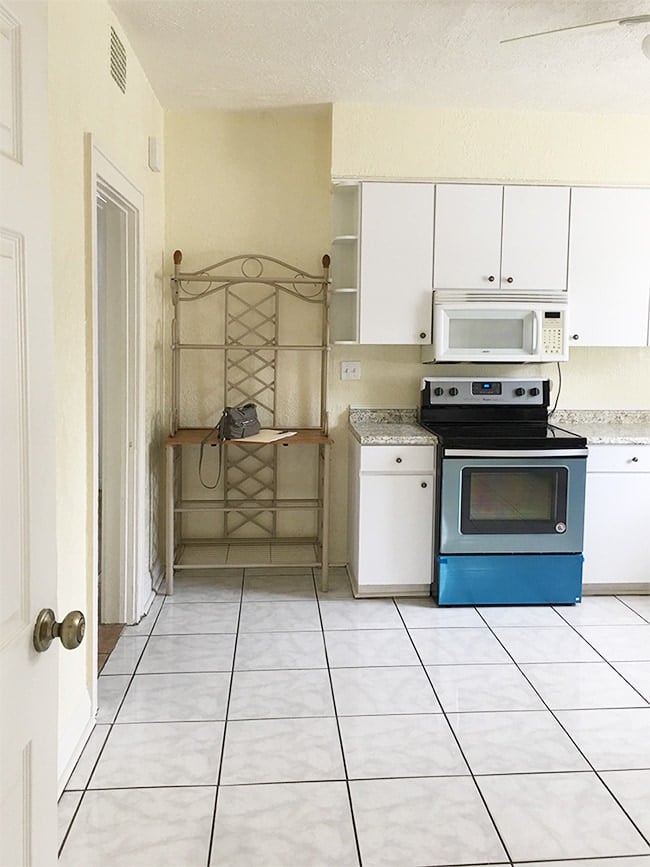
There’s a doorway leading from the dining room and another to the laundry room.
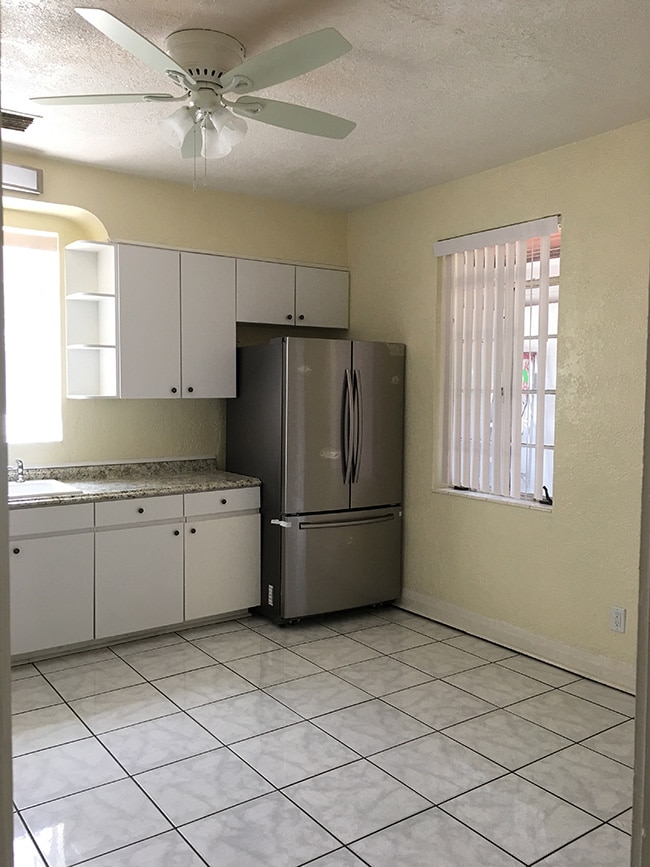
With the floor plan of the house, we didn’t have the option to change or increase the footprint (including widening the main doorway, which borders a bedroom).

But even if we did, the goal was to transform this room on a budget—this house will be a vacation rental and as an investment property, we need to minimize our costs.
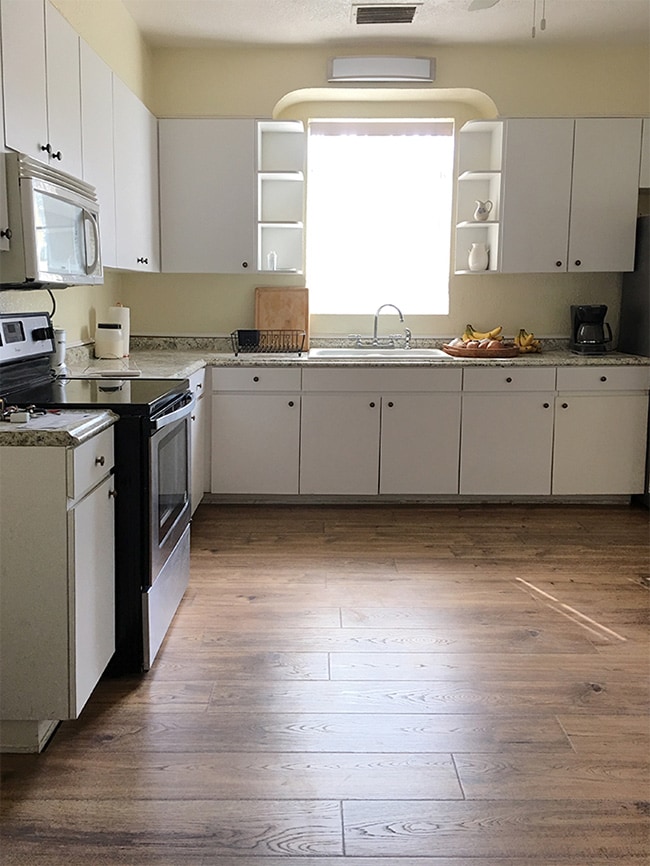
For this makeover, that meant choosing inexpensive finishes and lots of DIY! We first replaced the old tile with durable Pergo laminate back in 2018 (currently on sale for only $2.48/sf right now, I highly recommend these for wear/durability!):
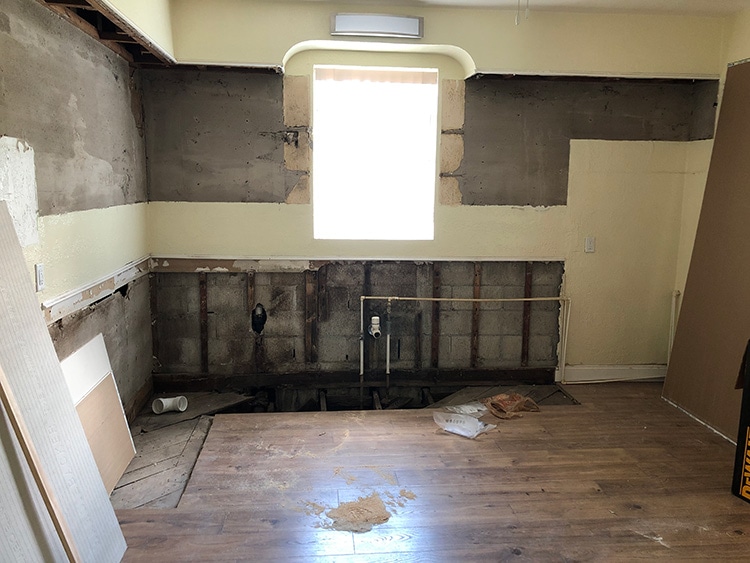
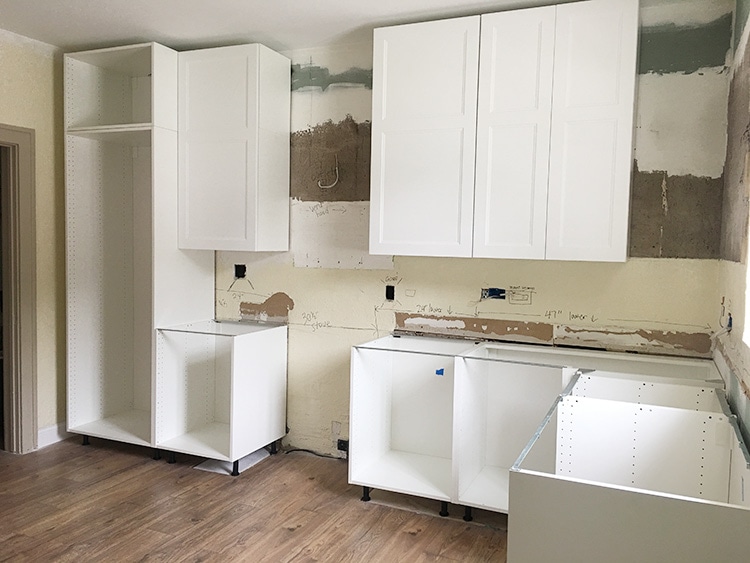
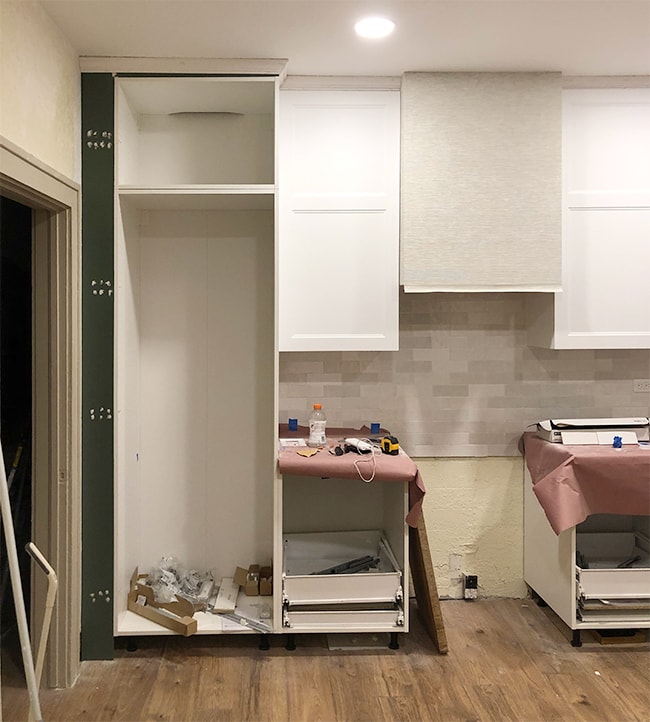
Over the last summer, we gutted the kitchen, redid some of the rotted joists, ran new plumbing and electric.
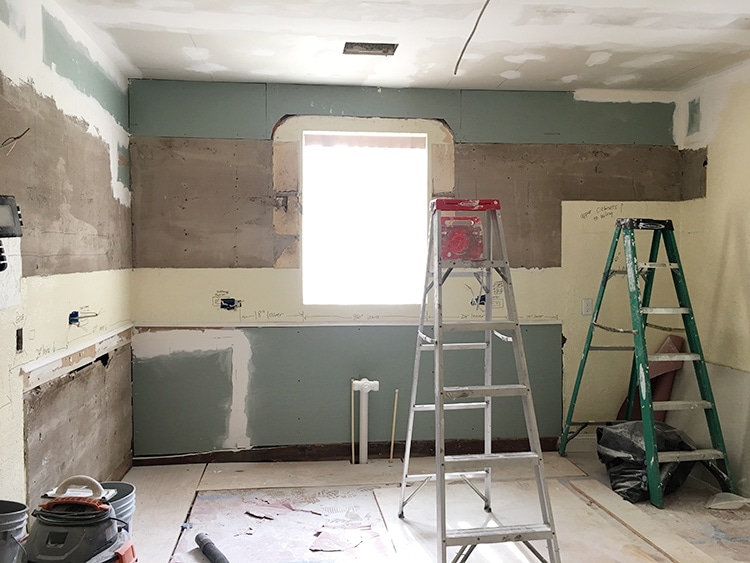
We also repaired the walls and added smooth drywall to the uneven ceiling.
We waited for Ikea’s kitchen sale and purchased all of the cabinets, built-in dishwasher and countertops for around $5800 (more details on that in this post).
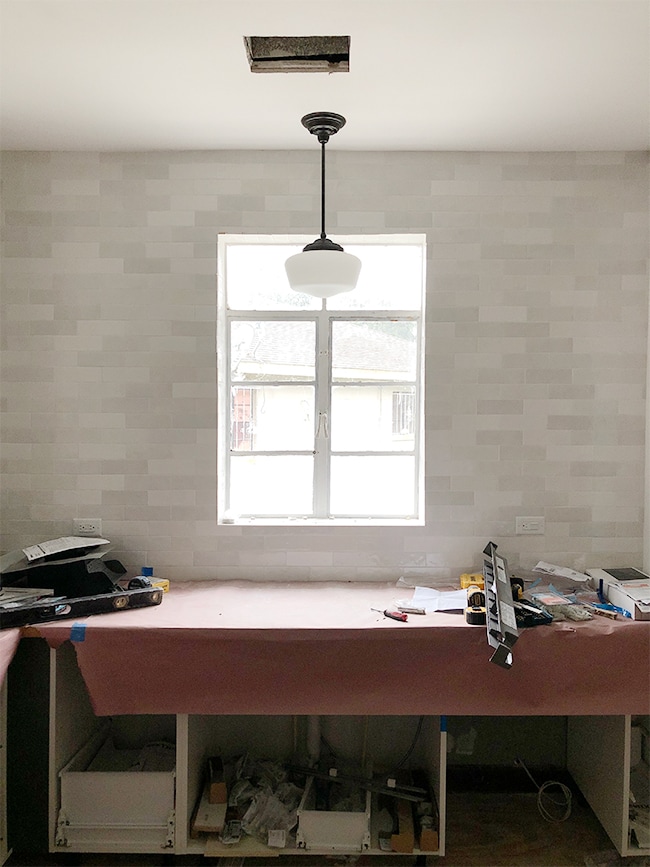
The backsplash tile was installed (we hired this part out to save time) …
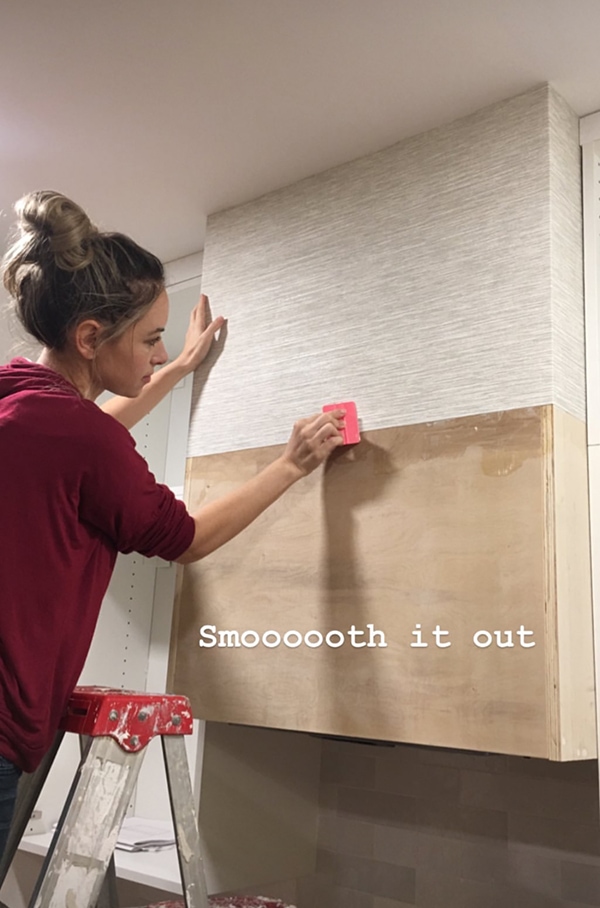
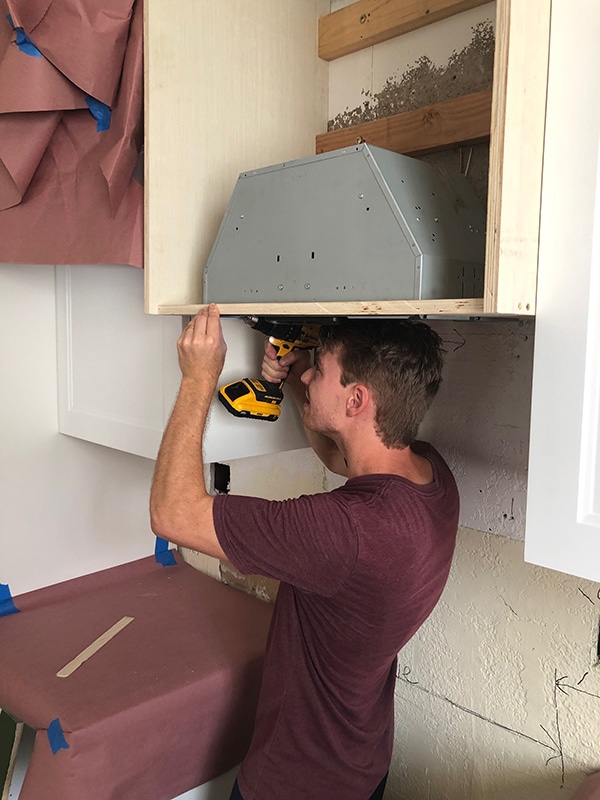
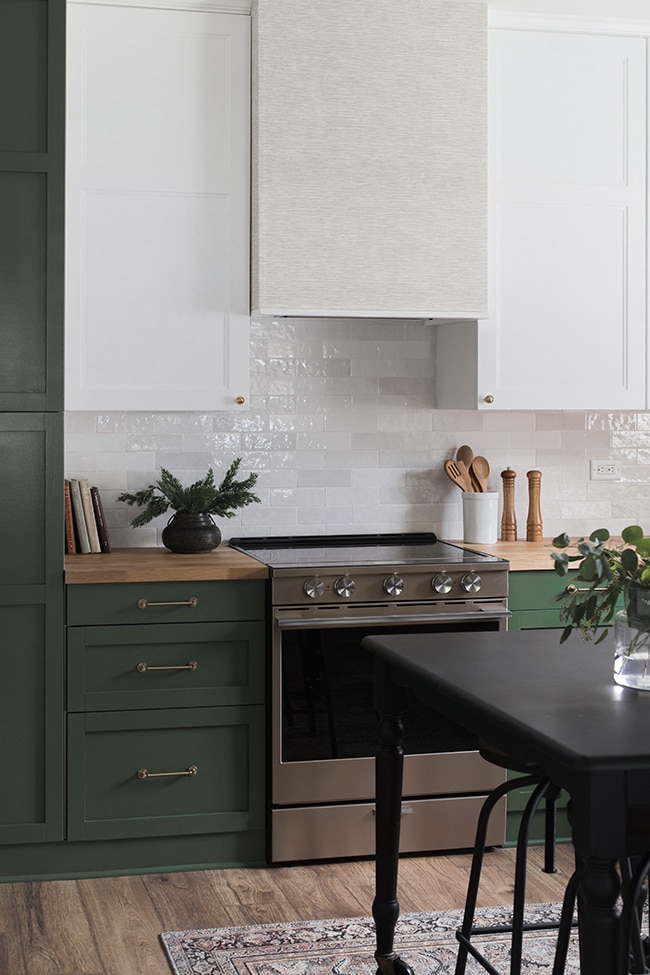
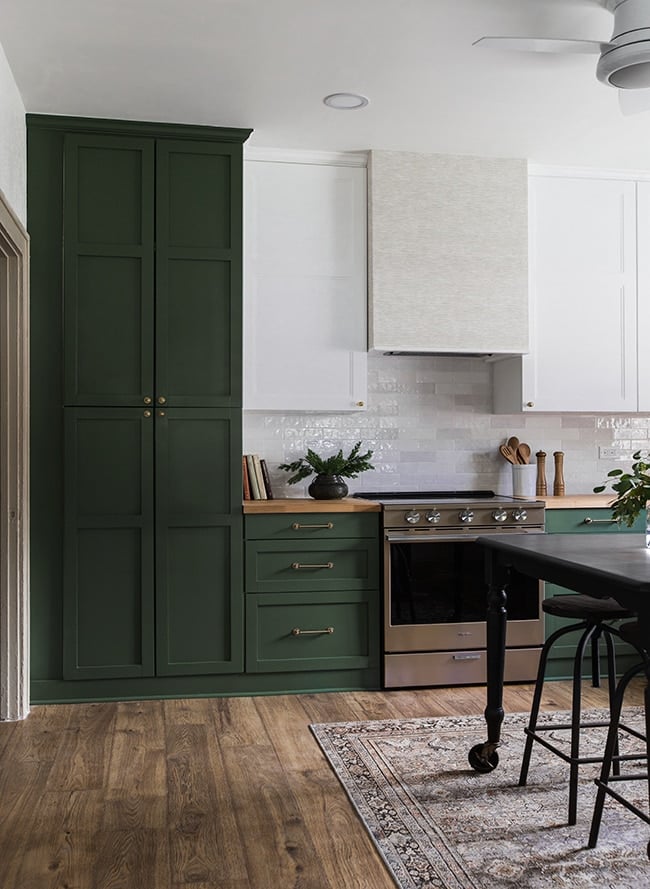
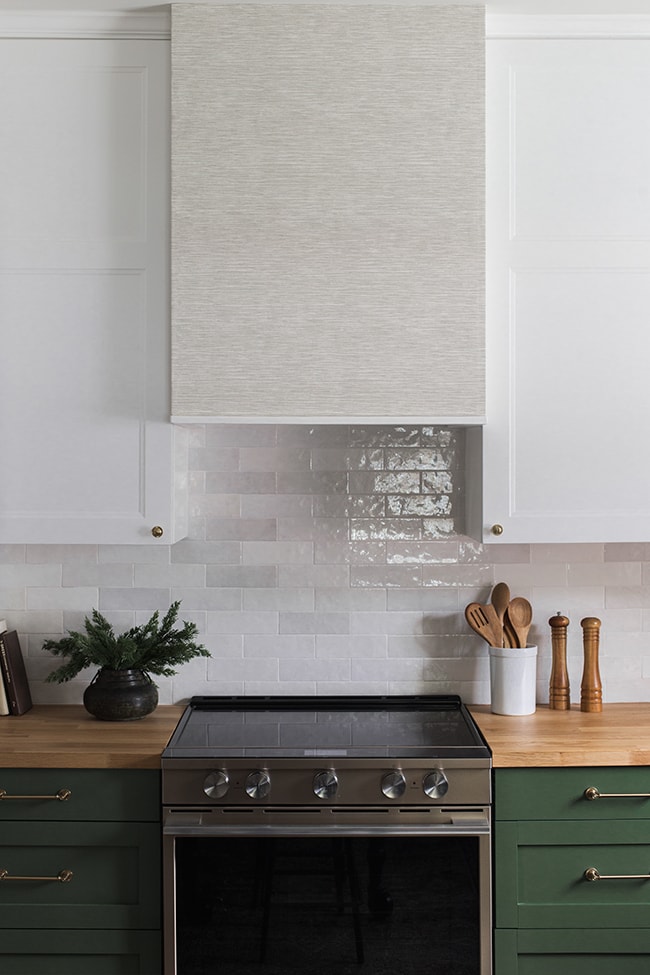
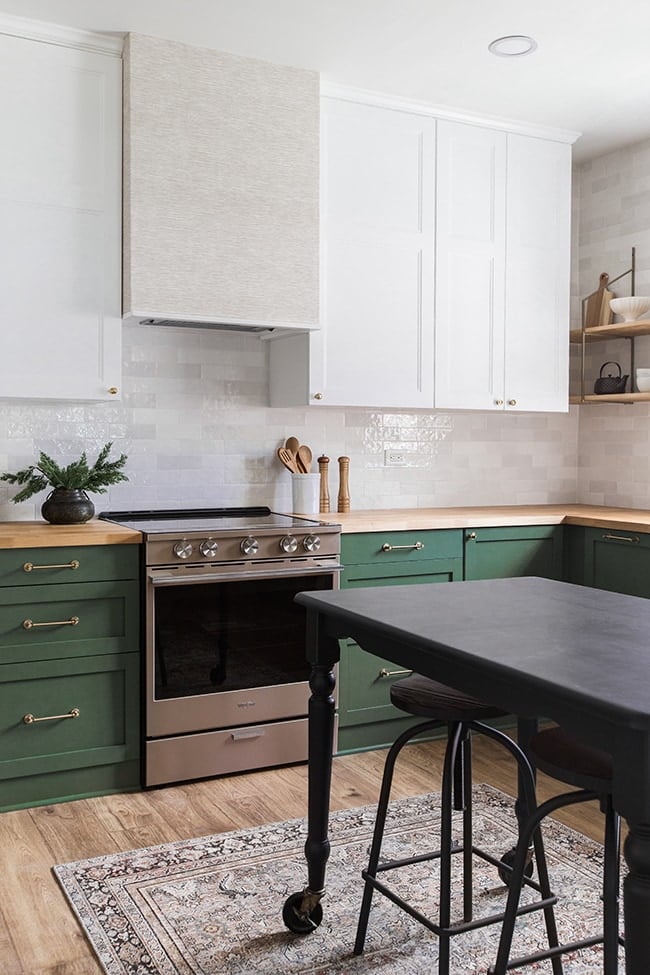
And then Lucas took over and spent his nights and weekends finishing the rest. So much custom work went into this, like building a custom range hood (which we finished with wallpaper!)…
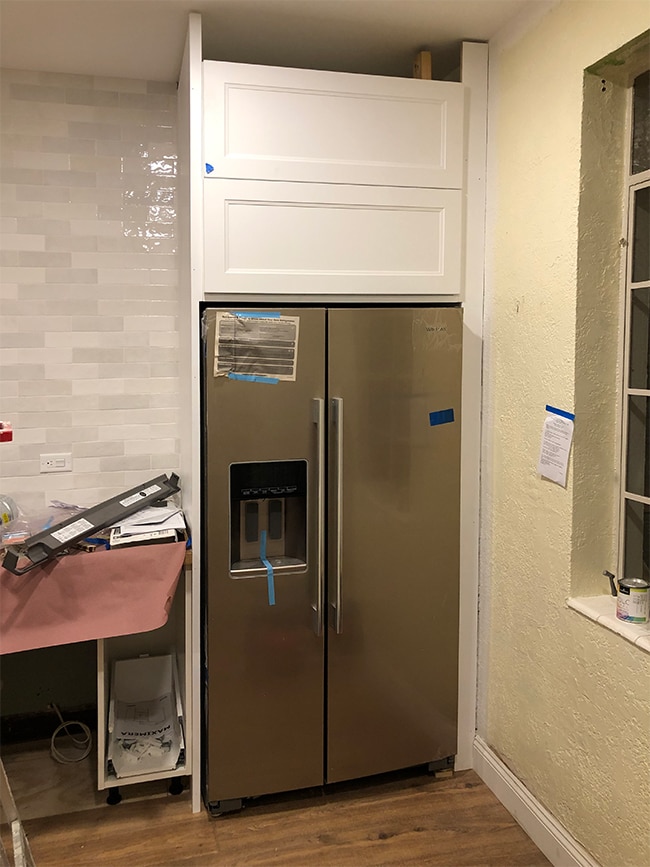
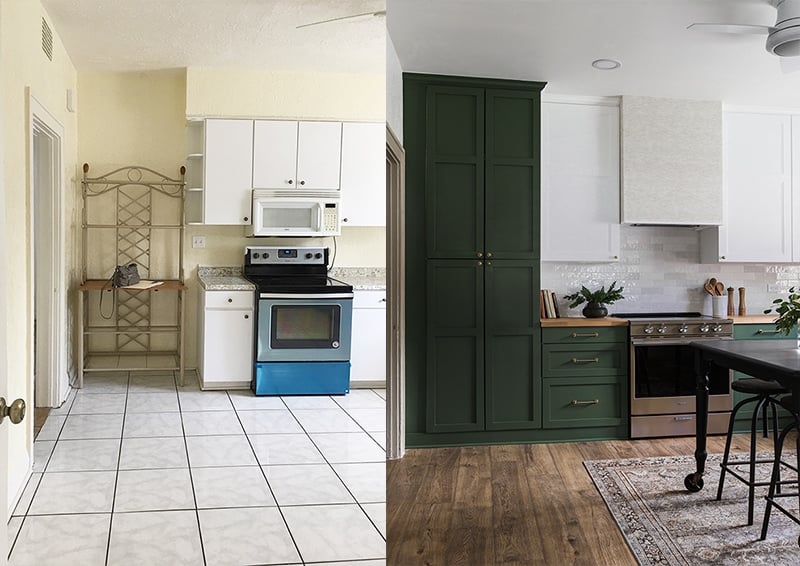
Custom wood panels around the fridge…
And around the pantry cabinet…
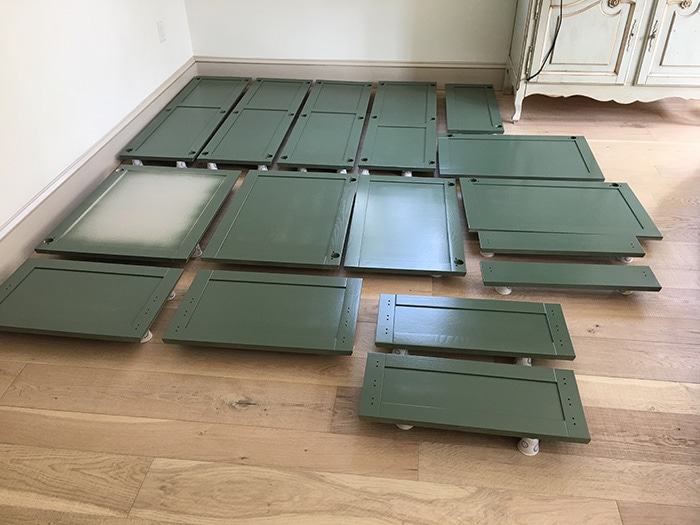
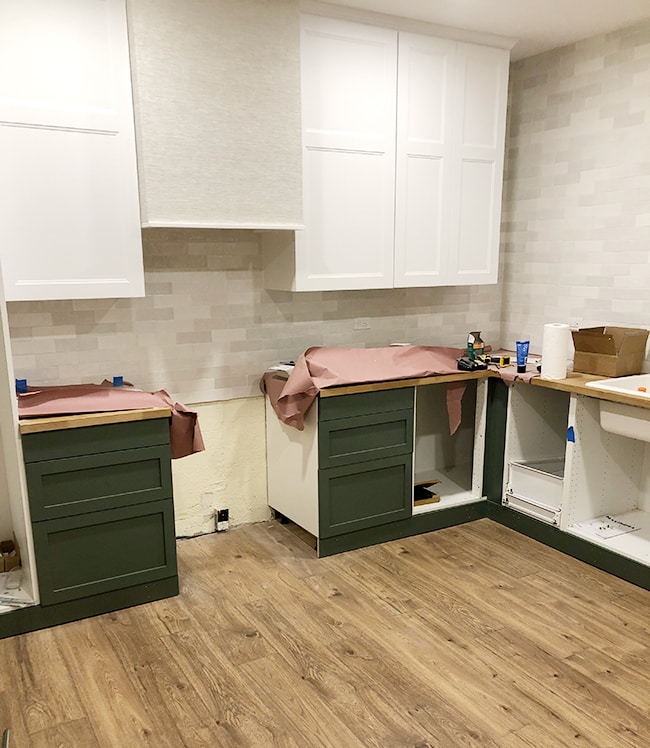
And of course, the weeks-long process of painting the lower wood cabinets (our first time using a paint gun):
And all of the custom fit trim and baseboard around the lower cabinets…
It was truly a learning experience for Lucas, who did 95% of the work (I wish I could have helped more, but someone’s gotta watch the baby!) It was his first time figuring out most of this and I’m so proud of his work ethic and determination to complete this project.
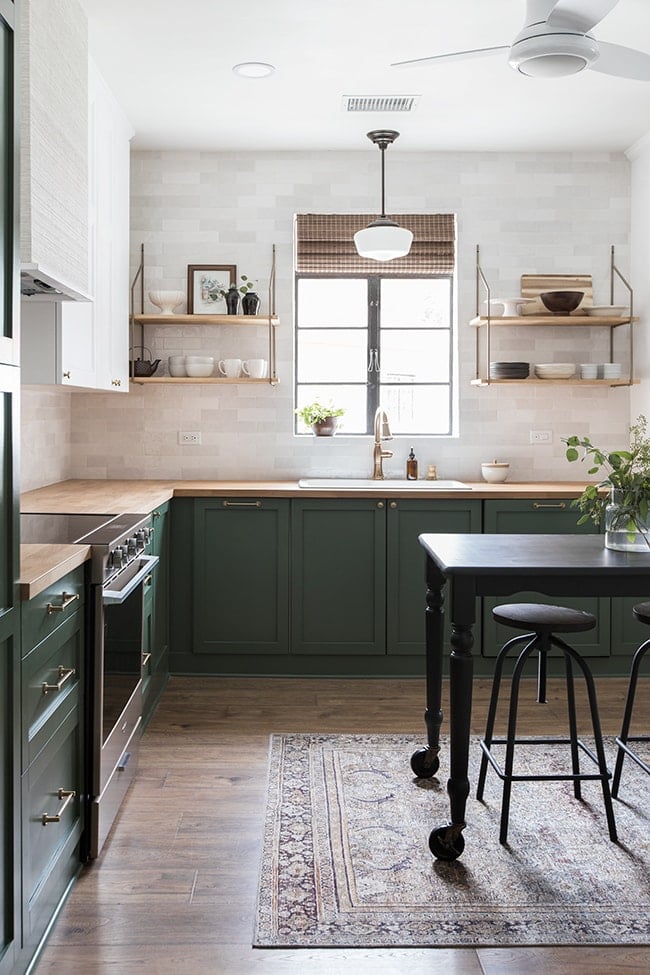
In the end, it took significantly longer than we had expected/hoped but going into the new year we have a brand new custom kitchen that I think anyone would be happy with!
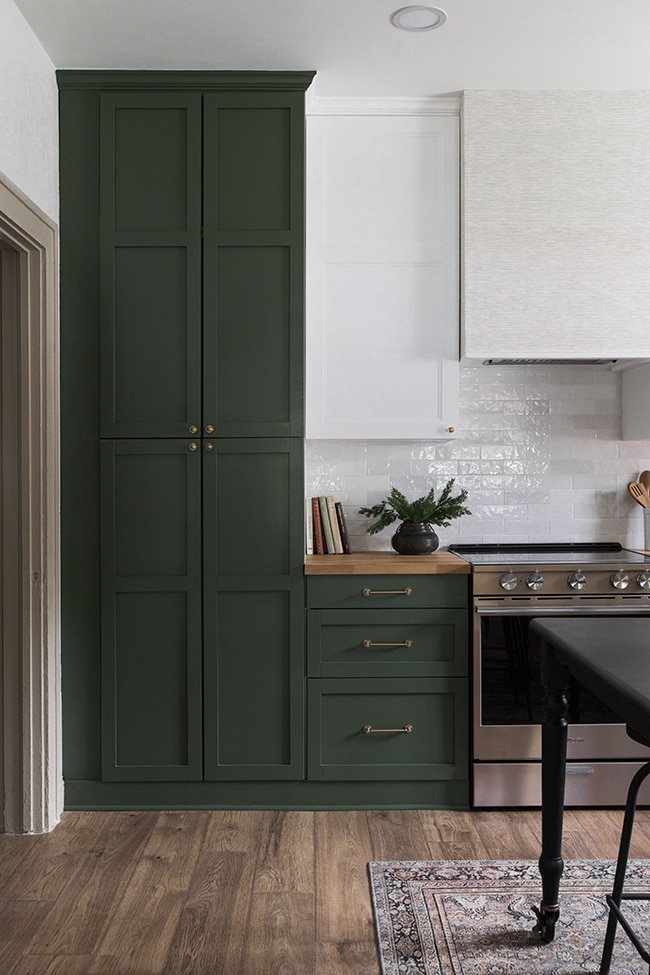
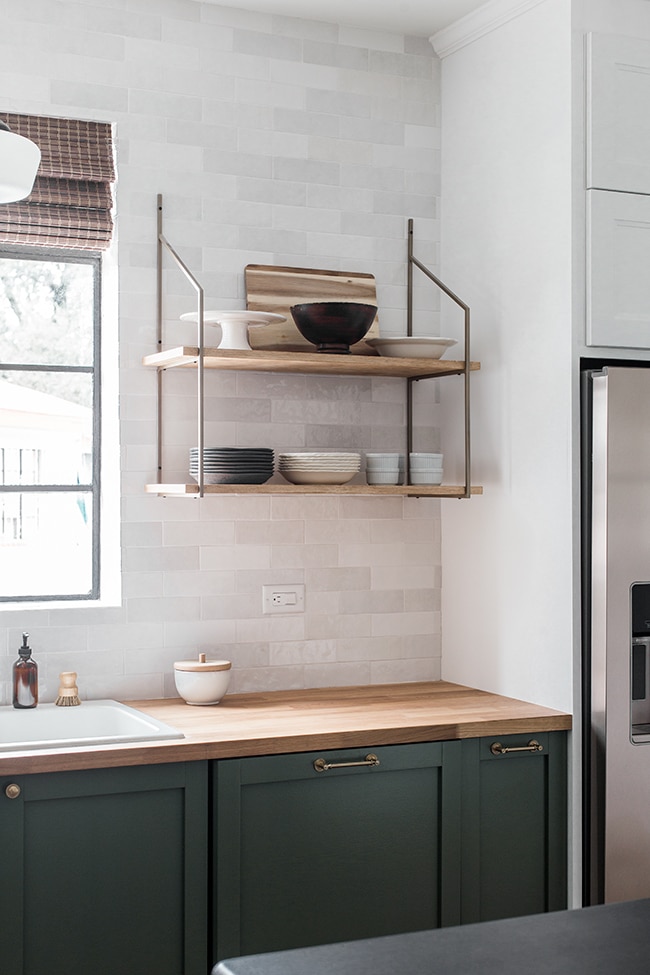
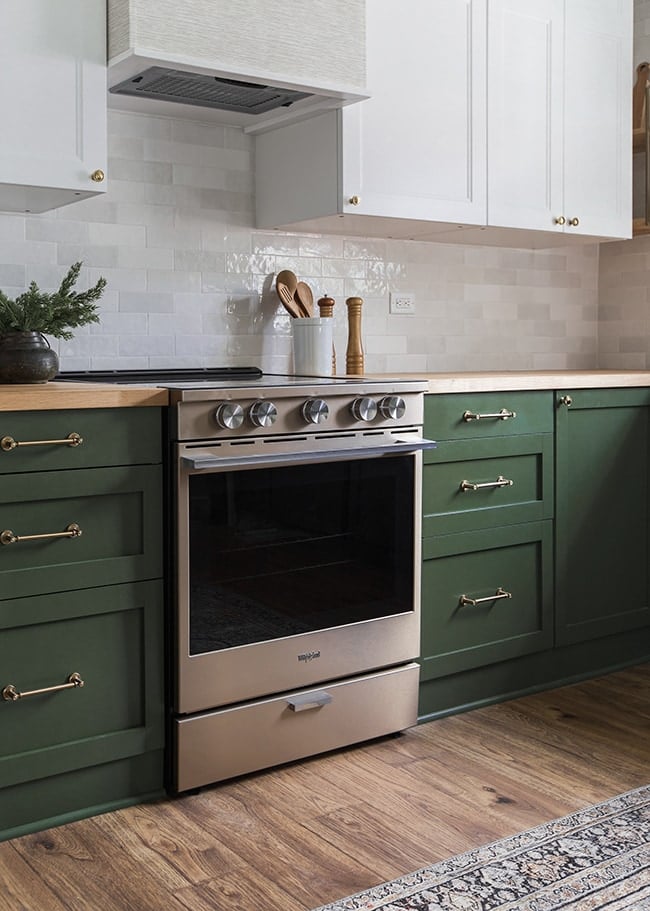
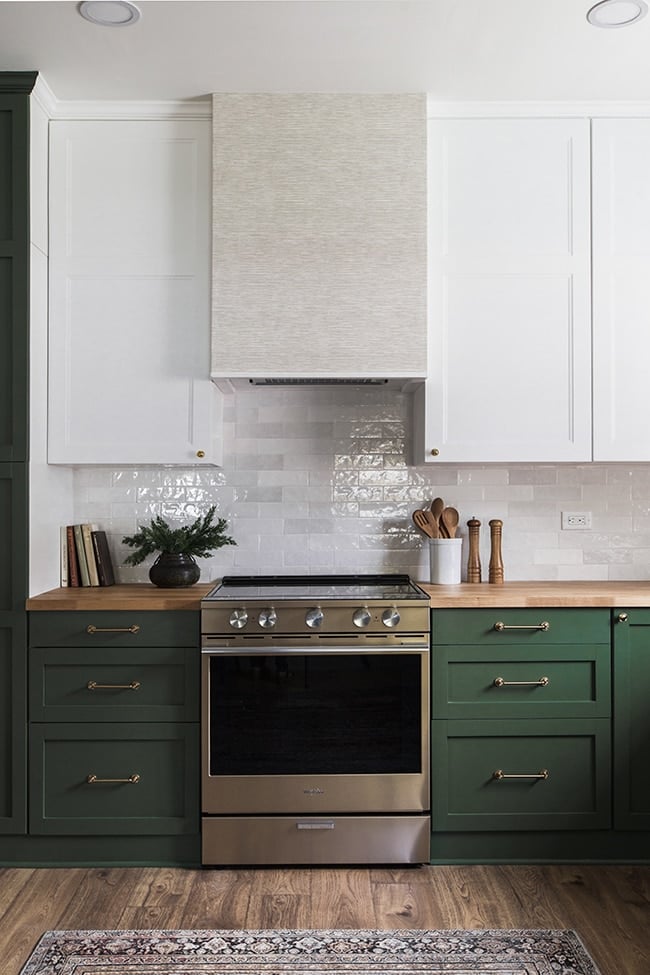
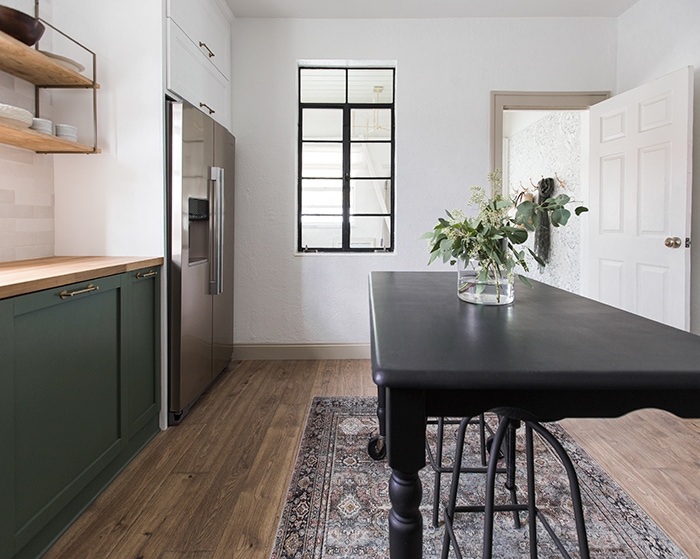
The star of this show is arguably those rich green cabinets.

I’m digging the BM Peale Green.
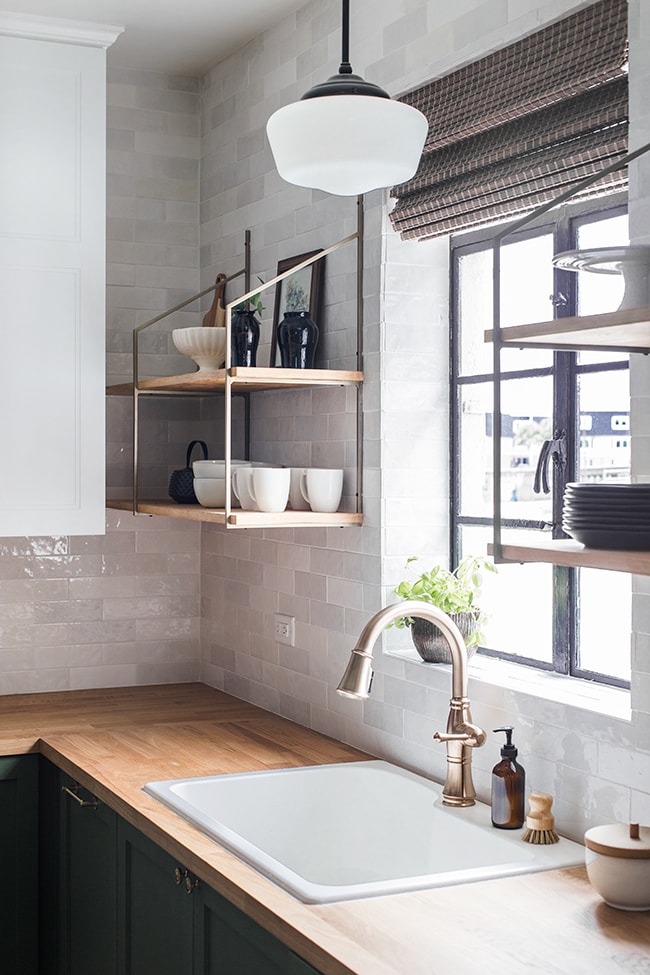
The warm gold finishes are a really nice compliment and I’m happy with the way they turned out. I used inexpensive pulls and knobs I had been eyeing on Lowe’s for a long time, and the finish is close to Delta’s champagne bronze faucets (a personal favorite).
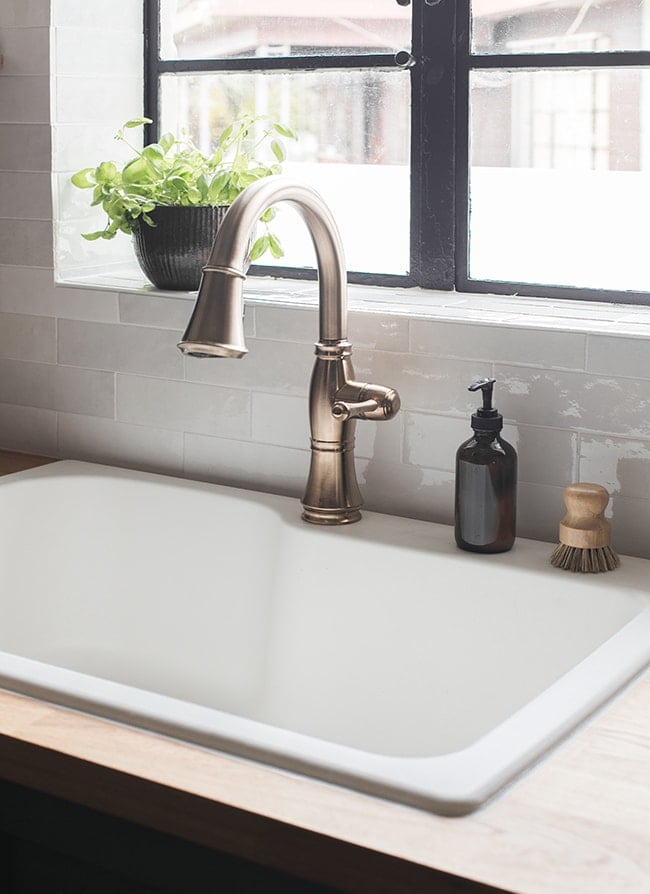
I went with an affordable drop in sink for easy installation, and because the counters are not solid butcher block so we didn’t want the cut to be visible.
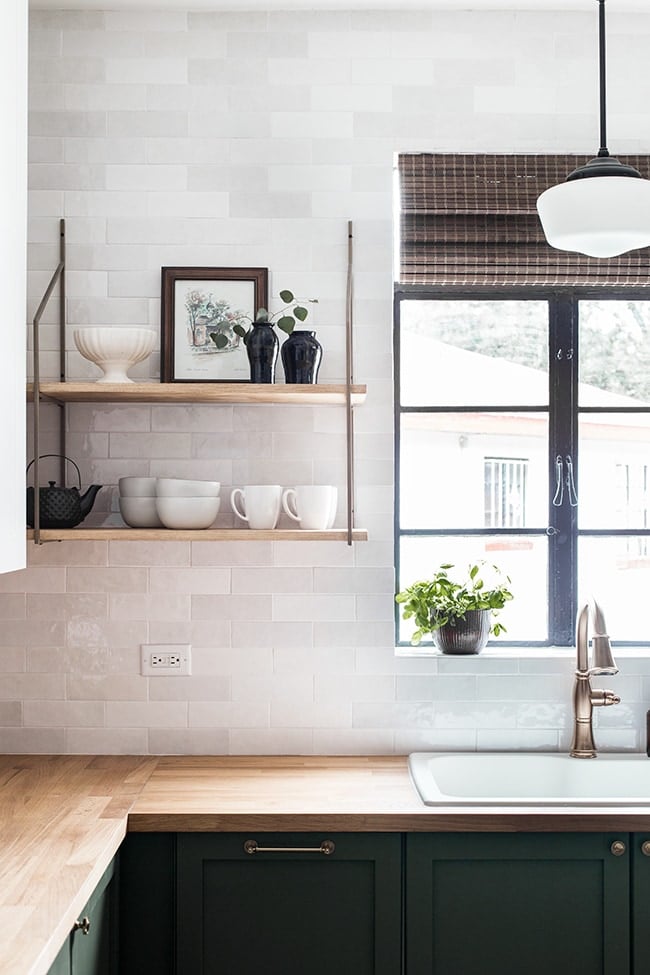
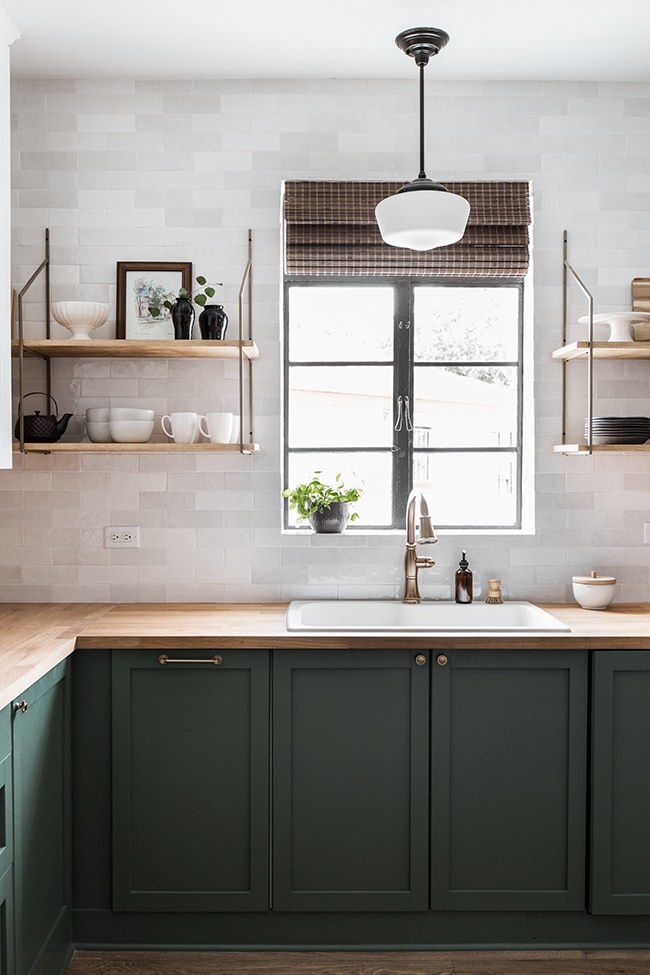
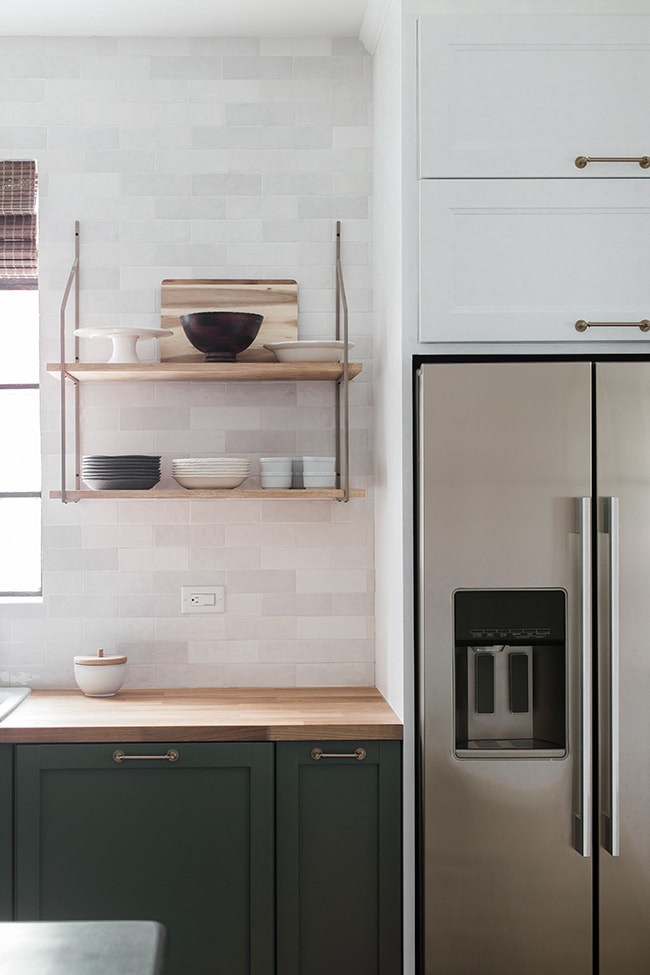
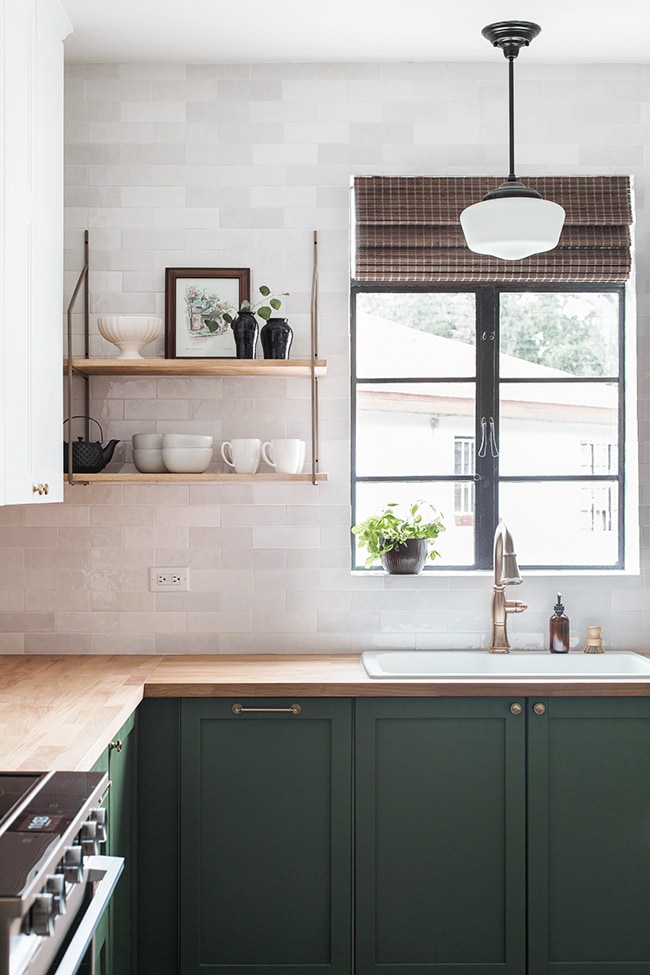
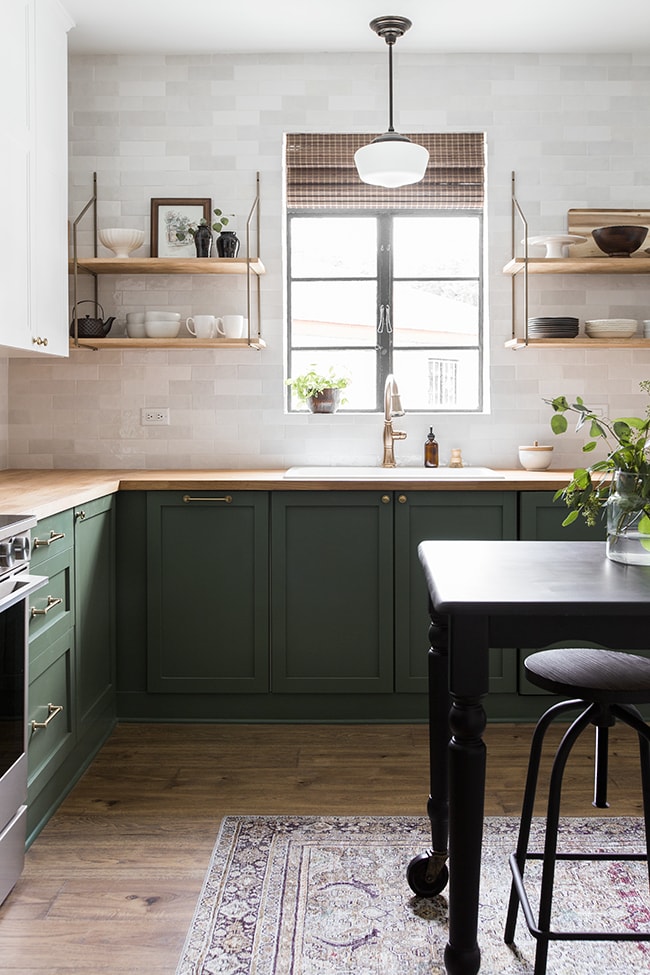
How neat are these shelves? I knew I wanted open shelving but thought it’d be fun to try something different than the typical floating shelves. I partnered with Shelfology to customize this Verne shelf system to perfectly fit our space.
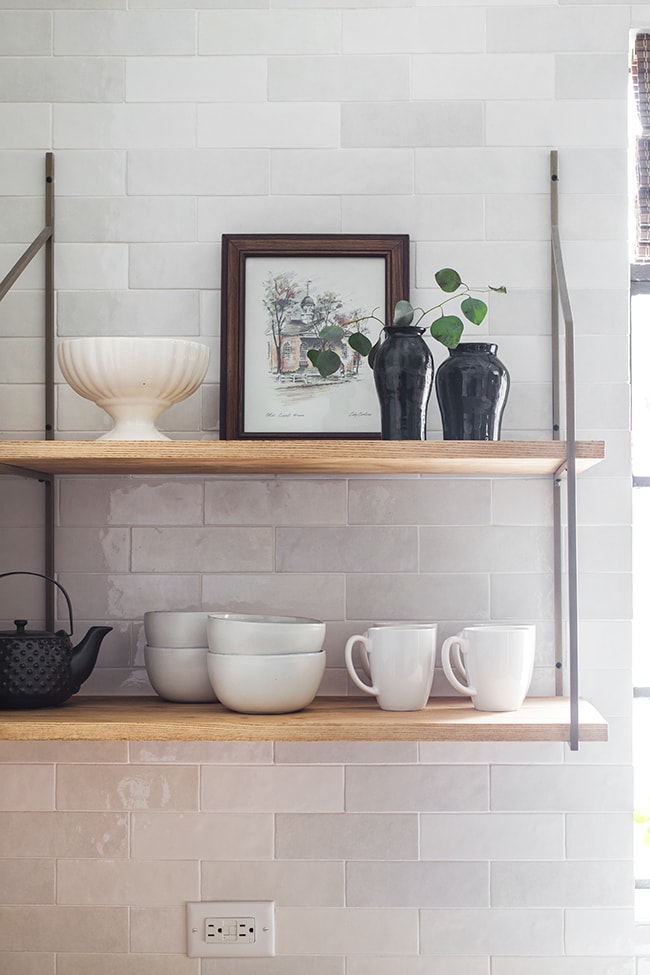
You can get them in any size with any type of wood (I ordered the 12″d unfinished Ash and we stained them to match our countertops). They’re installed using 3 screws & anchors in each bracket—much easier than our experiences installing floating shelves!
My favorite part is that you can make the brackets any color you want. They offer custom powder coating in hundreds of colors, so I was able to choose a metallic gold that matched our faucet. Can you tell how much I love these shelves? 🙂
And can we take a moment of appreciation for this Cloe tile? I knew it would be lovely (we installed it in baby blue in the Blue Lagoon Bathroom) but man, it’s pretty in white too.
It adds such a nice iridescent texture to the room.

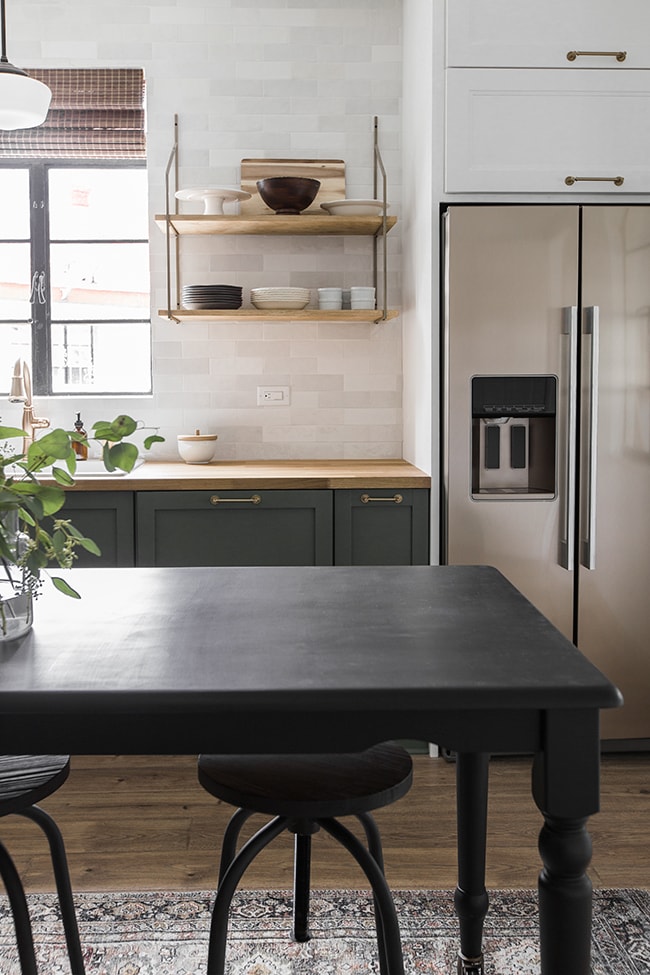
Speaking of shiny things… did you notice the appliances?! I was nervous about ordering these without seeing them in person (and very little photos of them ‘in the wild’ online) but I have to say, I’m a big fan of the Whirlpool Sunset Bronze…
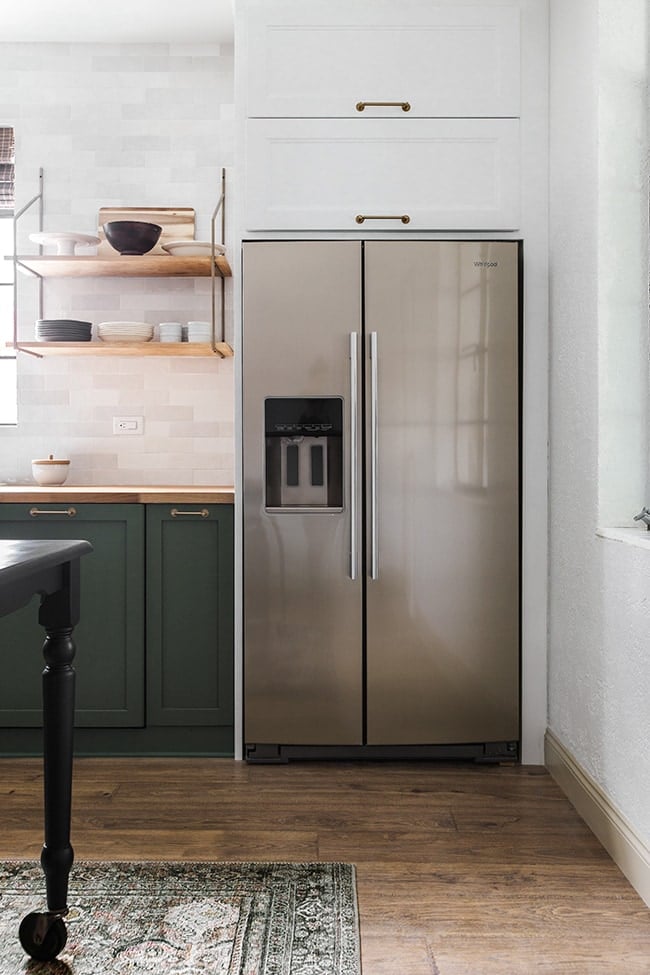
We ordered the counter-depth fridge (10% off right now!) with the ice/water dispenser—very convenient for a rental! The inside is still covered in plastic but so far, so good 🙂
The matching stove is my favorite, though. It’s a touch screen with smart technology and the most high tech appliance I’ve ever owned.
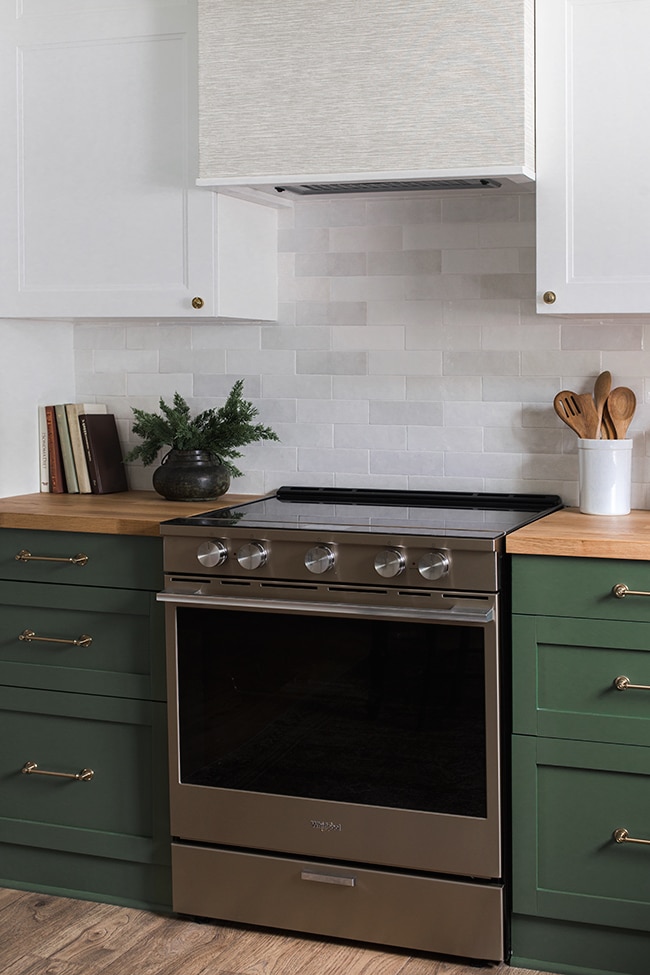
We’ll be able to connect it to our smart app and monitor/control it via phone if needed, which could come in handy later on.
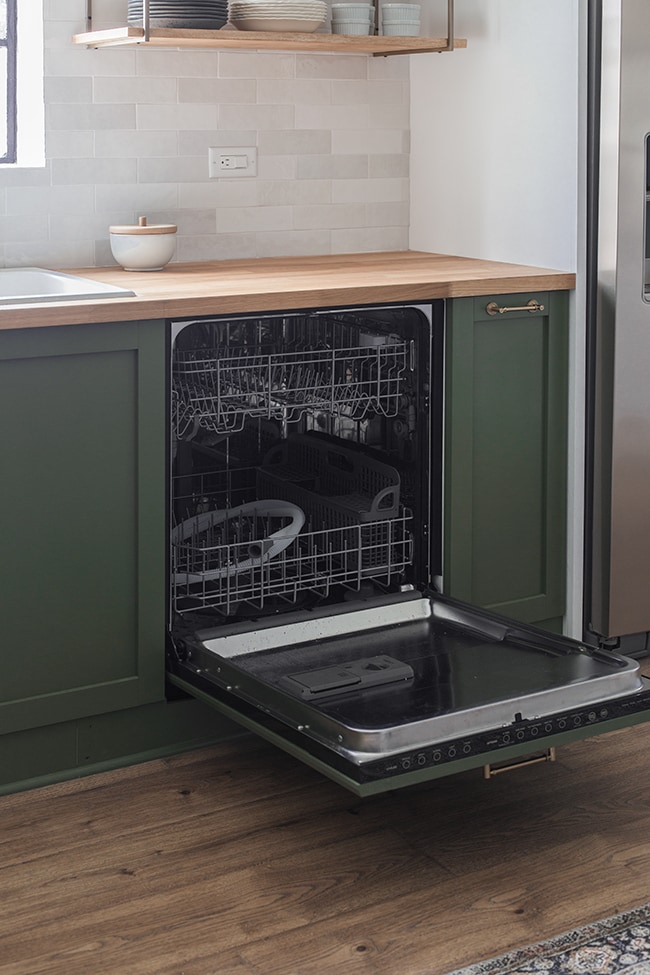
As for the dishwasher, we opted for the Ikea Spolad to fit with the Torhamn door for a built-in look. Haven’t ran a cycle yet so I can’t speak on the quality, but we don’t love the fact that it isn’t flush with the rest of the doors. Live and learn…
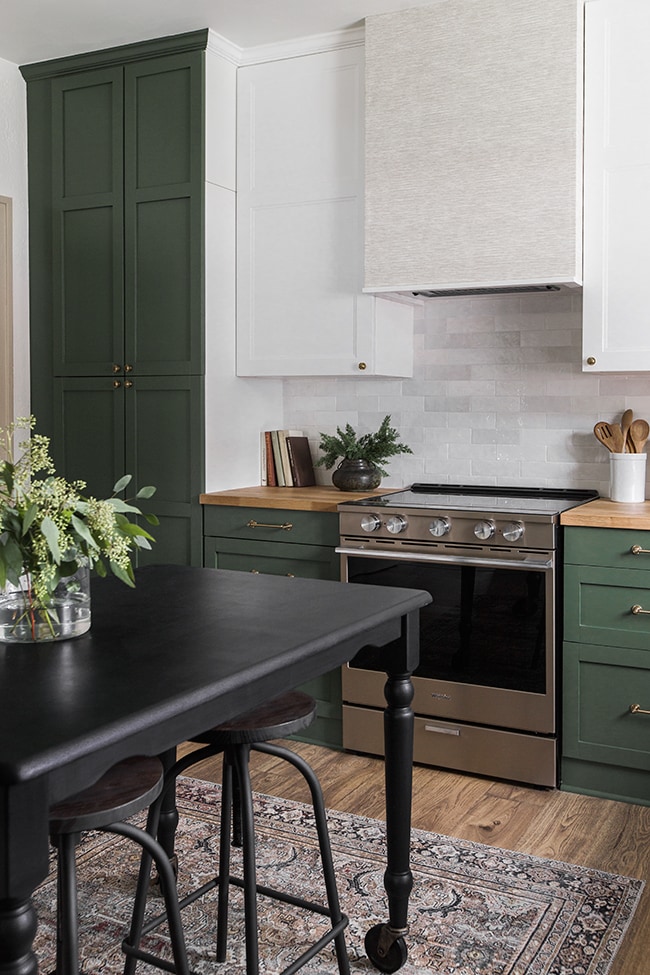
The “island” is a $50 table I refinished (Maison Blanche’s Wrought Iron) and put on 4″ casters.
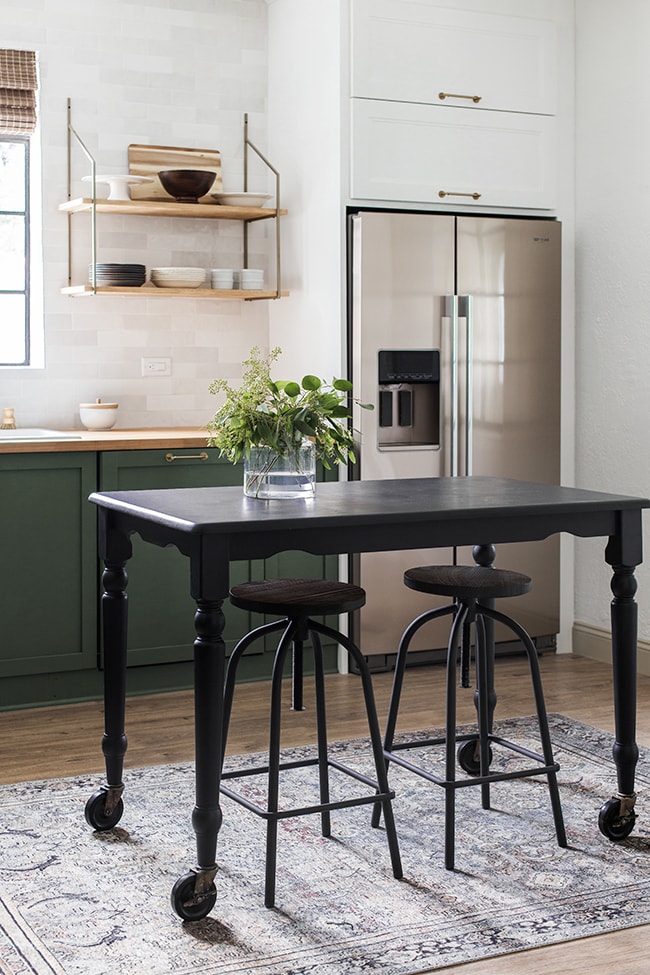
There isn’t a lot of counter space in this kitchen so this is an easy fix for that, and the bar stools provide the added bonus of seating.
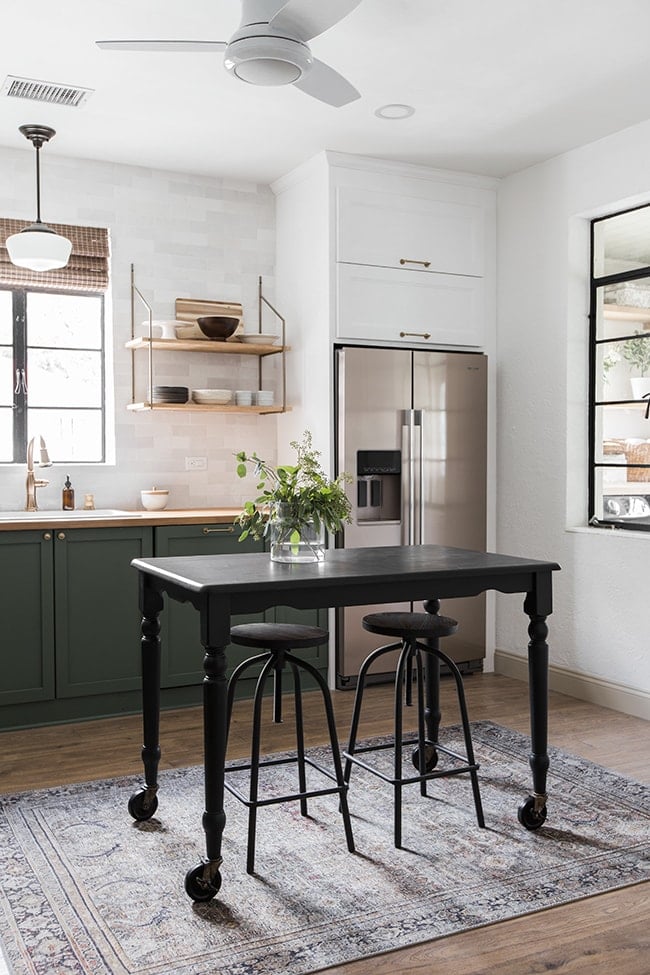
You barely notice the low profile ceiling fan, but it was a necessity in this room that can quickly turn into a greenhouse with west facing single pane windows and heat from the oven and stovetop.
Does the rug look familiar to you? It’s the same rug we have in our living room (my favorite rug of all time)! I loved it so much I had to get one for this house. It looks brownish in photos but in person it has a lot of deep green in it—a perfect match for our cabinets.

Using a grasscloth wallpaper treatment on our range hood was an experiment (I’ve never seen it done before) but I’m glad we took the risk, I think it turned out to be a pretty unique feature (and so simple!)
Side note: I haven’t finished stocking the kitchen with vacation rental supplies yet, so some of these photo props were borrowed from our house and won’t be staying permanently 😉
The tall cabinet on the left will hold the microwave + broom storage. We still need to customize the shelves to make that happen…
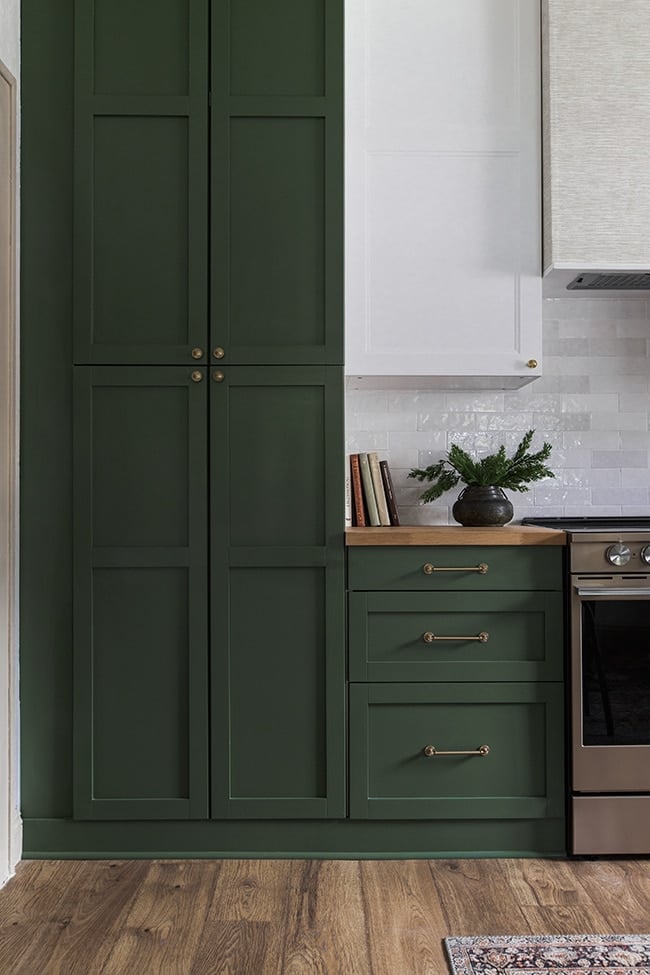
Since no one is living here full time and we only need the basic necessities, there’s an abundance of storage space!
Painting the metal windows black was a quick and easy way to make them pop.
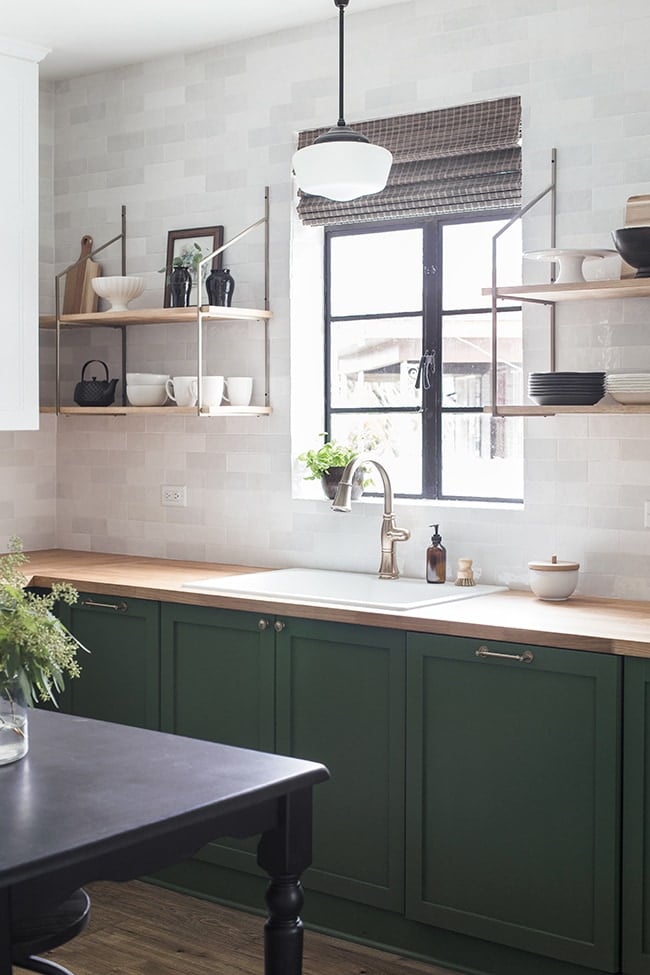
And you can never go wrong with a classic schoolhouse pendant light and inexpensive woven shade.
We can just imagine all the families that will soon get to enjoy this kitchen and make memories here!
A lot of love and time went into every detail, and we hope it shows.
The kitchen isn’t 100% finished though, we still have to swap out the laundry room door and build a large chalkboard for the back wall (between the two doorways).

The other side of the room is clearly not as exciting…
Ahh, this view is better…
Sources
Wall color: SW Pure White
Trim color: SW Loggia
Cabinets: Ikea Axstad uppers, Torhamn lowers (painted BM Peale Green)
Ikea Karlby countertops
Whirlpool Sunset Bronze Fridge
Cabinet pulls (in 4″, 5″ and 6″)
Grasscloth wallpaper (for range hood)
A huge thank you to Lowe’s for partnering with me on this project, along with Bedrosians, Shelfology and Loloi! These have been a few of my favorite brands/products to work with over the years and they’ve really helped make this kitchen something special.
A couple side by side transformation shots, just for fun…
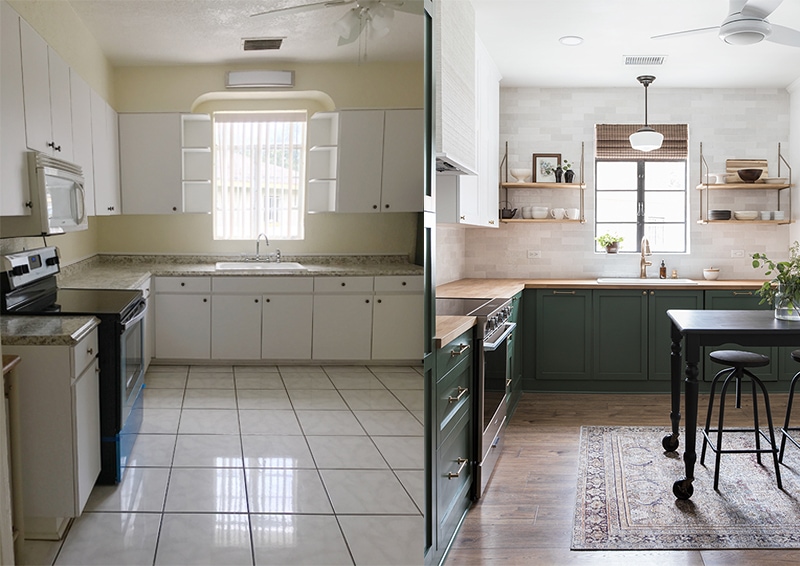
Ahh, so satisfying! Cheers to a clean slate in 2020—more big changes at the Riverside Retreat, coming up next!


Stacy says
Hi Jenna! What a beautiful kitchen and that green is giving me life!!! Any tips on painting the metal around the windows? I’m considering doing it too. Kudos to your husband, he’s learned a lifetime of skills during this process. Way to go you two and Happy New Year to you all!
Jenna Sue says
Thank you Stacy! We just used regular latex paint and a brush. It should be fine as long as no one is trying to scratch it off! Happy NY 🙂
Shauna says
Simply gorgeous. Well done, such an accomplishment along with all the other projects.
How far away from your first rental date are you?
I was worried that I wouldn’t like the deep green, but it’s just smoky enough to feel perfect in this kitchen, and you’ve paired it off with beautiful neutrals and textures. What talent. I’ve been converted to green.
Kari says
Dear Jenna- amazing, thoughtful, cost effective transformation, as always. I love seeing what you do in the real world! Have you considered extending the wall hooks from the laundry room onto to kitchen wall? I imagine your guests would have jackets and hats and beach bags to deal with. Thank you for sharing, I love reading your blog.
Jenna Sue says
Thanks Kari! That is the entrance to the backyard, but guests will be entering the house from the living room which has hooks and a bench. I think the 4 hooks in the laundry room will be plenty for a backyard entrance 🙂
Ice Cream & Tequilla says
I love seeing colorful kitchens! You have done a beautiful job.
I’ve never used butcher block counters. Can you use an under-mount sink with butcher block counters? What are the considerations if you use an under-mount sink with butcher block counters?
Jenna Sue says
Hi! Yes you can, but you’ll want them to be solid wood since the cut edge will be visible. The install takes more work (or a professional) to get a perfect and smooth cut, which has to be sanded and sealed along with the rest of the counters. We would have gone this route if we had solid butcher block!
kalina says
Gosh, you always do such an amazing job! You and your husband make a wonderful team. This kitchen is phenomenal !
Jenna Sue says
Thank you so much, Kalina!
Tanya says
I really love thia transformation, it looks amazing! The green colour on that cabinets looks so beautiful, great job ?
Cindy says
Beautiful! Love the color choices.
Kelsey G says
This is just incredible and beautiful! But what you do always is!
Lisa D. says
What a beautiful transition! Can you please tell us about the butcher block counter tops? What are they and where did you get them. Thanks, as always, for sharing Jenna.
Jenna Sue says
Thank you Lisa! They’re the Ikea Karlby (you can find the sources at the bottom of the post 😉
Athena says
Gorgeous job!! You are always so inspiring and talented!! Best wishes for 2020!!
Marcia says
Wish I could live there it is so beautiful
Amber says
Where is the island table from?
Jenna Sue says
Secondhand and I refinished it! You can find those details in the post 🙂
Heidi @ Broad Meadow Farm says
I love the green! I’m a navy fan myself, but I’m finding myself drawn to this green more and more these days. We also have the IKEA hidden dishwasher and have had mixed feelings about it. We also don’t love that it isn’t flush with our other cabinets. We do find that it gets a gunky on the door seal. But that could be due to our kids not scraping their dishes before putting them in.
The kitchen looks great!
Jenna Sue says
Oh I’m glad I’m not the only one!! I thought we had installed it wrong somehow. But it’s deeper than the cabinet boxes so it’s not just us. The photos online are very misleading and none of the reviews mention it!
Gina says
Another beautiful room! I wish I had your vision and skills. I’m trying to have someone redo my master and I’m already stuck picking out finishes. I love so many different looks I cannot pin it down. ?
wendy says
I couldn’t wait to see this room! Your vision is amazing and I love everything you do. So inspiring! Can you share what the microwave/broom storage will look like when complete?
Jenna Sue says
Thanks Wendy! Yes, I’ll have to do an update once we complete that!