We’ve reached the halfway point of this renovation and completed the single biggest update—the walls have been PAINTED! Watch the transformation & more in Episode 7:
In today’s post I’ll be covering the highlights, but make sure to watch the video for all of the updates!
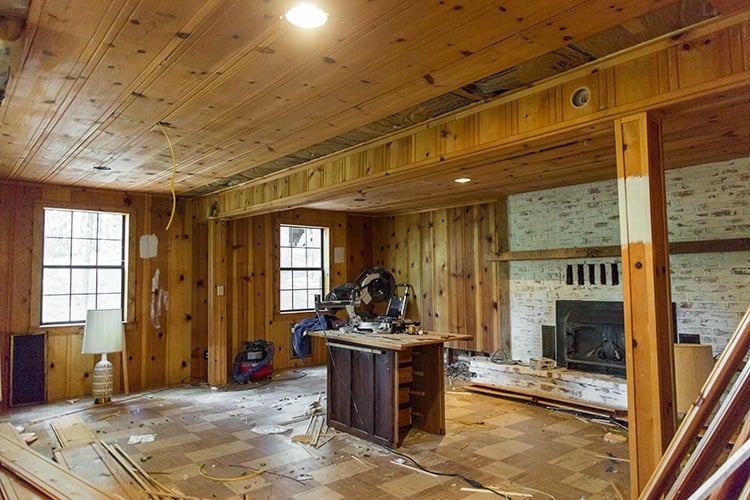
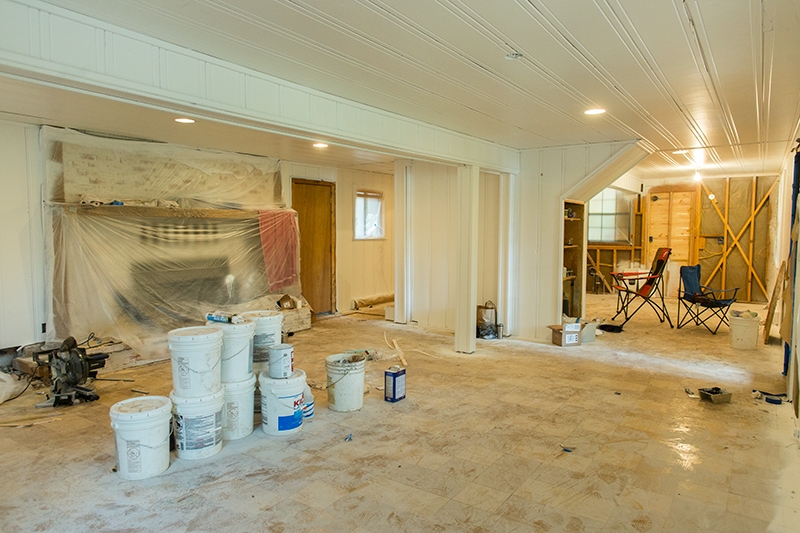
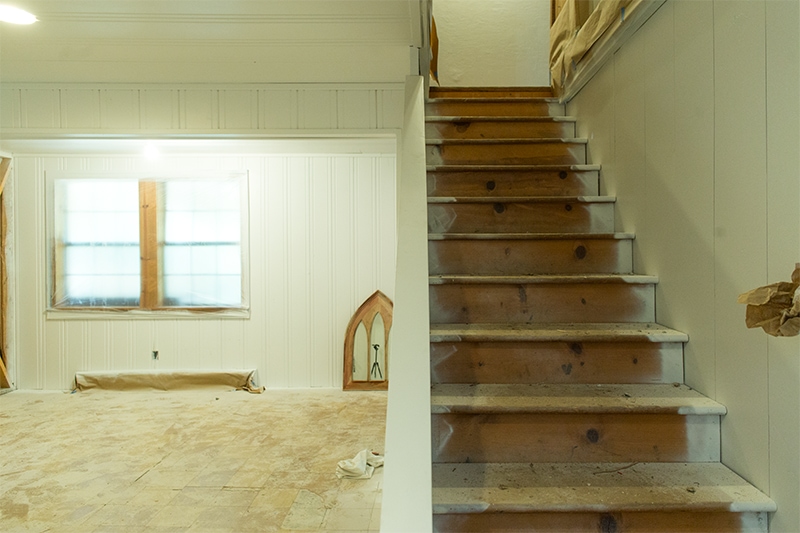
I barely recognized the house when I walked in the door last Friday—let me show you the transformational power of paint.
Before:
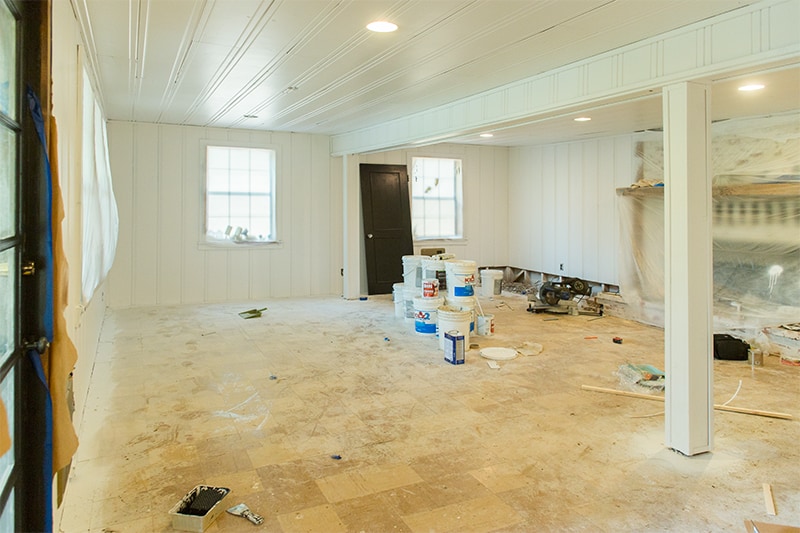
After:
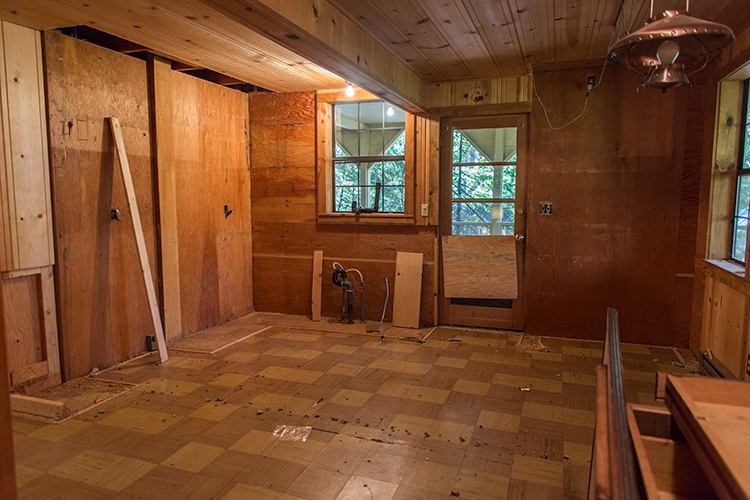
Before:
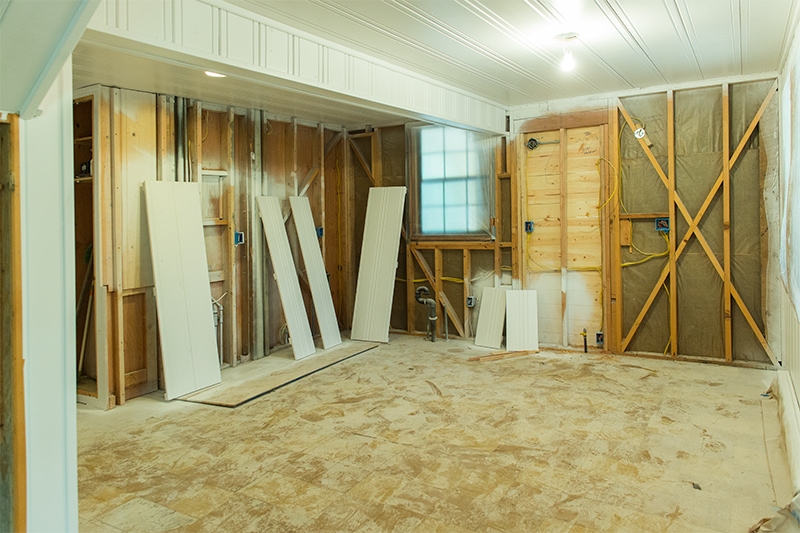
After:
This house is shaded under a forest of pine trees and gets very little natural sunlight (especially now in winter) so I knew immediately that white walls were the best choice to make the space feel open and brighter.
After a lot of researching and hearing opinions from other bloggers, I went with Valspar’s Bistro White which is a very neutral (neither warm nor cool) shade.
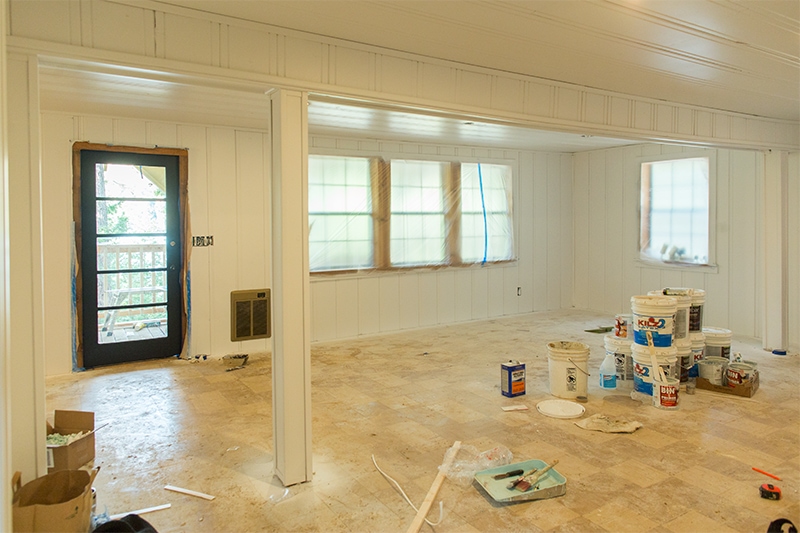
The heaviness of the orange wood has been lifted and the space feels so light and airy now.
If you find it too stark just trust me, once the wood floors go down and I get all the furniture and accessories into place, the walls will fade into the background.
It’s the perfect blank canvas for decorating and allowing all the wood trim to pop. I didn’t unmask the windows because there’s still some touchups that need to be made, but those should make an appearance on the blog next week.
Since I’m trying to keep this blog updated in as close to real time as possible, my contractor sent me a couple photos of the kitchen Monday afternoon:
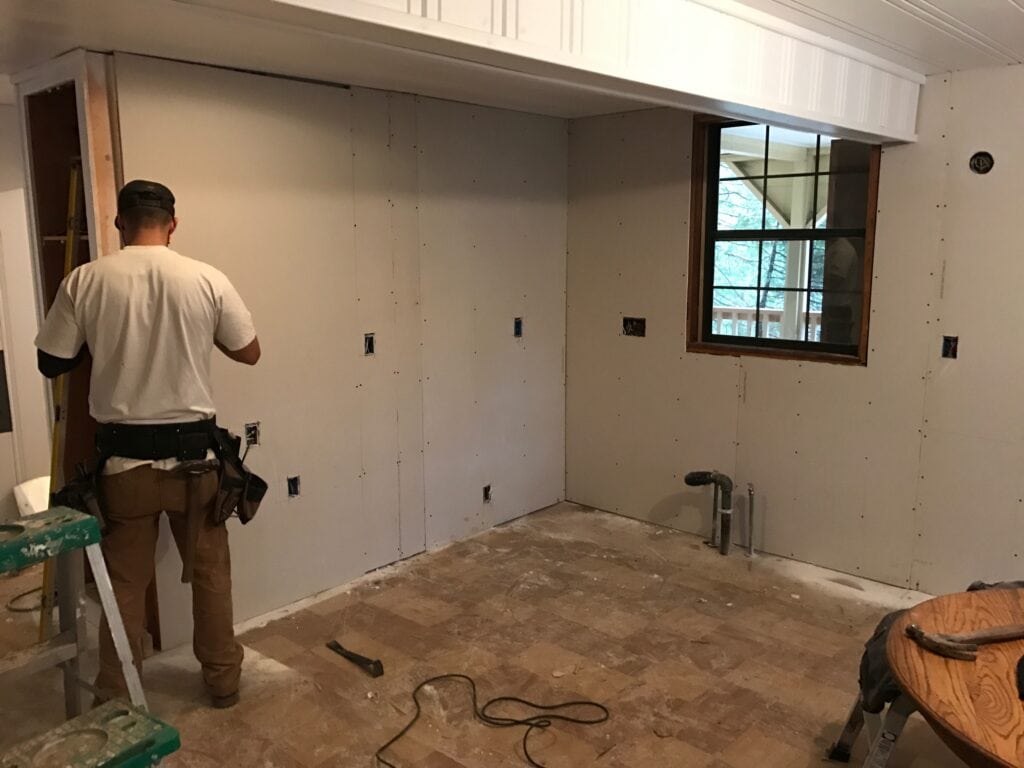
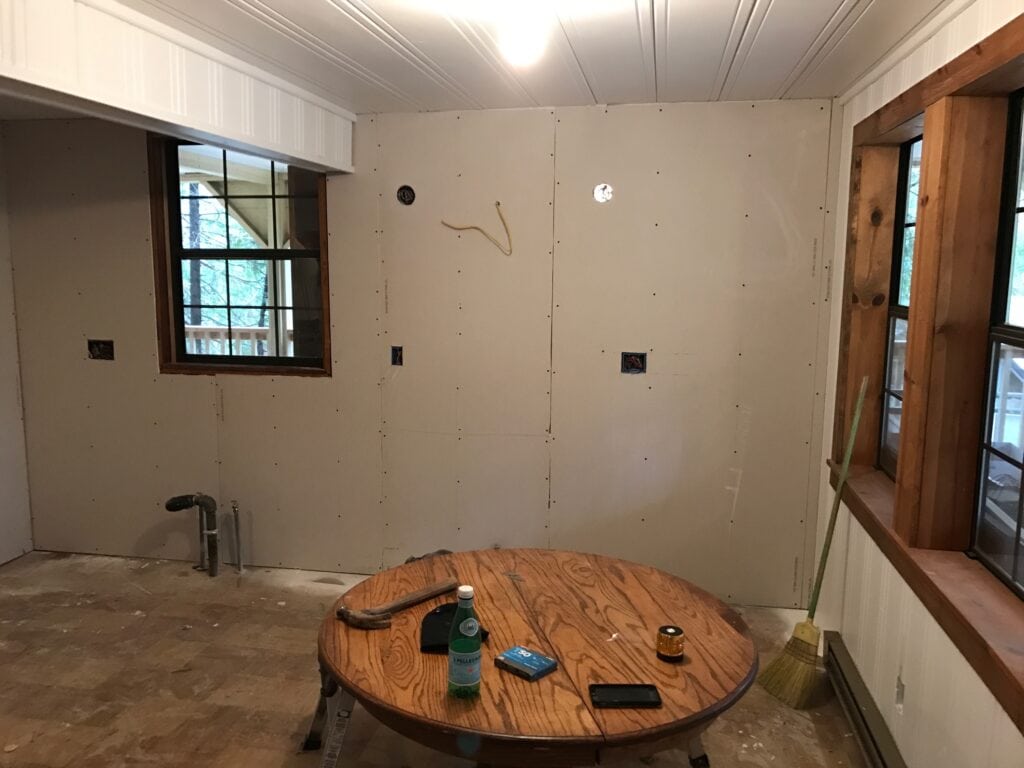
We finally have drywall! And look at that beautiful wood window!
After a 2 week delay, the cabinets were finally delivered Tuesday (!!!). They’re scheduled to be installed Saturday, and I’ll be there taking photos and videos and instagramming and snapchatting it up.
While we’re still discussing the kitchen, I found this pedestal table on a local buy & sell Facebook group on Sunday and the sweet sellers offered to deliver it to me that day…
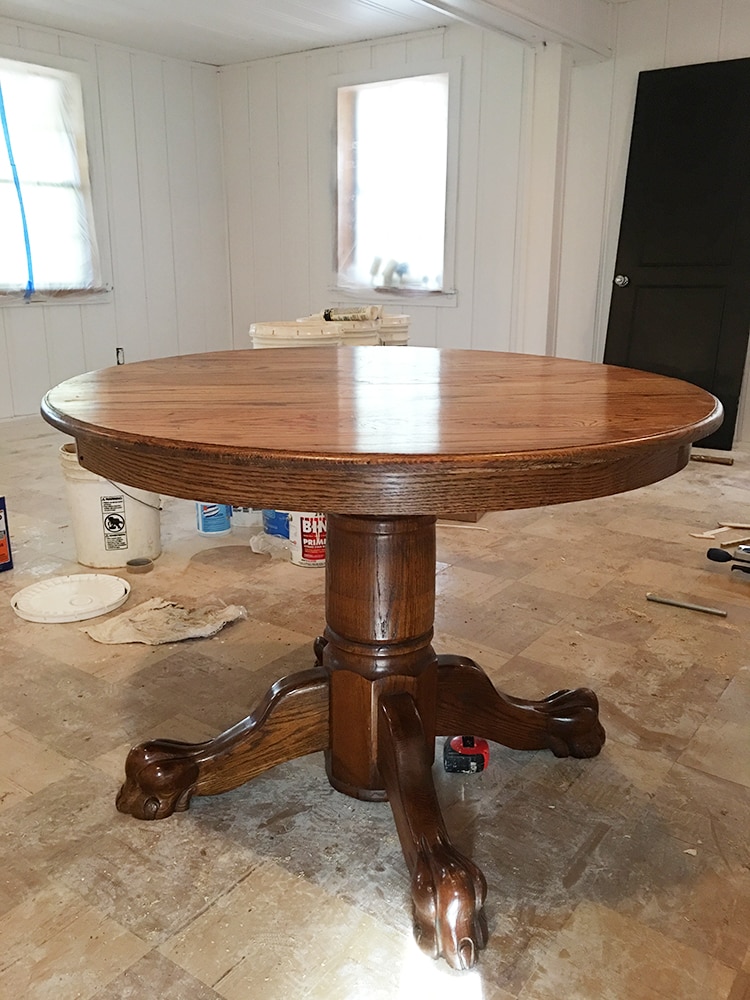
It cost me a grand total of $30 delivered. Thirty dollars! I’d been hunting for this exact size and style for a month. Major score. I plan to paint it a soft khaki or gray, and it will end up approximately in this location in the kitchen:
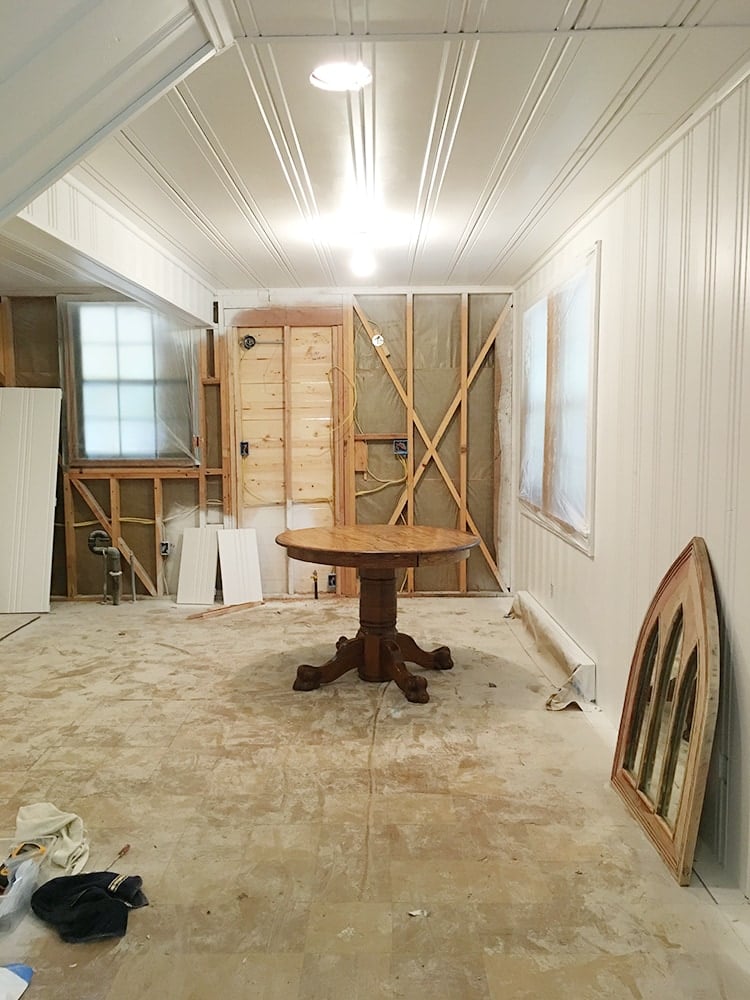
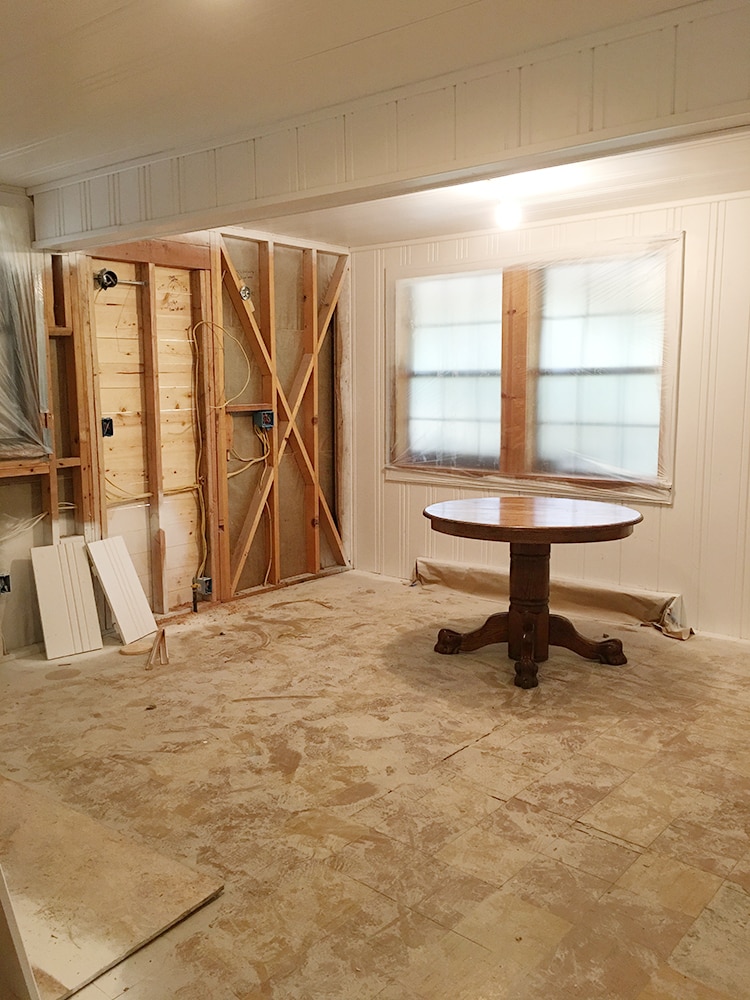
In front of the built in bench seating along the right wall. I’m hoping it won’t be too crowded in there. Here’s another angle:
The tricky part about flipping on a crazy fast timeline is that you can’t wait until something is in place to decide what will look good and what to buy next. You just have to visualize everything together, buy it all at once and hope it works out exactly the way you pictured in your head. Not the easiest thing to do, and I’m sure there will be some last minute changes so I’m giving myself a few weeks to arrange furniture and decorate (fingers crossed I’ll even have that).
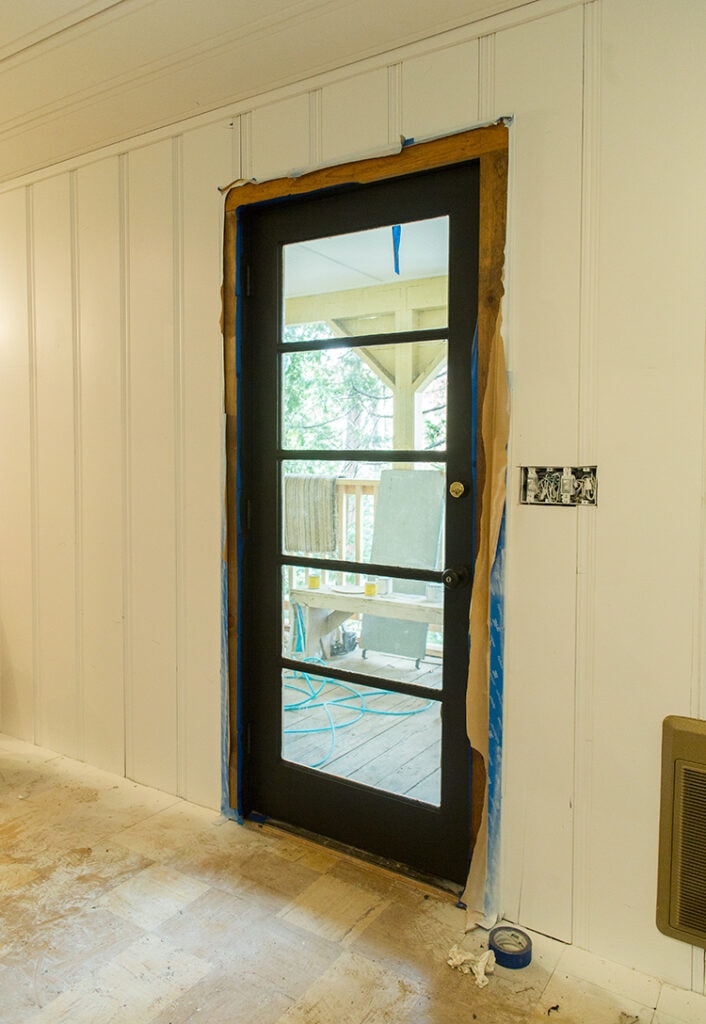
In other news, I painted the front door black (Valspar Cracked Pepper):
And the downstairs bathroom looks like this:
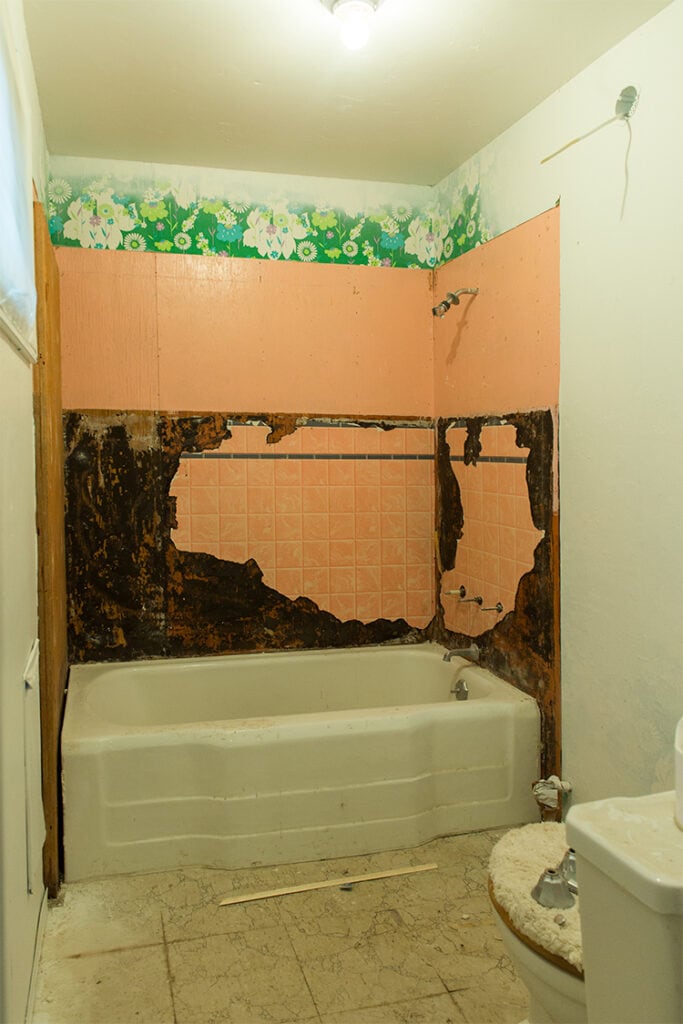
This might be the last room to be completed. My tile guy/plumber needs to finish the upstairs bathroom, then the laundry room next, then probably the kitchen before he can start in here. It’ll be done sometime in January.
Speaking of the upstairs bathroom… holy moly:
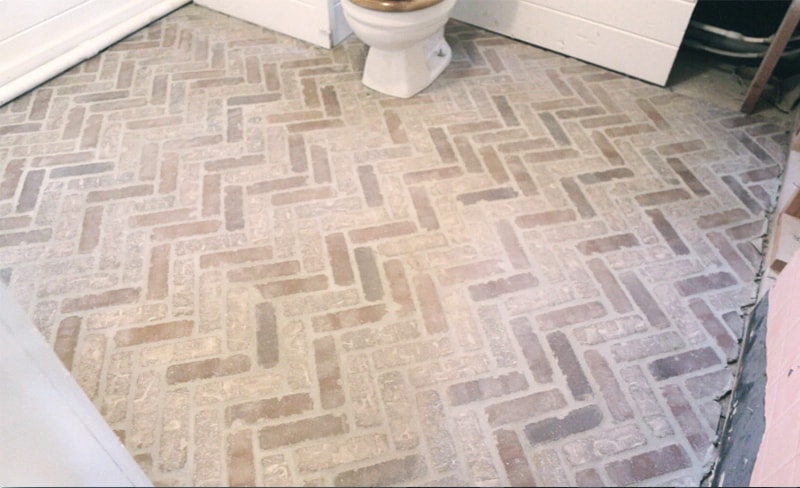
This screen shot does it absolutely no justice and I’m kicking myself because I forgot to take an actual photo… but these floors. Oh these floors. Lowe’s wins all the awards for offering these. I chose TEC grout in Silverado which blends into them nicely. This only reaffirms my prediction that this bathroom will be my favorite room in the house.
If you’ve been paying close attention, you may remember me stating that this weekend I’d be stenciling a couple walls. I’d been trying to schedule that for the past few weeks, and this weekend was finally going to be the one—I had it all planned out and was ready to go.
Then an hour into my drive to the cottage, I realized I forgot the most important thing… the stencils. Horrible, I know. After pulling off the freeway and debating if I wanted to battle San Francisco traffic and add another 3 hours onto my already 3 hour drive, I ditched that plan and decided to figure out something else to do. That something else ended up being painting, which is all I can really do at this point.
My painter had finished painting the bedroom walls last week (goodbye floral mismatched wallpaper!) which made me question my paint color choice for the closet doors.
I was aiming for a soft, subtle gray and hoped the color would pop more once the walls were painted, but sadly they did not. Gray paint is so tricky.
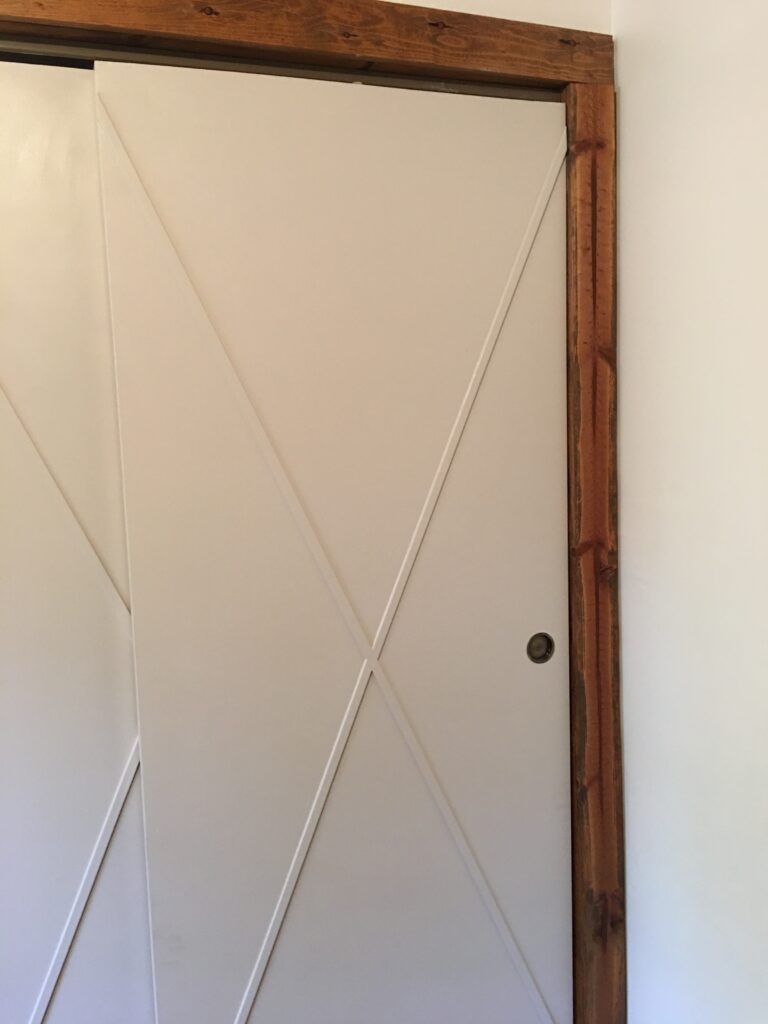
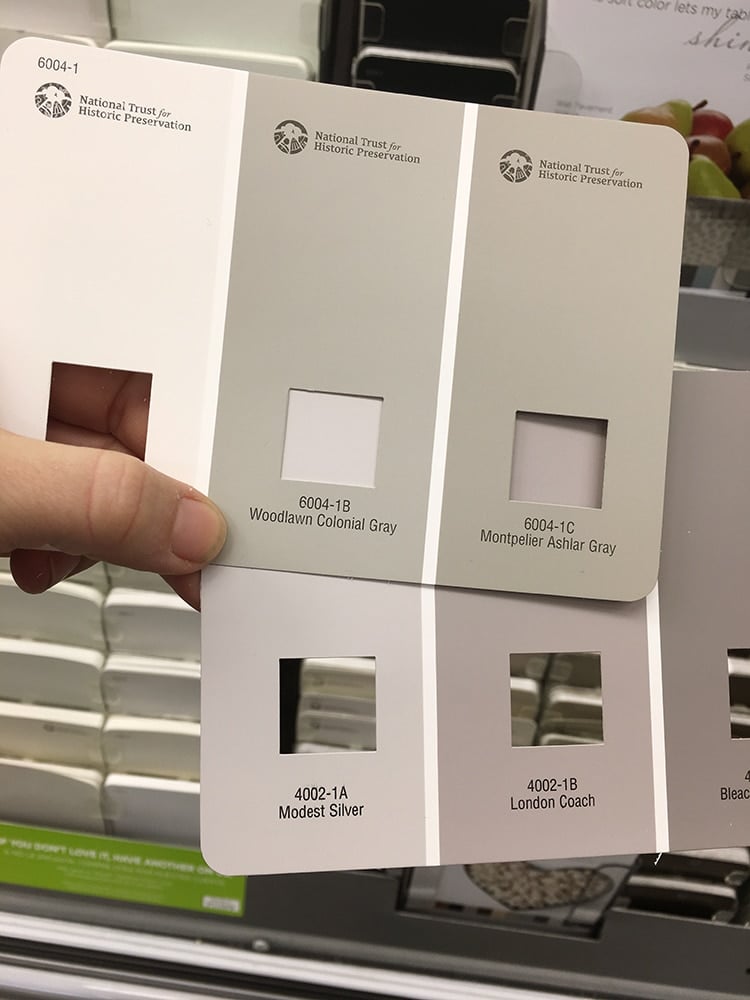
Modest Silver is a nice color on its own, but without much natural light, it was too similar to the walls. And it looked slightly too purple. Back to the drawing board.
Instead of starting over from scratch, I remembered that I had chosen another nice gray for the exterior—Valspar’s Woodlawn Colonial Gray—shown below compared to the old door color:
The exterior hasn’t been painted yet so I didn’t get a chance to test it out, but with no time to spare I took a gamble and bought a gallon in eggshell.
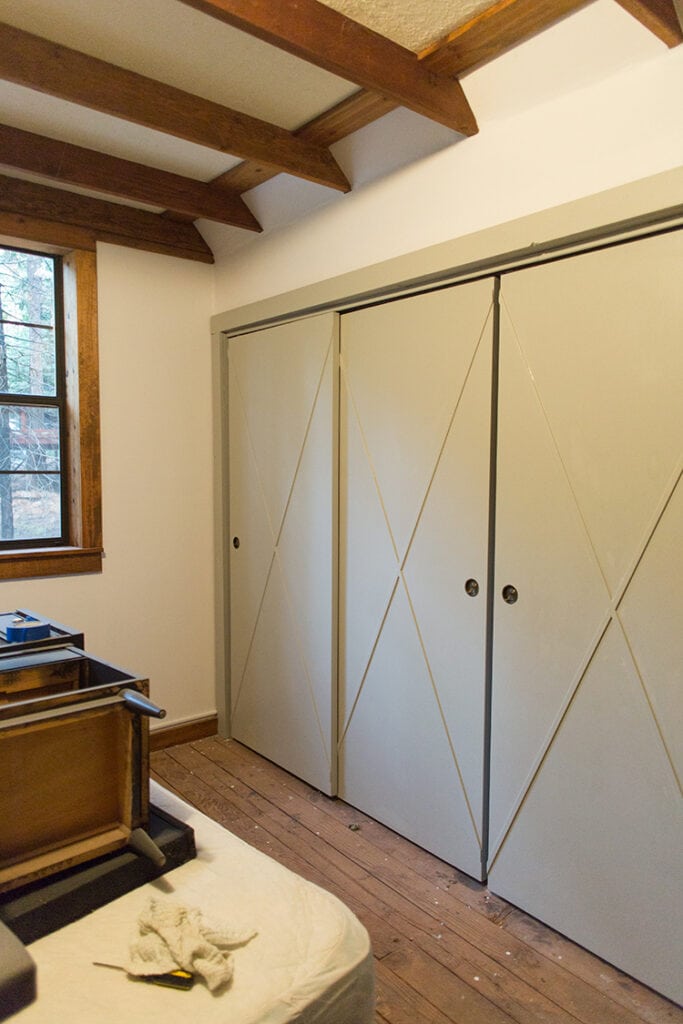
Fortunately, the DIY gods took mercy on me, because this color is perfect.
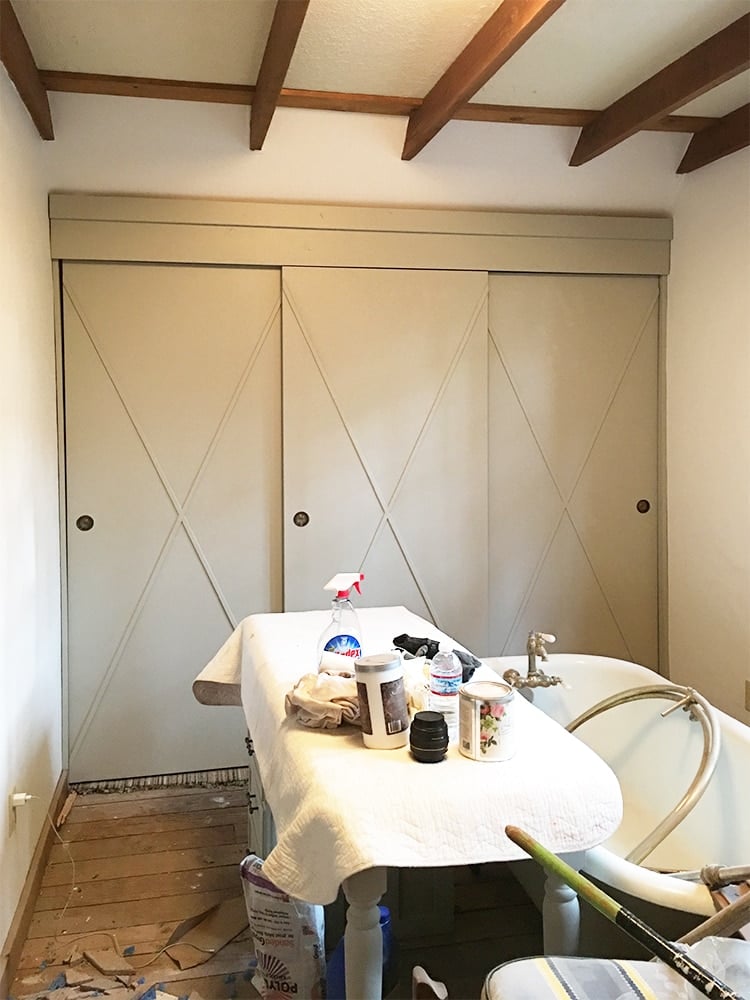
I ended up painting the trim around the doors as well for a cleaner look. I only had time to do the two bigger bedrooms but plan on painting the doors and at least most of the paneling in the other rooms as well (who wants to come over and help?)
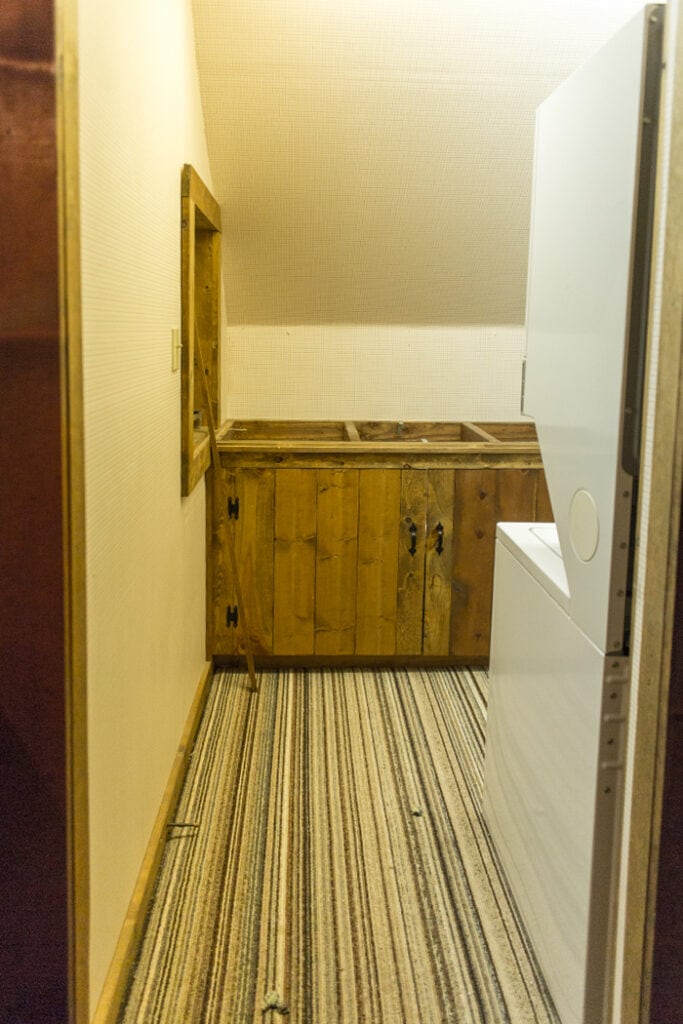
With that issue resolved, I had just enough hours to squeeze in a last minute DIY project in the laundry room. Here’s an older photo after the laminate countertop was removed:
A chunky reclaimed wood counter would add a nice rustic touch while staying in budget, so I headed to the lumber yard and found a nice 2×12″ for a whopping $40:
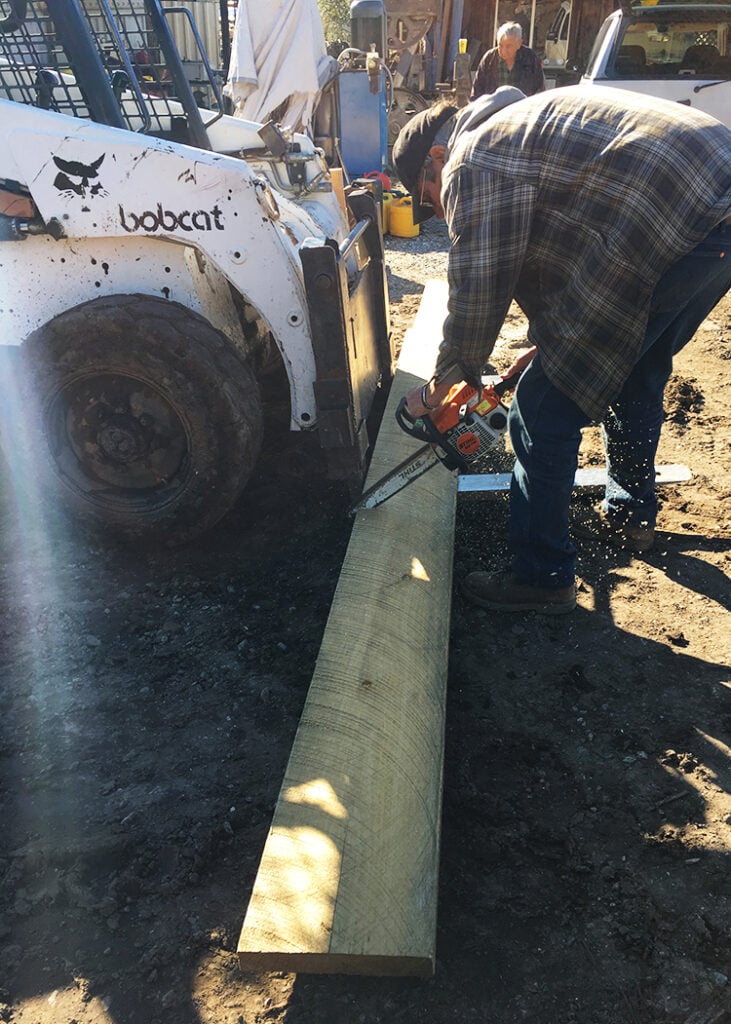
It was then cut down and secured into place:
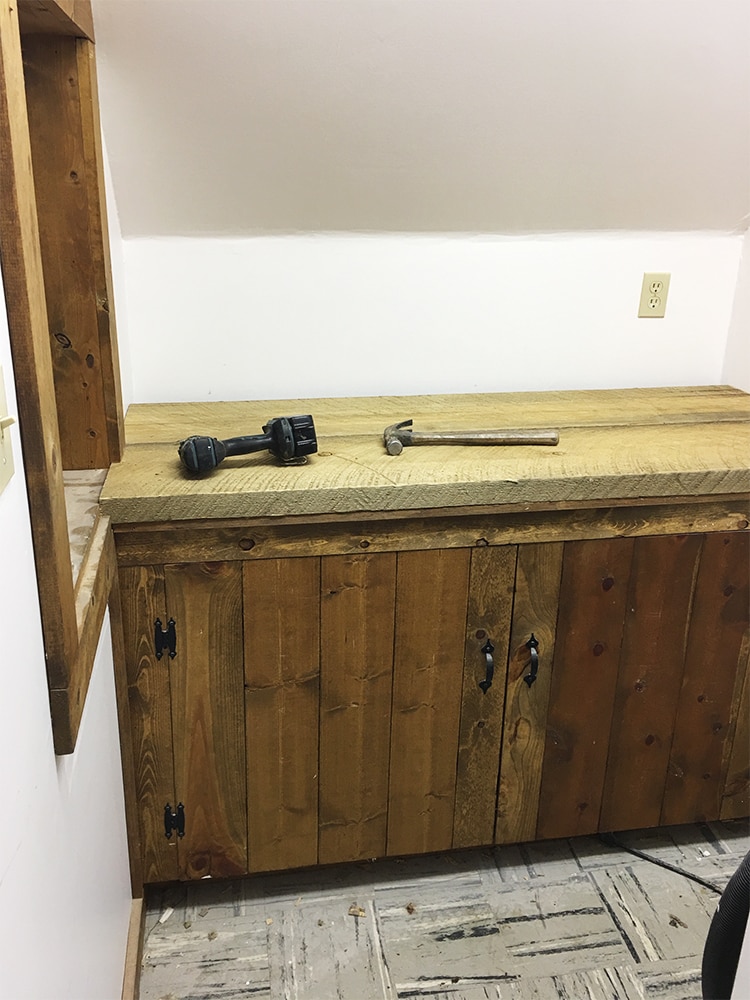
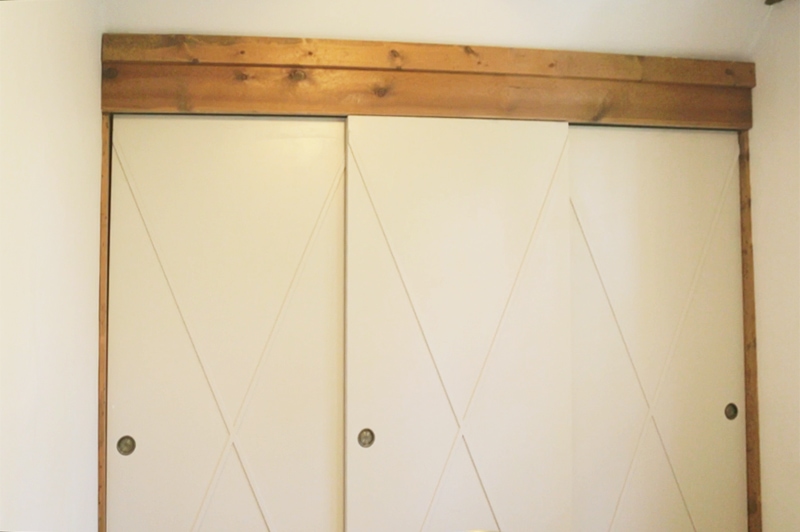
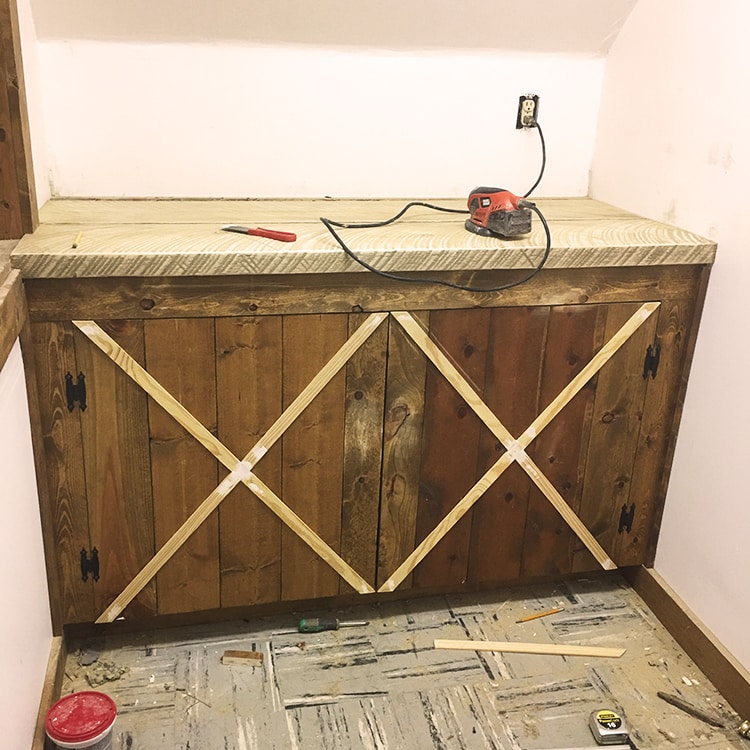
I sanded down the rough edges then turned my attention toward the cabinet. The plan was to paint it black but since I had a few extra hours, I decided to get a little fancy and add some trim, in the same style as my DIY closet doors.
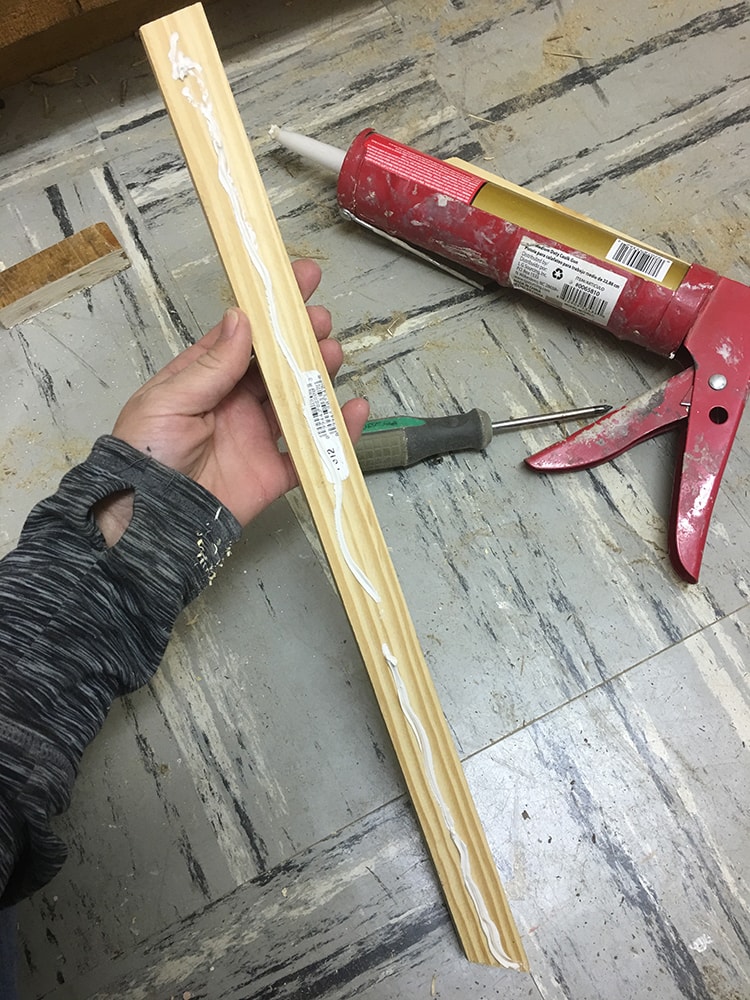
This idea came to me on the drive there so I made a quick stop at Lowe’s to pick up two pieces of 8′ lattice molding. Can’t beat a $10 upgrade!
I posted a complete video & blog tutorial about this technique already, and this is essentially the same process so I’ll keep it brief.
Starting with the first piece, I placed it diagonally across the door and positioned it on each end. Then I traced a line where the cut needed to be (a very non-technical procedure—professional carpenters shield your eyes):
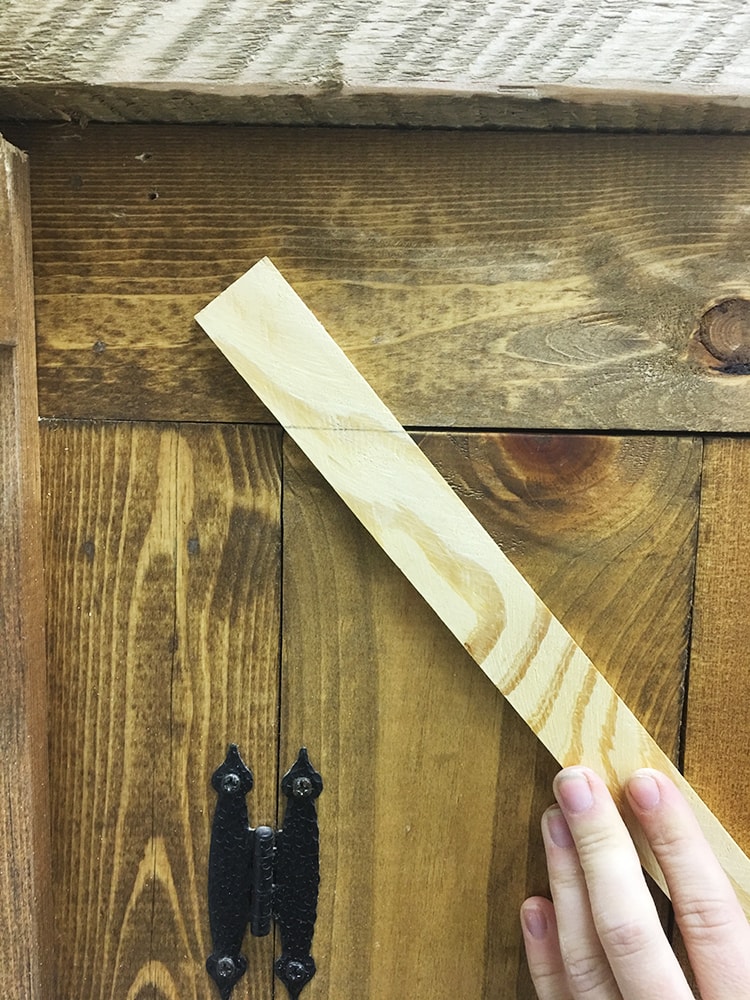
A line was also drawn at the bottom, then I used my miter saw to cut it down.

I repositioned the piece to make sure the cuts were correct, and applied a line of liquid nails to the back:
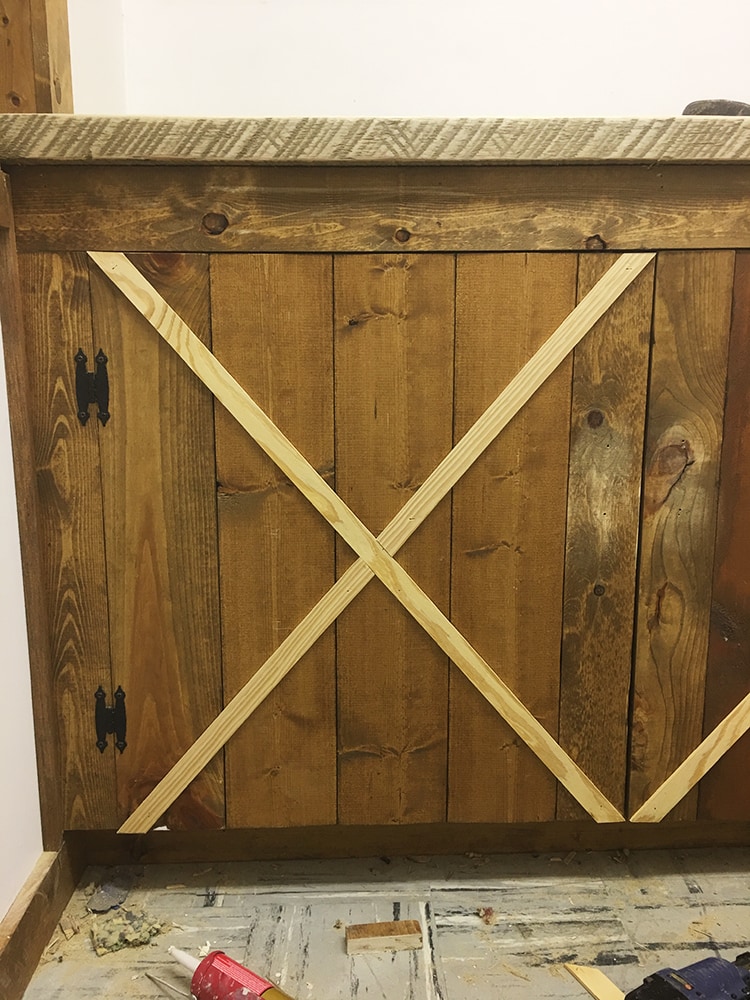
Then I held it back into place and secured it with finish nails.
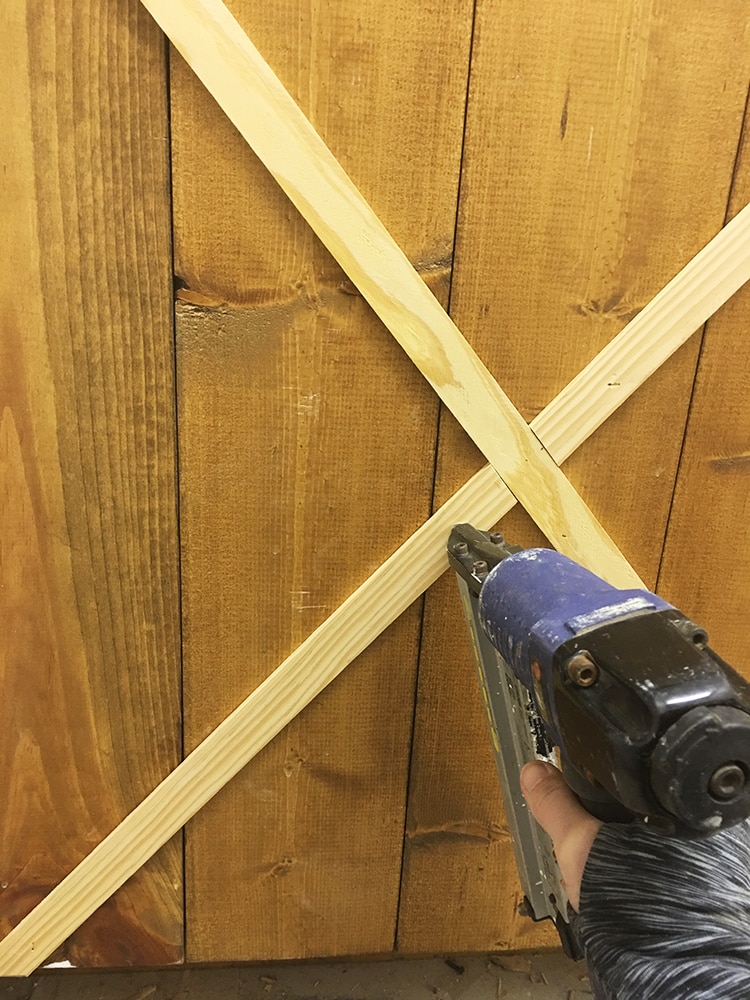
Done!
Time to putty those nail holes & seams…
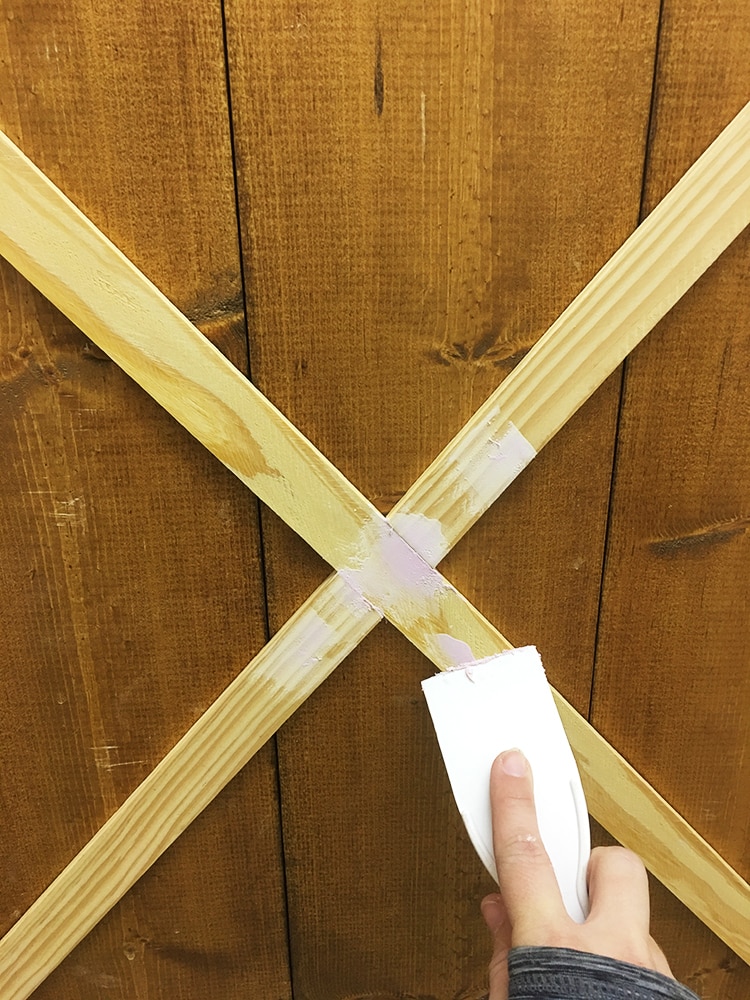
The putty was left to dry overnight.
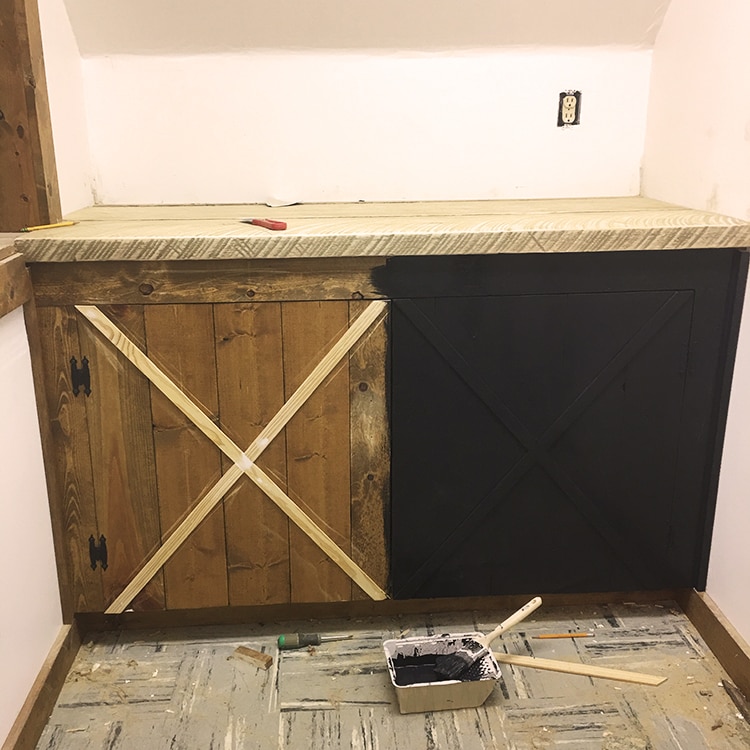
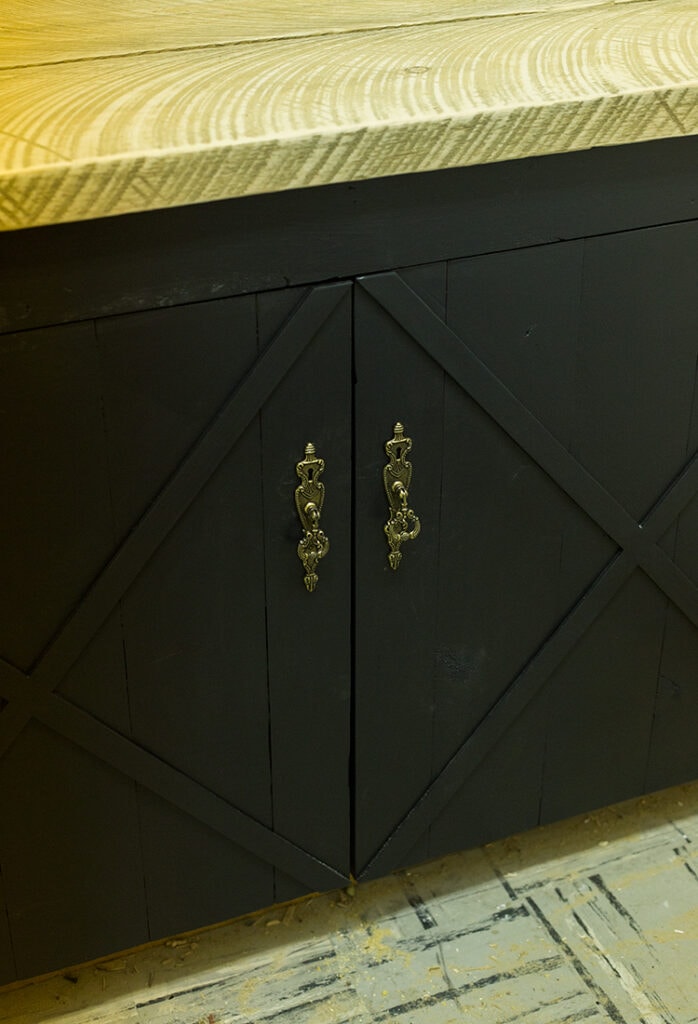
The next morning I sanded it down and gave it a coat of my favorite black paint (Valspar’s Cracked Pepper again):
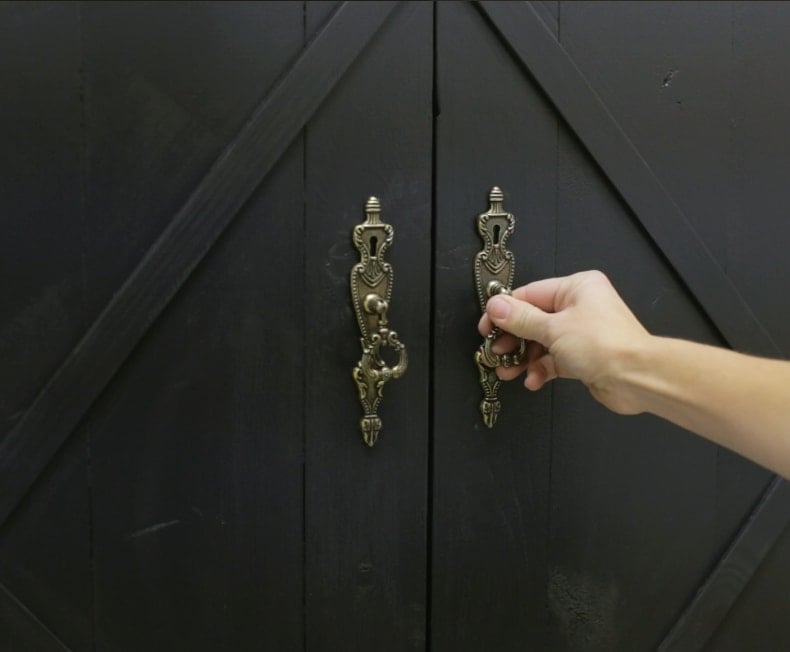
Then came the jewelry! I picked up these fun $3 vintage style brass pulls on Ebay:
And that concludes Phase 1 of the laundry room update!
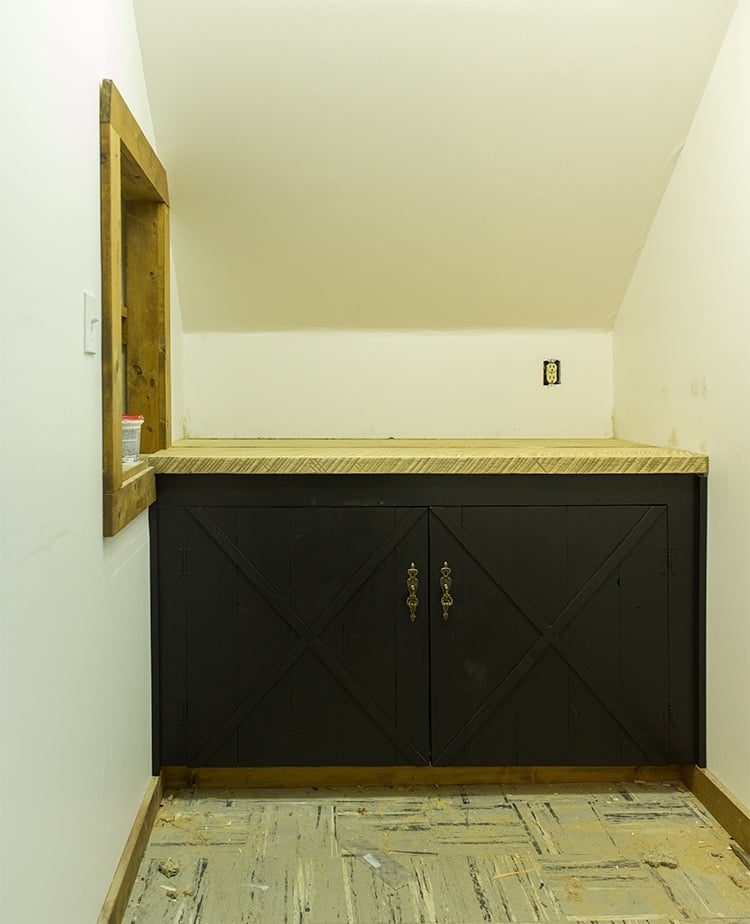
These photos make the trim design appear very subtle but you can see it quite clearly in person (and in the video):
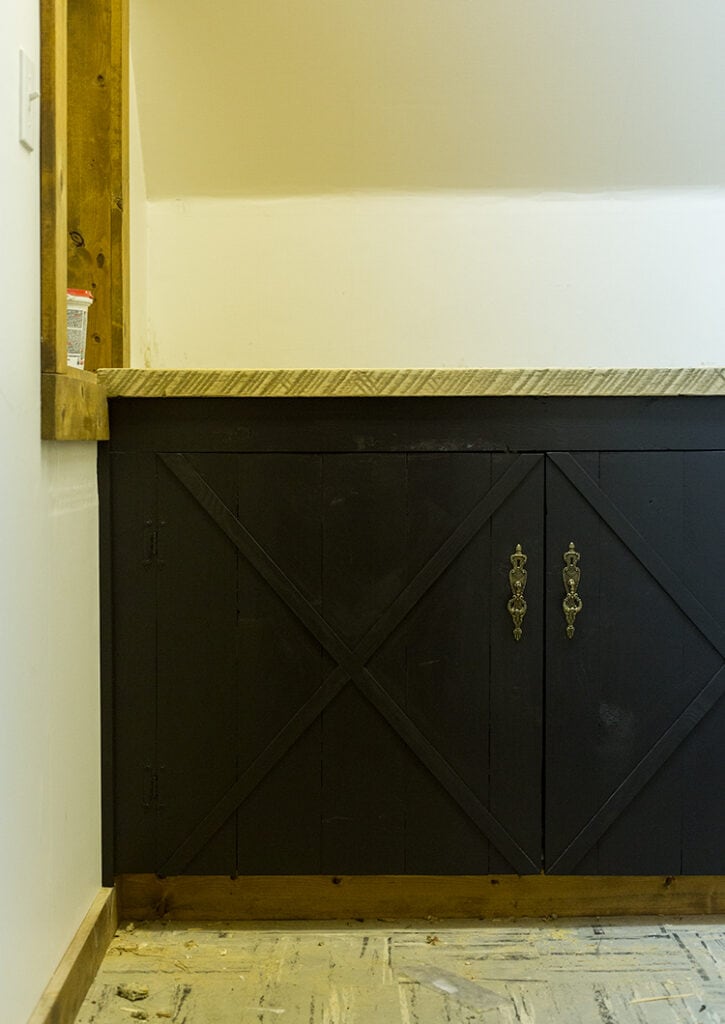
I think we’re off to a good start in here…
Next Saturday the floors will go down (using the same brick pavers as the bathroom) and I’ll stencil that back accent wall. A new sliding door and a few touchups & accessories later, and this room will be complete! It’s so close I can feel it.
I know my updates haven’t been too terribly exciting for the past two months, but that’s all about to change now that the demo/structural/behind the scenes work is almost done. You’re about to be bombarded with a whirlwind of updates. Bring on all the pretty things!
And if you’re wondering why there’s now a specific deadline to complete this flip, I have a very important photoshoot scheduled for February 9th. I’ll spill more details as the day gets closer, but that leaves me 2 months to get this place finished, furnished and decorated. I haven’t started panicking just yet because I have a great team of contractors and supportive family & friends who I can count on to step in and help if needed, so I’m keeping the faith. Stress doesn’t solve anything, right? 😉
Follow all the updates this weekend on my instagram stories and snapchat @jennasuedesign and watch as the kitchen comes together! Exciting times around the corner, my friends…
Disclosure: Some of the products listed were provided via sponsorship—all of which I selected and fully approve of.


Annene Uys says
Hi Jenna. I absolutely love your posts of the cottage flip and looking forward each week to the updates. I learn a lot from you. Can’t wait for the next week’s progress.
jennasuedesign says
Thanks for following along Annene!
Meghan says
Hi jenna! Long time reader, first time commenter. This house is looking amazing! I love the shade of white you chose for the walls. I have two questions. First, when painting walls white, do you also paint all the trim the same shade? Or go with a brighter shade? Our living room is this early 2000’s yellow beige color and I really want to paint it white, but I’m not sure what to do about the trim.
Secondly, I remember in your last house you had issues with the knots in the wood showing through the white paint after some time. Do you anticipate that happening here?
Keep up the good work!
jennasuedesign says
Thanks for leaving a comment Meghan! For this house, I’m leaving the trim wood but if I were to paint them white I would probably paint the trim the same color. I think it mostly comes down to personal preference but it would bug me to have two slightly different whites that look like an accident.
In my last house we didn’t use primer at all until we realized our mistake, and on this one he applied the primer first so I’m hoping we’ll be okay. The wood is also almost 60 years old so the tannins should have stopped bleeding by now!
Kris says
The painted wood walls look great! My husband and i are getting ready to paint wood walls in a bedroom. We have started by sanding them. Im wondering if your walls were sanded and if primer was used and if so what type of primer? Also what kind of paint? Ive done some research on line and opinions seem to differ somewhat. Thank you! Im hoping our room is transformed as much as yours!
jennasuedesign says
Thank you! I don’t think sanding is needed unless there’s a really rough texture that you want to smooth down? I used Bin Zinsser shellac based primer, it’s supposed to be the best out there. I always use Valspar (the colors are linked/noted in the post). Hope this helps!
AlisonG says
Emily Henderson wrote a blog about never painting a dark space white? That it will just look dingy, (I am going by memory). What do you think of the space now that you have painted it white? Do you agree with that assessment? I am asking because my house is so dark and surrounded by trees. Gotta love the power of paint! And your absolutely right stress doesn’t solve anything.
jennasuedesign says
Hi Alison, I’m not sure if that’s true or not but we added recessed lighting and I’ll be making sure there’s plenty of lamps/lighting sources so it doesn’t stay dark! I think white is timeless and can be used in any space, honestly. My current apartment tends to get pretty dark and it’s all white walls and looks just fine to me 🙂
Jessica devlin says
I’d love a tutorial for the white washing of your wood trim
jennasuedesign says
Hi Jess, I used the same process for the vanity top: https://www.jennasuedesign.com/2016/11/custom-bathroom-vanity-house-flip-episode-6/
Hope this helps!
Jade says
Keep up the good work! I’m very impressed that you have been able to do all the work on the house plus blog and create videos! This is one of my favorite websites 🙂 Can’t wait to see the final product!
Emma says
Love seeing your updates! You have a wonderful sense of design and I always enjoy reading the details. I was wondering what paint finish you chose for each of your painting projects?
jennasuedesign says
Thanks Emma! The doors and walls are all in eggshell.
Sue says
Jenna,
I’ve been following you since you began your trip to Asia and haven’t stopped since. I follow quite a few bloggers and yours is the first one I’ve ever commented on. I love everything you do and the inspiration you give! Always look forward to your posts and updates and can’t wait to see more. Girl Power!
jennasuedesign says
I am so honored Sue, thank you for taking the time to comment and for continuing to follow my journey! <3
lilly says
progress, progress, progress!!! those white walls provide such great light and feeling of openness. i wish i can come and paint (and learn) with you 🙁 but I am learning a ton already and now you are very close to start the fun part of decorating and making pretty things! the kitchen process might be my favorite.
Jamie says
So glad you didn’t have to remove all the wallpaper. That would have been a nightmare! I have painted over wallpaper many times and never regretted it. I keep seeing the mirror you bought at Habitat. I actually had my hands on that very same mirror and my son asked me if I really needed another mirror. I reluctantly put it back. After he went home to SF, I returned to Habitat only to find it had been sold. I was so happy to see it on your blog post shortly after. My son was right….I didn’t need it. It will be perfect in your cottage flip. I love the way the knotty pine looks white…have to admit I was a doubter but now I’m convinced. The white looks beautiful!
jennasuedesign says
Haha, maybe I bought your mirror!
Jen says
LOVE watching your project. Not sure if you’d know but I want to do a brick wall in my son’s room. Would that Lowes product be a good option for that? Or would that not work well for a wall?
Your updates each week make me so excited even through this background stage of less fun stuff! I just love visualizing the improvement in stuff like this. Can’t wait to see it all finished…I’m amazed at how much you get done living so far away!
jennasuedesign says
Thank you Jen! Yes, the bricks are ideal for walls. I’m stealing some to use as a backsplash accent in the kitchen too!
Tina says
Wow! I’ve been following along since day one! You are creating such a wonderful home…amazing. Great work!
~Tina
jennasuedesign says
Thank you Tina, I appreciate that!
Jessica devlin says
Eeee! Your in the fun part now. You have such a great eye, can’t wait to see how it all comes together!
jennasuedesign says
Thanks Jessica, it really has turned a corner now!
Michelle | Birds of Berwick says
You’re doing great so far and the white interior makes a huge difference already. I so wish I had the guts/capital to leave my job and flip houses. A friend and I say this all the time to each other. The market in Boston doesn’t leave a lot of options for affordable flips, though; at least not with what I’d have to pull together.
I love following along though! And yes, I had the same question as Denise about the wallpaper… please tell us you didn’t paint over it!!!
jennasuedesign says
Thank you Michelle! The walls were in fact primed/painted — see my answer to Denise below 🙂
Denise Tyson says
WOW, Jenna! Those wood walls are beautiful. Never underestimate the power of paint, right! Did I miss the video showing the wallpaper removal upstairs? How did you get that done so quickly? Did you have to do any drywall repair after the paper was removed? Can’t wait to see your next update. It is all coming together so beautifully. Excited for you!
jennasuedesign says
Thanks Denise! After talking to several painters/contractors, the general consensus was that it would be a costly nightmare and not worth removing a house full of 56 year old wallpaper. I actually couldn’t even find anyone willing to do it. The painters up here regularly deal with this so it was removed/patched where needed, then oil based shellac primed and painted. The walls are textured plaster underneath so it still has that same texture. Luckily the imperfections tend to blend into the texture. I wouldn’t recommend this for every house but for a rustic cottage style with tons of quirks and imperfections, it’s completely fine 🙂
Denise Tyson says
Jenna, thank you for the extra details on the walls. I may ask some odd questions at times since my husband and I renovated a 110 year old farmhouse in western NC that has become our mountain cottage. In order to reveal the original wood walls in our upstairs bedrooms, we had to remove layers of veneers – 1960s thin paneling, cardboard for insulation, 1940s wallpaper, 1930s newspapers applied with a flour and water paste…and dirt…lots of dirt. It would have cost a small fortune if we had not done the labor ourselves. Given your budget and time considerations, you were wise to seek the advice of experienced professionals, especially for bedroom and hallway walls. Incidentally, the 110 year old wood walls that we uncovered had aged very dark, depressingly dark, in rooms that only had one window. We painted the walls white, added sylights and that has made a world of difference! I appreciate how you are bringing fresh creativity and lots of glorious light to your cottage flip. It shows that you love the process! Thanks again for taking the time to reply.
Ice Cream & Tequilla says
When we were dating, my husband bought a home from the 1930s with wallpaper that had been painted. It took us a year to scrape off all the wallpaper. It was so much work, but the walls underneath were in good condition. I could not imagine how much it would have cost to have professionals remove it.