It’s LAUNDRY ROOM REVEAL Day! Can you believe it?!
This renovation was filled with many highs and lows and took about twice as long as I had hoped/planned for. These last several weeks have seemed to drag on forever, but now that it’s finally over it all feels like a blur. I’m still in that pinch-me-I’m-dreaming stage and I have a feeling this one will take some time to wear off.
It would have been easy to dismiss this room as a purely functional and utilitarian space and not give it much thought or effort. But I have this problem where when we decide to start any new project, big or small… I’m going all out and designing/planning/executing it to my dreams (within a reasonable budget, of course). Once my mind is set on something, I must do whatever it takes to fulfill that vision. (Thank you, Brad, for dealing with my stubbornness!)
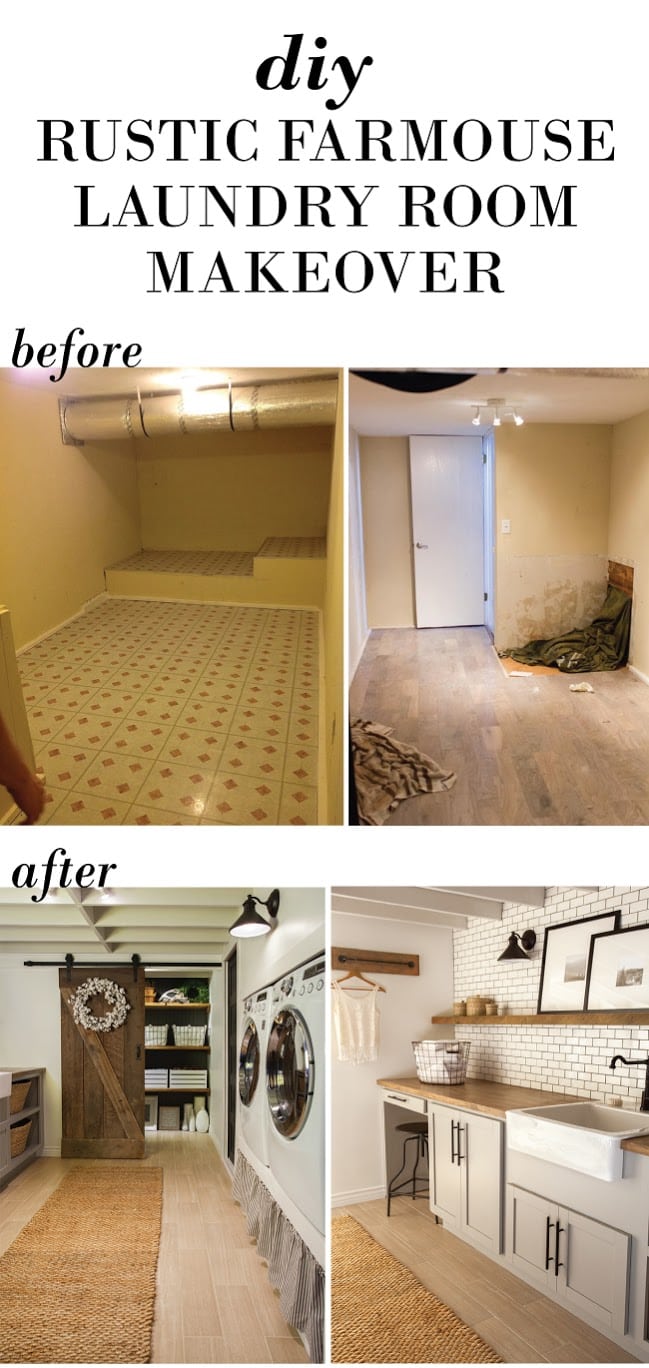
The real reason I love this renovation so much is because of where it started. We created a brand new room from an awkward, cave-like, almost closet space downstairs…
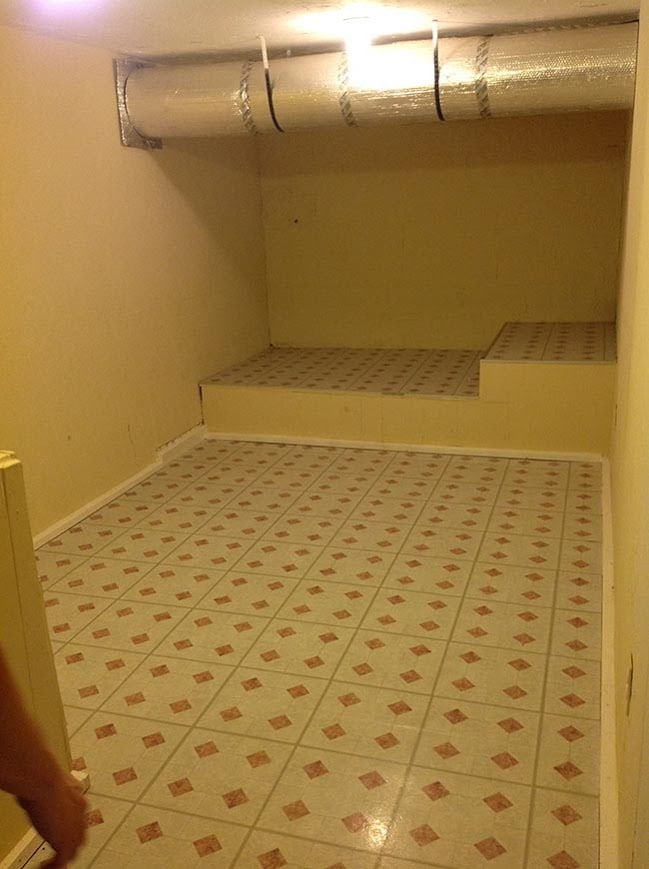
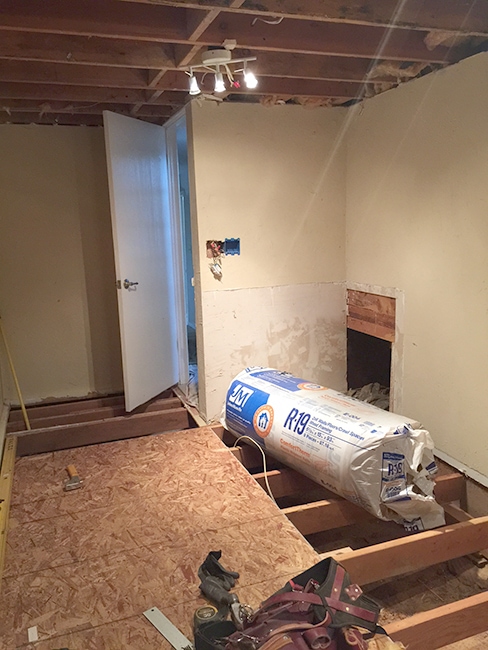
This “room” made no sense at all. Strange boxed walls and platforms, no windows, less than 7′ ceilings and a huge HVAC vent running through the middle.
We threw a bunch of storage items in the back (and kept the door closed so no one would ever be subjected to this mess).
In the meantime, we were struggling with our cramped laundry situation… this layout/lack of space was just not working:
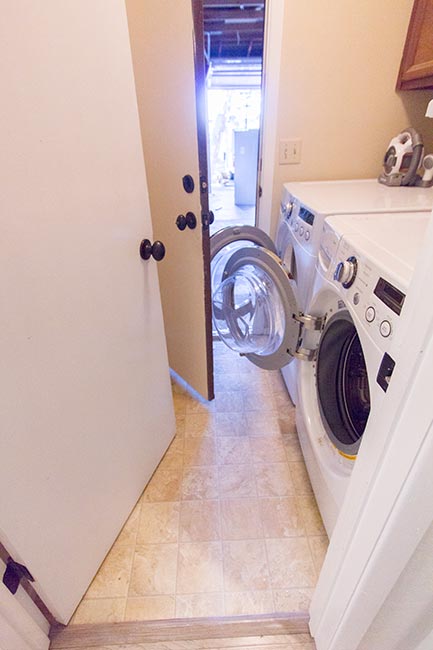
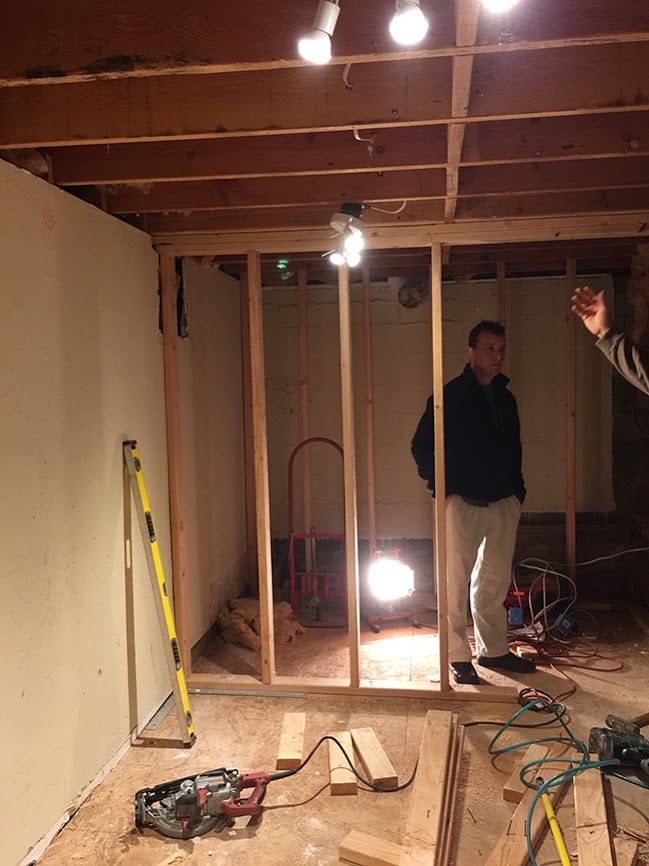
It was Brad’s idea to relocate the washer and dryer downstairs and I was 100% on board. I immediately went into planning mode and we came up with a solution to maximize the space by building an alcove for the appliances to be recessed into the wall and also create a separate storage room in the back.
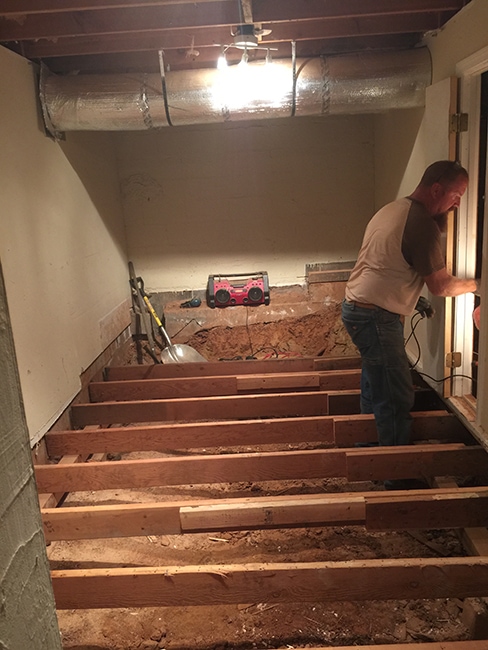
Demo began right away. Everything came out—the floors, ceiling, walls, HVAC, even dirt and rock that had to be excavated to extend the room and allow for a washer/dryer enclosure under the house.
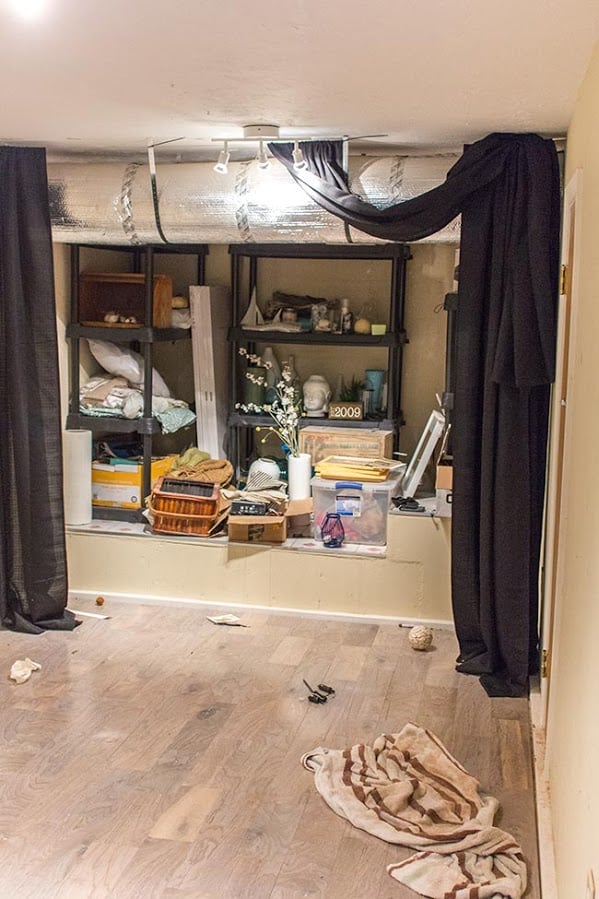
Looking back toward the entrance…
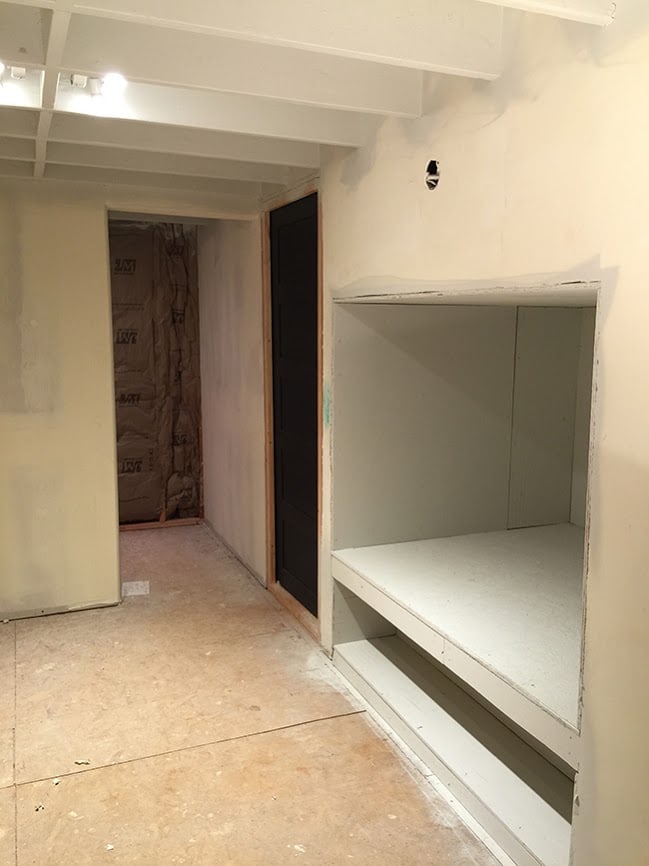
The beginnings of our built-in appliances and pocket door…

A new wall went up to divide the storage area:
New drywall and paint started pulling it all together…
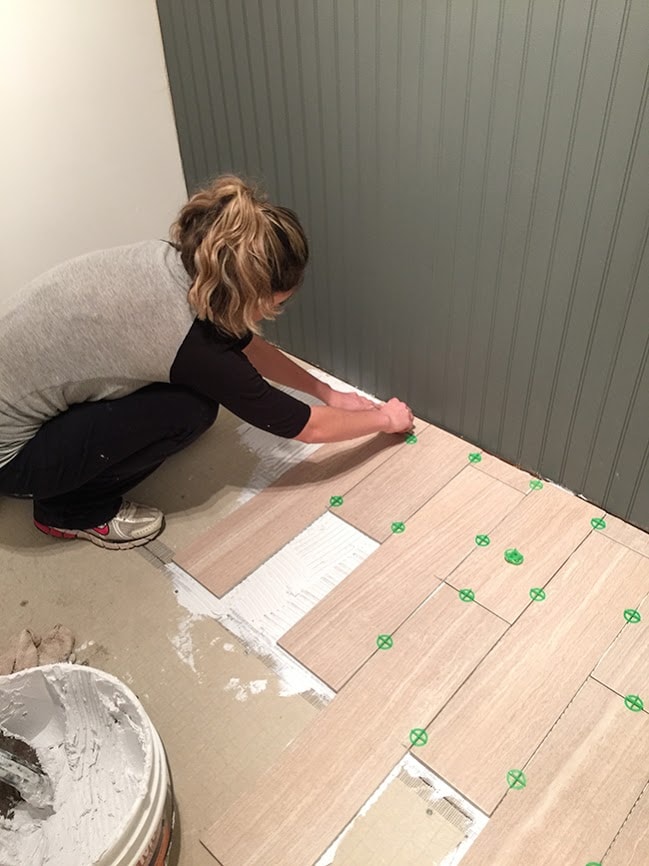
Our DIY skills, patience and stamina were put to the test on several occasions… starting with our first floor tiling job:
And our DIY barn door:

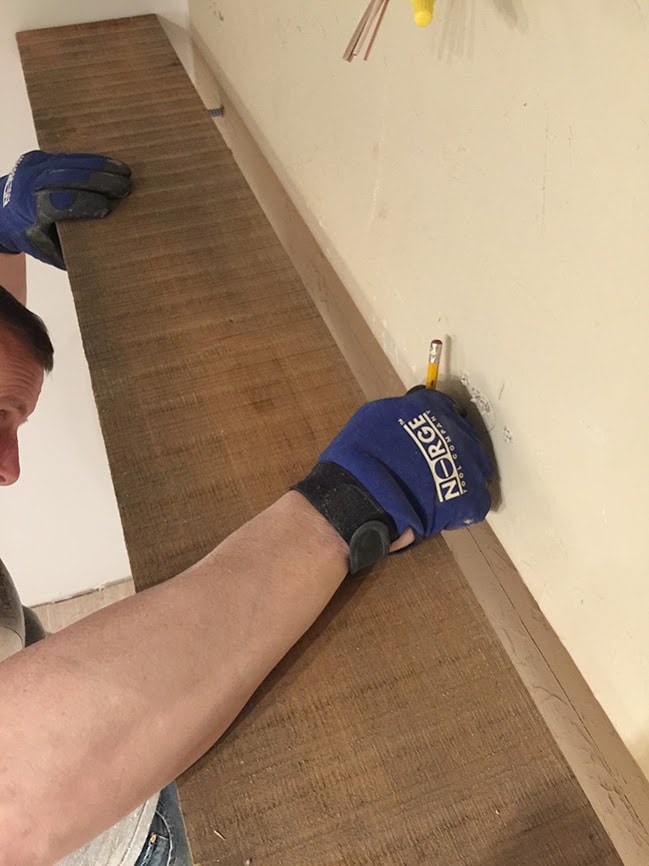
And floating reclaimed wood shelf…
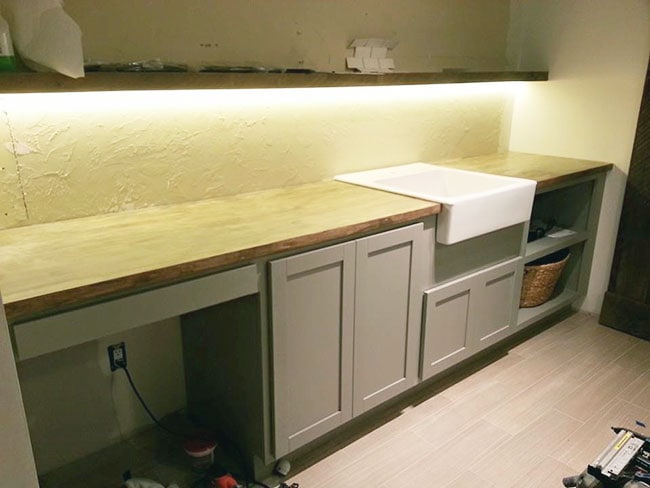
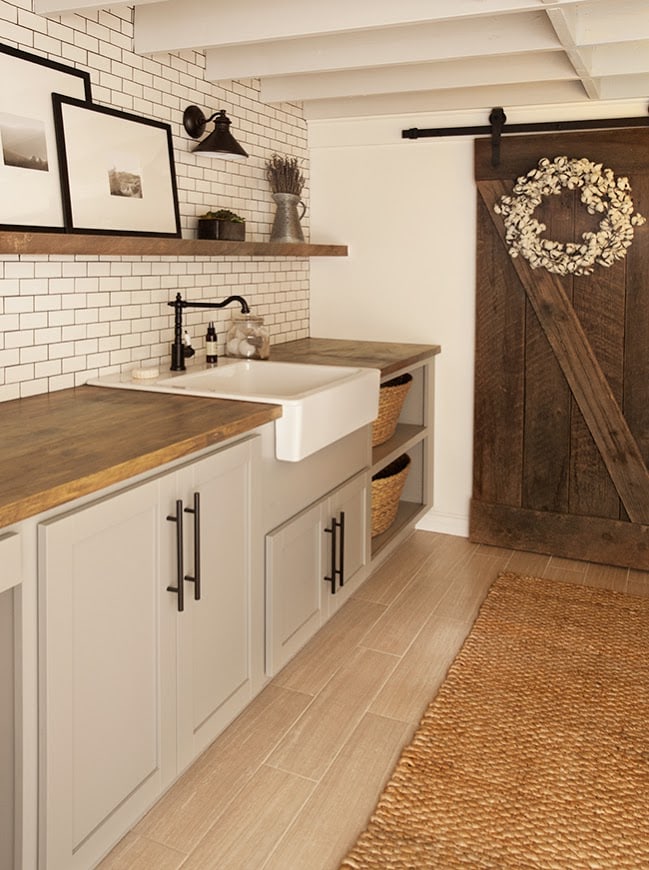
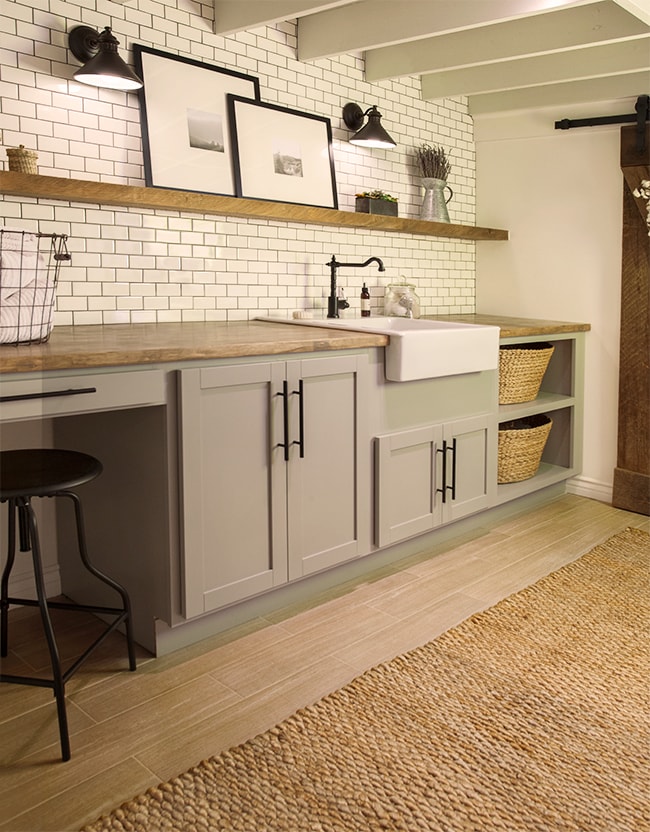
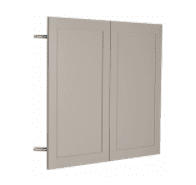
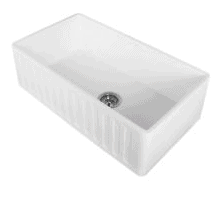
And just recently—our new cabinets, custom butcher block, farmhouse sink install & subway tile completion…
And now finally, the day we’ve all been waiting for… welcome to our new Laundry Room:
My neighbor & photographer friend came over with his camera and captured these really lovely shots for me. Thanks so much, Gary!
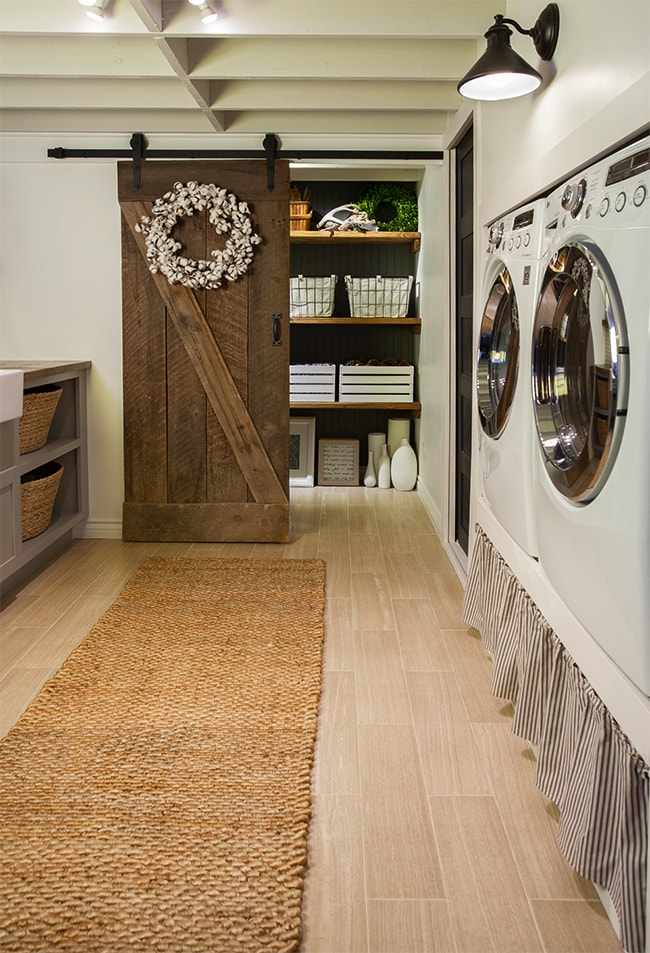
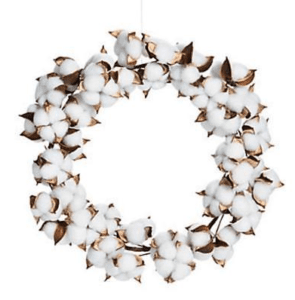
Yep, there will definitely be more barn doors in our future! And how perfect is this cotton wreath from my friend Shayna‘s collection? She’ll be selling them soon online (can’t wait for her shop opening!)
This space was inspired by my vision of what laundry must be like in heaven… picture a lavender field in the French countryside… a clothesline with the finest linens swaying in the breeze, abundant sunshine, birds chirping and children skipping around in white sundresses with fluffy kittens following behind. Okay, so I’ll never be the woman in my perfect laundry detergent commercial dream… but at least I can pretend I’m there by making the best of a small, half-underground windowless room.
Removing the ceiling drywall and leaving the joists exposed was a design risk that I wasn’t 100% confident about in the beginning, but it’s absolutely one of my favorite things we did. It not only makes the room look and feel SO much taller—it brings such personality and interest to the space. I’d do it again in a heartbeat.
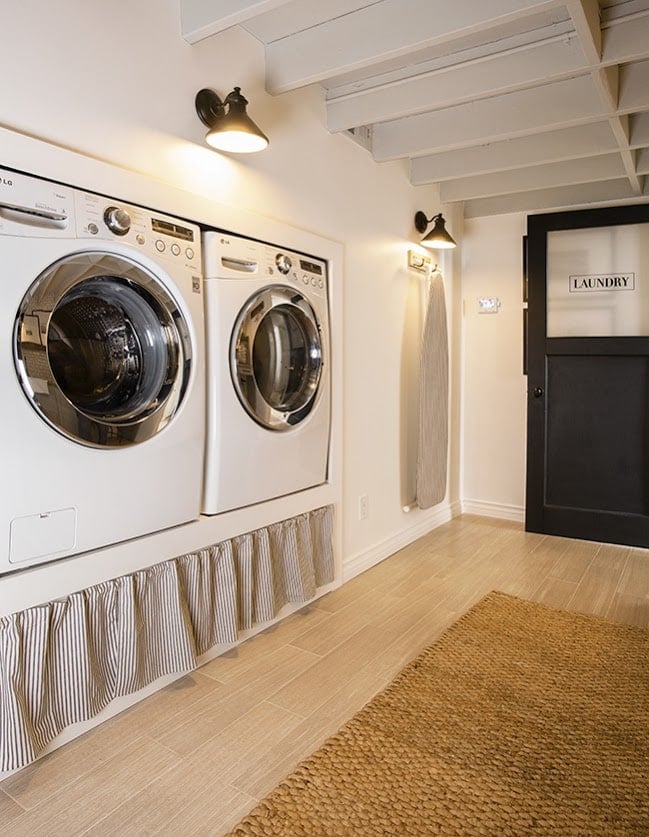
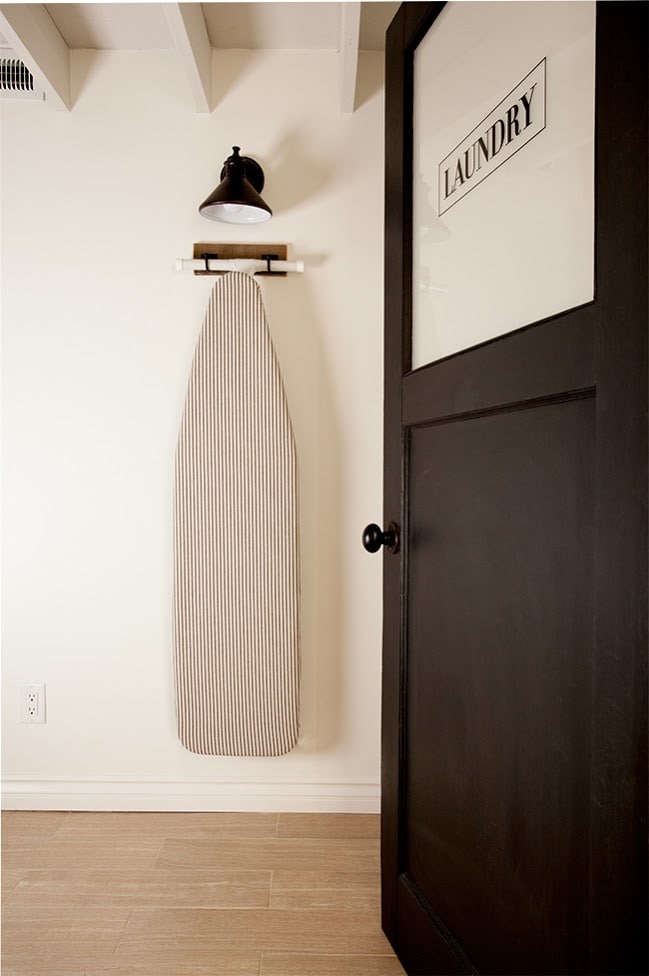
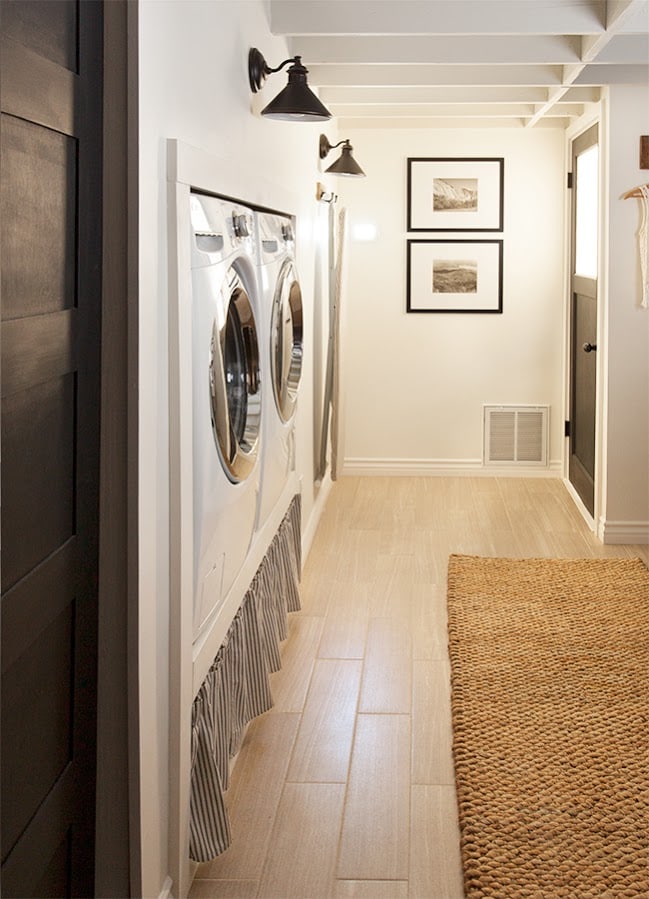
Oh, and this recessed washer and dryer… total game changer. This was Brad’s idea and his best one yet. It allowed us to add a full wall of cabinets and makes the laundry process much more ergonomic.
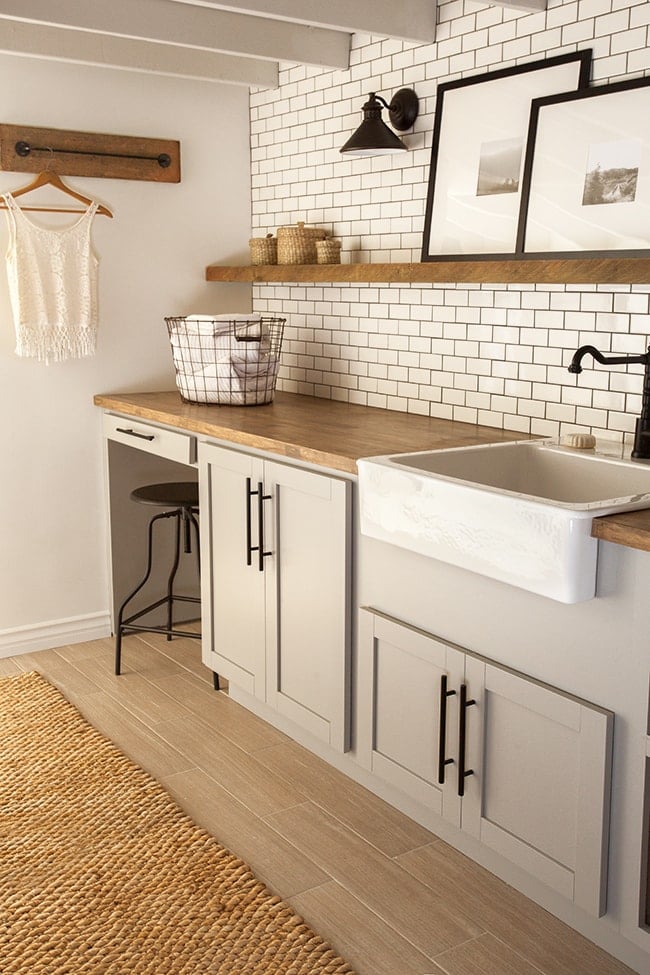
I intentionally kept everything soft and neutral. It’s all about that idyllic laundry vision, remember? Peaceful, fresh and calming.
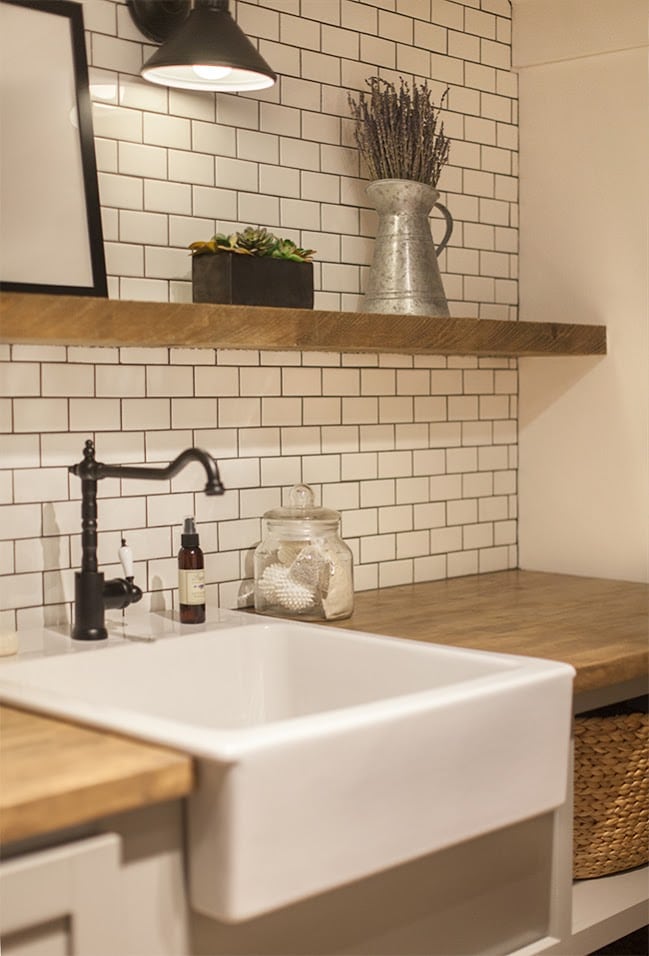
Can’t go without the lavender spray, satchels and dried bundle. Makes the whole room smell divine.
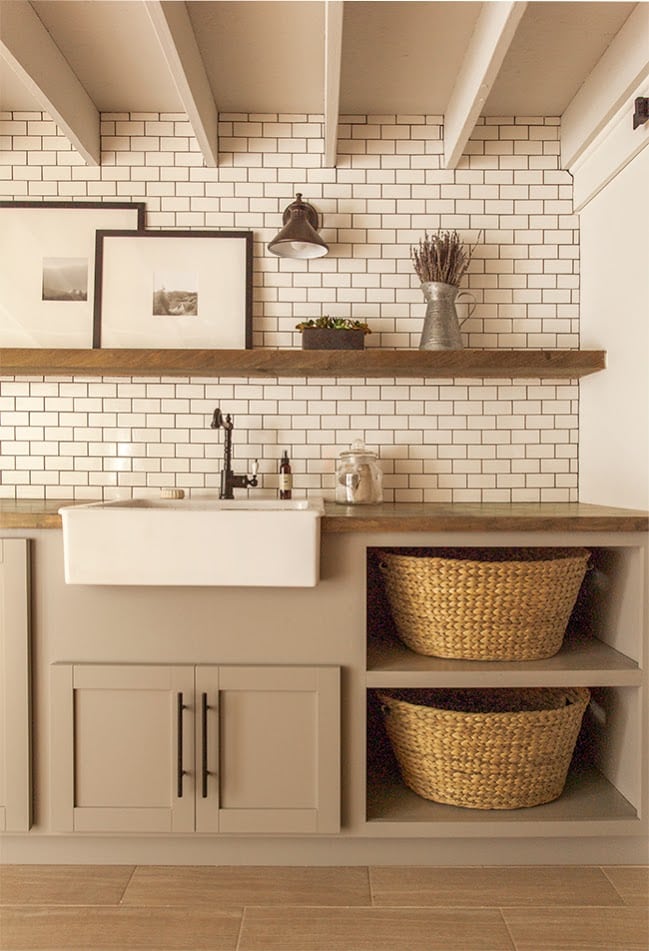
The photos are instagram prints of some local scenery, with inexpensive Ikea Nyttja frames and DIY mats.
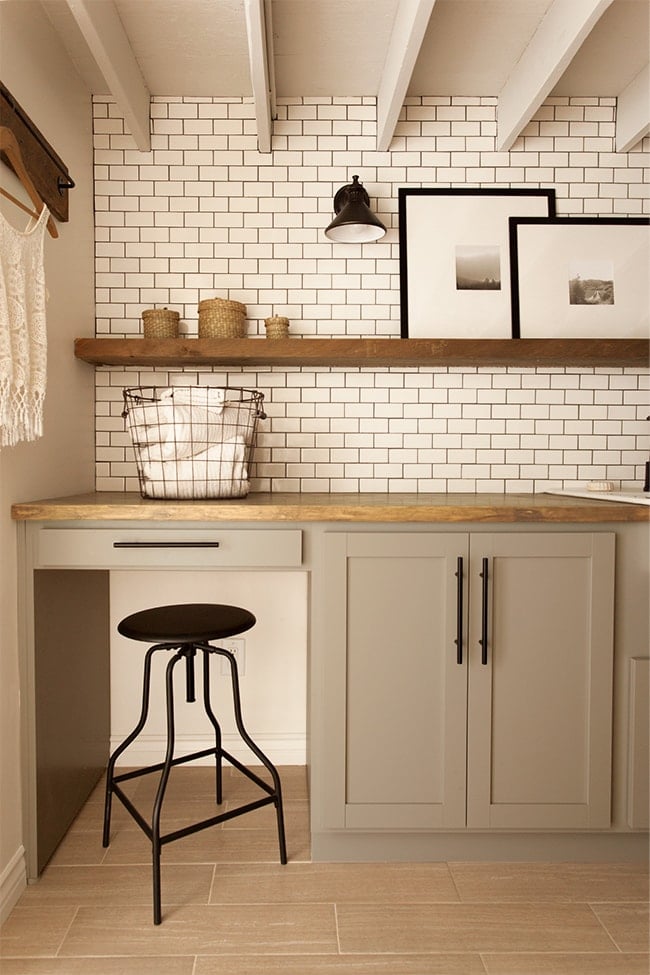
I was hoping to turn that little drawer into a pull out clothes drying rack. We’ll see if I have time to get around to it… in the meantime, I made this hanging rack with an old Ikea rail I spray painted and attached to a scrap wood leftover from our barn door.
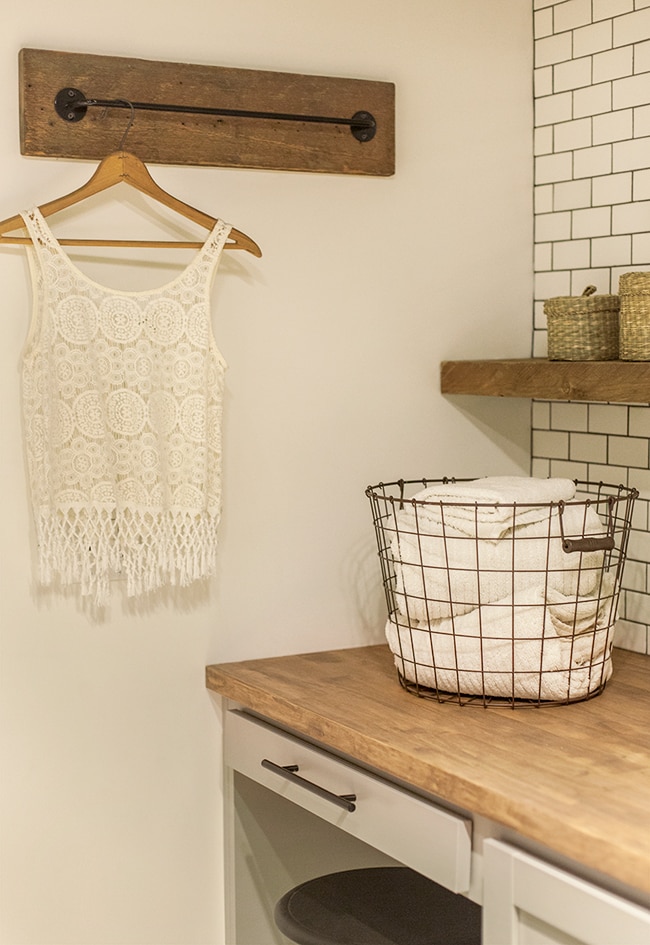
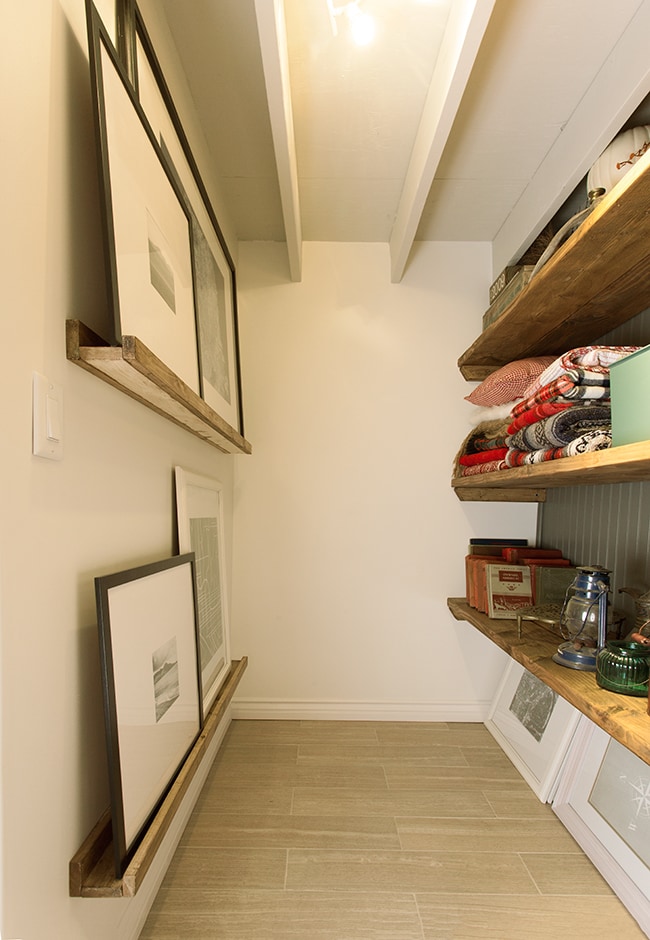
More local scenery photos and DIY matted frames behind the door.
And oh… the storage room. A decorator’s dream!
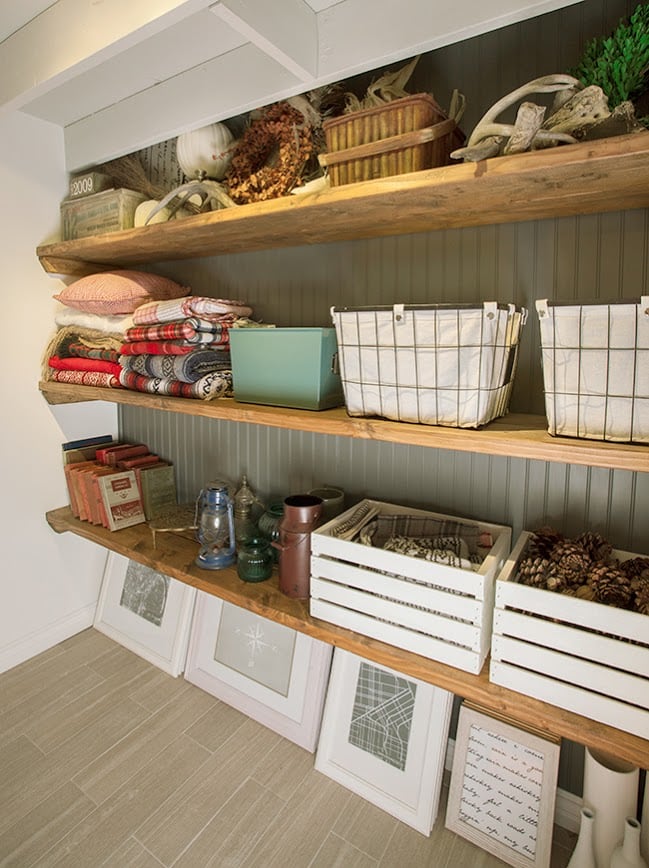
Plenty of room for accessories to switch out for the seasons or on a whim (and if it gets too crowded, I can use the empty cabinets!)
The DIY shelf ledges on the opposite wall are great for storing larger frames.
And that, my friends, is the story of our laundry room.
If you missed any of the action, here’s the complete recap:
Beadboard wall, paint and lighting
Floor tile, Part 2
Farmhouse curtain, ironing board & shelf lighting
Cabinets, butcher block & farmhouse sink
And a source list (let me know if I’ve forgotten anything!)
Wall paint: Kelly Moore’s Swiss Coffee (eggshell)
Ceiling paint: Valspar‘s Montpelier Madison White (eggshell)
Beadboard wall paint: Valspar‘s Ocean Storm
Cabinets: Lowe’s, Diamond brand Hanson style in Cloud
Door pulls: Ebay
Farmhouse Sink: Ikea Domsjo (similar here)
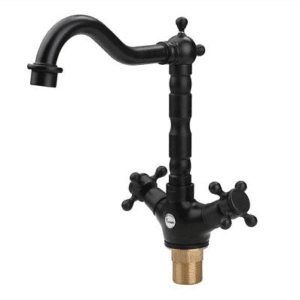
Faucet: Ikea Glittran (similar here)
Butcher block counters: DIY’d Ikea Akerby (stainable model here)
Floor tile: Lowe’s
Subway tile: Lowe’s
Wall lamps: Lowe’s
Rug: Rugs USA
Laundry baskets: Pier 1
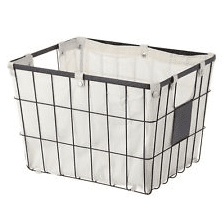
Wire basket: TJ Maxx
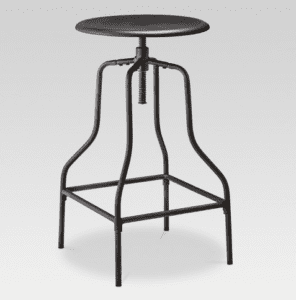
Metal Stool: Target
Black frames: Ikea Nyttja (with DIY mats)
Small shelf baskets: Ikea
Laundry Door decal: Etsy
Curtain & ironing board fabric: Fabric.com (similar here)
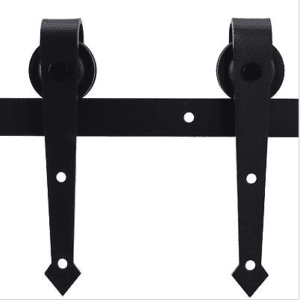
Barn door track system: Ebay
Cotton wreath: The Wood Grain Cottage
Lavender linen spray and sachets: Crane & Canopy
As far as the budget goes… I made a conscious effort at the beginning to track every expense but after the cabinet delays and other projects started getting in the way, I lost count. We did try very hard to keep costs down and DIY everyting possible but the biggest expenses came from the labor we had to hire out—demo/construction, plumbing, drywall/paint, and electrical. The cabinets were around $1300 from Lowe’s and we saved money by using inexpensive Ikea butcher block (DIY’d), farmhouse sink and faucet; flooring, subway tile and light fixtures (all Lowe’s) and doing that labor ourselves.
These past couple weeks of relief and joy have already made up for the frustration and struggles we faced during this process. I think it’s like childbirth (from what I hear)—when you’re enduring the worst of it you swear up and down you’ll never do this again, and then out comes this perfect creation that you can’t believe you made, and all the pain is forgotten. And so the cycle repeats. And here I am already in the middle of another big project, enduring the labor pains of our One Room Challenge, but I see the light at the end of the tunnel and know it will all be worth it. I may have to stop and catch my breath for a bit after this one though 😉
Lots of progress has been made in our guest bathroom in the last week… check back Wednesday for more!
Want to get this look in your laundry room? Here’s a handy shopping list:


Isabella says
Hi Jenna! I love love love the project! Congratulations!!! I just wanted to ask you the size of the laundry. I am building one now and I am in the fence about the size… Thanks so much!
Sandra Thomas says
So my new house has a laundry room on the second floor. I thought maybe that was a good thing considering the bedrooms were on the second as well.
Anyway, I was shopping around over the weekend for a new washer & dryer and was told that a front loader was a really bad choice. It has been known to make more excessive noise since its not on a solid foundation, and it tends to flood alot.
Has anyone else had any experience with this? Is there really a disadvantage to having a laundry room on the second floor?
jennasuedesign says
Considering most new washer/dryers tend to be front loading, I’m not sure if that was the best advice! There are pros and cons to both but I’ve had front loading for years and never had those problems. I don’t think the floor matters either — I’ve had mine on both and sure it’s a little louder if you’re closer to it but the convenience of having it near your bedrooms should outweigh that. Hope this helps!
Vivian says
Incredible!! The laundry room of my dreams! Honestly I would never complain of doing laundry again! Great job as always!
B. Hart says
Please share the overall wash room dimensions including the closet area. Really well done.
Suz says
Hi there. Love the laundry room but I’m wondering where you purchased the actual door that you frosted then decal’ed? I’m looking to do the exact same thing but am having trouble finding that type of door to start with at a reasonable cost. Thanks a bunch!
jennasuedesign says
Habitat for Humanity Restore 🙂
Anna says
Hello! I love your work. Can you please share your laundry room cabinet color? I would love to replicate the look in my kitchen. I searched the website but could not find it.
Thank you,
Anna
jennasuedesign says
Hi Anna, the info and links are listed at the bottom of the post 🙂 Diamond brand in Cloud.
Diena Cameron says
So sorry, i forgot the website i started on ! I just have to tell you besides that being the most gorgeous laundry room E.V.E.R. ! i could so easily move my kitchen into that room !! To die for storage area and of course who doesn’t love or want a farmhouse sink ?!? All i can say is, “WOW”, job well done. ((**)) Thanks for sharing. <3
Deb says
Great job on this! Amazing creativity and persistence to pull it off too.
carol says
What a great idea to build the washer and dryer into the wall! How was the platform built to withstand the weight and movement of the washer and dryer?
Jenna Hagan says
I was wondering how you ordered the cabinets with the sink that you got?
jennasuedesign says
The sink was ordered separately and you just order the proper size sink cabinet and make it fit!
Felesha says
All time favorite laundr room I have seen! We are about to redo our 1920s farmhouse laundry room and I had a similar shelf and scone light idea and it’s great to see it outloud! I’m ready now, thanks for sharing. You did a fabulous job!
And I have been searching for a cotton wreath too!
Jo @ Let's Face the Music says
Kudos to Brad for thinking outside the box while using the box you have. So lovely one could live in there. Great job to you both. Jo @ Let’s Face the Music
Ashley says
This is INCREDIBLE! I love what you did with the space. Way to have a vision for it! We just moved into a 1930s cape cod style home that we completely renovated (as in, tore everything down to the studs – the only things original to the house are the exterior walls, wood floors, and the brick chimney running from basement to upstairs master!). This gives me hope that my laundry room can someday be so gorgeous! I love that you left the joists exposed and just painted – definitely makes the space feel taller. And the built-in units are such a great idea! Seriously, way to go. Loving every bit of it.
Teresa says
Wow oh wow! This is absolutely incredible!!! And from where you started?! I’m blown away. You did an amazing job. I love every detail. The floors, tile, counter, sink and cabinets have me swooning. But, then you toss in the DIY paneled door, barn door, rustic floating shelf, and those lights….I have no words. I would want to eat dinner and sleep down there it so gorgeous!! I love it. Hands down. There is so much inspiration here. Love!
Jessie says
Jenna, could you please draw up a quick floor plan showing the before and after???